MD之材料设计库
Posted 痕迹天涯119
tags:
篇首语:本文由小常识网(cha138.com)小编为大家整理,主要介绍了MD之材料设计库相关的知识,希望对你有一定的参考价值。
本文主要介绍部分support:design(材料设计库)的控件使用,以及官方模板NavigationDrawer的实现。
DrawerLayout
该控件是一个侧滑菜单布局,当按照规定书写xml布局文件后,即可轻松实现侧滑效果。
ps:用于替代第三方的侧滑菜单,如sliding menu等。
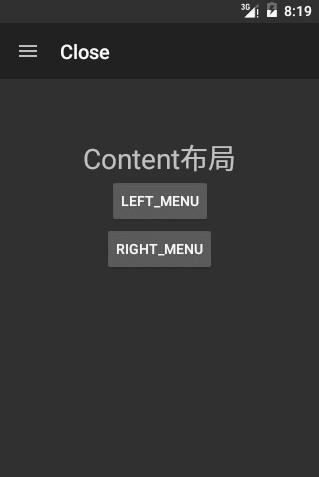
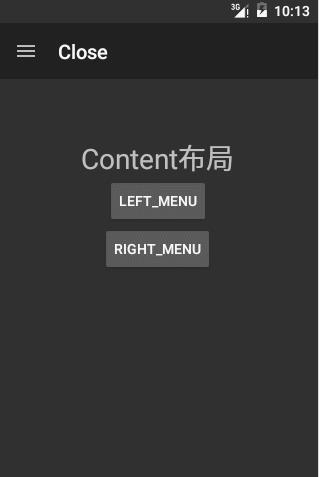
这里给一个简单的Demo示例(配合Toolbar,不熟悉请看MD设计之起步):

左右侧滑菜单设定
DrawLayout主要分为左右侧滑菜单和主内容区,设定左右菜单的方法非常简单,只需要在你需要设定为菜单的xml布局中添加如下代码:
左:android:layout_gravity="start"
右:android:layout_gravity="end"
此外,我们也可以在代码中进行部分操作,如打开与关闭侧滑菜单,设定透明度,设置渐变色等等,
drawerLayout的打开与关闭
这里需要重点指出的是侧滑菜单的打开与关闭
打开:DrawerLayout.openDrawer
关闭:DrawerLayout.closeDrawer
设置监听事件
尽管drawerLayout可以通过addDrawerListener的方式为自己设定监听事件,但还是推荐使用ActionBarDrawerToggle和Toolbar配合使用,这样不仅方便统一管理,也可使代码结构更为清晰。
ActionBarDrawerToggle toggle = new ActionBarDrawerToggle
                (this,drawerLayout,toolbar,R.string.open_drawer,R.string.close_drawer)
            //这里可以重写很多方法,以实现自己的需求
            @Override
            public void onDrawerOpened(View drawerView)
                getSupportActionBar().setTitle("Open");
                super.onDrawerOpened(drawerView);


            @Override
            public void onDrawerClosed(View drawerView)
                getSupportActionBar().setTitle("Close");
                super.onDrawerClosed(drawerView);


            @Override
            public boolean onOptionsItemSelected(MenuItem item)
                return super.onOptionsItemSelected(item);

        ;
        drawerLayout.addDrawerListener(toggle);
toggle.syncState();PS:在toolbar中也可以通过setNavigationOnClickListener和setOnMenuItemClickListener分别为对应的控件和MenuItem设置监听。
该Demo的主要布局文件
主界面布局:
<?xml version="1.0" encoding="utf-8"?>
<RelativeLayout xmlns:android="http://schemas.android.com/apk/res/android"
    xmlns:tools="http://schemas.android.com/tools"
    android:layout_width="match_parent"
    android:layout_height="match_parent"
    tools:context="com.example.horizon.myapplication.MainActivity">

    <android.support.v4.widget.DrawerLayout
        android:id="@+id/drawerLayout"
        android:layout_width="match_parent"
        android:layout_height="match_parent">
        <include
            layout="@layout/drawer_content"/>

        <include
            layout="@layout/drawer_menu_left"
            android:layout_gravity="start"
            android:layout_width="240dp"
            android:layout_height="match_parent"/>


        <include
            layout="@layout/drawer_menu_right"
            android:layout_gravity="end"
            android:layout_width="240dp"
            android:layout_height="match_parent"/>

    </android.support.v4.widget.DrawerLayout>
</RelativeLayout>
content布局
<?xml version="1.0" encoding="utf-8"?>
<LinearLayout xmlns:android="http://schemas.android.com/apk/res/android"
    android:orientation="vertical"
    android:layout_width="match_parent"
    android:layout_height="match_parent">


    <android.support.v7.widget.Toolbar
        android:id="@+id/toolbar"
        android:layout_width="match_parent"
        android:layout_height="?attr/actionBarSize"
        android:background="?attr/colorPrimary" />

    <TextView
        android:layout_marginTop="60dp"
        android:layout_width="wrap_content"
        android:layout_height="wrap_content"
        android:text="Content布局"
        android:textSize="28sp"
        android:id="@+id/textView_content"

        android:layout_gravity="center_horizontal" />

    <Button
        android:layout_width="wrap_content"
        android:layout_height="wrap_content"
        android:text="Left_Menu"
        android:id="@+id/button"
        android:layout_gravity="center"
        android:onClick="onClick"/>

    <Button
        android:layout_width="wrap_content"
        android:layout_height="wrap_content"
        android:text="Right_Menu"
        android:id="@+id/button2"
        android:layout_gravity="center"
        android:onClick="onClick"/>


</LinearLayout>
NavigationView
该控件用于侧滑简单的实现侧滑菜单,隶属于support:design材料库,使用前请先在gradle中添加依赖
compile 'com.android.support:design:23.3.0'在DrawerLayout添加菜单布局,主要有头部布局文件和NavigationView布局
Demo

左菜单布局:
<?xml version="1.0" encoding="utf-8"?>
<LinearLayout xmlns:android="http://schemas.android.com/apk/res/android"
    xmlns:app="http://schemas.android.com/apk/res-auto"
    android:orientation="vertical"
    android:layout_width="240dp"
    android:layout_height="match_parent"
    android:background="@color/colorAccent">


    <android.support.design.widget.NavigationView
        android:id="@+id/nav_view"
        android:layout_width="match_parent"
        android:layout_height="match_parent"
        android:layout_gravity="start"
        android:fitsSystemWindows="true"
        app:headerLayout="@layout/nav_header_main"
        app:menu="@menu/activity_main_drawer" />

</LinearLayout>
head布局
<?xml version="1.0" encoding="utf-8"?>
<LinearLayout xmlns:android="http://schemas.android.com/apk/res/android"
    android:layout_width="match_parent"
    android:layout_height="160dp"
    android:background="@drawable/side_nav_bar"
    android:gravity="bottom"
    android:orientation="vertical"
    android:padding="16dp"
    android:theme="@style/ThemeOverlay.AppCompat.Dark">

    <ImageView
        android:id="@+id/imageView"
        android:padding="0dp"
        android:layout_width="60dp"
        android:layout_height="60dp"
        android:paddingTop="@dimen/activity_horizontal_margin"
        android:src="@drawable/horizon" />

    <TextView
        android:layout_width="wrap_content"
        android:layout_height="wrap_content"
        android:paddingTop="12dp"
        android:text="Horizon"
        android:textAppearance="@style/TextAppearance.AppCompat.Body1" />

    <TextView
        android:id="@+id/textView"
        android:layout_width="wrap_content"
        android:layout_height="wrap_content"
        android:text="1308311472@qq.com" />

</LinearLayout>
menu菜单,嵌入到NavigationView中
<?xml version="1.0" encoding="utf-8"?>
<menu xmlns:android="http://schemas.android.com/apk/res/android">

    <group android:checkableBehavior="single">
        <item
            android:id="@+id/nav_camera"
            android:icon="@drawable/ic_menu_camera"
            android:title="Import" />
        <item
            android:id="@+id/nav_gallery"
            android:icon="@drawable/ic_menu_gallery"
            android:title="Gallery" />
        <item
            android:id="@+id/nav_slideshow"
            android:icon="@drawable/ic_menu_slideshow"
            android:title="Slideshow" />
        <item
            android:id="@+id/nav_manage"
            android:icon="@drawable/ic_menu_manage"
            android:title="Tools" />
    </group>

    <item android:title="Communicate">
        <menu>
            <item
                android:id="@+id/nav_share"
                android:icon="@drawable/ic_menu_share"
                android:title="Share" />
            <item
                android:id="@+id/nav_send"
                android:icon="@drawable/ic_menu_send"
                android:title="Send" />
        </menu>
    </item>

</menu>
主活动代码
public class MainActivity extends AppCompatActivity implements
        NavigationView.OnNavigationItemSelectedListener,View.OnClickListener

    private DrawerLayout drawerLayout;
    private Toolbar toolbar;
    private NavigationView navigationView;


    @Override
    protected void onCreate(Bundle savedInstanceState)
        super.onCreate(savedInstanceState);
        setContentView(R.layout.activity_main);

        toolbar = (Toolbar) findViewById(R.id.toolbar);
        setSupportActionBar(toolbar);
        getSupportActionBar().setDisplayHomeAsUpEnabled(true);


        drawerLayout = (DrawerLayout) findViewById(R.id.drawerLayout);
        ActionBarDrawerToggle toggle = new ActionBarDrawerToggle
                (this, drawerLayout, toolbar, R.string.open_drawer, R.string.close_drawer)
            //这里可以重写很多方法,以实现自己的需求
            @Override
            public void onDrawerOpened(View drawerView)
                getSupportActionBar().setTitle("Open");
                super.onDrawerOpened(drawerView);


            @Override
            public void onDrawerClosed(View drawerView)
                getSupportActionBar().setTitle("Close");
                super.onDrawerClosed(drawerView);


            @Override
            public boolean onOptionsItemSelected(MenuItem item)
                return super.onOptionsItemSelected(item);

        ;
        drawerLayout.addDrawerListener(toggle);
        toggle.syncState();

        navigationView = (NavigationView) findViewById(R.id.nav_view);
        navigationView.setNavigationItemSelectedListener(this);


    @Override
    public boolean onNavigationItemSelected(MenuItem item)
        // Handle navigation view item clicks here.
        int id = item.getItemId();

        if (id == R.id.nav_camera)
            // Handle the camera action
         else if (id == R.id.nav_gallery)

         else if (id == R.id.nav_slideshow)

         else if (id == R.id.nav_manage)

         else if (id == R.id.nav_share)

         else if (id == R.id.nav_send)


        drawerLayout.closeDrawer(GravityCompat.START);
        return true;


    @Override
    public void onClick(View v)
        if(v.getId() == R.id.button)
            drawerLayout.openDrawer(GravityCompat.START);
        else
            drawerLayout.openDrawer(GravityCompat.END);
当然,对于很多布局控件,如果条件允许,你完全可以去除多余的嵌套。
这样,就简单实现了官方模板NavigationDrawer的主要功能,完整模板Demo:

关于floating button,snacbar以及沉浸式状态栏等,我会在后面的文章中陆续讲解。
本文的源码地址:https://github.com/walkthehorizon/AndroidLearnDemo
以上是关于MD之材料设计库的主要内容,如果未能解决你的问题,请参考以下文章