OpenCV两张图片叠加,一张旋转一定的角度,另一张不变,如何叠加?
Posted
tags:
篇首语:本文由小常识网(cha138.com)小编为大家整理,主要介绍了OpenCV两张图片叠加,一张旋转一定的角度,另一张不变,如何叠加?相关的知识,希望对你有一定的参考价值。
OpenCV大神帮忙,本人是OpenCV初学者,我想请教个问题,两张图片叠加,正常情况可以通过设置ROI然后进行拷贝即可,但是如果其中一张图片旋转了一定的角度以后要如何叠加呢?

IplImage* rotateImage2(IplImage* img, int degree)//图像保留尺寸旋转
double angle = degree * CV_PI / 180.;
double a = sin(angle), b = cos(angle);
int width=img->width, height=img->height;
//旋转后的新图尺寸
int width_rotate= int(height * fabs(a) + width * fabs(b));
int height_rotate=int(width * fabs(a) + height * fabs(b));
IplImage* img_rotate = cvCreateImage(cvSize(width_rotate, height_rotate), img->depth, img->nChannels);
cvZero(img_rotate);
//保证原图可以任意角度旋转的最小尺寸
int tempLength = sqrt((double)width * width + (double)height *height) + 10;
int tempX = (tempLength + 1) / 2 - width / 2;
int tempY = (tempLength + 1) / 2 - height / 2;
IplImage* temp = cvCreateImage(cvSize(tempLength, tempLength), img->depth, img->nChannels);
cvZero(temp);
//将原图复制到临时图像tmp中心
cvSetImageROI(temp, cvRect(tempX, tempY, width, height));
cvCopy(img, temp, NULL);
cvResetImageROI(temp);
//旋转数组map
// [ m0 m1 m2 ] ===> [ A11 A12 b1 ]
// [ m3 m4 m5 ] ===> [ A21 A22 b2 ]
float m[6];
int w = temp->width;
int h = temp->height;
m[0] = b;
m[1] = a;
m[3] = -m[1];
m[4] = m[0];
// 将旋转中心移至图像中间
m[2] = w * 0.5f;
m[5] = h * 0.5f;
CvMat M = cvMat(2, 3, CV_32F, m);
cvGetQuadrangleSubPix(temp, img_rotate, &M);
cvReleaseImage(&temp);
return img_rotate;
void main()
IplImage *src1 = cvLoadImage("E:/src1.png");
IplImage *src2 = cvLoadImage("E:/src2.png");
IplImage *t = rotateImage2(src2,20);
cvShowImage("rotate",t);
cvSetImageROI(src1,cvRect(20,20,t->width,t->height));
cvAddWeighted(src1,0,t,1,0,src1);//参数(src1,a,src2,b,c,dst),
//计算公式:dst=src1*a+src2*b+c;这个函数改成自己的以实现透明效果
cvResetImageROI(src1);
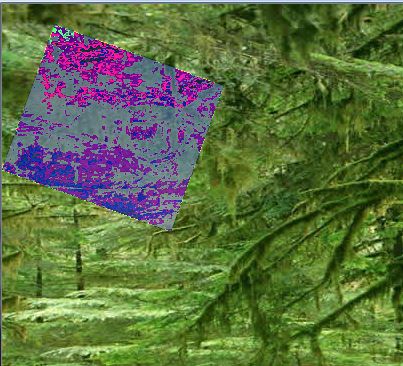
cvShowImage("emerge",src1);
效果图:

旋转后

叠加:如果要使黑色的透明,则把cvAddWeighted函数换成自己写的,逐点读取图像,若点不是原来的图像的点,则使用另一张图像的值。
再请问,您说叠加的时候可以通过判断是不是原来图像的点,怎么判断是不是原来图像的点呢?通过颜色么?颜色应该不可靠吧?
追答原图像本来是个矩形,旋转之后还是个矩形,用数学的方法肯定能判断的。
追问最后再请教一下,叠加的时候是两张图片的对应像素点按照dst=src1*a+src2*b+c进行加法计算么?可为什么我按照dst=src1*0.5+src2*0.5叠加后的图片颜色会很恐怖呢?


你这么做相当与两张图片到像素值取平均了。
只取某一个图片的像素值就没问题了。比如src3=src1*0+src2*1
可我希望两张图片是透明叠加的,要怎么做呢
追答那你再调节一下数值。dst=a*src1+(1-a)*src2;取不同的a试试
追问所有的值都试过了,效果都不好,按理来讲cvAddWeighted函数不就是这样做的么,怎么效果却不一样呢?高人可能解释?
本回答被提问者和网友采纳圆形物体旋转角度检测
【中文标题】圆形物体旋转角度检测【英文标题】:Circular objects rotate angle detection 【发布时间】:2022-01-18 09:01:00 【问题描述】:我正在尝试检测两个圆形物体之间的角度差,如下图 2 所示。
我正在考虑以一些小角度旋转其中一张图像。每次旋转一张图像,都会计算旋转图像与另一张图像之间的 SSIM。 SSIM最大的角度就是角度差。
但是,找到极端从来都不是一件容易的事。所以我的问题是:在这种情况下是否可以使用另一种算法(opencv)?
图片#1
图片#2
编辑:
感谢@Micka,我只是按照他建议的方式进行操作,并像@Yves Daoust 所说的那样删除黑色区域以缩短处理时间。这是我的最终结果:
原始图像 旋转 + 移位图像
【问题讨论】:
尝试霍夫循环变换。识别出圆圈后,您可以使用匹配过滤之类的方法围绕共同中心旋转它们以确定最佳旋转。 这对图像的结果是什么?这个例子中的角度差是42°吗? @Micka 是的,结果必须在 42° 左右。 不要逐步旋转图像。那很浪费。霍夫圆是一个必要的开始步骤(或其他东西来抓住圆),但是你需要一个极坐标变换。那么图片仅在沿一个轴的平移上有所不同。翻译的估计可以通过卷积来处理。 如果您需要额外考虑比例,请进行对数极坐标变换。 【参考方案1】:这是一种方法:
-
检测圆圈(例如,我假设圆圈位于图像中心,半径为图像宽度的 50%)
按极坐标展开圆形图像
确保第二张图片在第一张图片中完全可见,没有“圆端溢出”
简单的模板匹配
以下代码的结果:
min: 9.54111e+07
pos: [0, 2470]
angle-right: 317.571
angle-left: -42.4286
我认为这应该很好用。
int main()

    // load images
    cv::Mat image1 = cv::imread("C:/data/***/circleAngle/circleAngle1.jpg");
    cv::Mat image2 = cv::imread("C:/data/***/circleAngle/circleAngle2.jpg");

    // generate circle information. Here I assume image center and image is filled by the circles.
    // use houghCircles or a RANSAC based circle detection instead, if necessary
    cv::Point2f center1 = cv::Point2f(image1.cols/2.0f, image1.rows/2.0f);
    cv::Point2f center2 = cv::Point2f(image2.cols / 2.0f, image2.rows / 2.0f);
    float radius1 = image1.cols / 2.0f;
    float radius2 = image2.cols / 2.0f;

    cv::Mat unrolled1, unrolled2;
    // define a size for the unrolling. Best might be to choose the arc-length of the circle. The smaller you choose this, the less resolution is available (the more pixel information of the circle is lost during warping)
    cv::Size unrolledSize(radius1, image1.cols * 2);

    // unroll the circles by warpPolar
    cv::warpPolar(image1, unrolled1, unrolledSize, center1, radius1, cv::WARP_POLAR_LINEAR);
    cv::warpPolar(image2, unrolled2, unrolledSize, center2, radius2, cv::WARP_POLAR_LINEAR);

    // double the first image (720° of the circle), so that the second image is fully included without a "circle end overflow"
    cv::Mat doubleImg1;
    cv::vconcat(unrolled1, unrolled1, doubleImg1);

    // the height of the unrolled image is exactly 360° of the circle
    double degreesPerPixel = 360.0 / unrolledSize.height;

    // template matching. Maybe correlation could be the better matching metric
    cv::Mat matchingResult;
    cv::matchTemplate(doubleImg1, unrolled2, matchingResult, cv::TemplateMatchModes::TM_SQDIFF);

    double minVal; double maxVal; cv::Point minLoc; cv::Point maxLoc;
    cv::Point matchLoc;
    cv::minMaxLoc(matchingResult, &minVal, &maxVal, &minLoc, &maxLoc, cv::Mat());

    std::cout << "min: " << minVal << std::endl;
    std::cout << "pos: " << minLoc << std::endl;

    // angles in clockwise direction:
    std::cout << "angle-right: " << minLoc.y * degreesPerPixel << std::endl;
    std::cout << "angle-left: " << minLoc.y * degreesPerPixel -360.0 << std::endl;
    double foundAngle = minLoc.y * degreesPerPixel;

    // visualizations:
    // display the matched position
    cv::Rect pos = cv::Rect(minLoc, cv::Size(unrolled2.cols, unrolled2.rows));
    cv::rectangle(doubleImg1, pos, cv::Scalar(0, 255, 0), 4);

    // resize because the images are too big
    cv::Mat resizedResult;
    cv::resize(doubleImg1, resizedResult, cv::Size(), 0.2, 0.2);

    cv::resize(unrolled1, unrolled1, cv::Size(), 0.2, 0.2);
    cv::resize(unrolled2, unrolled2, cv::Size(), 0.2, 0.2);

    double startAngleUpright = 0;
    cv::ellipse(image1, center1, cv::Size(100, 100), 0, startAngleUpright, startAngleUpright + foundAngle, cv::Scalar::all(255), -1, 0);

    cv::resize(image1, image1, cv::Size(), 0.5, 0.5);
    cv::imshow("image1", image1);

    cv::imshow("unrolled1", unrolled1);
    cv::imshow("unrolled2", unrolled2);

    cv::imshow("resized", resizedResult);

    cv::waitKey(0);
这是中间图像和结果的样子:
展开的图像 1 / 展开的 2 / 展开的 1 (720°) / 展开的 2 在展开的 1 (720°) 中的最佳匹配:
【讨论】:
是的,我就是这样做的(但没有所有这些黑色区域)。 绘制的绿色矩形太小(使用 image2 而不是 unrolled2 大小),我会更新答案。 先检测内外圆部分(或最小和最大半径)去除黑色区域会更好,是的! 如果模板匹配不符合您的喜好,您可以进行卷积(相同但不同)。因为图像无论如何都是沿一个轴周期性的,这甚至适合傅立叶变换。使用 FFT 进行卷积具有时间复杂度较低的优势,这意味着对于较大的图片可能更快。【参考方案2】:这是相同的想法,但相关性是通过卷积 (FFT) 而不是matchTemplate 完成的。如果数据量大,FFT 会更快。
加载输入:
im1 = cv.imread("circle1.jpg", cv.IMREAD_GRAYSCALE)
im2 = cv.imread("circle2.jpg", cv.IMREAD_GRAYSCALE)
height, width = im1.shape
带有一些影响“分辨率”的任意参数的极坐标变换(记录极坐标作为练习给读者):
maxradius = width // 2

stripwidth = maxradius
stripheight = int(maxradius * 2 * pi) # approximately square at the radius
#stripheight = 360

def polar(im):
    return cv.warpPolar(im, center=(width/2, height/2),
        dsize=(stripwidth, stripheight), maxRadius=maxradius,
        flags=cv.WARP_POLAR_LOG*0 + cv.INTER_LINEAR)

strip1 = polar(im1)
strip2 = polar(im2)
卷积:
f1 = np.fft.fft2(strip1[::-1, ::-1])
f2 = np.fft.fft2(strip2)
conv = np.fft.ifft2(f1 * f2)
minmaxloc:
conv = np.real(conv) # or np.abs, can't decide
(i,j) = np.unravel_index(conv.argmax(), conv.shape)
i,j = (i+1) % stripheight, (j+1) % stripwidth
那是什么角度:
print("degrees:", i / stripheight * 360)
# 42.401091405184175
https://gist.github.com/crackwitz/3da91f43324b0c53504d587a394d4c71
【讨论】:
我认为在进行卷积之前获得最佳 fft 大小会带来更好的性能(这篇文章:docs.opencv.org/4.x/de/dbc/tutorial_py_fourier_transform.html)。我将尝试将此解决方案转换为 Opencvsharp 并尽快比较/更新结果。谢谢你的回答。 你应该通过在 warpPolar 中设置 dsize 来做到这一点,而不是通过填充。无论如何,我怀疑它会产生很大的不同。以上是关于OpenCV两张图片叠加,一张旋转一定的角度,另一张不变,如何叠加?的主要内容,如果未能解决你的问题,请参考以下文章