nginx
Posted xue_yun_xiang
tags:
篇首语:本文由小常识网(cha138.com)小编为大家整理,主要介绍了nginx相关的知识,希望对你有一定的参考价值。
一、概述

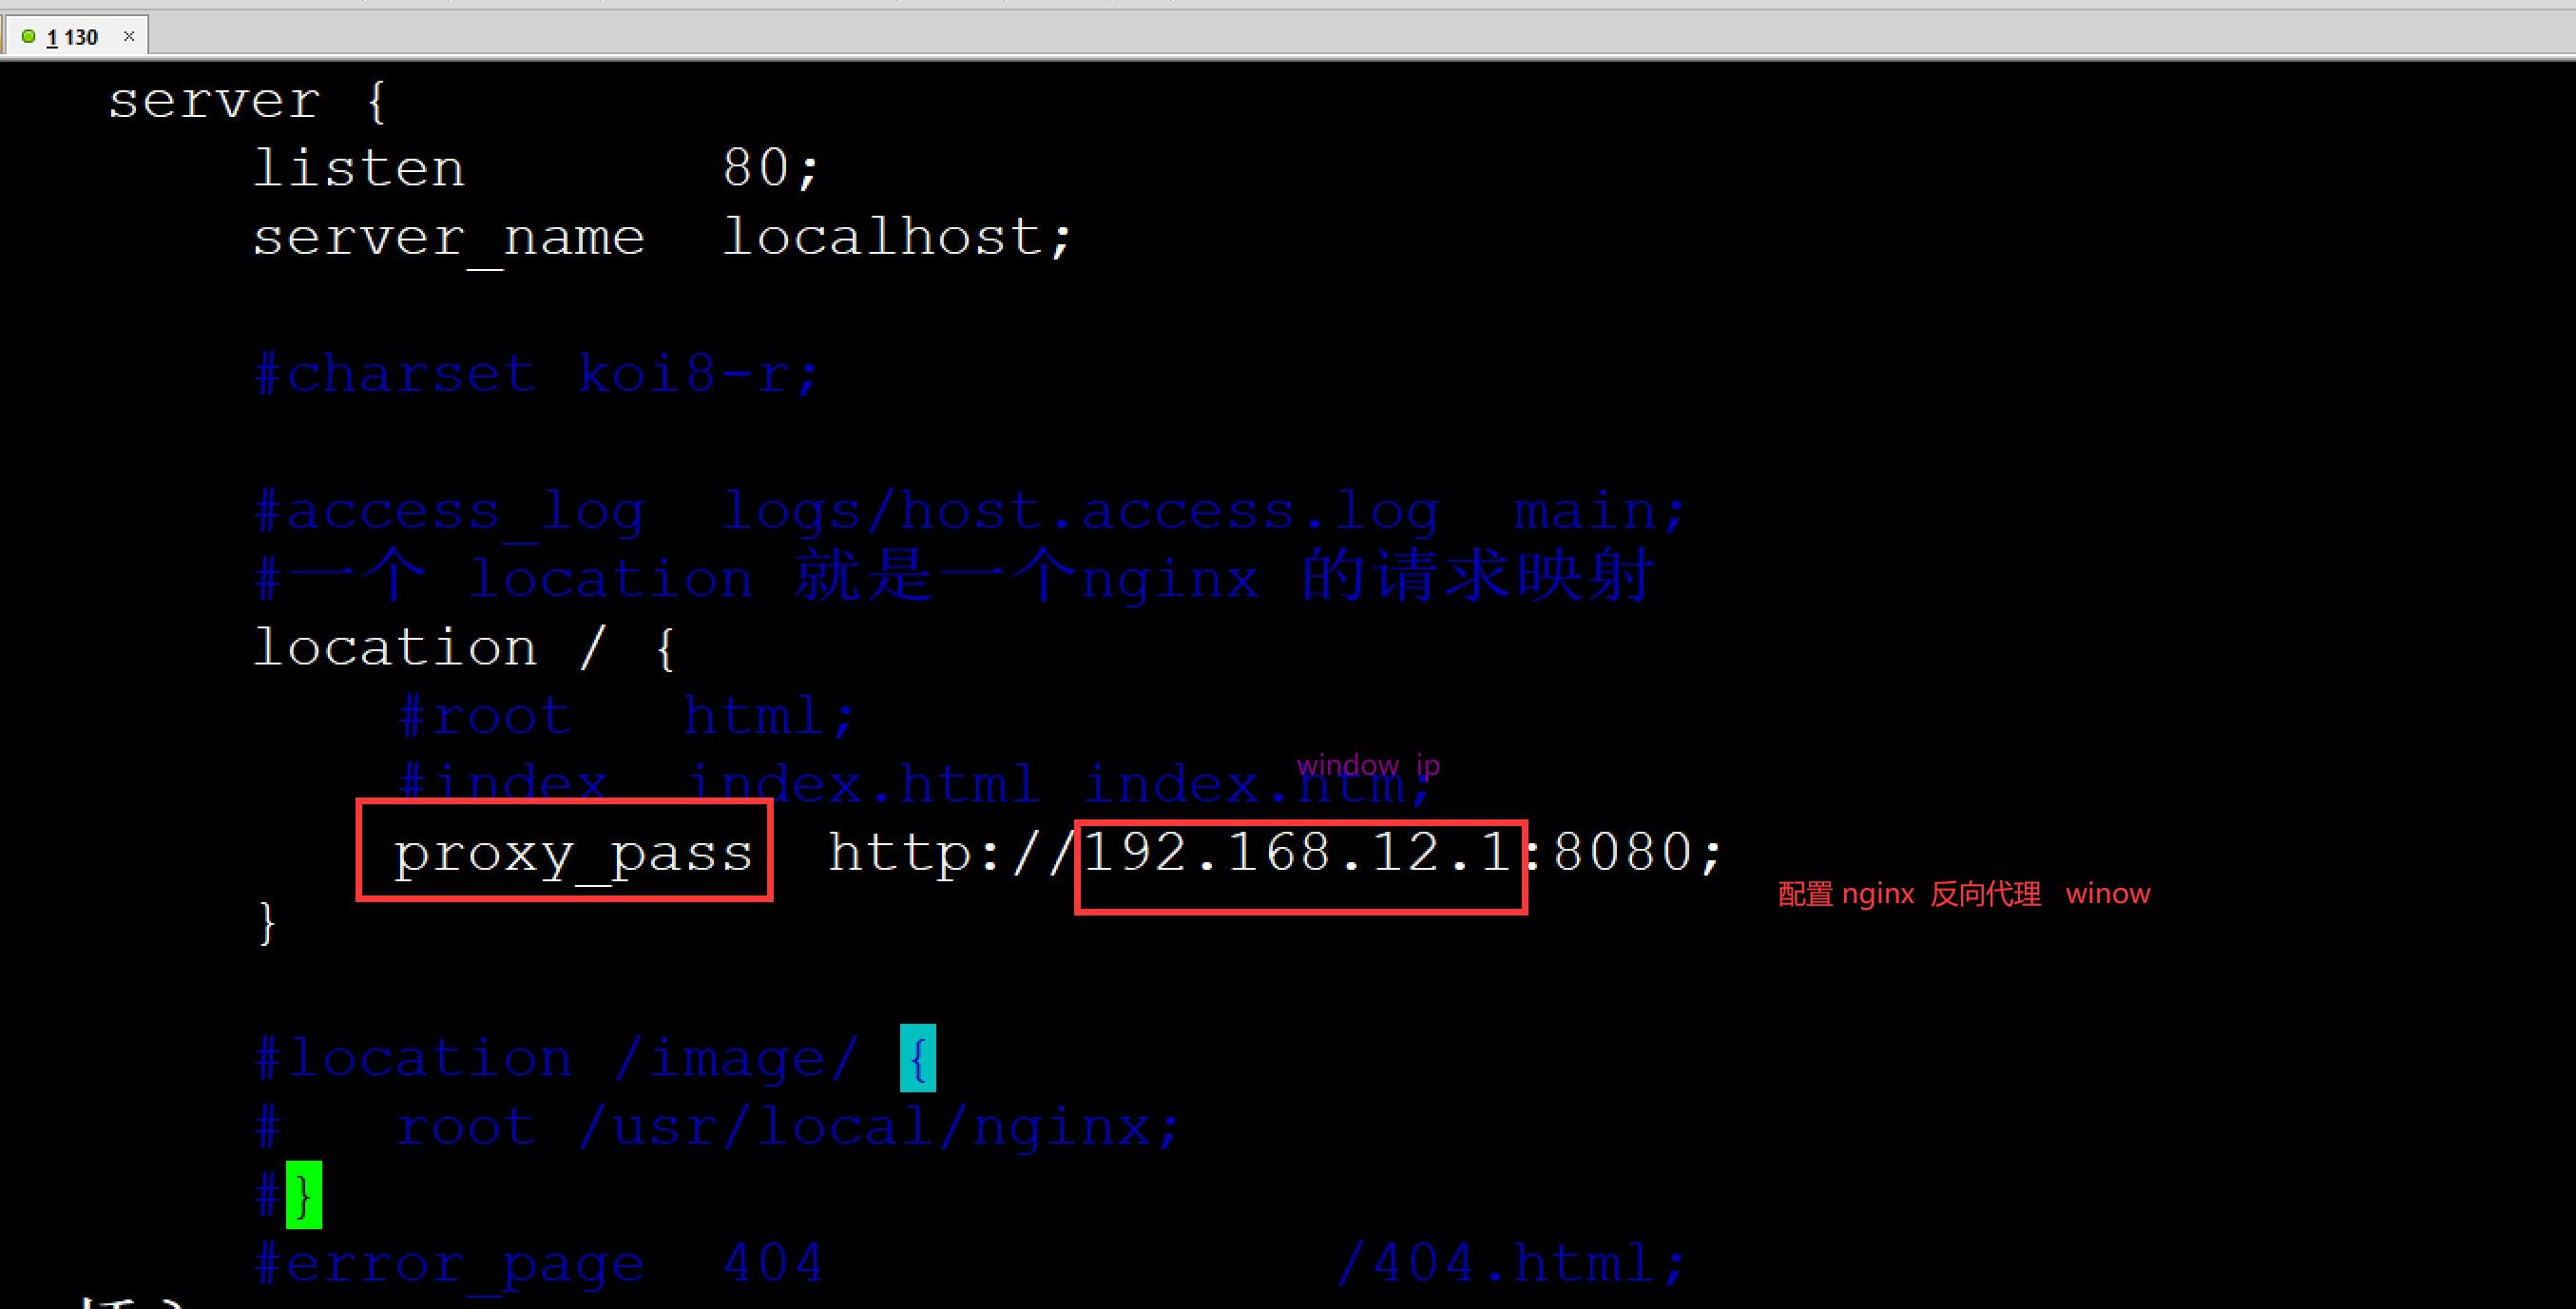
1、反向代理
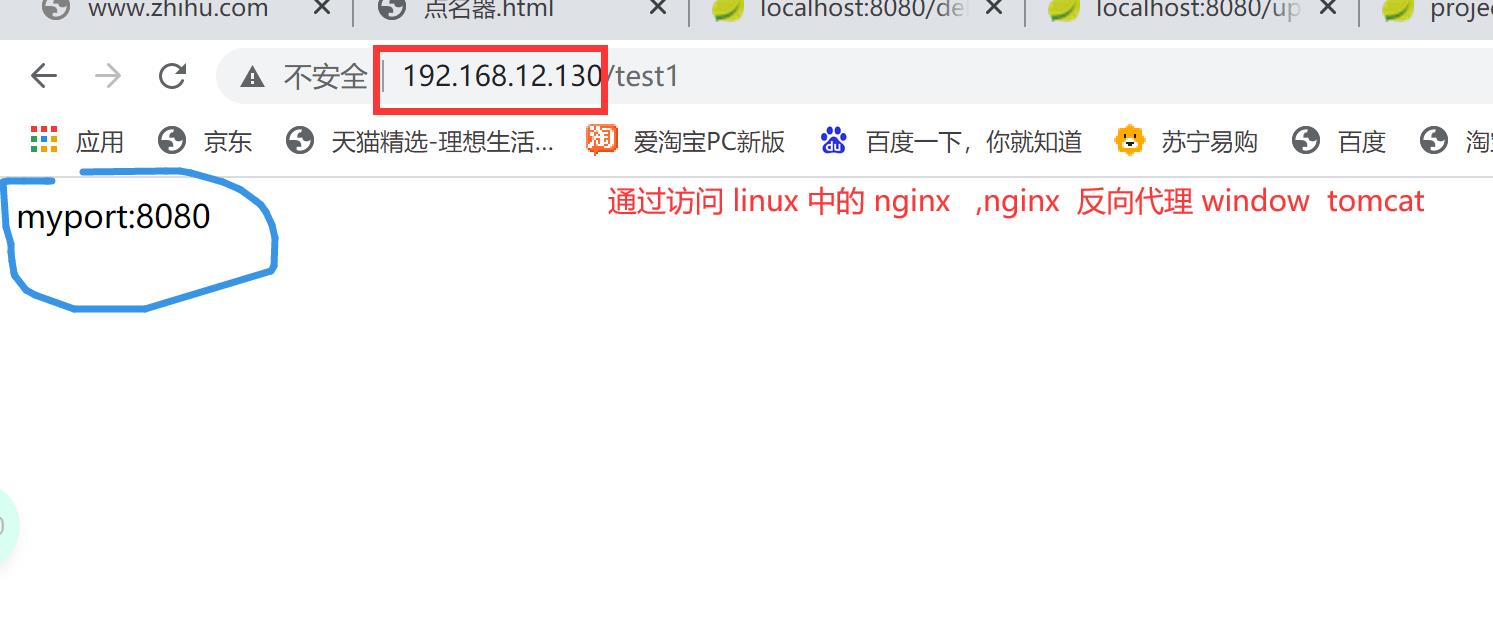
反向代理:就是nginx 可以代理我们的tomcat ,用户只需要访问nginx 不需要知道真正提供服务的Tomcat 的ip,通过nginx 访问就可以了
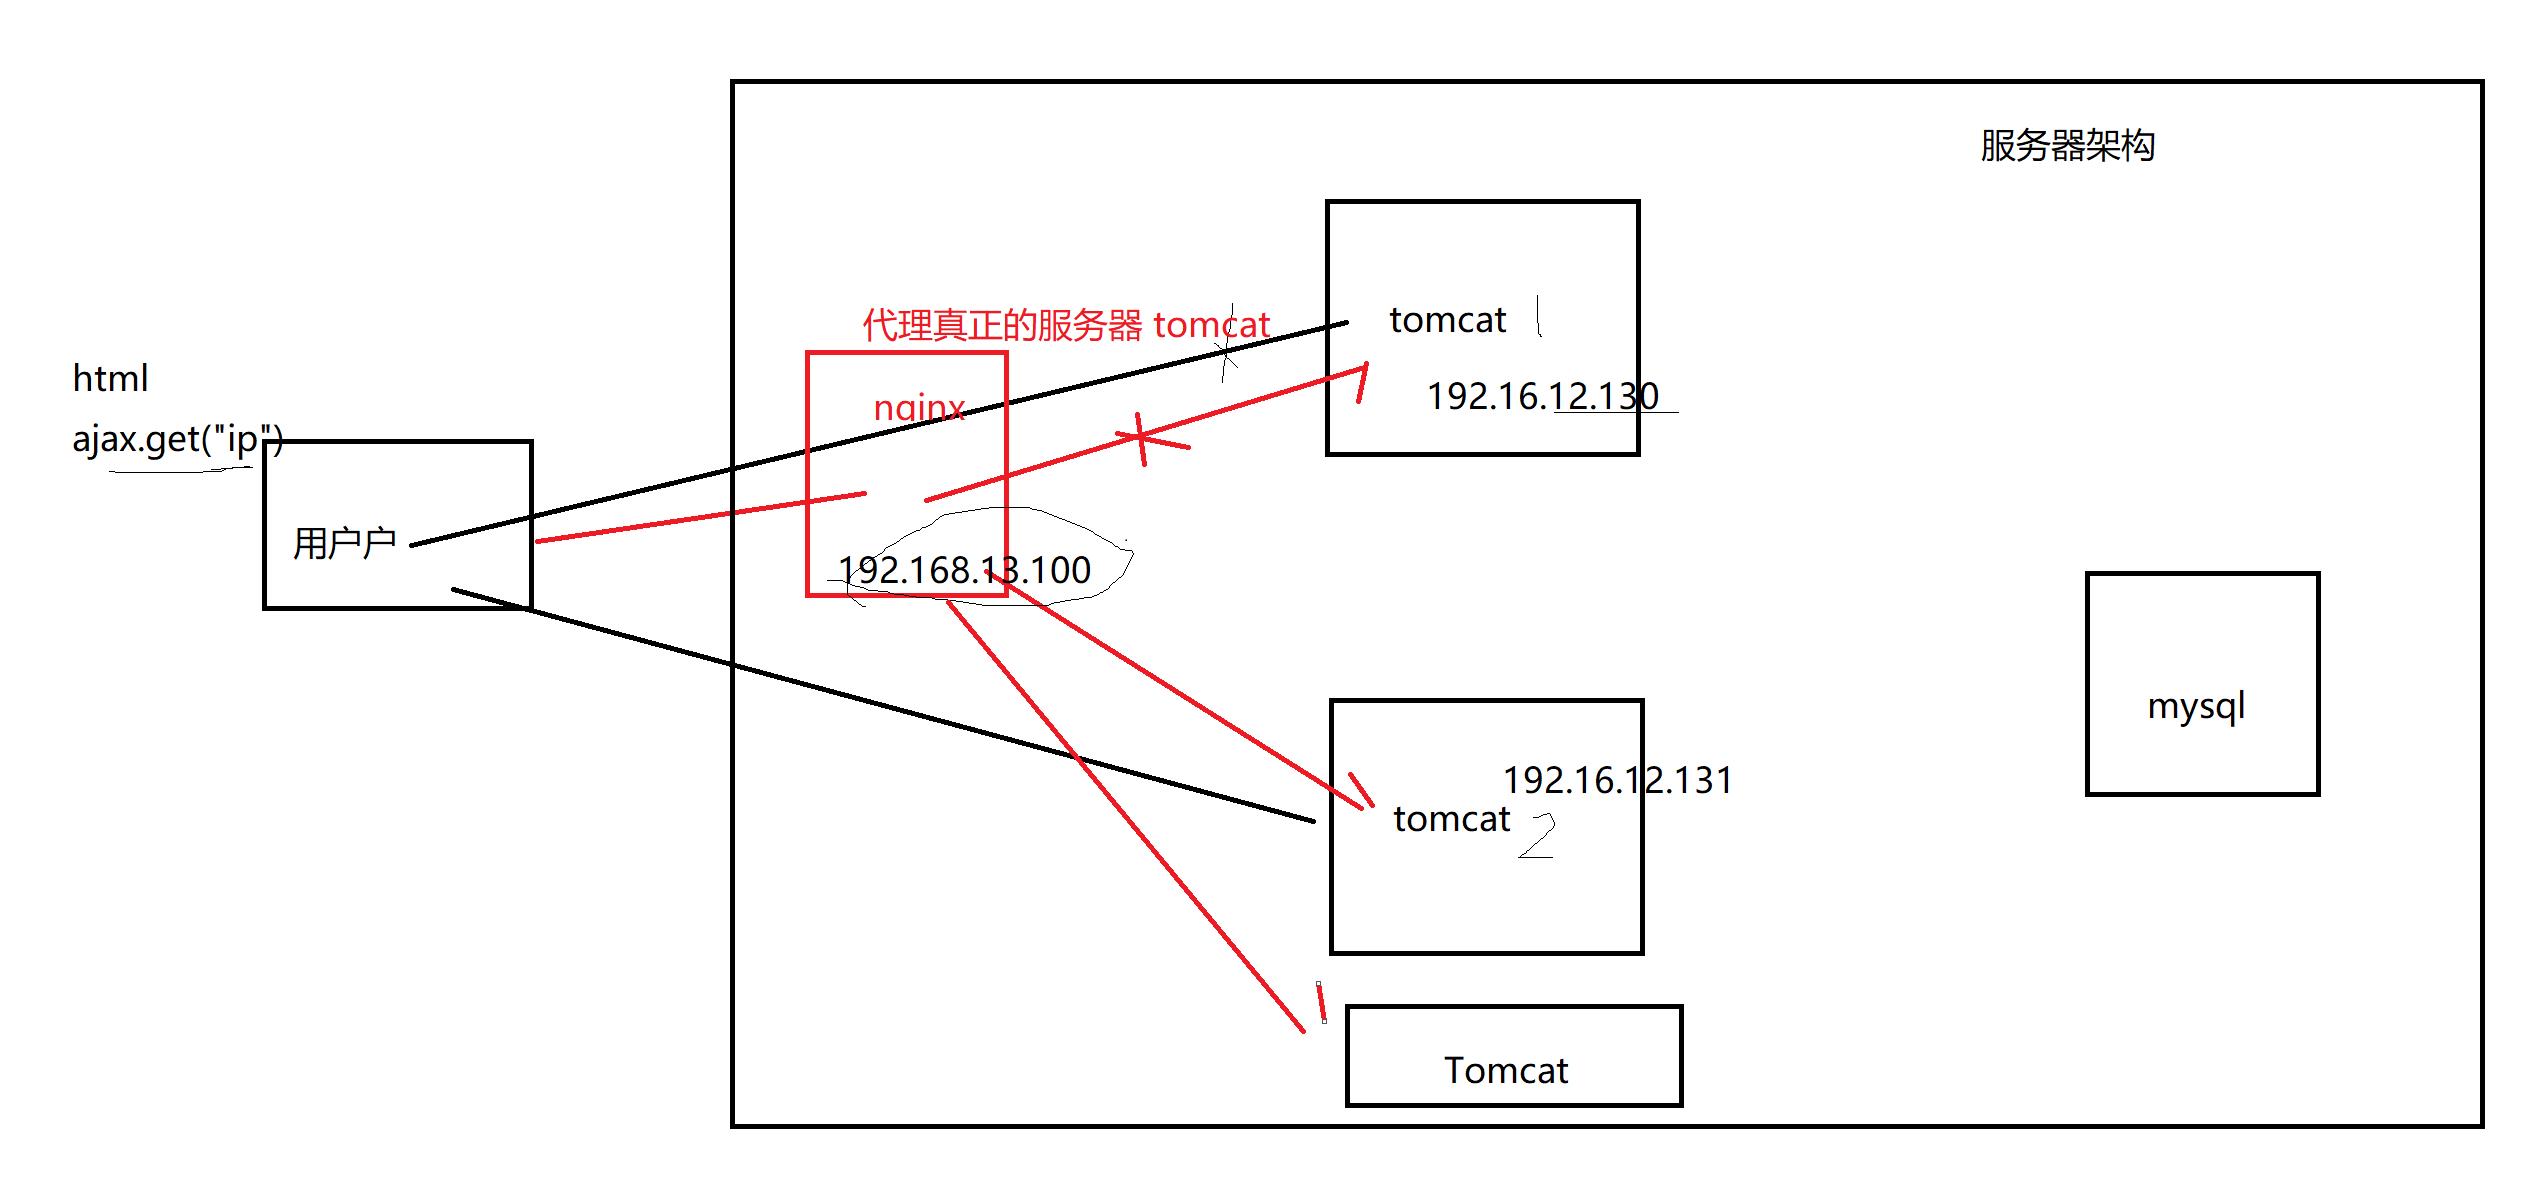
正向代理:客户端主动需要一台代理服务器 ,通过代理服务器去访问目标服务器
2、负载均衡
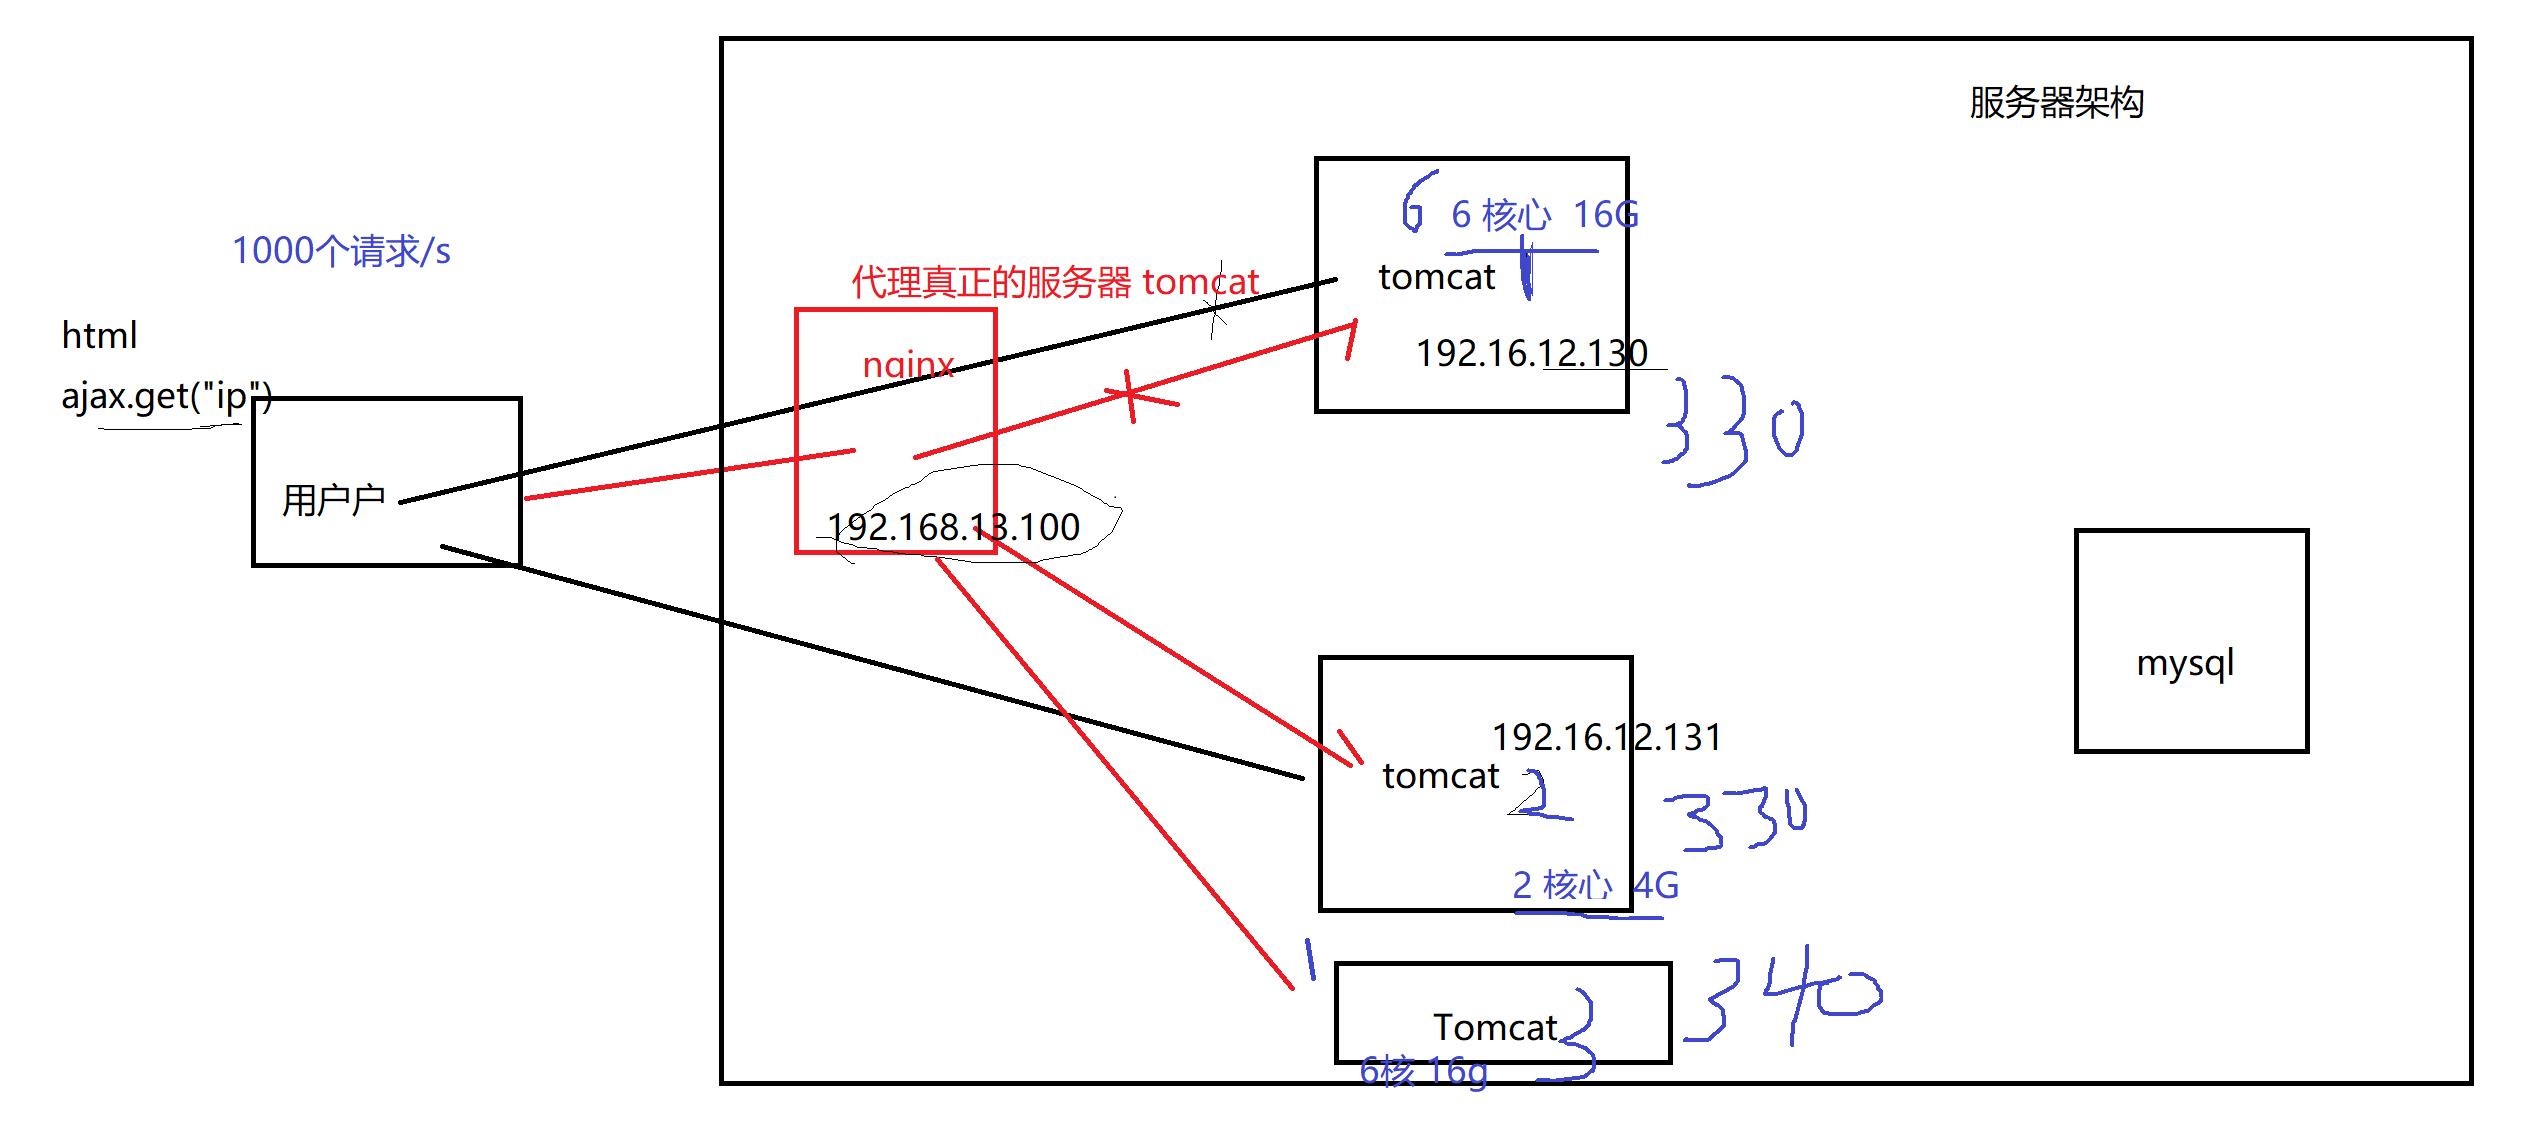
就是用户请求过来到达nginx ,nginx 将请求 转发个tomcat 处理 响应请求,如果每秒都有1000次请求,nginx 会根据tomcat 机器的性能 均衡分配(能者多劳)
假如 每秒中 1000ge 请求 (QPS)
3、动静分离
就是将我们以前工程中的 静态资源 放在nginx中,使用nginx 提供静态资源服务,使用tomcat 提供动态资源

二、安装
1、前提保证网络通常
ping www.baidu.com
2、安装环境依赖
yum -y install gcc zlib zlib-devel pcre-devel openssl openssl-devel
3、将 nginx-1.4.2.tar.gz上传linux
4、解压缩到指定目录
[root@mastera ~]# mkdir /usr/nginx
[root@mastera ~]# tar -xzvf nginx-1.4.2.tar.gz -C /usr/nginx/
5、执行配置文件 生成makefile
[root@mastera ~]# cd /usr/nginx/nginx-1.4.2/
[root@mastera nginx-1.4.2]# ls
auto     CHANGES.ru  configure  html     man     src
CHANGES  conf        contrib    LICENSE  README
[root@redis01 nginx-1.4.2]# ./configure
6、编译安装
[root@mastera nginx-1.4.2]# make
[root@mastera nginx-1.4.2]# make install
7、切换到nginx 的安装目录
[root@mastera nginx-1.4.2]# pwd
/usr/nginx/nginx-1.4.2
[root@mastera nginx-1.4.2]# cd /usr/local/nginx/
[root@mastera nginx]# ls
conf  html  logs  sbin
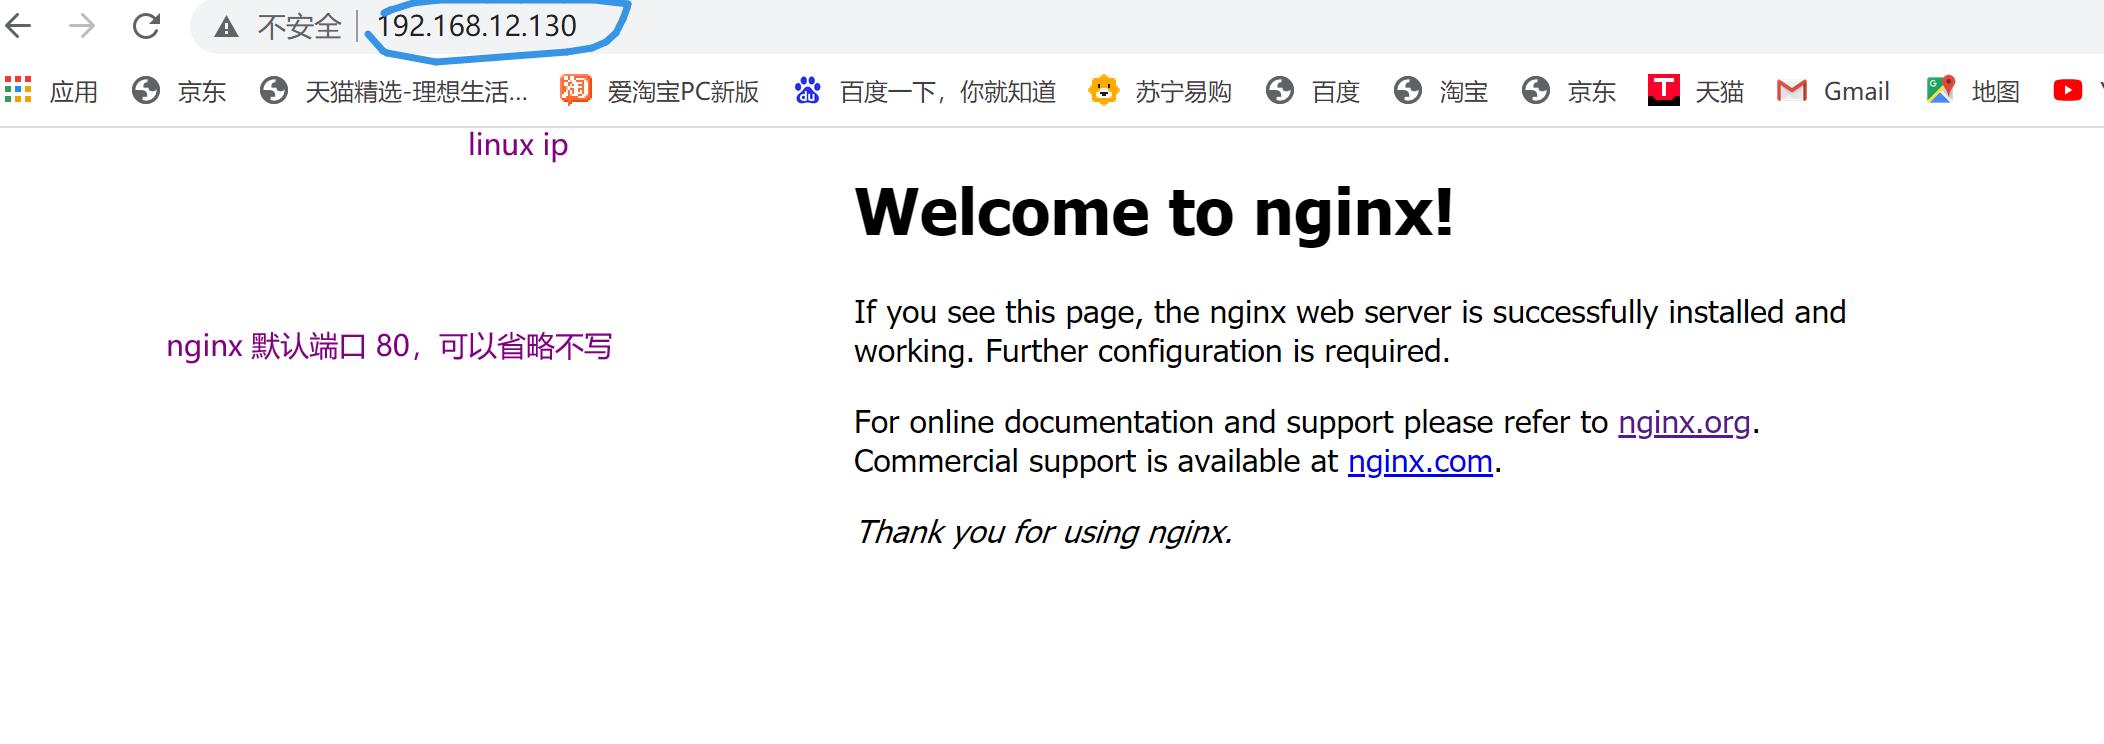
8、启动nginx
[root@mastera nginx]# ./sbin/nginx
让nginx 重现加载配置文件
[root@mastera nginx]# ./sbin/nginx -s reload
停止nginx
[root@mastera nginx]# ./sbin/nginx -s stop

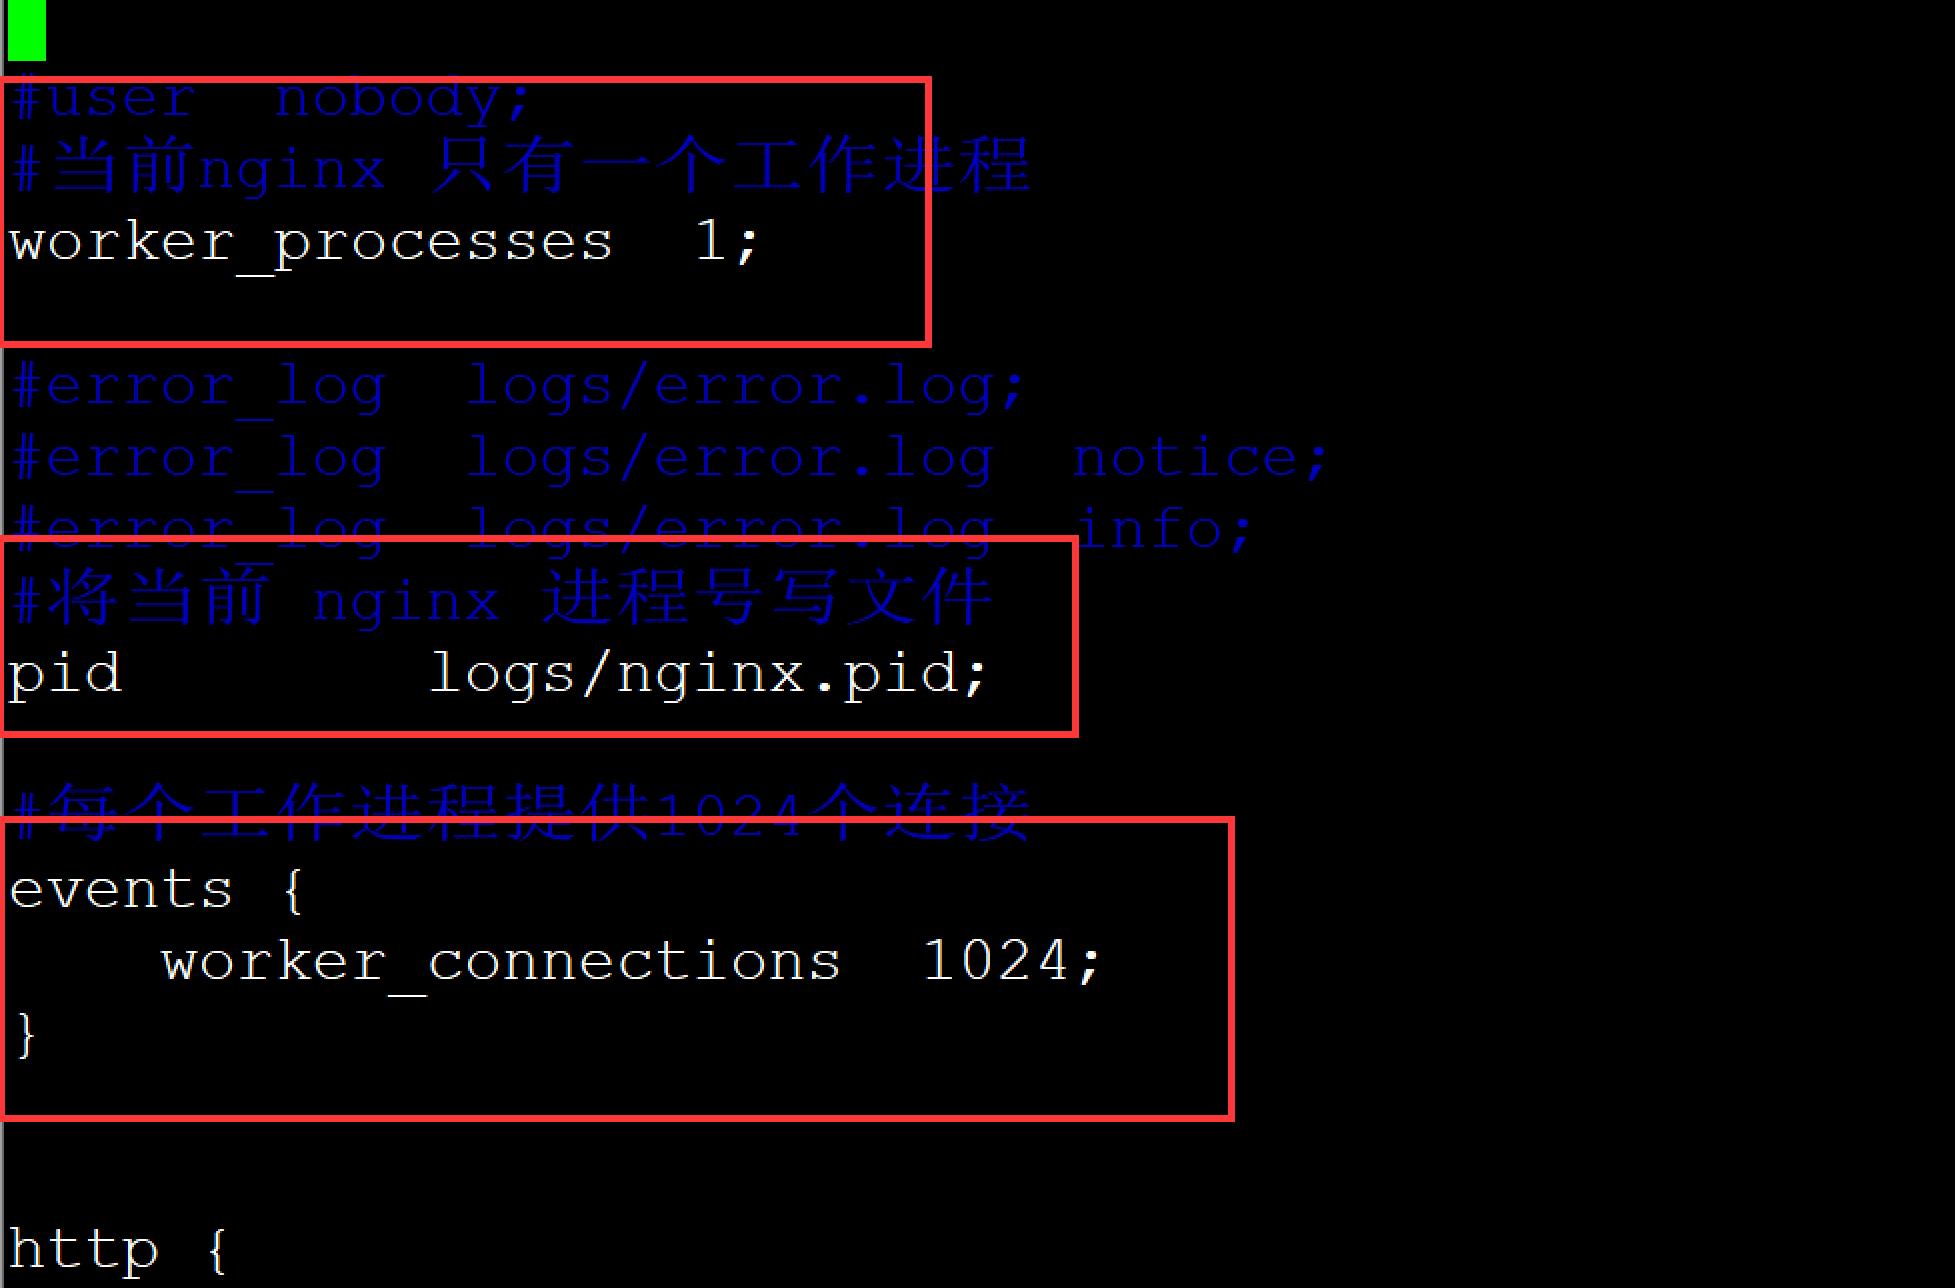
三、niginx配置

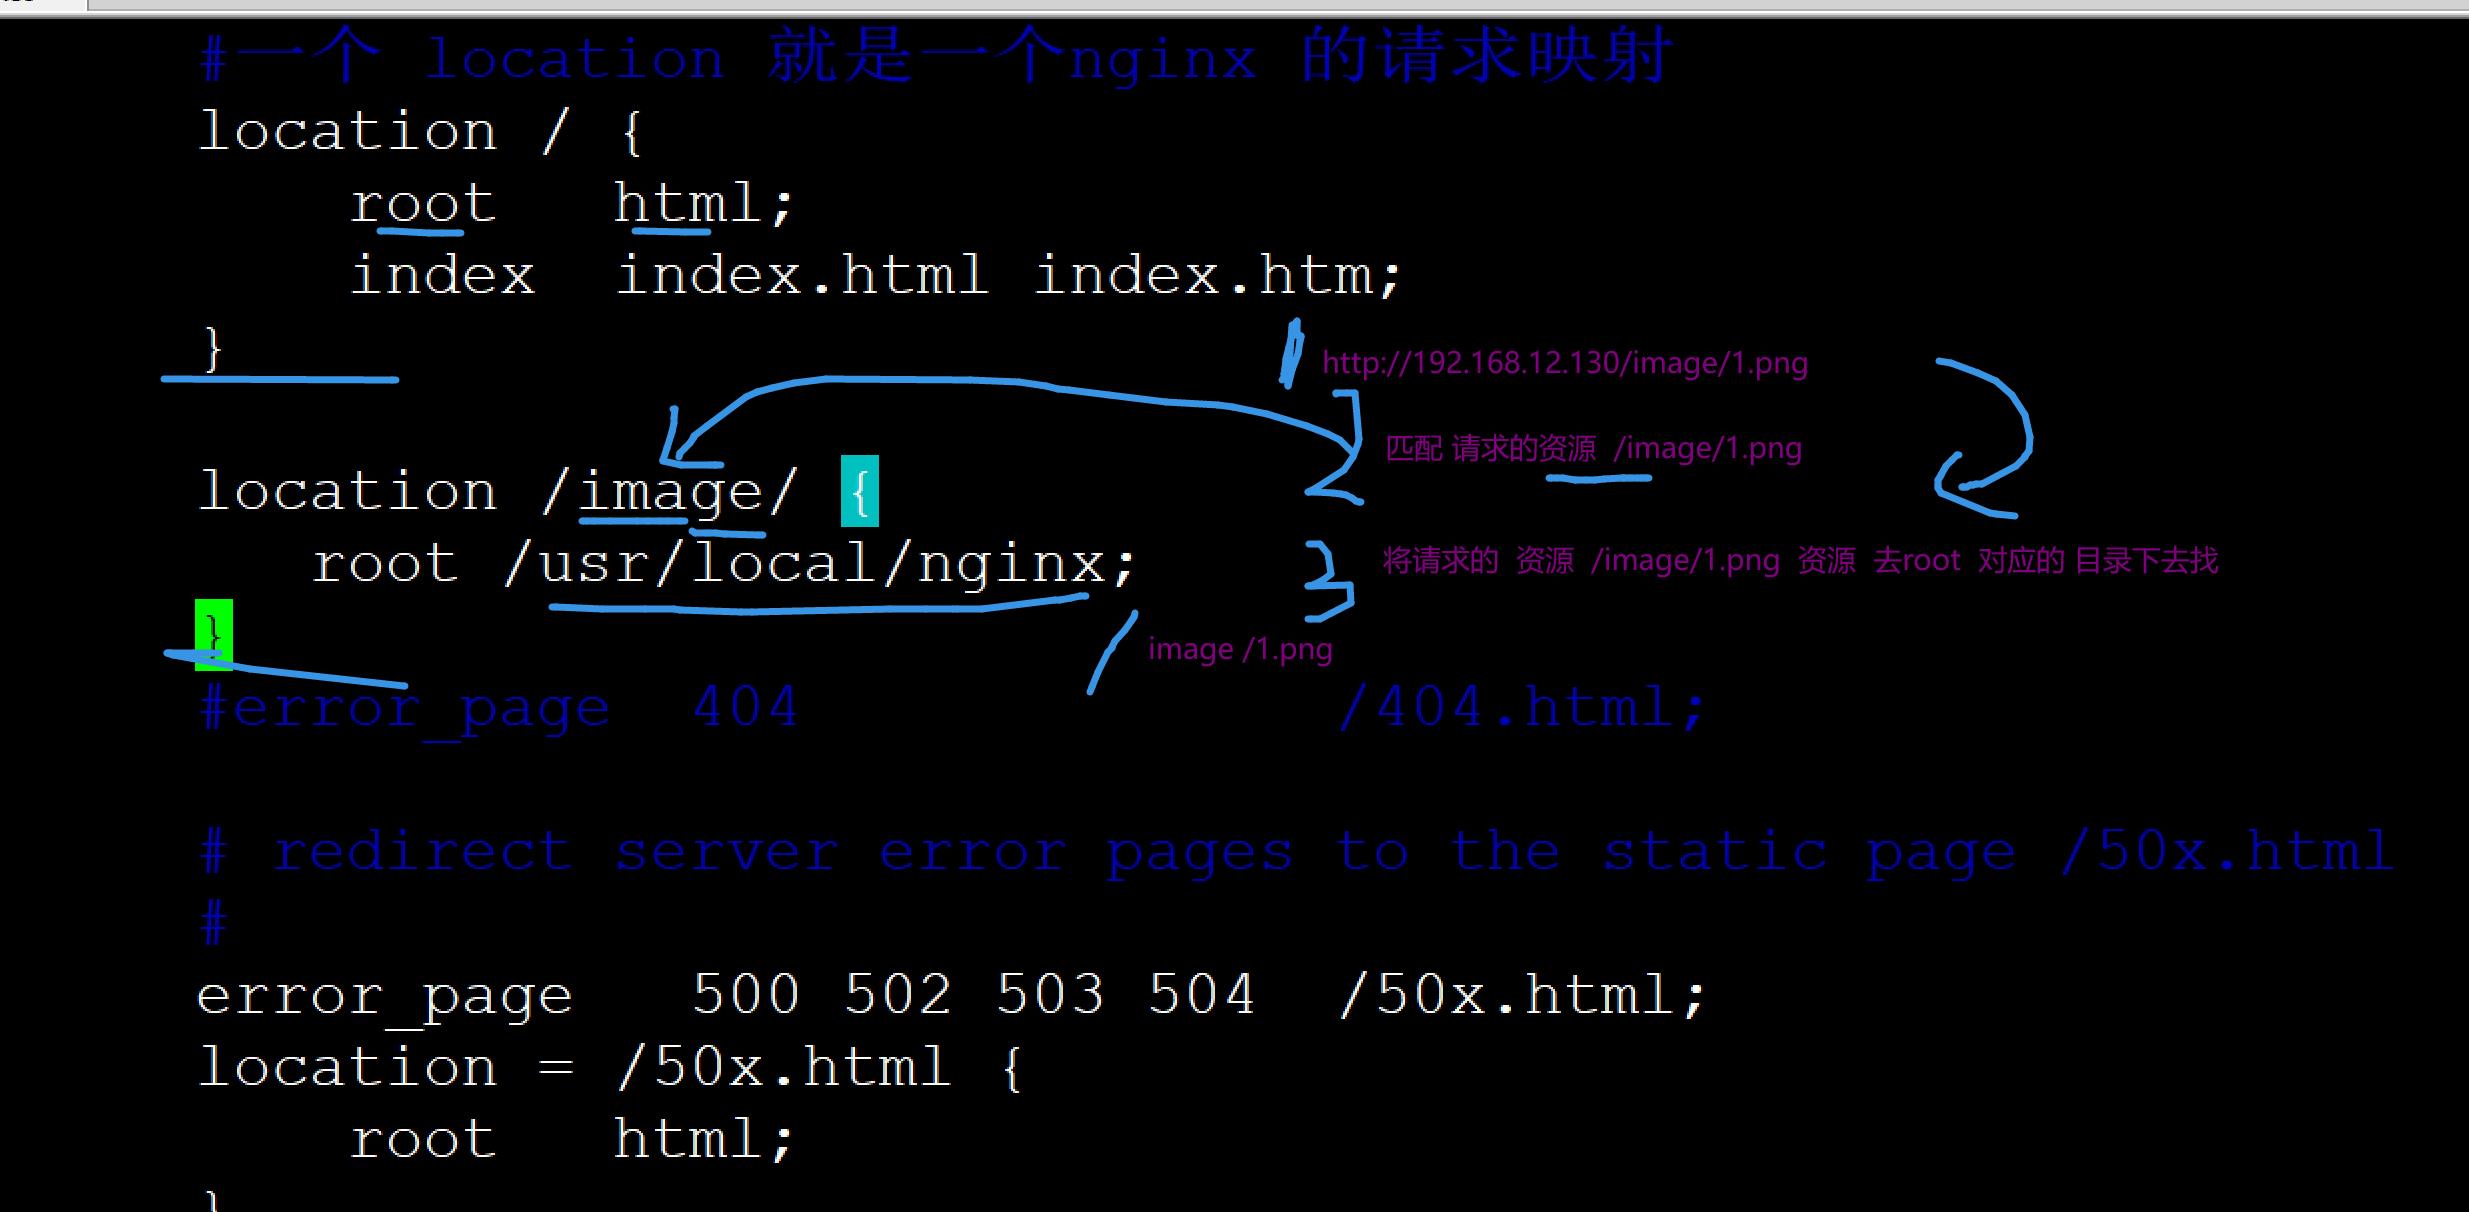
#一个 location 就是一个nginx 的请求映射
#当前映射 匹配 / 根路径,所有的请求都会去 配置root 对应目录下去找资源
# http://192.168.12.130/index.html
location /
root html;
# 配置默认访问页 首页 http://192.168.12.130 === http://192.168.12.130/index.html
index index.html index.htm;
1、nginx 配置静态资源
静态资源就是html 图片 css js 音频
 # 只能匹配image
        location /image/
           root /usr/local/nginx;


        # 匹配所有以 gif jp jpeg png .. 结尾的文件
        location ~* \\.(gif|jpg|jpeg|png|css|js|ico)$
            root /usr/local/nginx/;
            expires 30d;
2、配置图片静态路径
1、在conf/nginx.conf 添加路径映射
# 只能匹配image
        location /image/
           root /usr/local/nginx;
2、在 /usr/local/nginx 创建 image 文件夹,上传图片
3、nginx 重新加载配置文件
[root@mastera nginx]# ./sbin/nginx -s reload
4、访问

3、路径映射优先级
路径映射优先级 从高到底,依次降低
1. 直接匹配
location = /
精准匹配,主机名后面不能带任何的字符串
2. 通用匹配
location /xxx
匹配所有以/xxx开头的路径
3. 正则匹配
location ~ /xxx
匹配所有以/xxx开头的路径
4. 匹配开头路径
location ^~ /images/
匹配所有以/images开头的路径
5. 匹配后缀
location ~* .(gif|jpg|png)$
匹配以gif或者jpg或者png为结尾的路径
6. 全部通配
location /
匹配全部路径
四、反向代理
1、创建springboot工程
 <parent>
        <groupId>org.springframework.boot</groupId>
        <artifactId>spring-boot-starter-parent</artifactId>
        <version>2.0.3.RELEASE</version>
        <relativePath/>
    </parent>


    <dependencies>

        <dependency>
            <groupId>org.springframework.boot</groupId>
            <artifactId>spring-boot-starter-web</artifactId>
            <version>2.0.3.RELEASE</version>
        </dependency>

    </dependencies>
    <build>
        <plugins>

            <!--  将spring boot 应用打为jar  -->
            <plugin>
                <groupId>org.springframework.boot</groupId>
                <artifactId>spring-boot-maven-plugin</artifactId>
            </plugin>
        </plugins>
    </build>
2、创建启动类
@SpringBootApplication
public class MyApplication
    public static void main(String[] args)
        SpringApplication.run(MyApplication.class,args);
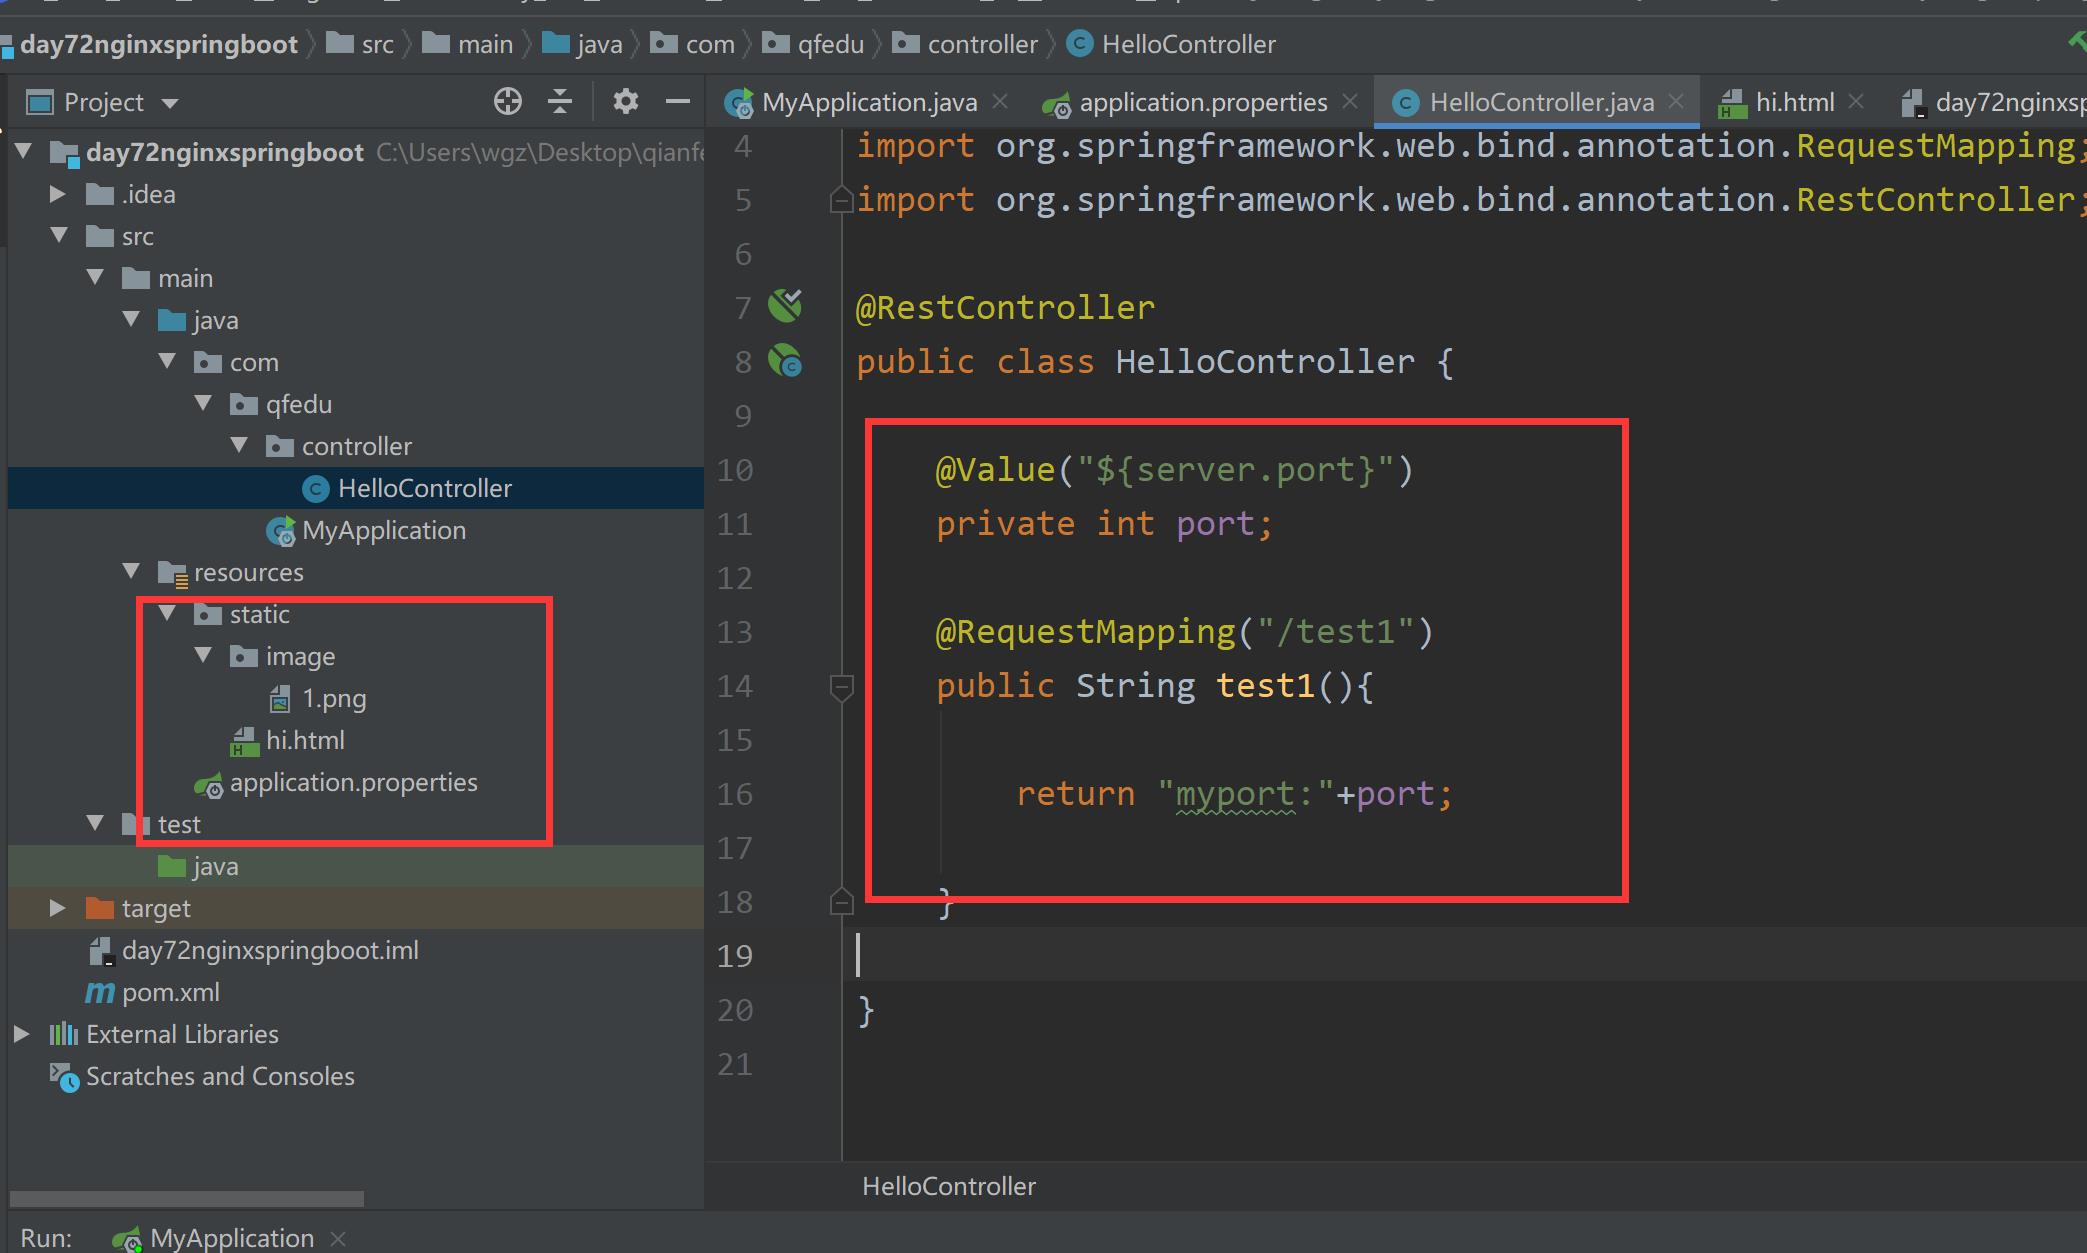
3、创建配置文件
server.port=8080
4、创建controller
@RestController
public class HelloController

    @Value("$server.port")
    private int port;

    @RequestMapping("/test1")
    public String test1()
        return "myport:"+port;
5、创建html
<!DOCTYPE html>
<html lang="en">
<head>
    <meta charset="UTF-8">
    <title>Title</title>
</head>
<body>

<h1>  hi  nginx  !!!!</h1>

<img src="image/1.png">

</body>
</html>
6、测试
五、配置动静分离
1、将工程中static 目录 拷贝到nginx 目录中

2、修改配置文件
  #access_log  logs/host.access.log  main;
        #一个 location 就是一个nginx 的请求映射
        location /
            #root   html;
            #index  index.html index.htm;
            proxy_pass  http://192.168.12.1:8080;

       # 就是所有 以 html jpb 结尾的文件 都去 root(映射根节点) 对应linux目录
        location ~ .*\\.(html|htm|gif|jpg|jpeg|bmp|png|ico|js|css)$
            expires 24h;
            root  /usr/local/nginx/static;

3、重新加载配置文件
[root@mastera nginx]# ./sbin/nginx -s reload
4、测试

为什么要做动静分离?
1.tomcat 加载静态资源性能差
2.让tomcat专注于 响应用户动态请求,降低Tomcat压力
3.修改静态代码,不需要重置tomcat ,只需要将nginx 对应静态目录文件 替换就可以
六、负载均衡
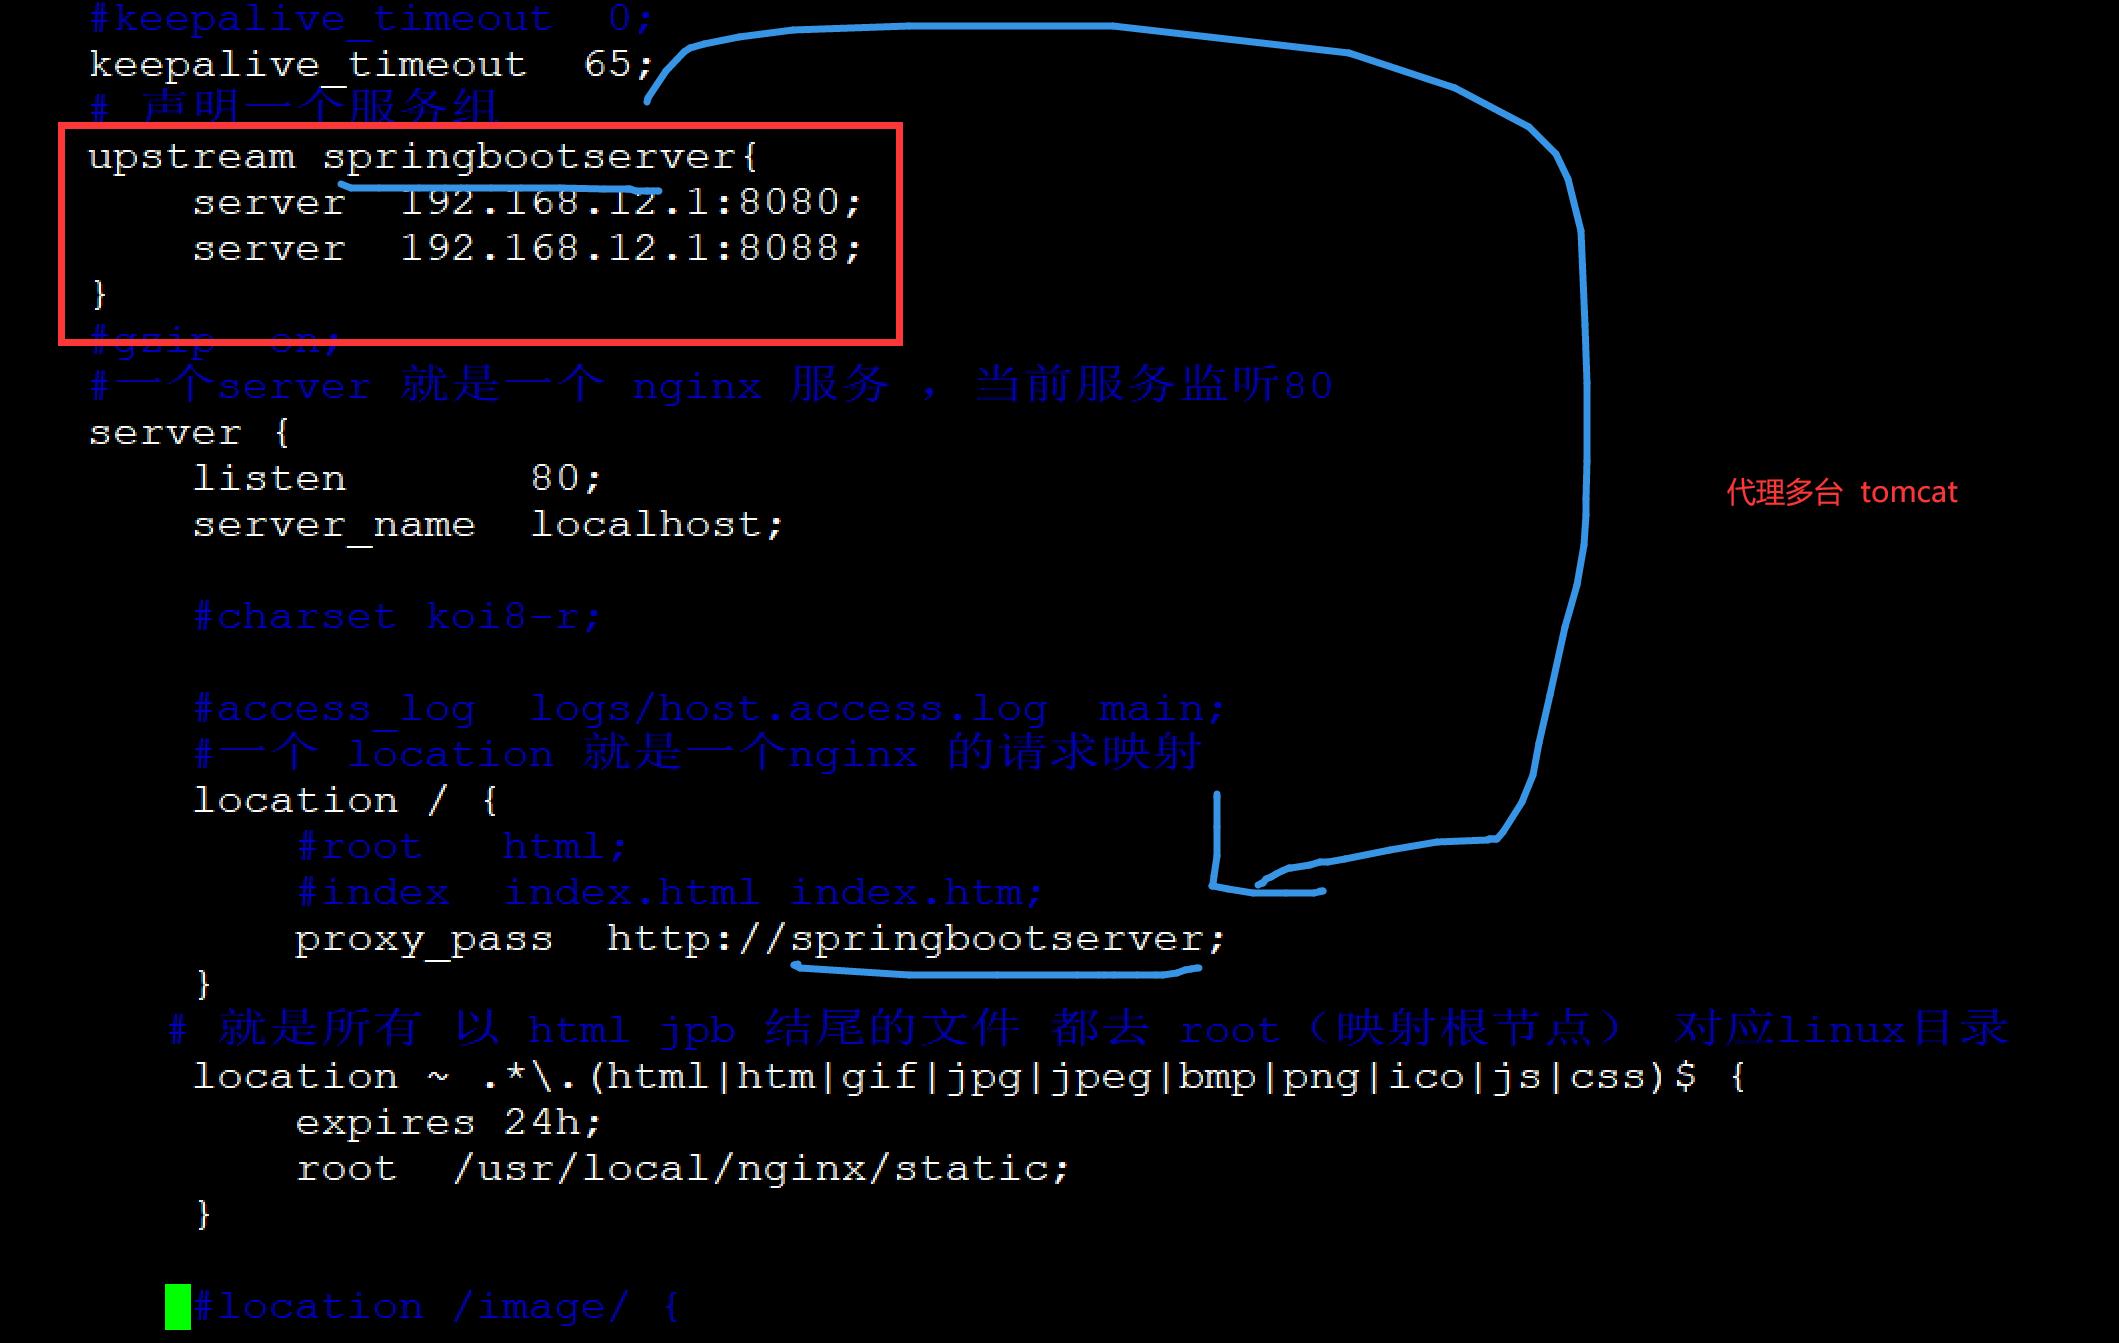
负载均衡:就是nginx 根据配置 让多台tomcat 可以均衡的分配前端请求
1、创建工程
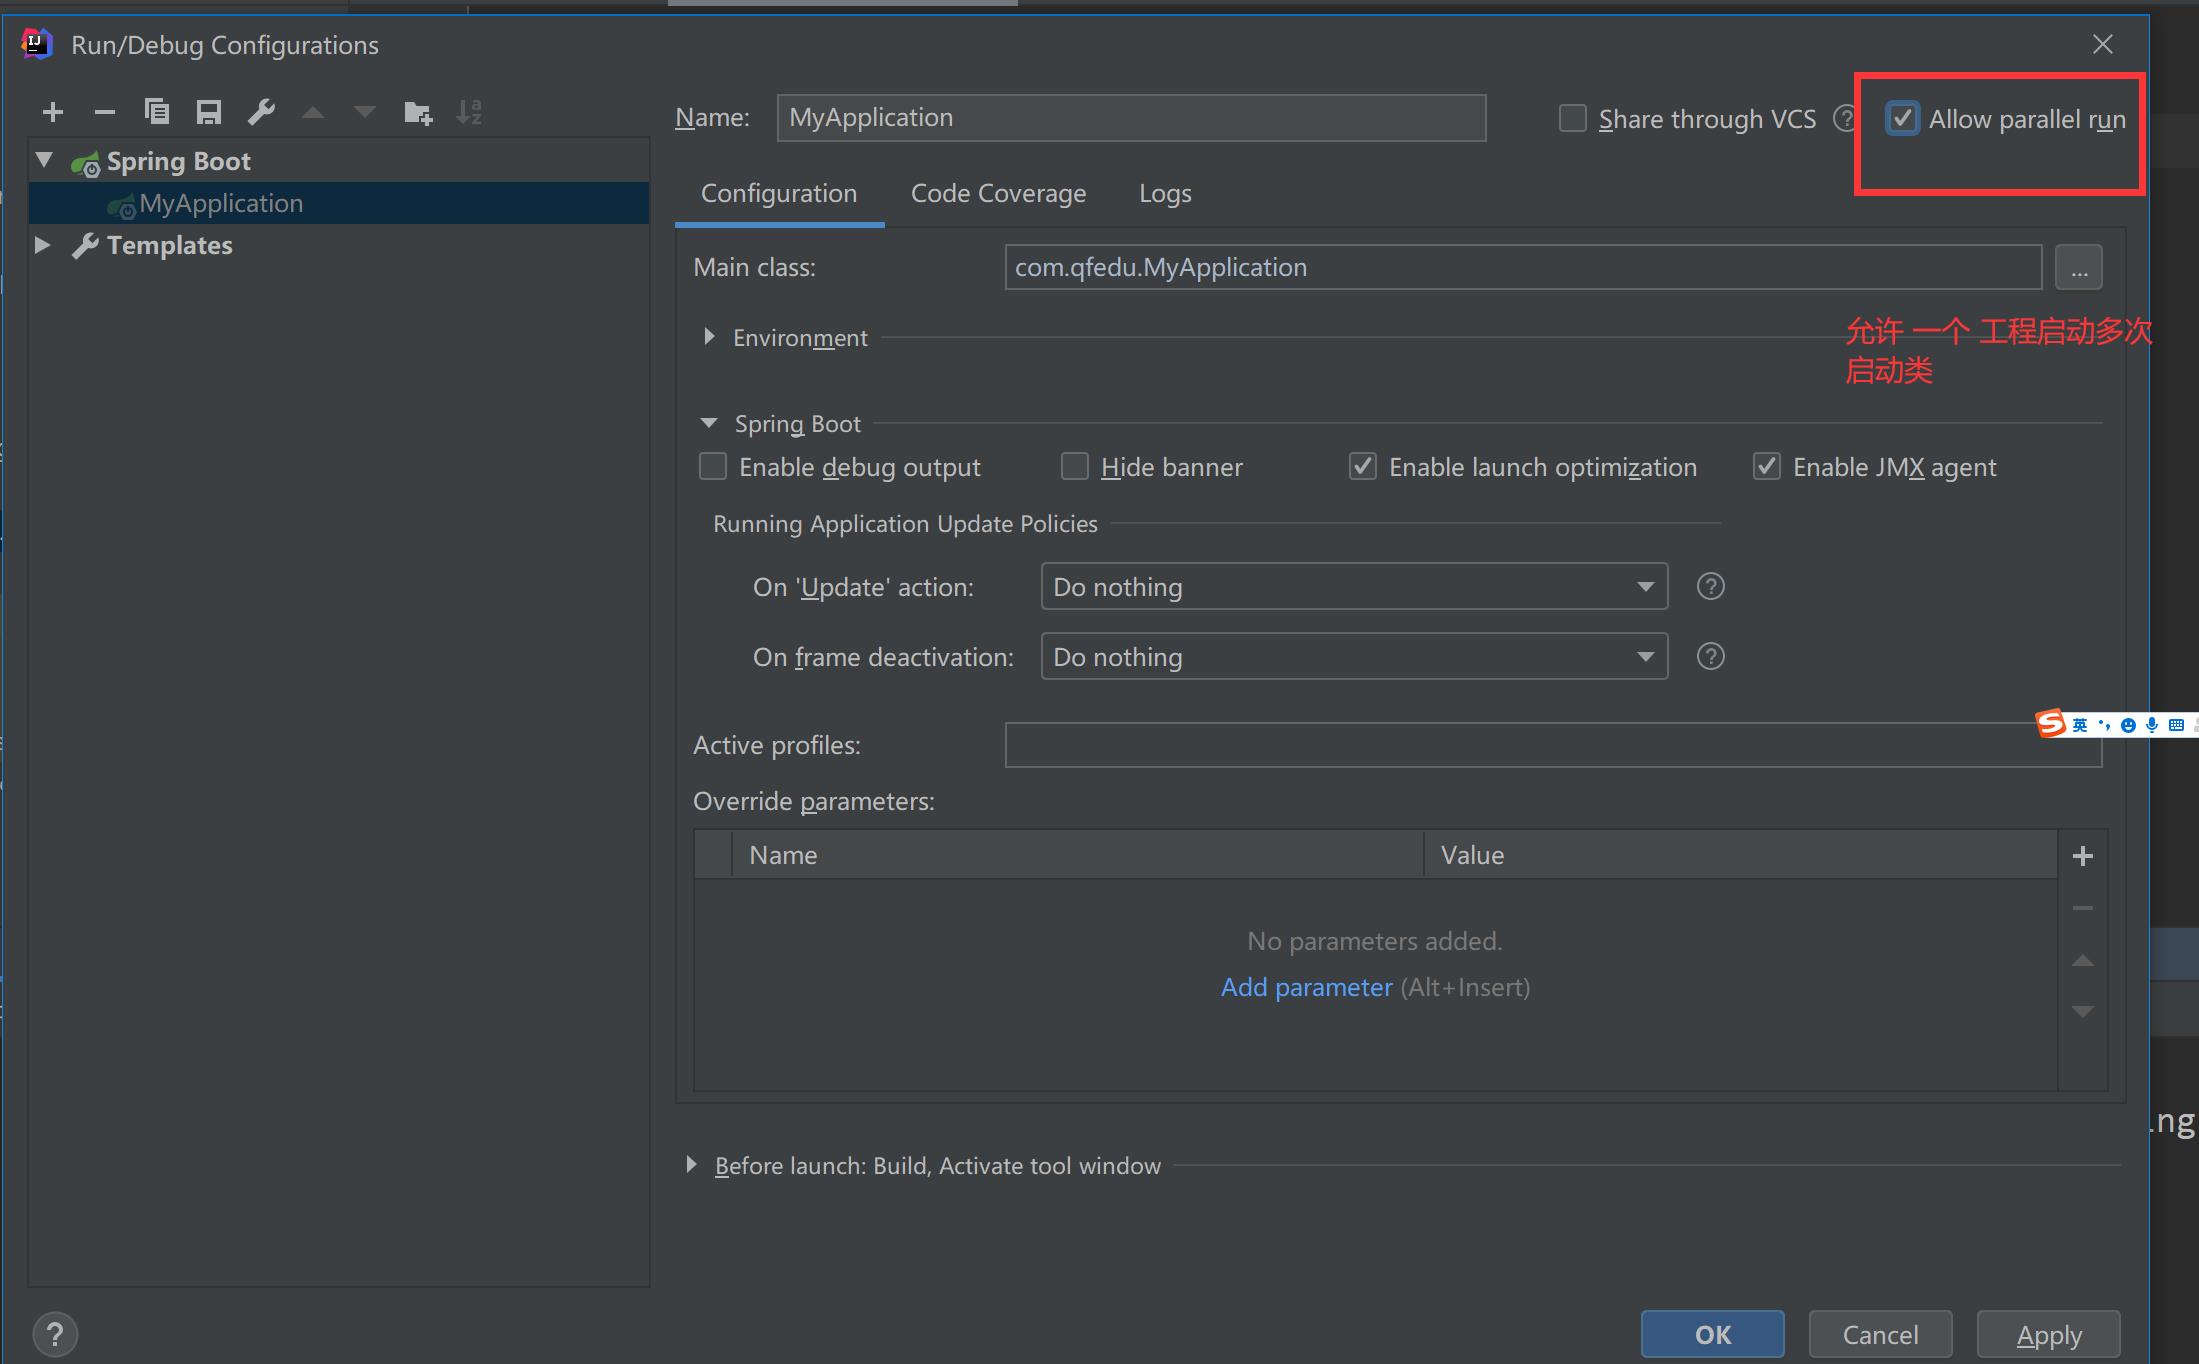
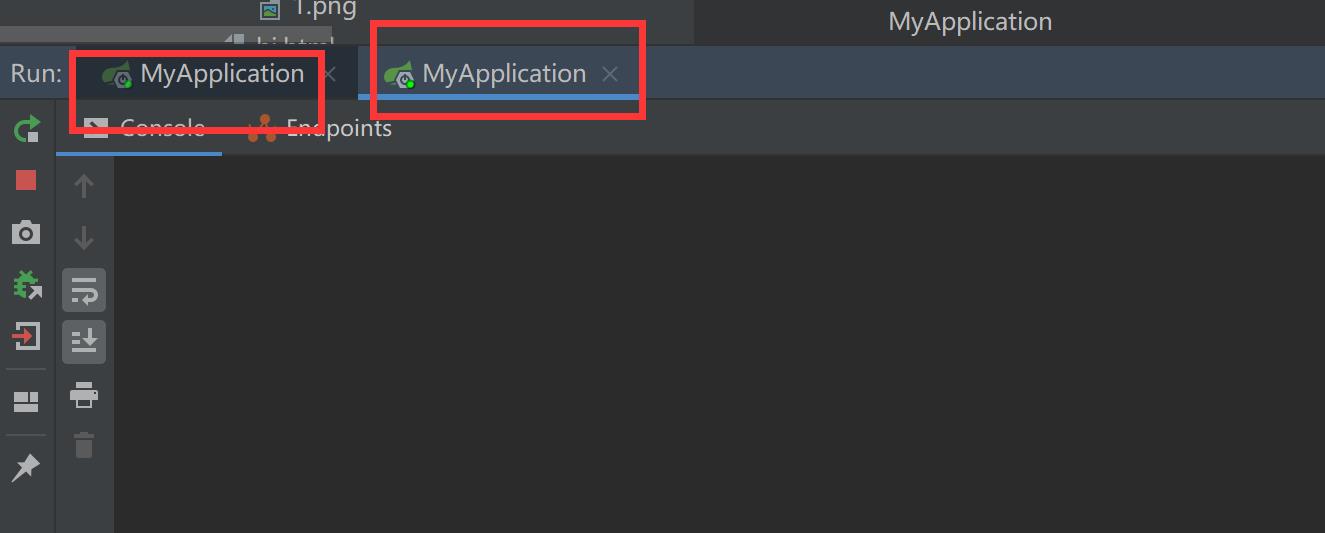
2、修改配置文件
    upstream springbootserver
        server  192.168.12.1:8080;
        server  192.168.12.1:8088;


     server
        listen       80;
        server_name  localhost;

        #charset koi8-r;

        #access_log  logs/host.access.log  main;
        #一个 location 就是一个nginx 的请求映射
        location /
            #root   html;
            #index  index.html index.htm;
            proxy_pass  http://springbootserver;

       # 就是所有 以 html jpb 结尾的文件 都去 root(映射根节点) 对应linux目录
        location ~ .*\\.(html|htm|gif|jpg|jpeg|bmp|png|ico|js|css)$
            expires 24h;
            root  /usr/local/nginx/static;
3、重新加载配置文件
[root@mastera nginx]# ./sbin/nginx -s reload
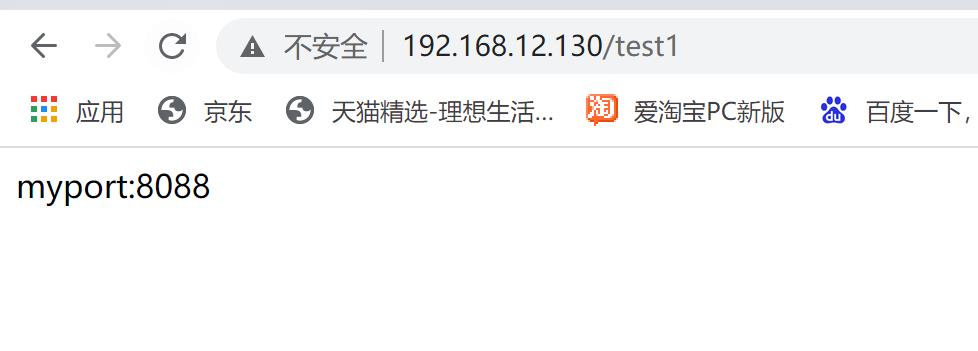
4、测试
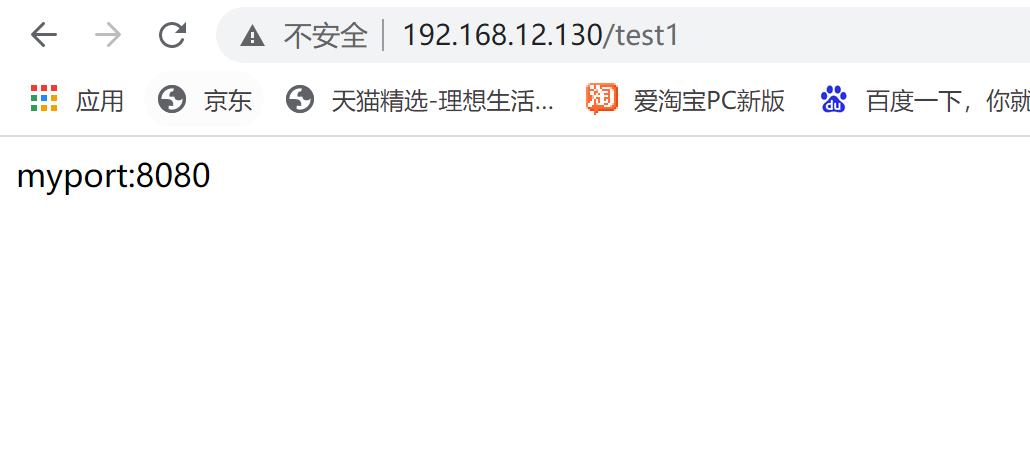
七、负载均衡
1、轮询 ( 默认算法)
2、weight (能者多劳,物尽其用)
 upstream springbootserver
        server  192.168.12.1:8080 weight=4;
        server  192.168.12.1:8088 weight=1;
3、ip_hash
nginx 会根据用户的 ip 对应的hash 对tomcat 数量进行取余,来决定用户访问那一台tomcat;
解决问题 就是:登录时 如果轮询就会在多个tomcat ,产生多个会话,此时使用 ip_hash
 upstream springbootserver
        ip_hash;
        server  192.168.12.1:8080 ;
        server  192.168.12.1:8088 ;
用户登录,多台tomcat 提供服务(session 不共享)解决办法:
1.使用nginx ip_hash
2.让tomcat 共享session (存储redis 中)
3.抛弃session 使用token 实现
4、backup
备胎策略 ,所有能用的tomcat 都挂了,备胎上位
 upstream springbootserver
        server  192.168.12.1:8080 backup;
        server  192.168.12.1:8088 ;
5、down
让当前对应的tomcat 下线 ,便于升级tomcat
upstream springserver
		server	192.168.13.1:8080 down;
		server	192.168.13.1:8088;
6、max_fails
允许请求的失败次数,默认为1,配合fail_timeout一起使用
fail_timeout:
经历max_fails次失败后,暂停服务的时间,默认为10s(某个server连接失败了max_fails次,则nginx会认为该server不工作了。同时,在接下来的 fail_timeout时间内,nginx不再将请求分发给失效的server。)
upstream springserver
		server	192.168.13.1:8080;
		server	192.168.13.1:8088 max_fails=3 fail_timeout=20s;
以上是关于nginx的主要内容,如果未能解决你的问题,请参考以下文章
