树莓派摄像头实现 红线循迹
Posted ʚVVcatɞ
tags:
篇首语:本文由小常识网(cha138.com)小编为大家整理,主要介绍了树莓派摄像头实现 红线循迹相关的知识,希望对你有一定的参考价值。
import cv2
import numpy as np

global color_x, color_y, color_radius
color_x = color_y = color_radius = 0

global color_lower
global color_upper

color_hsv = "red" : ((100, 120, 0), (200, 250, 200))

color = "red"
color_lower = np.array([color_hsv[color][0][0], color_hsv[color][0][1], color_hsv[color][0][2]])
color_upper = np.array([color_hsv[color][1][0], color_hsv[color][1][1], color_hsv[color][1][2]])

image = cv2.imread("./test.jpg")

def Color_Recongnize():
    global color_lower, color_upper
    global color_x, target_servox,picture
    frame = cv2.GaussianBlur(image,(5,5),0)  # 高斯滤波
    hsv = cv2.cvtColor(frame, cv2.COLOR_BGR2HSV)
    mask = cv2.inRange(hsv,color_lower, color_upper)
    rows, cols = mask.shape[:2]
    res = cv2.resize(mask, (int(cols / 10), int(rows / 10)), interpolation=cv2.INTER_CUBIC)
    cv2.imshow('Binarization', res)

    mask = cv2.erode(mask,None, iterations=2)
    mask = cv2.dilate(mask,None, iterations=2)
    mask = cv2.GaussianBlur(mask, (5, 5), 0)
    cnts = cv2.findContours(mask.copy(), cv2.RETR_EXTERNAL, cv2.CHAIN_APPROX_SIMPLE)[-2]
    if 1:
        if len(cnts) > 0:
            cnt = max (cnts, key = cv2.contourArea)
            (color_x, color_y), color_radius = cv2.minEnclosingCircle(cnt)
            print(color_x, color_y, color_radius)
            if color_radius > 5:
				# 将检测到的颜色用原形线圈标记出来
               cv2.circle(frame, (int(color_x), int(color_y)), int(color_radius), (0, 0, 0), 10)

    rows, cols = frame.shape[:2]
    res = cv2.resize(frame, (int(cols / 10), int(rows / 10)), interpolation=cv2.INTER_CUBIC)
    cv2.imshow('mark', res)
    cv2.waitKey(0)
    cv2.destroyAllWindows()

if __name__ == '__main__':
    Color_Recongnize()
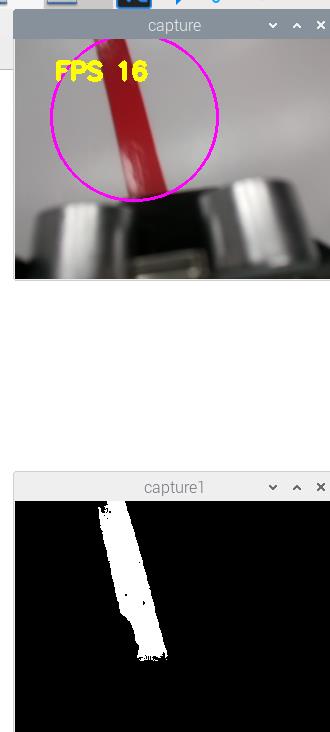
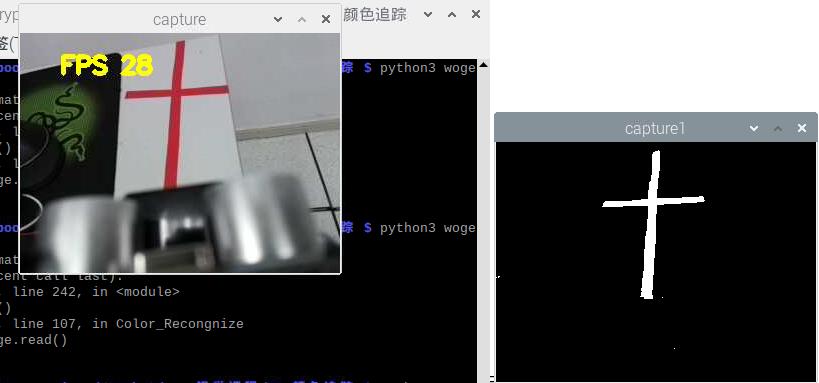
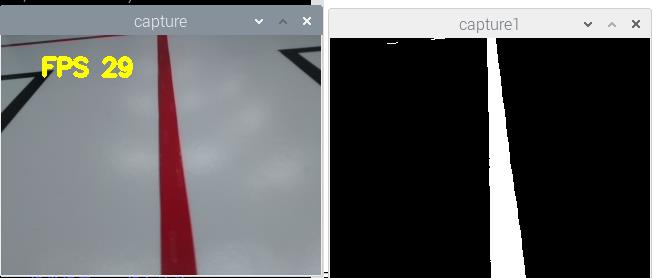
实现效果:
以上是关于树莓派摄像头实现 红线循迹的主要内容,如果未能解决你的问题,请参考以下文章