Android 实现无需权限的悬浮球效果,可适配至Android 10
Posted houruoyu3
tags:
篇首语:本文由小常识网(cha138.com)小编为大家整理,主要介绍了Android 实现无需权限的悬浮球效果,可适配至Android 10相关的知识,希望对你有一定的参考价值。
前言:
最近闲来无事,突然想起搞一下悬浮球,之前的项目的悬浮球一直都需要授权,android6.0以后需要手动授权,悬浮球使用时就非常不便,这里为大家带来一种无需权限的悬浮球实现方式。
- 无需权限!
- 无需权限!
功能:
- 自动贴边
- 显示红点
- 隐藏红点
- 自由移动
- 显示悬浮球
- 隐藏悬浮球
- 销毁悬浮球
- 接入简单,可进行自定义拓展
附上demo地址
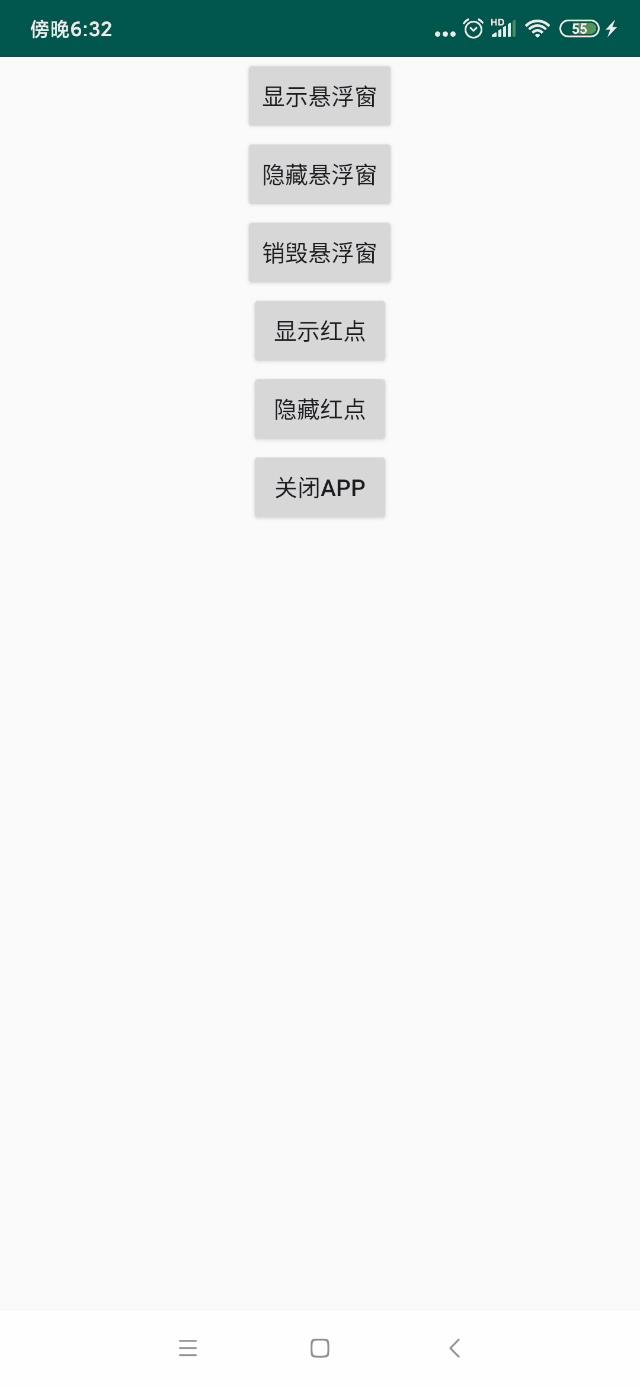
效果如下:

以下是主要的代码部分:
MainActivity.class
public class MainActivity extends Activity

    @Override
    protected void onCreate(Bundle savedInstanceState)
        super.onCreate(savedInstanceState);
        setContentView(R.layout.activity_main);
        findViewById(R.id.showbtn).setOnClickListener(new View.OnClickListener()
            @Override
            public void onClick(View view)
                RoundView.getInstance().showRoundView(MainActivity.this);


        );

        findViewById(R.id.hidebtn).setOnClickListener(new View.OnClickListener()
            @Override
            public void onClick(View view)
                RoundView.getInstance().hideRoundView(MainActivity.this);

        );

        findViewById(R.id.closebtn).setOnClickListener(new View.OnClickListener()
            @Override
            public void onClick(View view)
                RoundView.getInstance().closeRoundView(MainActivity.this);

        );

        findViewById(R.id.showMsgbtn).setOnClickListener(new View.OnClickListener()
            @Override
            public void onClick(View view)
                RoundView.getInstance().showRoundMsg();

        );
        findViewById(R.id.hideMsgbtn).setOnClickListener(new View.OnClickListener()
            @Override
            public void onClick(View view)
                RoundView.getInstance().hideRoundMsg();

        );
        findViewById(R.id.exitbtn).setOnClickListener(new View.OnClickListener()
            @Override
            public void onClick(View view)
                android.os.Process.killProcess(android.os.Process.myPid());

        );
RoundView.class
/**
 * 悬浮窗管理器
 */
public class RoundView

    private static RoundView sFloatingLayer;

    /**
     * 用于控制在屏幕上添加或移除悬浮窗
     */
    private static WindowManager mWindowManager;

    public static boolean isNearLeft = true;  //判断悬浮球是否在左边

    private static boolean isShow = false;  //判断悬浮球是否已经显示

    private int mWidth,mHeight;   //屏幕的宽高

    public static final int WIN_NONE = 0;// 不展示
    public static final int WIN_SMALL = 1;// 小浮标
    public static final int WIN_BIG = 2;// 展开
    public static final int WIN_HIDE = 3;// 靠边隐藏 无操作隐藏
    public static int winStatus;

    public static boolean isMsg=false;  //红点消息提示是否显示


    /**
     * 小悬浮窗view的实例
     */
    private static RoundWindowSmallView smallWindow;


    /**
     * 隐藏悬浮窗view的实例
     */
    private static RoundWindowHideView hideWindow;

    /**
     * 大悬浮窗view的实例
     */
    private static RoundWindowBigView bigWindow;


    /**
     * 大小悬浮窗view的参数
     */
    private static WindowManager.LayoutParams mLayoutParams;


    public static RoundView getInstance()
        if (null == sFloatingLayer)
            synchronized (RoundView.class)
                if (null == sFloatingLayer)
                    sFloatingLayer = new RoundView();


        return sFloatingLayer;


    /**
     * 显示悬浮窗
     * @param context
     */
    public void showRoundView(Context context)
        if(mWindowManager==null)
            mWindowManager = (WindowManager) context.getSystemService(Context.WINDOW_SERVICE);


        //每一次显示浮窗前都重新获取一次宽高,避免横竖屏切换后宽高变化
        getWidthAndHeight(context);

        if(!isShow)
            //处于非显示状态,可以显示
            isShow=true;
            if(winStatus==WIN_NONE)
                //处于未创建状态,请创建
                showSmallwin(context);
            else
                //已创建了,直接显示
                switch (winStatus)
                    case WIN_SMALL:
                        if(smallWindow!=null)
                            smallWindow.setVisibilityState(View.VISIBLE);
                        break;
                    case WIN_BIG:
                        if(bigWindow!=null)
                            bigWindow.setVisibilityState(View.VISIBLE);
                        break;
                    case WIN_HIDE:
                        if(hideWindow!=null)
                            hideWindow.setVisibilityState(View.VISIBLE);
                        break;


    /**
     * 隐藏悬浮窗
     * @param context
     */
    public void hideRoundView(Context context)
        if(isShow)
            //处于显示状态,可以隐藏
            isShow=false;
            switch (winStatus)
                case WIN_SMALL:
                    if(smallWindow!=null)
                    smallWindow.setVisibilityState(View.GONE);
                    break;
                case WIN_BIG:
                    if(bigWindow!=null)
                    bigWindow.setVisibilityState(View.GONE);
                    break;
                case WIN_HIDE:
                    if(hideWindow!=null)
                    hideWindow.setVisibilityState(View.GONE);
                    break;


    /**
     * 销毁悬浮窗
     * @param context
     */
    public void closeRoundView(Context context)
        isShow=false;
        isMsg=false;
        winStatus=WIN_NONE;
        removeSmallWindow(context);
        removeBigWindow(context);
        removeHideWindow(context);


    /**
     * 显示红点提示
     */
    public void showRoundMsg()
        if(!isMsg)
            isMsg=true;
            switch (winStatus)
                case WIN_SMALL:
                    if(smallWindow!=null)
                        smallWindow.showRoundMsg();
                    break;
                case WIN_BIG:
                    if(bigWindow!=null)
                        bigWindow.showRoundMsg();
                    break;
                case WIN_HIDE:
                    if(hideWindow!=null)
                        hideWindow.showRoundMsg();
                    break;


    /**
     * 隐藏红点提示
     */
    public void hideRoundMsg()
        if(isMsg)
            isMsg=false;
            switch (winStatus)
                case WIN_SMALL:
                    if(smallWindow!=null)
                        smallWindow.hideRoundMsg();
                    break;
                case WIN_BIG:
                    if(bigWindow!=null)
                        bigWindow.hideRoundMsg();
                    break;
                case WIN_HIDE:
                    if(hideWindow!=null)
                        hideWindow.hideRoundMsg();
                    break;


    /**
     * 显示小悬浮窗
     * @param context context
     */
    public void showSmallwin(final Context context)
        new Handler().postDelayed(new Runnable()
            @Override
            public void run()
                createSmallWindow(context);
                removeBigWindow(context);
                removeHideWindow(context);

        , 500);


    /************************************************ 创建窗口 ************************************************************/

    /**
     * 创建一个小悬浮窗。初始位置在屏幕的左上角位置
     *
     * @param context 必须为应用程序的Context
     */
    public void createSmallWindow(Context context)
        //每一次创建前都要重新获取宽高,不然横竖屏切换时会出问题
        getWidthAndHeight(context);
        if (smallWindow == null)
            smallWindow = new RoundWindowSmallView(context);
            if (mLayoutParams == null)
                mLayoutParams = new WindowManager.LayoutParams();

                mLayoutParams.format = PixelFormat.RGBA_8888;// 解决带Alpha的32位png图片失真问题
                mLayoutParams.gravity = Gravity.LEFT | Gravity.TOP; //显示在左上角
                mLayoutParams.flags = WindowManager.LayoutParams.FLAG_NOT_TOUCH_MODAL | WindowManager.LayoutParams.FLAG_NOT_FOCUSABLE;
                // 在设置宽高
                mLayoutParams.x = 0;
                mLayoutParams.y = context.getResources().getDisplayMetrics().heightPixels / 3 * 2;

                mLayoutParams.width = WindowManager.LayoutParams.WRAP_CONTENT;
                mLayoutParams.height = WindowManager.LayoutParams.WRAP_CONTENT;


        mLayoutParams.type = WindowManager.LayoutParams.TYPE_APPLICATION_ATTACHED_DIALOG; //设置悬浮窗的层次

        if (!isNearLeft) // 当在屏幕右侧时 重新计算x坐标
            int w = View.MeasureSpec.makeMeasureSpec(0, View.MeasureSpec.UNSPECIFIED);
            int h = View.MeasureSpec.makeMeasureSpec(0, View.MeasureSpec.UNSPECIFIED);
            smallWindow.measure(w, h);
            if (Configuration.ORIENTATION_LANDSCAPE == context.getResources().getConfiguration().orientation) // 横屏
                mLayoutParams.x = mWidth - smallWindow.getMeasuredWidth();
             else // 竖屏
                mLayoutParams.x = mWidth - smallWindow.getMeasuredWidth();


        smallWindow.setParams(mLayoutParams);

        // 将悬浮球添加到窗体
        if (smallWindow.getParent() == null)
            mWindowManager.addView(smallWindow, mLayoutParams);


        winStatus=WIN_SMALL;

        smallWindow.timehide();// 小悬浮窗3s后隐藏动画


    /**
     * 将小悬浮窗从屏幕上移除
     *
     * @param context 必须为应用程序的context
     */
    public void removeSmallWindow(Context context)
        if (smallWindow != null)
            smallWindow.stopDelayed();
            if (context != null)
                if (mWindowManager != null)
                    try
                        mWindowManager.removeView(smallWindow);
                     catch (Exception e)


                smallWindow = null;
             else
                smallWindow = null;


    /**
     * 创建一个隐藏悬浮窗。
     *
     * @param context 必须为应用程序的Context
     */
    public void createHideWindow(Context context)

        //每一次创建前都要重新获取宽高,不然横竖屏切换时会出问题
        getWidthAndHeight(context);

        if (hideWindow == null)

            int w = View.MeasureSpec.makeMeasureSpec(0, View.MeasureSpec.UNSPECIFIED);
            int h = View.MeasureSpec.makeMeasureSpec(0, View.MeasureSpec.UNSPECIFIED);
            smallWindow.measure(w, h);// 测量

            int width = smallWindow.getMeasuredWidth();// 获得视图实际宽度(测量宽度)
            if (isNearLeft)
                hideWindow = new RoundWindowHideView(context);
             else
                hideWindow = new RoundWindowHideView(context);
                mLayoutParams.x = mLayoutParams.x + width / 2;


        mWindowManager.addView(hideWindow, mLayoutParams);

        winStatus=WIN_HIDE;


    /**
     * 将隐藏悬浮窗从屏幕上移除
     *
     * @param context 必须为应用程序的context
     */
    public void removeHideWindow(Context context)
        if (hideWindow != null)
            if (context != null)
                if (mWindowManager != null)
                    mWindowManager.removeView(hideWindow);


            hideWindow = null;


    /**
     * 创建一个大悬浮窗。
     *
     * @param context 必须为应用程序的Context
     */
    public  void createBigWindow(Context context)

        //每一次创建前都要重新获取宽高,不然横竖屏切换时会出问题
        getWidthAndHeight(context);

        int w = View.MeasureSpec.makeMeasureSpec(0, View.MeasureSpec.UNSPECIFIED);
        int h = View.MeasureSpec.makeMeasureSpec(0, View.MeasureSpec.UNSPECIFIED);
        if (bigWindow == null)
            if (smallWindow != null)
                smallWindow.measure(w, h);
             else if (hideWindow != null)
                hideWindow.measure(w, h);

            bigWindow = new RoundWindowBigView(context);

        bigWindow.measure(w,h);
        if (mLayoutParams.x>(mWidth-bigWindow.getMeasuredWidth()))
            // 在右边拖动的时候需要减去虚拟按钮
            mLayoutParams.x = mWidth-bigWindow.getMeasuredWidth();

        mLayoutParams.type = WindowManager.LayoutParams.TYPE_APPLICATION_SUB_PANEL+1; //设置悬浮窗的层次 数据越大则越下面
        mWindowManager.addView(bigWindow, mLayoutParams);

        winStatus=WIN_BIG;


    /**
     * 将大悬浮窗从屏幕上移除
     *
     * @param context 必须为应用程序的context
     */
    public void removeBigWindow(Context context)
        if (bigWindow != null)
            if (context != null)
                if (mWindowManager != null)
                    mWindowManager.removeView(bigWindow);


            bigWindow = null;


    /**
     * 获取全屏状态下的宽高
     * @param context
     */
    public void getWidthAndHeight(Context context)
        mWidth=context.getResources().getDisplayMetrics().widthPixels;
        mHeight = context.getResources().getDisplayMetrics().heightPixels;

        //有的手机是有虚拟导航键的,当横屏且全屏时,悬浮球无法靠到最右边,所以要用包含虚拟导航键的屏幕宽度
        Point point = new Point();
        if (mWindowManager != null)
            if (Build.VERSION.SDK_INT >= Build.VERSION_CODES.M)
                mWindowManager.getDefaultDisplay()以上是关于Android 实现无需权限的悬浮球效果,可适配至Android 10的主要内容,如果未能解决你的问题,请参考以下文章