Mybatis-plus的学习
Posted 来一沓Java
tags:
篇首语:本文由小常识网(cha138.com)小编为大家整理,主要介绍了Mybatis-plus的学习相关的知识,希望对你有一定的参考价值。
一、使用Mybatis-plus时为什么要配置?
其实这很简单,因为当我们使用Mybatis-plus时,所有的sql都是不可见的,当我们想要知道它是怎样执行的时候,我们就需要看日志!
二、如何配置日志?
在application.properties中进行日志的配置
#配置日志,这里我选择默认的控制台输出,不管选择什么日志,都需要导包的
mybatis-plus.configuration.log-impl=org.apache.ibatis.logging.stdout.StdOutImpl
三、控制台的输出

总结: 不管选择什么日志,都需要导包;在application.properties中进行日志的配置!
四、插入测试
-
CRUD的扩展
- insert
    //测试插入功能
    @Test
    public void testInsert()
        User user = new User();
        user.setName( "来一沓java" );
        user.setAge( 18 );
        user.setEmail( "123456789@163.com" );
        int insert = userMapper.insert( user );//帮我们自动设置id
        System.out.println(insert);//受影响的行数
        System.out.println("--------");
        System.out.println(user);
运行的截图

数据库插入的id的默认值:全局唯一id
主键生成的策略
在实体类中的主键上面添加注解
@Data
public class User
    @TableId(type = IdType.AUTO)
    //默认ID_WORKER:是全局唯一id
    //AUTO:主键自增策略,这里一定要注意数据库中的主键字段一定得是自增的!
    //NONE:未设置主键
    //INPUT:手动输入
    //UUID:全局唯一id uuid
    //ID_WORKER_STR:ID_WORKER的字符串表示法
    private Long id;
    private String name;
    private Integer age;
    private String email;
可以看到,当我们设置主键自增以后删除刚才插入的数据 id就变为6了

update
    //测试更新
    @Test
    public void testUpdate()
        User user = new User();
        //通过条件自动拼接动态sql
        long l = 6;
        user.setId( l );
        user.setName( "我爱学习" );
        int i = userMapper.updateById( user );
        System.out.println(i);

所有的动态sql都是Mybatis-plus自动给我们动态配置的!
自动填充
比如创建时间、修改时间这些操作一般都是自动化完成的,我们不需要手动完成。看过阿里巴巴开发手册的人应该都知道所有的数据库表都必须用到两个字段【gmt_create和gmt_modifed】
自动填充方式一:数据库级别
在表中新增上面两个字段gmt_create和gmt_modifed
同步实体类,并再次测试插入
@Data
public class User
    @TableId(type = IdType.AUTO)
    private Long id;
    private String name;
    private Integer age;
    private String email;
    private Date gmtCreate;
    private Date gmtModifed;
自动填充方式二:代码级别
1.首先删除数据库的默认值,更新操作,在这里我们需要在实体类字段属性上添加注解
    @TableField(fill = FieldFill.INSERT)
    //INSERT:插入和更新的时候自动填充
    private Date gmtCreate;
    @TableField(fill = FieldFill.INSERT_UPDATE)
    //INSERT_UPDATE:插入和更新的时候自动填充
    private Date gmtModifed;
2.编写一个处理器来处理这个注解即可
@Slf4j
@Component //这里是把处理器加到IOC容器中
public class MyMetaObjectHandler implements MetaObjectHandler
    @Override
    public void insertFill(MetaObject metaObject) //插入时的填充策略
        log.info( "start insert fill ....." );
        this.setFieldValByName( "gmtCreate",new Date(),metaObject );
        this.setFieldValByName( "gmtModifed",new Date(),metaObject );


    @Override
    public void updateFill(MetaObject metaObject) //更新时的填充策略
        log.info( "start update fill ....." );
        this.setFieldValByName( "gmtModifed",new Date(),metaObject );
3.再次执行之前的插入和更新操作
查询操作
    //测试单个查询
    @Test
    public void testSelectById()
        User user = userMapper.selectById( 1 );
        System.out.println(user);

    //查询批量用户
    @Test
    public void testSelectByBatchId()
        List<User> users = userMapper.selectBatchIds( Arrays.asList( 1, 2, 3 ) );
        for (User user:users)
            System.out.println(user);


    //条件查询 map
    @Test
    public void testSelectByBatchIds()
        HashMap<String, Object> map = new HashMap<>();
        //自定义查询
        map.put( "name","来一沓Java" );
        List<User> users = userMapper.selectByMap( map );
        users.forEach( System.out::println);
4.删除操作
    //单个删除
    @Test
    public void testDelete1()
        userMapper.deleteById( (long)1 );

    //批量删除
    @Test
    public void testDelete2()
        userMapper.deleteBatchIds( Arrays.asList( 3,4 ) );

    //条件删除
    @Test
    public void testDelete3()
        HashMap<String, Object> map = new HashMap<>();
        map.put( "name","我爱学习2" );
        userMapper.deleteByMap( map );
五、雪花算法
snowflake是Twitter开源的分布式ID生成算法,结果是一个long型的ID。其核心思想是:使用41bit作为毫秒数,10bit作为机器的ID(5个bit是数据中心,5个bit的机器ID),12bit作为毫秒内的流水号(意味着每个节点在每毫秒可以产生 4096 个 ID),最后还有一个符号位,永远是0。这样几乎可以保证全球唯一了。
六、乐观锁
乐观锁:它总认为不会出现问题,不管做什么都不加锁,如果出现问题,就会再次更新值测试!【有新version和new version,每次都会判断版本号是否更新了】
悲观锁:它总是认为总是会出现问题,不管做什么都加锁,再去操作!
七、乐观锁机制
乐观锁实现方式
- 取出记录时,获取当前版本号
- 更新时,带上这个version
- 执行时更新时,set version=newVersion where version = oldVersion
- 如果version不对,就会执行失败
update user set name = "来一沓java",version = version + 1 where id = 2 and version = 1乐观锁第一步回先查询,获得版本号
比如说两个线程A和B,A和B同时执行上面的sql语句,B在A之前完成,那么version变为了2,此时A就会执行失败!
测试乐观锁插件
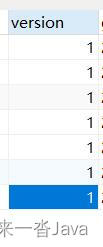
1.数据库表增加字段version

2.完善实体类
    @Version //是乐观锁version的注解
    private Integer version;
3.注册组件
@EnableTransactionManagement //自动管理事务,默认开启
@MapperScan("com.rxj.mapper") //扫描mapper文件夹
@Configuration //配置类
public class MybatisPlusConfig
    //注册乐观锁插件
    @Bean
    public OptimisticLockerInterceptor optimisticLockerInterceptor()
        return new OptimisticLockerInterceptor();
4.测试乐观锁
测试成功
    @Test
    public void testOptimisticLocker()
        //查询用户信息
        User user = userMapper.selectById( 1 );
        //修改用户信息
        user.setAge( 11 );
        user.setEmail( "987654321@163.com" );
        //更新操作
        int i = userMapper.updateById( user );
        System.out.println(i);

测试失败
    @Test
    public void testOptimisticLocker1()
        User user1 = userMapper.selectById( 1 );
        user1.setAge( 4 );
        user1.setEmail( "987654321@163.com" );

        User user2 = userMapper.selectById( 1 );
        user2.setAge( 5 );
        user2.setEmail( "987654321@163.com" );
        int i = userMapper.updateById( user2 );//如果没有乐观锁就会覆盖插队线程的值
        //自旋锁来多次尝试提交
        int i1 = userMapper.updateById( user1 );

可以看到数据库中id为1的年龄只更新为5,并没有更新为4,在这里我们一般会使用自旋锁多次尝试提交!
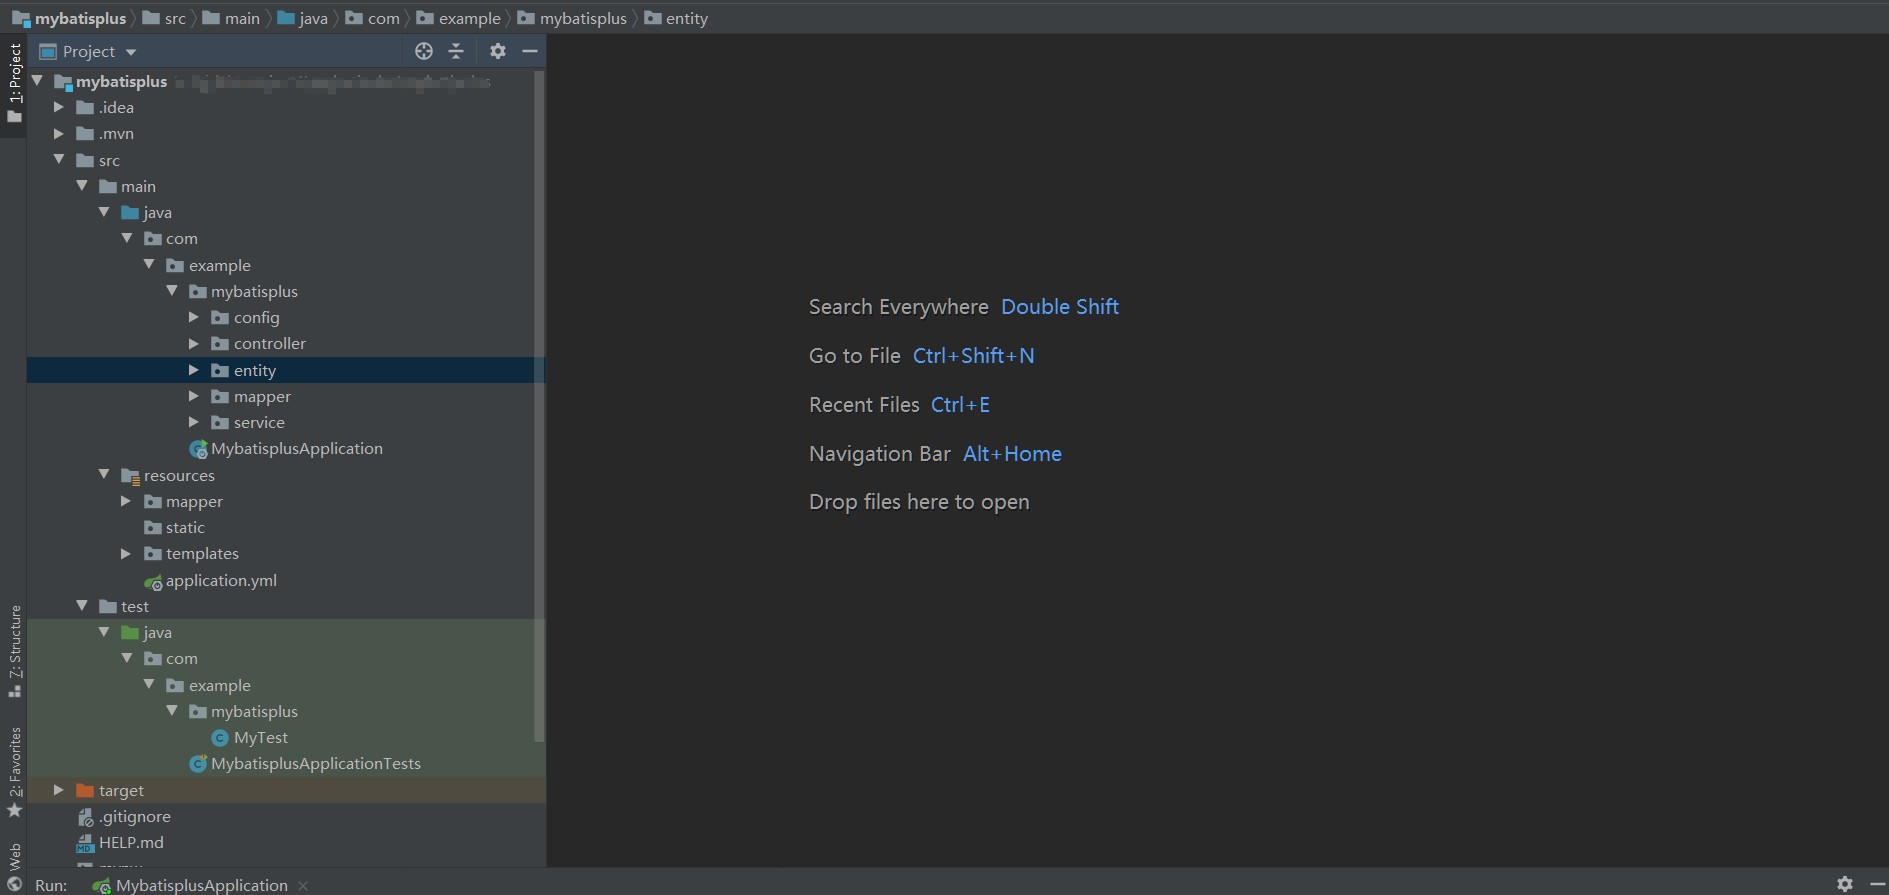
八、项目全局截图

Mybatis-Plus学习小项目及详细教程
Mybatis-Plus学习总结
Mybatis-plus官网:https://baomidou.com/
Mybatis-plus详细教程:https://www.hxstrive.com/subject/mybatis_plus.htm
Mybatis-plus简介
MyBatis-Plus (opens new window)(简称 MP)是一个 MyBatis (opens new window)的增强工具,在 MyBatis 的基础上只做增强不做改变,为简化开发、提高效率而生。
Mybatis-plus项目
- Spring Boot 2.5.0
- mybatis-plus 3.4.0
- Mysql 8.0.25
- lombok
- Swagger2 2.9.2
一、准备工作
在创建项目之前,这里首先准备了一张用户信息表 user_info,相应的sql脚本如下:SET NAMES utf8mb4;
SET FOREIGN_KEY_CHECKS = 0;
DROP TABLE IF EXISTS `user_info`;
CREATE TABLE `user_info` (
`id` bigint(20) NOT NULL AUTO_INCREMENT COMMENT '主键',
`available` int(1) NULL DEFAULT 1 COMMENT '是否可用,1 可用,0 不可用',
`create_time` datetime(0) NULL DEFAULT NULL COMMENT '创建时间',
`deleted` int(1) NULL DEFAULT 0 COMMENT '是否删除,0 未删除, 1 删除',
`update_time` datetime(0) NULL DEFAULT NULL COMMENT '修改时间',
`avatar` varchar(255) CHARACTER SET utf8mb4 COLLATE utf8mb4_general_ci NULL DEFAULT NULL COMMENT '头像',
`email` varchar(255) CHARACTER SET utf8mb4 COLLATE utf8mb4_general_ci NULL DEFAULT NULL COMMENT '邮箱',
`password` varchar(255) CHARACTER SET utf8mb4 COLLATE utf8mb4_general_ci NULL DEFAULT NULL COMMENT '密码',
`phone` varchar(255) CHARACTER SET utf8mb4 COLLATE utf8mb4_general_ci NULL DEFAULT NULL COMMENT '手机号',
`salt` varchar(255) CHARACTER SET utf8mb4 COLLATE utf8mb4_general_ci NULL DEFAULT NULL COMMENT '盐',
`sex` int(1) NULL DEFAULT NULL COMMENT '性别 0未知 1女 2男',
`user_name` varchar(255) CHARACTER SET utf8mb4 COLLATE utf8mb4_general_ci NULL DEFAULT NULL COMMENT '姓名',
PRIMARY KEY (`id`) USING BTREE
) ENGINE = InnoDB AUTO_INCREMENT = 33 CHARACTER SET = utf8mb4 COLLATE = utf8mb4_general_ci COMMENT = '用户信息表' ROW_FORMAT = Dynamic;
INSERT INTO `user_info` VALUES (1, 1, '2021-05-14 13:30:32', 0, '2021-05-19 15:19:15', NULL, '12345678@qq.com', '123456', '12345678910', '12', 1, '张三');
INSERT INTO `user_info` VALUES (2, 1, '2021-05-14 13:30:32', 0, '2021-05-19 15:19:15', NULL, '12345678@qq.com', '123456', '12345678910', '12', 1, '张三');
INSERT INTO `user_info` VALUES (3, 1, '2021-05-14 13:30:32', 0, '2021-05-19 15:19:15', NULL, '12345678@qq.com', '123456', '12345678910', '12', 1, '张三');
INSERT INTO `user_info` VALUES (4, 1, '2021-05-14 13:30:32', 0, '2021-05-19 15:19:15', NULL, '12345678@qq.com', '123456', '12345678910', '12', 1, '张三');
INSERT INTO `user_info` VALUES (5, 1, '2021-05-14 13:30:32', 0, '2021-05-19 15:19:15', NULL, '12345678@qq.com', '123456', '12345678910', '12', 1, '张三');
INSERT INTO `user_info` VALUES (6, 1, '2021-05-14 13:30:32', 0, '2021-05-19 15:19:15', NULL, '12345678@qq.com', '123456', '12345678910', '12', 1, '张三');
INSERT INTO `user_info` VALUES (7, 1, '2021-05-14 13:30:32', 0, '2021-05-19 15:19:15', NULL, '12345678@qq.com', '123456', '12345678910', '12', 1, '张三');
INSERT INTO `user_info` VALUES (8, 1, '2021-05-14 13:30:32', 0, '2021-05-19 15:19:15', NULL, '12345678@qq.com', '123456', '12345678910', '12', 1, '张三');
INSERT INTO `user_info` VALUES (9, 1, '2021-05-14 13:30:32', 0, '2021-05-19 15:19:15', NULL, '12345678@qq.com', '123456', '12345678910', '12', 1, '张三');
INSERT INTO `user_info` VALUES (10, 1, '2021-05-14 13:30:32', 0, '2021-05-19 15:19:15', NULL, '12345678@qq.com', '123456', '12345678910', '12', 1, '张三');
SET FOREIGN_KEY_CHECKS = 1;
二、创建一个Spring Boot项目

三、添加所需依赖
在项目的pom.xml文件中添加如下依赖
 <!--mybatis plus-->
     <dependency>
            <groupId>com.baomidou</groupId>
            <artifactId>mybatis-plus-boot-starter</artifactId>
            <version>3.4.0</version>
     </dependency>

  <!--引入mysql-->
    <dependency>
            <groupId>mysql</groupId>
            <artifactId>mysql-connector-java</artifactId>
            <version>8.0.25</version>
    </dependency>

    <dependency>
            <groupId>org.projectlombok</groupId>
            <artifactId>lombok</artifactId>
            <optional>true</optional>
    </dependency>

    <dependency>
            <groupId>io.springfox</groupId>
            <artifactId>springfox-swagger2</artifactId>
            <version>2.9.2</version>
    </dependency>
四、在项目的application.yml配置文件中,配置如下信息
spring:
  application:
    name: mybatis-plus
  datasource:
    url: jdbc:mysql://127.0.0.1:3306/test?useUnicode=true&characterEncoding=UTF-8&autoReconnect=true&failOverReadOnly=false
    driver-class-name: com.mysql.cj.jdbc.Driver
    username: root
    password: 123456

logging:
  level:
    com:
      example:
        mybatisplus:
          mapper: trace
    root: warn
  pattern:
    console: '%p%m%n'
mybatis-plus:
  configuration:
    log-impl: org.apache.ibatis.logging.stdout.StdOutImpl
注:新建的项目默认配置文件是application.properties,在这里习惯使用yml文件格式。
.yml文件与.properties文件相互转化工具:https://www.toyaml.com/index.html
五、创建实体类
BaseEntity.java
@Data
@AllArgsConstructor
@NoArgsConstructor
public abstract class BaseEntity implements Serializable {
    private static final long serialVersionUID = 1L;

    @ApiModelProperty(value = "主键")
    @TableId(value = "id", type = IdType.AUTO)
    private Long id;

    @ApiModelProperty(value = "是否删除,0 未删除, 1 删除")
    @TableLogic(value = "0",delval = "1")
    @TableField(value = "deleted", fill = FieldFill.INSERT)
    private Integer deleted;

    @ApiModelProperty(value = "是否可用,1 可用,0 不可用")
    @TableField(value = "available", fill = FieldFill.INSERT)
    private Integer available;

    @ApiModelProperty(value = "创建时间")
    @TableField(value = "create_time", fill = FieldFill.INSERT)
    private Date createTime;

    @ApiModelProperty(value = "修改时间")
    @TableField(value = "update_time", fill = FieldFill.INSERT_UPDATE)
    private Date updateTime;
UserInfo.java
@Data
@AllArgsConstructor
@NoArgsConstructor
@EqualsAndHashCode(callSuper = true)
@Accessors(chain = true)
@TableName("user_info")   //定义表名
@ApiModel(value="UserInfo对象", description="用户信息表")
public class UserInfo extends BaseEntity {

    private static final long serialVersionUID = 1L;

    @ApiModelProperty(value = "头像")
    @TableField("avatar")
    private String avatar;

    @ApiModelProperty(value = "邮箱")
    @TableField("email")
    private String email;

    @ApiModelProperty(value = "密码")
    @TableField("password")
    private String password;

    @ApiModelProperty(value = "手机号")
    @TableField("phone")
    private String phone;

    @ApiModelProperty(value = "盐")
    @TableField("salt")
    private String salt;

    @ApiModelProperty(value = "性别 0未知 1女 2男")
    @TableField("sex")
    private Integer sex;

    @ApiModelProperty(value = "姓名")
    @TableField("user_name")
    private String userName;
}
六、创建mapper接口
UserInfoMapper.java
public interface UserInfoMapper extends BaseMapper<UserInfo> {

}
可以明显看到,上面代码中没有自定义任何自己的方法,所有方法均从 BaseMapper 父接口继承而来。
七、添加mapper接口扫描路径配置
使用 @MapperScan 注解 在Spring Boot的启动类添加mapper接口的扫描路径配置,扫描 com.example.mybatisplus.mapper 包下面的所有 mapper!!!@SpringBootApplication
@MapperScan("com.example.mybatisplus.mapper")
public class MybatisplusApplication {
public static void main(String[] args) {
SpringApplication.run(MybatisplusApplication.class, args);
}
}
八、编写一个简单Controller
编写一个简单的controller,使用@Autowired 注解自动注入自定义的 mapper
UserInfoController.java
@RestController
@RequestMapping("/api/userInfo")
@Api(value = "/api/userInfo", tags = {"用户信息表接口"})
public class UserInfoController {

    @Autowired
    private UserInfoMapper userInfoMapper;

    @GetMapping
    public  List  findAllUserList(){
        List<UserInfo> list = userInfoMapper.selectList(null);
        return list;
    }
}
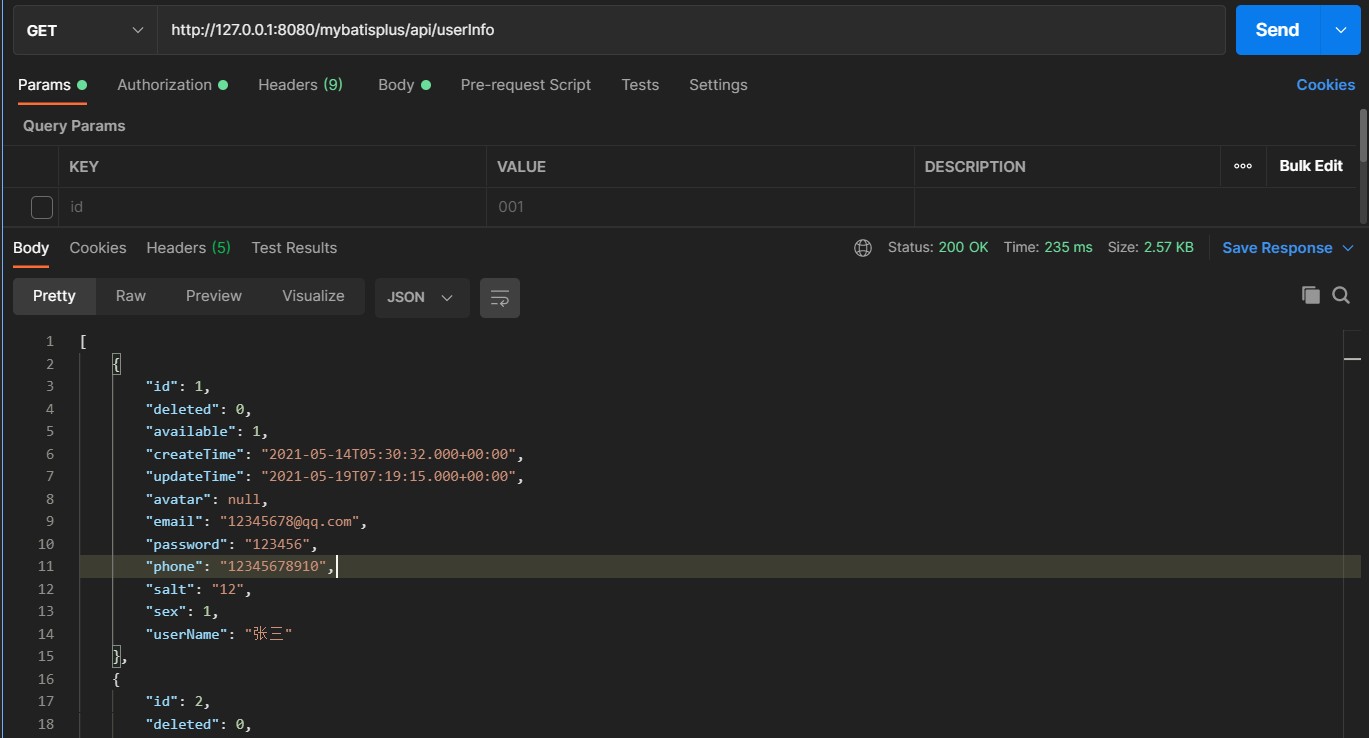
九、启动项目,进行简单测试

关于更多Mybatis-plus详细知识:
- BaseMapper 接口 CRUD
- Service CRUD 接口
- 条件构造器
- 常用注解
- 代码生成器
可以查看https://www.hxstrive.com/subject/mybatis_plus.htm
这里将不对每个知识点进行演示啦!!!
代码生成器
AutoGenerator 是 MyBatis-Plus 的代码生成器,通过 AutoGenerator 可以快速生成 Entity、Mapper、Mapper XML、Service、Controller 等各个模块的代码,极大的提升了开发效率。
代码演示
注:下面代码示例基于上面项目,所有代码在generator包下面。此外需要添加下面的依赖。
一、添加依赖
    <dependency>
            <groupId>com.baomidou</groupId>
            <artifactId>mybatis-plus-generator</artifactId>
            <version>3.4.0</version>
   </dependency>
    <dependency>
            <groupId>org.freemarker</groupId>
            <artifactId>freemarker</artifactId>
            <version>2.3.31</version>
    </dependency>
二、编写工具类
Config.java
package com.example.generator.config;
/**
 * @Author:
 * @Description:
 * @CreateDate: 2021-05-25 14:49
 * @Version: 1.0
 */

public class Config {
    public static String URL = "jdbc:mysql://127.0.0.1:3306/hang?useUnicode=true&characterEncoding=UTF-8&autoReconnect=true&failOverReadOnly=false&zeroDateTimeBehavior=convertToNull&serverTimezone=GMT%2B8&nullCatalogMeansCurrent=true";
    public static String USERNAME = "root";
    public static String PASSWORD = "123456";
    public static String DRIVER = "com.mysql.cj.jdbc.Driver";
    public static String TABLE_NAME = "sys_user,sys_role,sys_file";  //多个表明用,连接

    /**
     * 包名
     */
    public static final String PACKAGE_PARENT = "com.example";

    /**
     * 文件名后缀:Dao
     */
    public static final String FILE_NAME_DAO = "%sMapper";

    /**
     * 文件名后缀:MapperXml
     */
    public static final String FILE_NAME_XML = "%sMapper";

    /**
     * MP开头,Service结尾
     */
    public static final String FILE_NAME_SERVICE = "%sService";

    /**
     * 文件名后缀:ServiceImpl
     */
    public static final String FILE_NAME_SERVICE_IMPL = "%sServiceImpl";

    /**
     * 文件名后缀:Controller
     */
    public static final String FILE_NAME_CONTROLLER = "%sController";

    /**
     * 逻辑删除字段
     */
    public static final String FIELD_LOGIC_DELETE_NAME = "deleted";

    /**
     * 作者
     */
    public static final String AUTHOR = "generator";

    /**
     * 生成文件的输出目录
     */
//    public static String projectPath = System.getProperty("user.dir") + "/mp-generator";
    public static String projectPath = System.getProperty("user.dir");

    /**
     * 输出目录
     */
    public static final String outputDir = projectPath + "/src/main/java";

    /**
     * 模板引擎。velocity / freemarker / beetl
     */
    public static final String TEMPLATE_ENGINE = "freemarker";

    /**
     * 是否支持Swagger,默认不支持
     */
    public static final Boolean SWAGGER_SUPPORT = true;

}
CommonUtils.java
package com.example.generator.utils;
import com.baomidou.mybatisplus.annotation.DbType;
import com.baomidou.mybatisplus.core.toolkit.StringPool;
import com.baom以上是关于Mybatis-plus的学习的主要内容,如果未能解决你的问题,请参考以下文章
