Android Notification使用
Posted 初学者-Study
tags:
篇首语:本文由小常识网(cha138.com)小编为大家整理,主要介绍了Android Notification使用相关的知识,希望对你有一定的参考价值。
android 通知栏适配
前言
在应用的开发中,我们必然会接触到应用通知这个知识,而在通知是随着Android版本进行不断变化,为了能在高版本和低版本中使用,就需要开发者去做适配,也属于查漏补缺。了解之前,先看一个效果图吧。

正文
通知的使用的内容还是比较多的,此篇文章将会尽可能详细的介绍Notification的内容。
一、Android中通知的变化
1. Android 4.1,API 16
- 推出了展开式通知模板(称为通知样式),可以提供较大的通知内容区域来显示信息。
- 用户可以通过单指向上/向下滑动的手势来展开通知。还支持以按钮的形式向通知添加其他操作。
- 允许用户在设置中按应用关闭通知。
2. Android 4.4,API 19 和 20
- 向 API 中添加了通知监听器服务。
- API 级别 20 中新增了 Android Wear(现已更名为 Wear OS)支持。
3. Android 5.0,API 21
- 推出了锁定屏幕和提醒式通知。
- 用户现在可以将手机设为勿扰模式,并配置允许哪些通知在设备处于“仅限优先事项”模式时打扰他们。
- 向 API 集添加了通知是否在锁定屏幕上显示的方法 (setVisibility()),以及指定通知文本的“公开”版本的方法。
- 添加了 setPriority() 方法,告知系统通知的“干扰性”(例如,将其设为“高”可使通知以提醒式通知的形式显示)。
- 向 Android Wear(现已更名为 Wear OS)设备添加了通知堆栈支持。使用 setGroup() 将通知放入堆栈。请注意,平板电脑和手机尚不支持通知堆栈。通知堆栈以后会称为组或 Bundle。
4. Android 7.0,API 24
- 重新设置了通知模板的样式以强调主打图片和头像。
- 添加了三个通知模板:一个用于短信应用,另外两个用于借助展开式选项和其他系统装饰来装饰自定义内容视图。
- 向手持设备(手机和平板电脑)添加了对通知组的支持。使用与 Android 5.0(API 级别 21)中推出的 Android Wear(现已更名为 Wear OS)通知堆栈相同的 API。
- 用户可以使用内嵌回复功能直接在通知内进行回复(他们输入的文本将转发到通知的父应用)。
5. Android 8.0,API 26
- 必须将各个通知放入特定渠道中。
- 用户可以按渠道关闭通知,而非关闭来自某个应用的所有通知。
- 包含有效通知的应用将在主屏幕/启动器屏幕上相应应用图标的上方显示通知“标志”。
- 用户可以从抽屉式通知栏中暂停某个通知。您可以为通知设置自动超时时间。
- 您还可以设置通知的背景颜色。
- 部分与通知行为相关的 API 已从 Notification 移至 NotificationChannel。例如,在搭载 Android 8.0 及更高版本的设备中,使用 NotificationChannel.setImportance(),而非 NotificationCompat.Builder.setPriority()。
6. Android 12.0,API 31
- 自定义通知,提供通知模板。
- 更改了完全自定义通知的外观和行为。
下面就开始我们的适配之旅吧。
二、创建项目
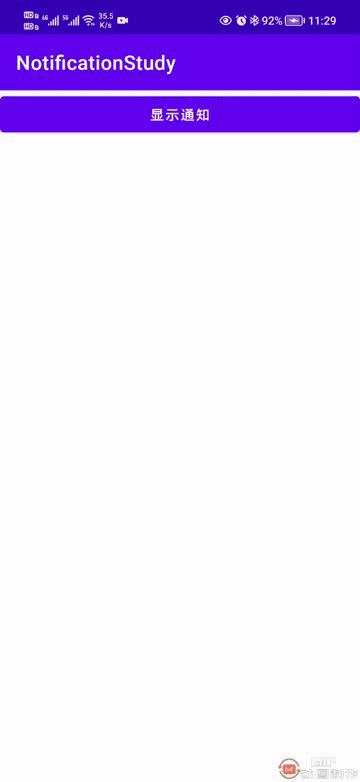
新建一个名为NotificationStudy的项目,如下图所示:

点击Finish完成项目创建,然后在app的build.gradle中的android闭包中开启viewBinding,代码如下:
	buildFeatures
        viewBinding true
项目创建好之后,我们首先改动一下activity_main.xml布局。
<?xml version="1.0" encoding="utf-8"?>
<androidx.constraintlayout.widget.ConstraintLayout xmlns:android="http://schemas.android.com/apk/res/android"
    xmlns:app="http://schemas.android.com/apk/res-auto"
    xmlns:tools="http://schemas.android.com/tools"
    android:layout_width="match_parent"
    android:layout_height="match_parent"
    tools:context=".MainActivity">

    <Button
        android:id="@+id/btn_show"
        android:layout_width="0dp"
        android:layout_height="wrap_content"
        android:text="显示通知"
        app:layout_constraintEnd_toEndOf="parent"
        app:layout_constraintStart_toStartOf="parent"
        app:layout_constraintTop_toTopOf="parent" />
</androidx.constraintlayout.widget.ConstraintLayout>
放一个按钮,然后再修改一下MainActivity中的代码,如下所示:
class MainActivity : AppCompatActivity()

    private lateinit var binding: ActivityMainBinding

    override fun onCreate(savedInstanceState: Bundle?)
        super.onCreate(savedInstanceState)
        binding = ActivityMainBinding.inflate(layoutInflater)
        setContentView(binding.root)

        //显示通知
        binding.btnShow.setOnClickListener
这里就是绑定ViewBinding,然后设置按钮点击监听,下面我们就要开始做显示通知的操作了。
三、显示通知
常规的通知由三个内容构成:标题、内容和图标。在8.0中还有一个通知渠道,所以我们需要先创建一个通知渠道。
① 创建通知渠道
创建通知渠道需要三个参数,渠道ID、渠道名称和渠道重要性。
首先在MainActivity中增加几个变量。
	//渠道Id
    private val channelId = "test"
    //渠道名
    private val channelName = "测试通知"
    //渠道重要级
    private val importance = NotificationManagerCompat.IMPORTANCE_HIGH
    //通知管理者
    private lateinit var notificationManager: NotificationManager
    //通知
    private lateinit var notification: Notification
    //通知Id
    private val notificationId = 1
发送通知首先要通过通知服务得到通知管理者,在onCreate方法中增加如下代码:
	override fun onCreate(savedInstanceState: Bundle?)
        super.onCreate(savedInstanceState)
        binding = ActivityMainBinding.inflate(layoutInflater)
        setContentView(binding.root)

        //获取系统通知服务
        notificationManager = getSystemService(NOTIFICATION_SERVICE) as NotificationManager

        ...
然后是创建通知渠道,在MainActivity中新增如下函数。
	/**
     * 创建通知渠道
     */
    @RequiresApi(Build.VERSION_CODES.O)
    private fun createNotificationChannel(channelId: String, channelName: String, importance: Int) =
        notificationManager.createNotificationChannel(NotificationChannel(channelId, channelName, importance))
因为通知渠道是Android8.0才有的,因此我们添加一个注解,然后将数据构建通知渠道的参数传入进来,注意我们通过notificationManager的createNotificationChannel()函数去创建渠道的,如果notificationManager没有初始化的话,毫无疑问你的这一行代码会报错。
② 初始化通知
通知渠道创建好了,下面我们去初始化通知,同样在MainActivity中新增一个initNotification()函数,代码如下:
	/**
     * 初始化通知
     */
    private fun initNotification()
        notification = if (Build.VERSION.SDK_INT >= Build.VERSION_CODES.O)
            //创建通知渠道
            createNotificationChannel(channelId,channelName,importance)
            NotificationCompat.Builder(this, channelId)
         else
            NotificationCompat.Builder(this)
        .apply
            setSmallIcon(R.mipmap.ic_launcher)//小图标(显示在状态栏)
            setLargeIcon(BitmapFactory.decodeResource(resources, R.mipmap.ic_launcher))//大图标(显示在通知上)
            setContentTitle("打工人")//标题
            setContentText("我要搞钱!!!")//内容
        .build()
这里首先通过版本判断检查是否需要创建通知渠道,然后会得到一个通知的Builder,通过Builder去配置通知所需要的基本参数,这里我设置了图标,标题,内容,配置完之后调用build(),完成通知的构建,最后返回一个notification,现在我们的通知就构建好了。
③ 显示通知
然后我们再修改一下onCreate中的代码,如下所示
	override fun onCreate(savedInstanceState: Bundle?)
        super.onCreate(savedInstanceState)
        binding = ActivityMainBinding.inflate(layoutInflater)
        setContentView(binding.root)
        //获取系统通知服务
        notificationManager = getSystemService(NOTIFICATION_SERVICE) as NotificationManager
        //初始化通知
        initNotification()
        //显示通知
        binding.btnShow.setOnClickListener
            notificationManager.notify(notificationId, notification)
这里我们调用了initNotification()函数,然后在点击按钮时发送通知。
	binding.btnShow.setOnClickListener
		notificationManager.notify(notificationId, notification)
运行一下,效果如下图所示:
四、通知点击
在上面的gif中,我们成功显示了通知,其中我们尝试去做了点击通知的动作,但是没有什么反应,因为这方面的功能还没有写,下面我们就来写。
首先要想一下点击之后要干嘛?通常来说都是跳转到指定的Activity,我们当前只有一个MainActivity,因此我们需要创建一个。
① 创建目的Activity
我们在com.llw.notification下创建DetailsActivity,对应activity_details.xml布局文件,修改一下布局文件,代码如下:
<?xml version="1.0" encoding="utf-8"?>
<androidx.constraintlayout.widget.ConstraintLayout xmlns:android="http://schemas.android.com/apk/res/android"
    xmlns:app="http://schemas.android.com/apk/res-auto"
    xmlns:tools="http://schemas.android.com/tools"
    android:layout_width="match_parent"
    android:layout_height="match_parent"
    tools:context=".DetailsActivity">

    <TextView
        android:id="@+id/tv_notification_content"
        android:layout_width="wrap_content"
        android:layout_height="wrap_content"
        android:text="TextView"
        app:layout_constraintBottom_toBottomOf="parent"
        app:layout_constraintEnd_toEndOf="parent"
        app:layout_constraintStart_toStartOf="parent"
        app:layout_constraintTop_toTopOf="parent" />
</androidx.constraintlayout.widget.ConstraintLayout>
这里增加一个TextView,然后回到DetailsActivity中,修改代码如下:
class DetailsActivity : AppCompatActivity()

    private lateinit var binding: ActivityDetailsBinding

    @SuppressLint("SetTextI18n")
    override fun onCreate(savedInstanceState: Bundle?)
        super.onCreate(savedInstanceState)
        binding = ActivityDetailsBinding.inflate(layoutInflater)
        setContentView(binding.root)

        intent?.let
            binding.tvNotificationContent.text =
                "$it.getStringExtra("title")\\n" + "$it.getStringExtra("content")"
这里的代码也很简单,就是获取传递过来的intent中携带的参数显示在TextView上,假设我们在MainActivity中点击时传递title和content。
② PendingIntent使用
我们经常使用Intent,但是接触PendingIntent是比较少的,PendingIntent可以看作是对Intent的一个封装,但它不是立刻执行某个行为,而是满足某些条件或触发某些事件后才执行指定的行为。
PendingIntent获取有三种方式:Activity、Service和BroadcastReceiver获取。PendingIntent有一个比较简单的使用方式,例如我们现在要在Activity中使用,修改initNotification()函数中的代码:
	private fun initNotification()
        val title = "打工人"
        val content = "我要搞钱!!!"
        // 为DetailsActivity 创建显式 Intent
        val intent = Intent(this, DetailsActivity::class.java).apply
            flags = Intent.FLAG_ACTIVITY_NEW_TASK or Intent.FLAG_ACTIVITY_CLEAR_TASK
            putExtra("title", title).putExtra("content", content)

        val pendingIntent = PendingIntent.getActivity(this, 0, intent, 0)

        notification = if (Build.VERSION.SDK_INT >= Build.VERSION_CODES.O)
            //创建通知渠道
            createNotificationChannel(channelId, channelName, importance)
            NotificationCompat.Builder(this, channelId)
         else
            NotificationCompat.Builder(this)
        .apply
            setSmallIcon(R.mipmap.ic_launcher)//小图标(显示在状态栏)
            setLargeIcon(BitmapFactory.decodeResource(resources, R.mipmap.ic_launcher))//大图标(显示在通知上)
            setContentTitle(title)//标题
            setContentText(content)//内容
            setContentIntent(pendingIntent)//设置内容意图
        .build()
这里的代码解释一下,首先将title、content抽离出来,然后创建intent,再创建pendingIntent 。最后在配置build中设置setContentIntent(pendingIntent),下面我们运行一下。

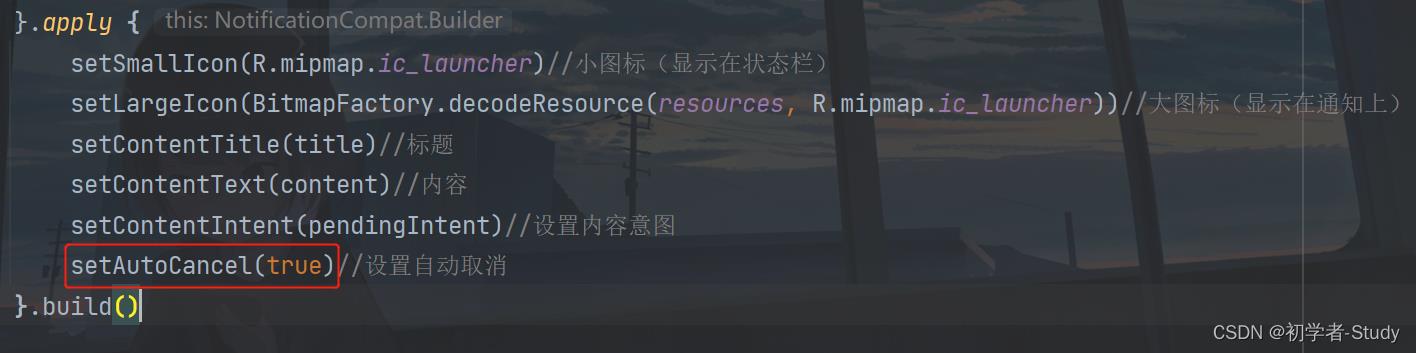
这里已经完成了点击通知并传递的操作,这里还有一个细节就是常规来说我们点击了这个通知表示我们已经看到了,或者已经知晓了内容,因此通知就会消失,而这里通知并没有消息。
只需要一个配置就可以做到。
setAutoCancel(true)//设置自动取消
添加位置如下图所示:
运行测试一下就行,我就不用gif说明了。
五、折叠通知
有时候我们设置通知的内容可能一行放不下,这个时候就需要收缩和展开通知,让用户看到完整的信息。
① 长文本
现在我将content的内容修改一下:
val content = "我要搞钱!!!富强、明主、文明、和谐、自由、平等、公正、法治、爱国、敬业、诚信、友善"
然后我们什么都不做去运行看看。

这里并没有显示多行,同时也没有那个向下展开的按钮,内容文字做了省略,因此这说明那个展开需要我们去设置。
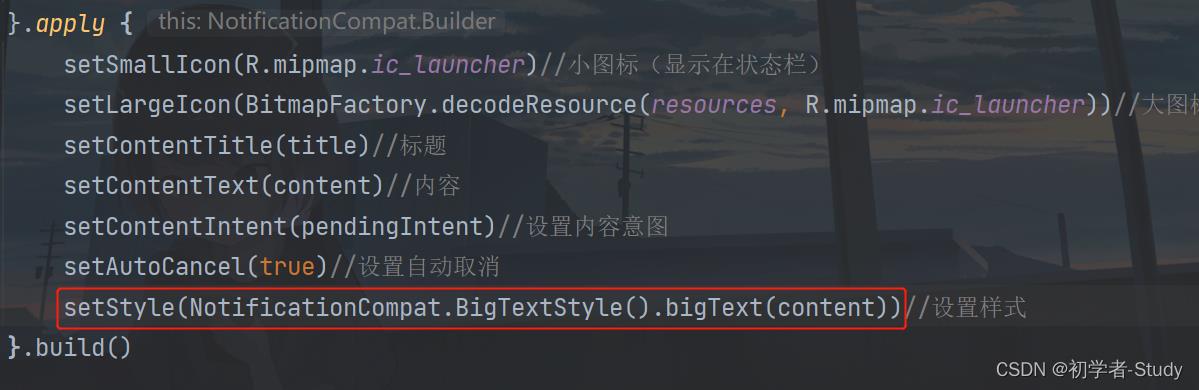
一行代码搞定:
setStyle(NotificationCompat.BigTextStyle().bigText(content))
通过设置通知的风格样式,这里使用的是长文本信息样式,将content传递进去。添加位置如下图所示:
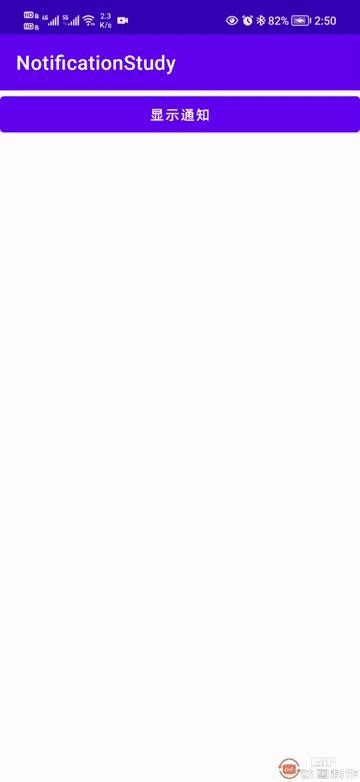
运行一下看看
② 显示图片
有时候我们会在通知中展开时看到图片,实际上就是使用了另一个样式,也是一行代码解决。
setStyle(NotificationCompat.BigPictureStyle().bigPicture(BitmapFactory.decodeResource(resources,R.drawable.logo)))//设置样式
这行代码的位置和替换掉刚才哪一行,通知只能设置一个样式,后面设置的样式会覆盖掉前面的样式,这里我们使用大图片样式,传进入一个logo.jpg图片,你在写的时候随便用什么都行,然后我们再运行一下。

六、回复通知
有时候我们的手机收到短信消息,是可以直接回复的。当然了这个功能是需要手动去写的。流程就是点击按钮出现一个通知,通知中回复消息,广播或服务收到消息后更新通知,然后关闭通知。
① 创建广播
这里我们先来写这个接收回复消息的处理,这里用广播来处理,首先我们需要创建一个广播,在com.llw.notification下新建一个ReplyMessageReceiver类,里面的代码如下:
class ReplyMessageReceiver : BroadcastReceiver()

    private val TAG = ReplyMessageReceiver::class.java.simpleName

    override fun onReceive(context: Context, intent: Intent)
        //获取回复消息的内容
        val inputContent =
            RemoteInput.getResultsFromIntent(intent)?.getCharSequence("key_text_reply")?.toString()
        Log.d(TAG, "onReceive: $inputContent")

        if (inputContent == null)
            Log.e(TAG, "onReceive: 没有回复消息!")
            return

        //构建回复消息通知
        val repliedNotification = if (Build.VERSION.SDK_INT >= Build.VERSION_CODES.O)
            NotificationCompat.Builder(context, "reply")
         else
            NotificationCompat.Builder(context)
        .apply
            setSmallIcon(R.mipmap.ic_launcher)//小图标(显示在状态栏)
            setContentTitle("1008666")//标题
            setContentText("消息发送成功!")//内容
        .build()

        val notificationManager =
            context.getSystemService(AppCompatActivity.NOTIFICATION_SERVICE) as NotificationManager
        //发送通知
        notificationManager.notify(2, repliedNotification)
        //1秒后取消通知
        Timer().schedule(1000)
            notificationManager.cancel(2)
这里说明一下:首先是RemoteInput表示远程输入,也就是通知栏上输入框,这里就是获取输入框的内容,注意"key_text_reply"这个值,我们在构建RemoteInput时使用的值要与这个一致,不一致你在广播中就拿不到输入的值。
然后是构建通知了,这里的设置都是常规操作,渠道id我是写死的,因此在Activity中创建通知时渠道Id也要一致。最后就是在发送通知之后加了一个1秒的延时去取消通知,表示收到回复的处理。
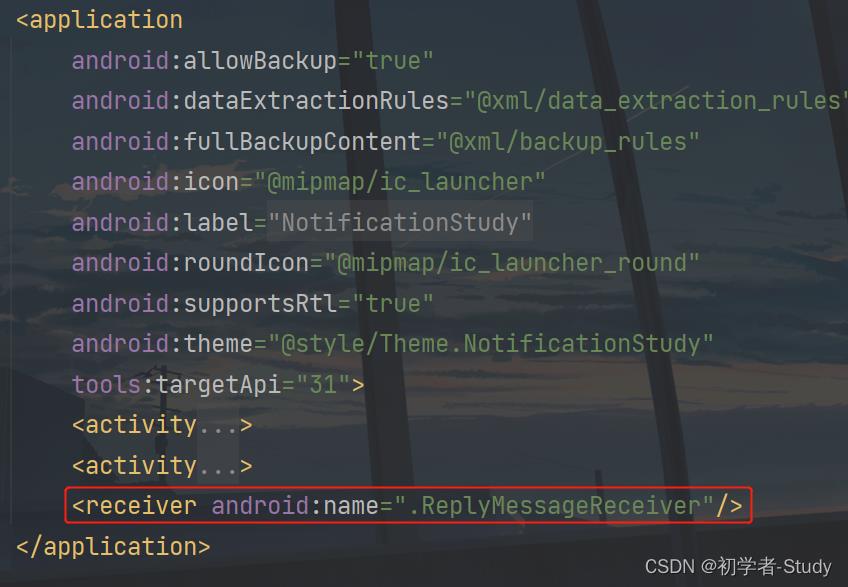
广播是需要在AndroidManifest.xml注册的,代码如下:
<receiver android:name=".ReplyMessageReceiver"/>
位置如下:
下面就是要构建回复通知了。因为要区别于之前的普通通知,所以这里我需要更改一下activity_main.xml中的布局代码
	<Button
        android:id="@+id/btn_show_reply"
        android:layout_width="0dp"
        android:layout_height="wrap_content"
        android:text="显示回复通知"
        app:layout_constraintEnd_toEndOf="parent"
        app:layout_constraintStart_toStartOf="parent"
        app:layout_constraintTop_toBottomOf="@+id/btn_show" />
增加一个按钮,点击事件后面再写。
② RemoteInput
为了区分普通通知和回复通知,在MainActivity中定义一下。
	//回复通知Id
    private val replyNotificationId = 2
    //回复通知
    private lateinit var replyNotification: Notification
下面我们新建一个initReplyNotification()函数,在里面对RemoteInput进行构建。
	private fun initReplyNotification()
        //远程输入
        val remoteInput = RemoteInput.Builder("key_text_reply").setLabel("快速回复").build()
这里RemoteInput的构建也很简单,最关键的就是"key_text_reply",刚才在适配器中已经说了,而Label就是一个输入框的提示文本。
③ PendingIntent
现在我们要通过BroadcastReceiver获取PendingIntent,在initReplyNotification()函数中新增代码:
	private fun initReplyNotification()
        ...
        //构建回复pendingIntent
        val replyIntent = Intent(this, ReplyMessageReceiver::class.java)
        val pendingIntent = PendingIntent.getBroadcast(this, 0, replyIntent, PendingIntent.FLAG_ONE_SHOT)
④ NotificationCompat.Action
通知动作,我们在输入框写入信息,需要一个按钮发送这个按钮,这个Action就是用来做这个事情的,在initReplyNotification()函数中新增代码:
	private fun initReplyNotification()
        ...
        //点击通知的发送按钮
        val action = NotificationCompat.Action.Builder(0, "回复", pendingIntent)以上是关于Android Notification使用的主要内容,如果未能解决你的问题,请参考以下文章