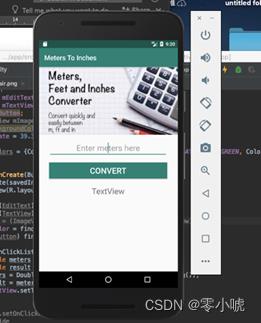
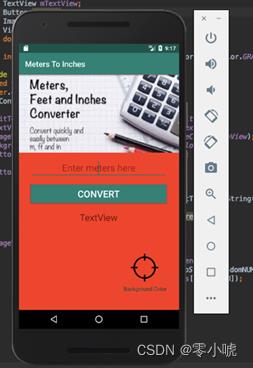
Android Studio:一个简单的米英尺单位转化app的实现过程
Posted 零小唬
tags:
篇首语:本文由小常识网(cha138.com)小编为大家整理,主要介绍了Android Studio:一个简单的米英尺单位转化app的实现过程相关的知识,希望对你有一定的参考价值。
📌Android Studio 专栏正在持续更新中,案例的原理图解析、各种模块分析💖这里都有哦,同时也欢迎大家订阅专栏,获取更多详细信息哦✊✊✊
✨个人主页:零小唬的博客主页
🥂欢迎大家 👍点赞 📨评论 🔔收藏
✨作者简介:20级计算机专业学生一枚,来自宁夏,想从事前端开发,目前还在努力学习并记录博客中🧸
🎀本系列专栏: Android Studio
💕希望本文对你在学习android Studio的过程中有所帮助,如有不足请指正一起学习,一起进步🥇
⛪座右铭:只要你还愿意努力,世界一定会给你惊喜
实验说明
制作一个单位转化app要求以及功能如下所述:
- 使用imageview插入一幅图.png格式的图片(附件中下载)
- 输入框的颜色需要与上边栏一致。(需要一个EditView 一个Button 以及一个TextView)
- 用户输入转换的单位之后,点击“COVERT”转换按钮后,结果将在TextView上显示,如右图所示。
- 附加要求(给追求挑战的学生)多添加一个图片,当用户点击此图片的时候,程序的背景颜色就会随机发生变化。(附加要求完成,将给予实验分数适当奖励!)
注:本实验来自帅帅的作业实验
实验分析
要实现米和英尺转换器的Android移动应用,可以采用Android Studio进行设计和开发。以下是实现的大致步骤:
创建一个Android应用程序项目,设置主界面布局和组件。添加输入框,用于用户输入数值米的值。添加按钮,用于触发转换操作。编写Java代码,实现数值转换算法。可以根据用户选择的转换单位,将输入的数值乘以相应的换算系数,获得转换结果。在Java代码中,添加事件处理程序,以实现从按钮点击到数据处理和输出显示的完整逻辑流程。当用户点击“转换”按钮时,应用程序将接收用户输入的数据,并计算出转换结果,然后显示在界面上。对应用程序进行测试和调试,确保应用程序在Android设备上正常运行。
总之,使用Android Studio进行开发,可以很方便地实现一个米和英尺转换器。在开发过程中,需要注意界面布局、事件处理、数据处理、算法实现等方面的细节,以实现一个稳定、高效、易用的移动应用程序。同时,可以根据需求进行功能扩展和用户体验优化,以满足不同用户的需求和要求。
部分核心代码
<!-- 输入文本框  -->
<EditText
        android:id="@+id/edit_text"
        android:layout_width="286dp"
        android:layout_height="85dp"
        android:ems="10"
        android:inputType="textPersonName"
        android:text="Enter meters here"
        app:layout_constraintBottom_toBottomOf="parent"
        app:layout_constraintEnd_toEndOf="parent"
        app:layout_constraintHorizontal_bias="0.497"
        app:layout_constraintStart_toStartOf="parent"
        app:layout_constraintTop_toTopOf="parent"
        app:layout_constraintVertical_bias="0.346" />

<!-- 图片视图  -->
<ImageView
        android:id="@+id/imageView2"
        android:layout_width="408dp"
        android:layout_height="213dp"
        app:layout_constraintBottom_toBottomOf="parent"
        app:layout_constraintEnd_toEndOf="parent"
        app:layout_constraintHorizontal_bias="1.0"
        app:layout_constraintStart_toStartOf="parent"
        app:layout_constraintTop_toTopOf="parent"
        app:layout_constraintVertical_bias="0.0"
        app:srcCompat="@drawable/image" />

<!-- 按钮控件  -->
<Button
        android:id="@+id/convert_button"
        android:layout_width="363dp"
        android:layout_height="63dp"
        android:text="CONVERT"
        app:layout_constraintBottom_toBottomOf="parent"
        app:layout_constraintEnd_toEndOf="parent"
        app:layout_constraintStart_toStartOf="parent"
        app:layout_constraintTop_toTopOf="parent" />

<!-- 显示文本框  -->
<TextView
        android:id="@+id/result_text"
        android:layout_width="348dp"
        android:layout_height="121dp"
        android:text="TextView"
        android:textAlignment="center"
        android:textSize="34sp"
        app:layout_constraintBottom_toBottomOf="parent"
        app:layout_constraintEnd_toEndOf="parent"
        app:layout_constraintHorizontal_bias="0.38"
        app:layout_constraintStart_toStartOf="parent"
        app:layout_constraintTop_toTopOf="parent"
        app:layout_constraintVertical_bias="0.693" />
// 按钮的转换操作
converbutton.setOnClickListener((v) ->
            String input = edittext.getText().toString();
            double value = Double.parseDouble(input);
            double result = value * miToFT;
            resulttext.setText(String.format("%.2f英尺",result));
            resulttext.setVisibility(View.VISIBLE);
        );
基本效果图
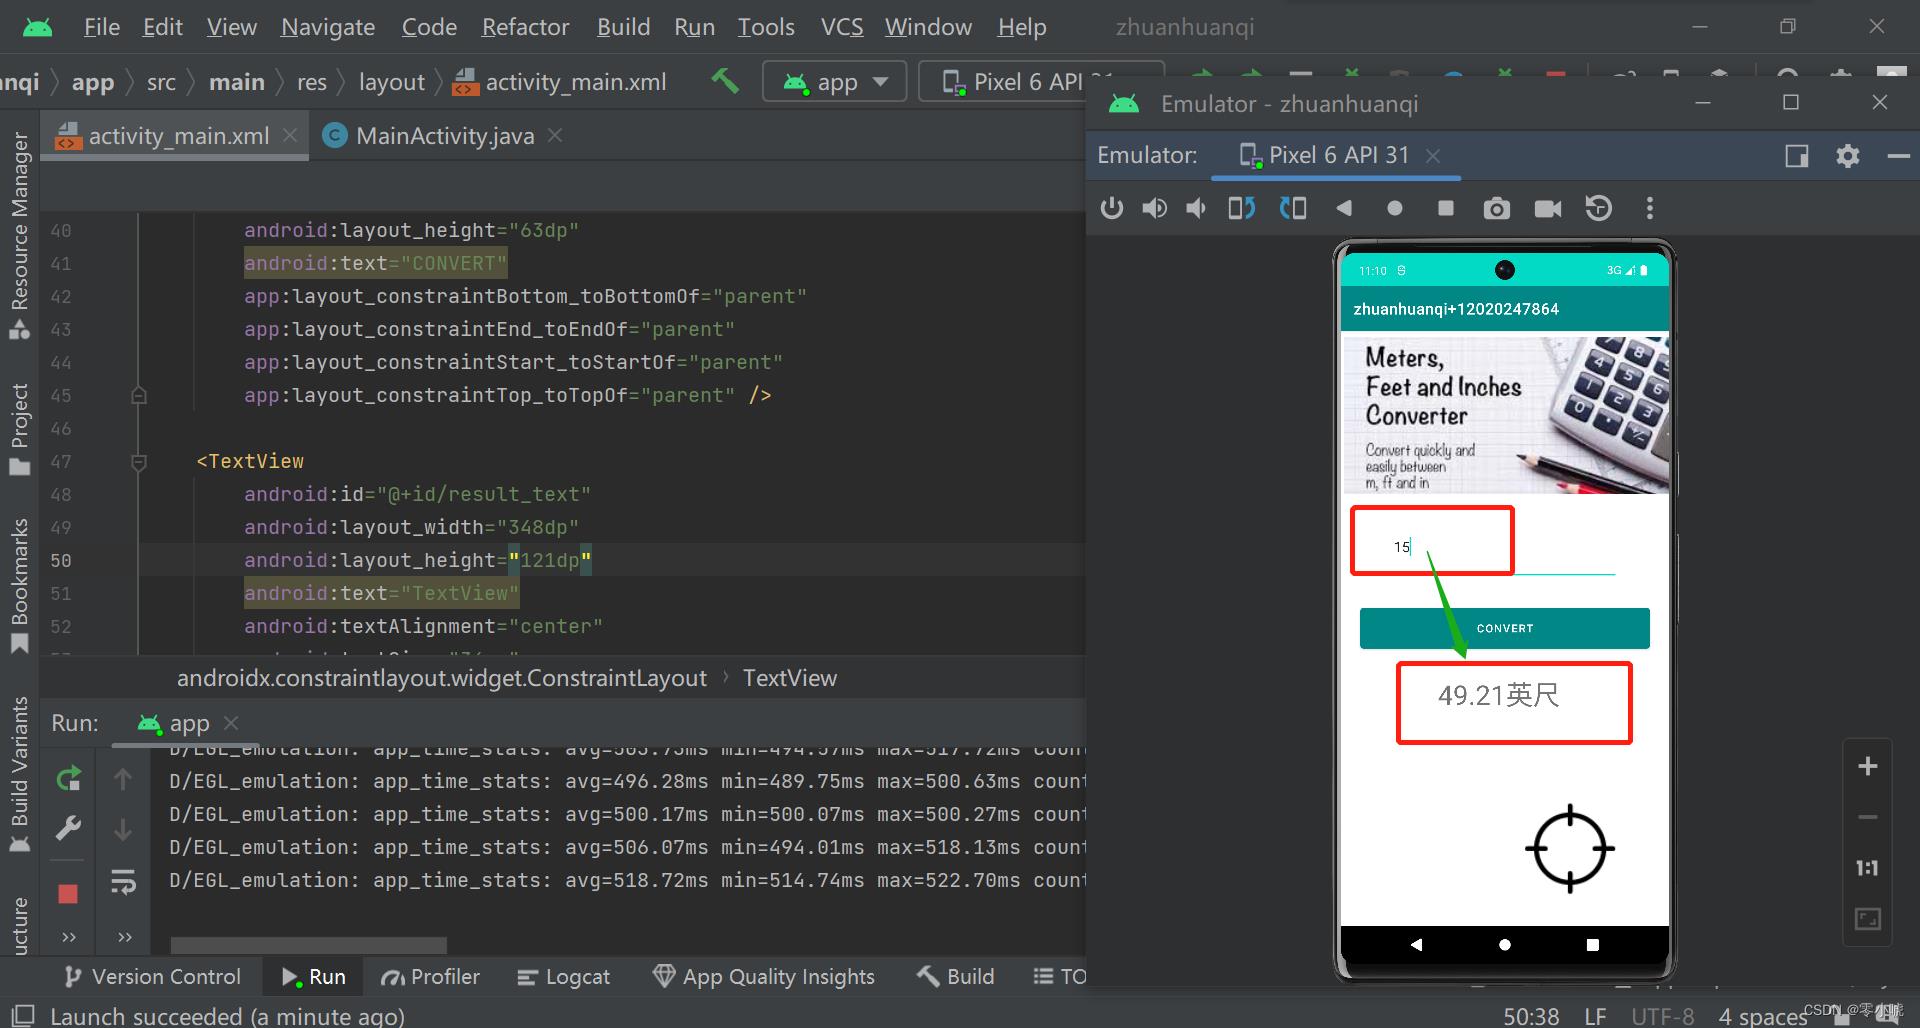
说明:实验要求完成的部分基本完成,只是简单的实现单位的转换功能,右下角的那个图片属于拓展部分的,适用于通过点击图片实现为页面添加背景颜色的功能,下面就简单说一下怎么实现这一功能吧。
拓展部分简单分析
如果需求是文本图片下方显示一段红色的固定背景,在用户点击图片时,背景不需要变化,可以采用以下步骤实现:
在原有的项目基础上,添加一个ImageView和一个TextView控件。选定需要带有红色背景的TextView,将其位置设置在ImageView的下方。在Java代码中,为TextView控件设置背景颜色。将TextView的背景颜色设置为红色,以显示红色的背景。
相关代码的实现
<TextView
        android:id="@+id/result_text"
        android:layout_width="348dp"
        android:layout_height="121dp"
        android:text="TextView"
        android:textAlignment="center"
        android:textSize="34sp"
        app:layout_constraintBottom_toBottomOf="parent"
        app:layout_constraintEnd_toEndOf="parent"
        app:layout_constraintHorizontal_bias="0.38"
        app:layout_constraintStart_toStartOf="parent"
        app:layout_constraintTop_toTopOf="parent"
        app:layout_constraintVertical_bias="0.693" />

<ImageView
        android:id="@+id/imageView3"
        android:layout_width="200dp"
        android:layout_height="141dp"
        app:layout_constraintBottom_toBottomOf="parent"
        app:layout_constraintEnd_toEndOf="parent"
        app:layout_constraintHorizontal_bias="0.886"
        app:layout_constraintStart_toStartOf="parent"
        app:layout_constraintTop_toTopOf="@+id/imageView2"
        app:layout_constraintVertical_bias="0.957"
        app:srcCompat="@drawable/image1" />
imageView.setOnClickListener((V)->
            int color = Color.argb(128,255,0,0);
            mainview.setBackgroundColor(color);
        );
代码说明:找到需要设置背景色的控件,然后使用Color.argb方法生成一个Argb颜色值,其中第一个参数128指定了颜色的透明度为50%(255是不透明,0是全透明),后面三个参数分别为红、绿、蓝的颜色值。最后使用setBackgroundColor方法将颜色值设置为控件的背景色即可,需要注意的是,不同的设备可能会有不同的透明度支持,因此需要进行实测调试,以保证透明效果符合需求。
基本实现效果图
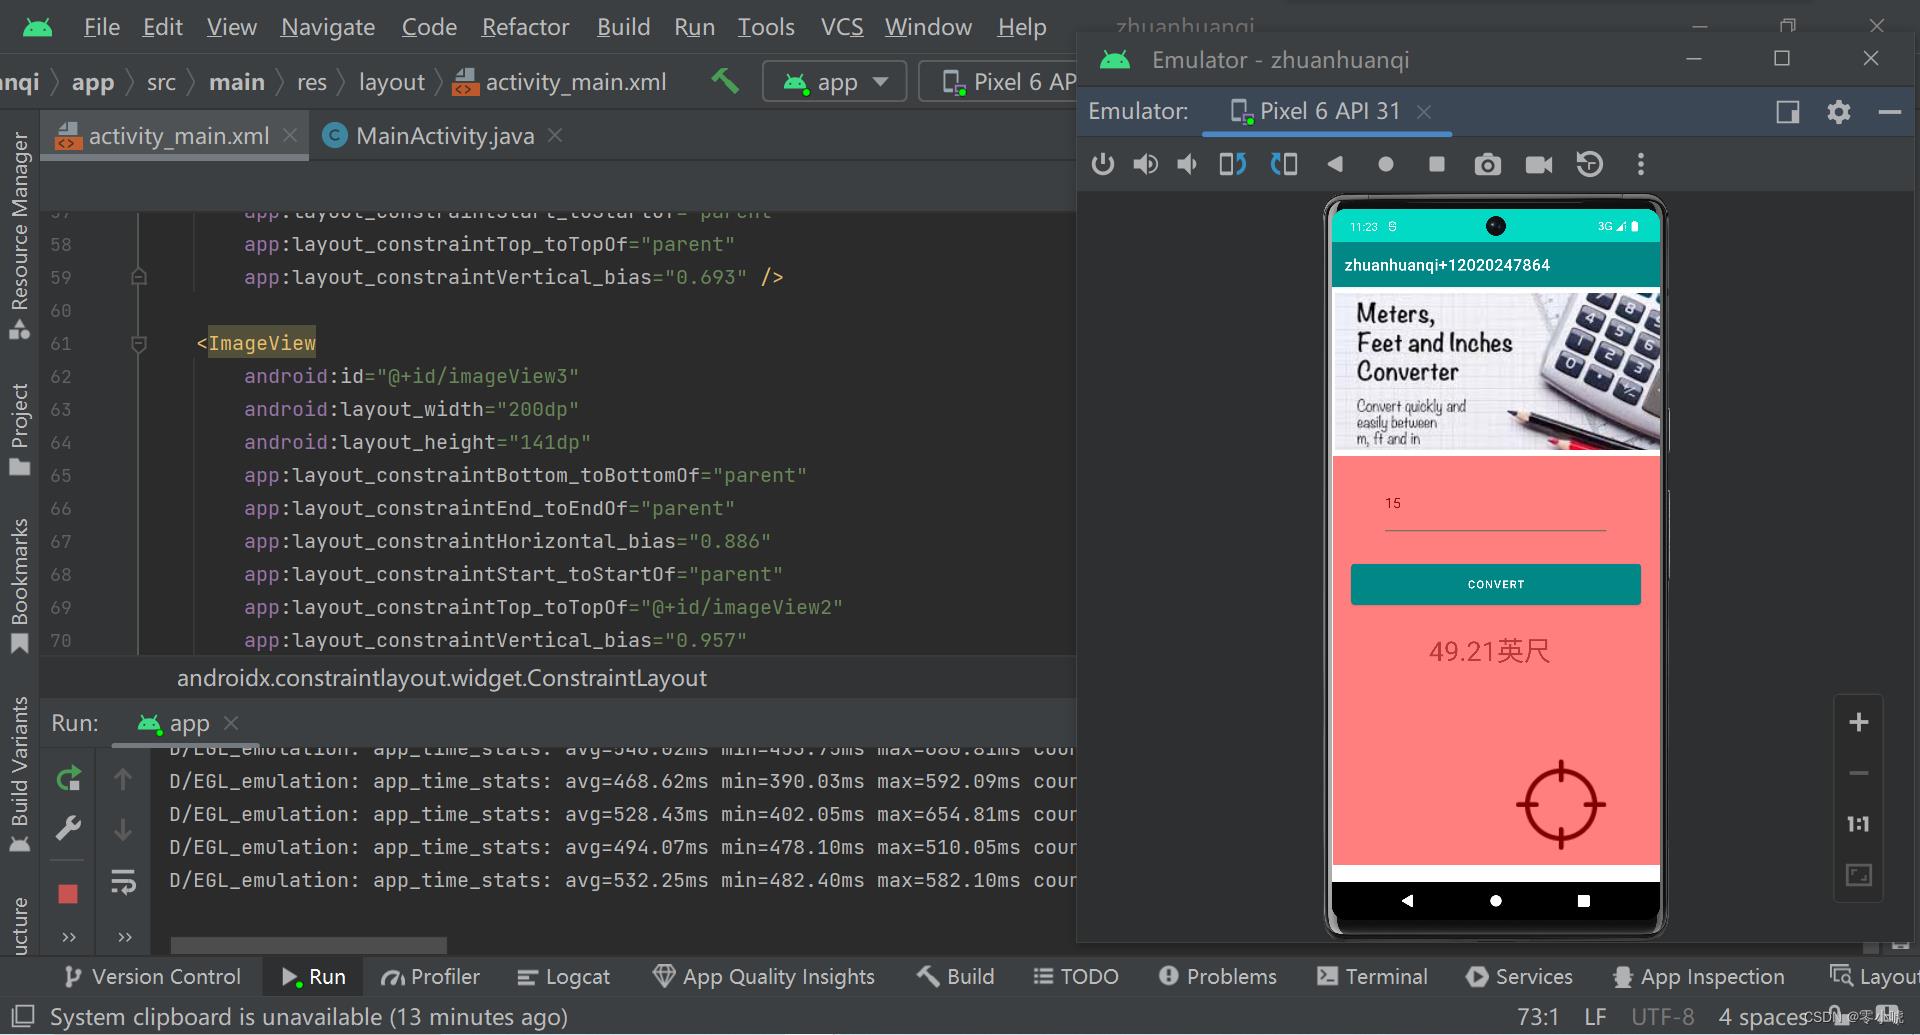
再次申明本次实验是自己的Android Studio实验作业,题目出自帅帅老师,上面的只是部分核心代码的实现,很简单,因为自己也是第一次学习Android Studio,本身Java基础就不怎么好,上面的代码仅供参考,基本的bug已经修复,运行是没有问题的。有问题或者代码还有可以改进的地方可以一起学习交流,欢迎大佬指正~
bug问题1描述
上面的实现过程中有一个问题不知道大家有没有发现,这个也是我调试多次后发现这个地方可以改进一下,就是那个输入文本框中的内容,在用户每次输入数值的时候,都必须将里面的提示内容全部清除掉才可以进行输入新的内容,所以显得很麻烦,理想的状态应该是用户通过点击输入文本框的时候,就会自动将里面的提示内容隐藏掉,直接输入新的内容。
修改bug2的过程
<EditText
        android:id="@+id/edit_text"
        android:layout_width="286dp"
        android:layout_height="85dp"
        android:ems="10"
        android:inputType="text"
        android:hint="Enter meters here"
        app:layout_constraintBottom_toBottomOf="parent"
        app:layout_constraintEnd_toEndOf="parent"
        app:layout_constraintHorizontal_bias="0.497"
        app:layout_constraintStart_toStartOf="parent"
        app:layout_constraintTop_toTopOf="parent"
        app:layout_constraintVertical_bias="0.346" />
说明:其中,android:hint属性表示提示文本的内容,可以根据需求自行修改。此外,android:inputType属性指定了EditText控件的输入类型。在上述代码中,输入类型设置为text,表示接受任意文本输入。可以根据需求设置对应的输入类型,例如数字、日期、邮箱等。当用户点击EditText控件时,提示文本会自动隐藏,用户可以直接在输入框内输入内容。需要注意的是,在设置EditText控件的输入类型时,可能会受到输入法的影响,不同的输入法可能会有不同的输入效果。为避免输入错误,建议在需要输入特定类型的文本时,通过设置输入类型及相关的输入限制,来确保输入的正确性。
bug问题2描述
前一个问题就是一个简单的小问题,大不了用户删除内容重新进行修改就可以了,但是还有一个致命的问题就是在输入文本框中,当用户输入直接的数字,运行是没有问题的,但是当用户输入12米或者13m的时候,程序就会闪崩,既然提前注意到了,下面是自己尝试修改的过程。
修改bug2的过程
converbutton.setOnClickListener((v) ->
            String input = edittext.getText().toString();

            String regex = "\\\\d+(\\\\.\\\\d+)?";
            Pattern pattern = Pattern.compile(regex);
            Matcher matcher = pattern.matcher(input);

            while (matcher.find())
                String numberStr = matcher.group();
                double number = Double.parseDouble(numberStr);
                double result = number * miToFT;
                resulttext.setText(String.format("%.2f英尺", result));
                resulttext.setVisibility(View.VISIBLE);


        );
实现过程
以上代码中,首先
通过findViewById方法找到EditText控件,并获取其文本内容。然后定义一个正则表达式来匹配数字,使用Pattern类和Matcher类提取EditText中的数字,并逐个进行处理。需要注意的是,在实际应用中,还需要针对不同情况进行不同的处理,例如判断用户输入的数字单位是否符合要求,以及输入的数字是否为0等。同时,在使用正则表达式提取数字时,也需要考虑一些边界情况,例如小数点的位置和多次数字输入等等,但是本次实验就是一个简单的实现过程,不需要考虑这么多哦。
修改后的效果图
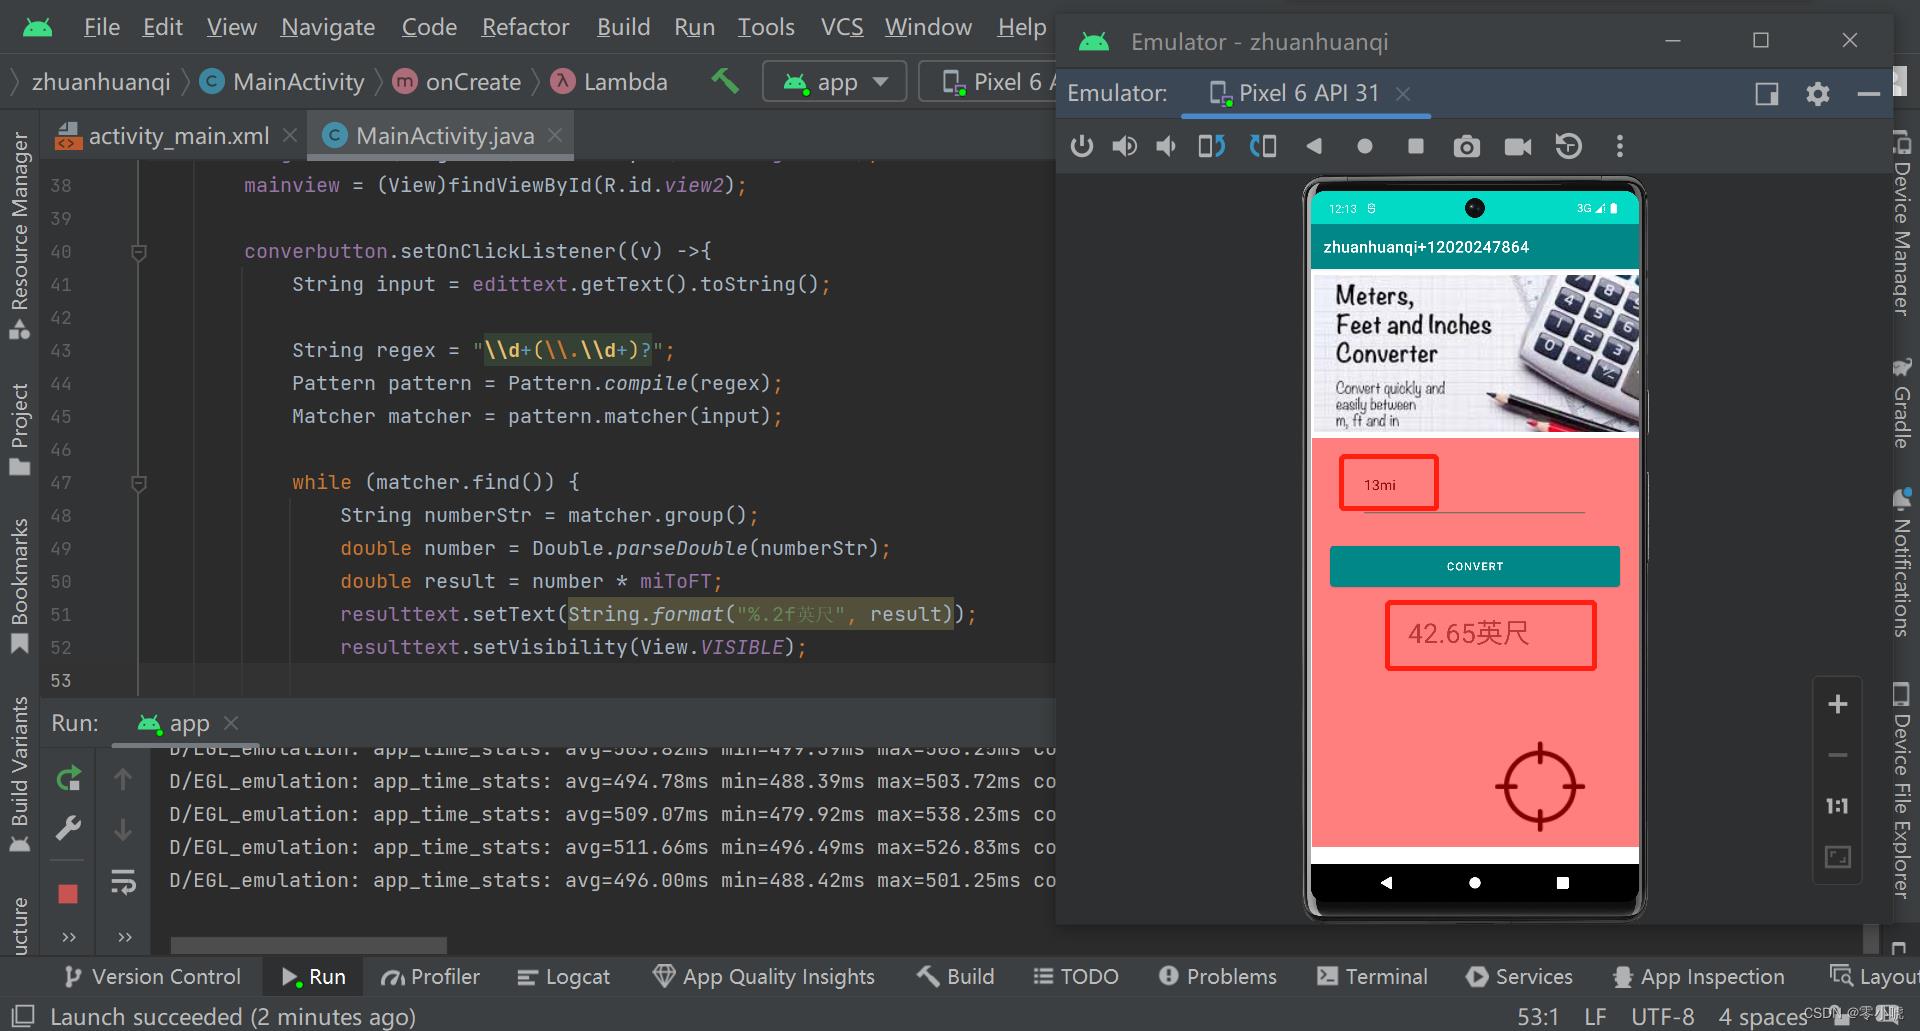
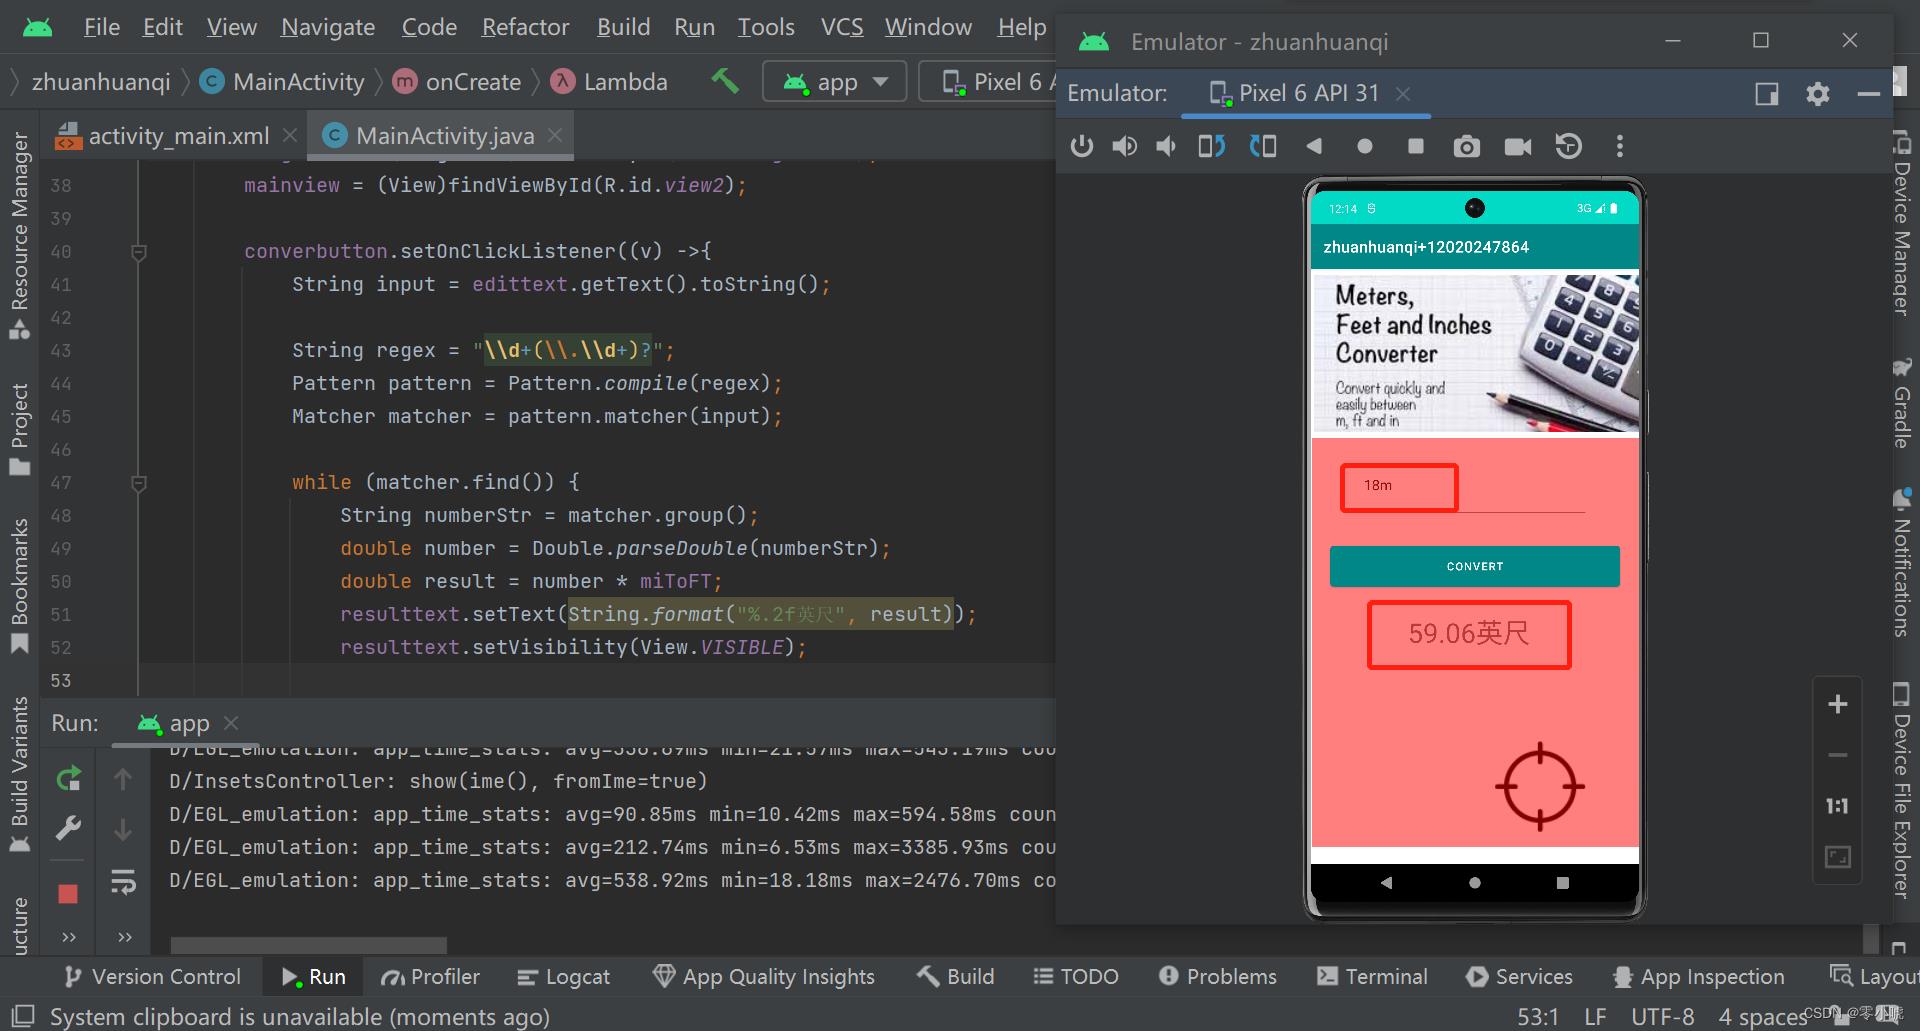
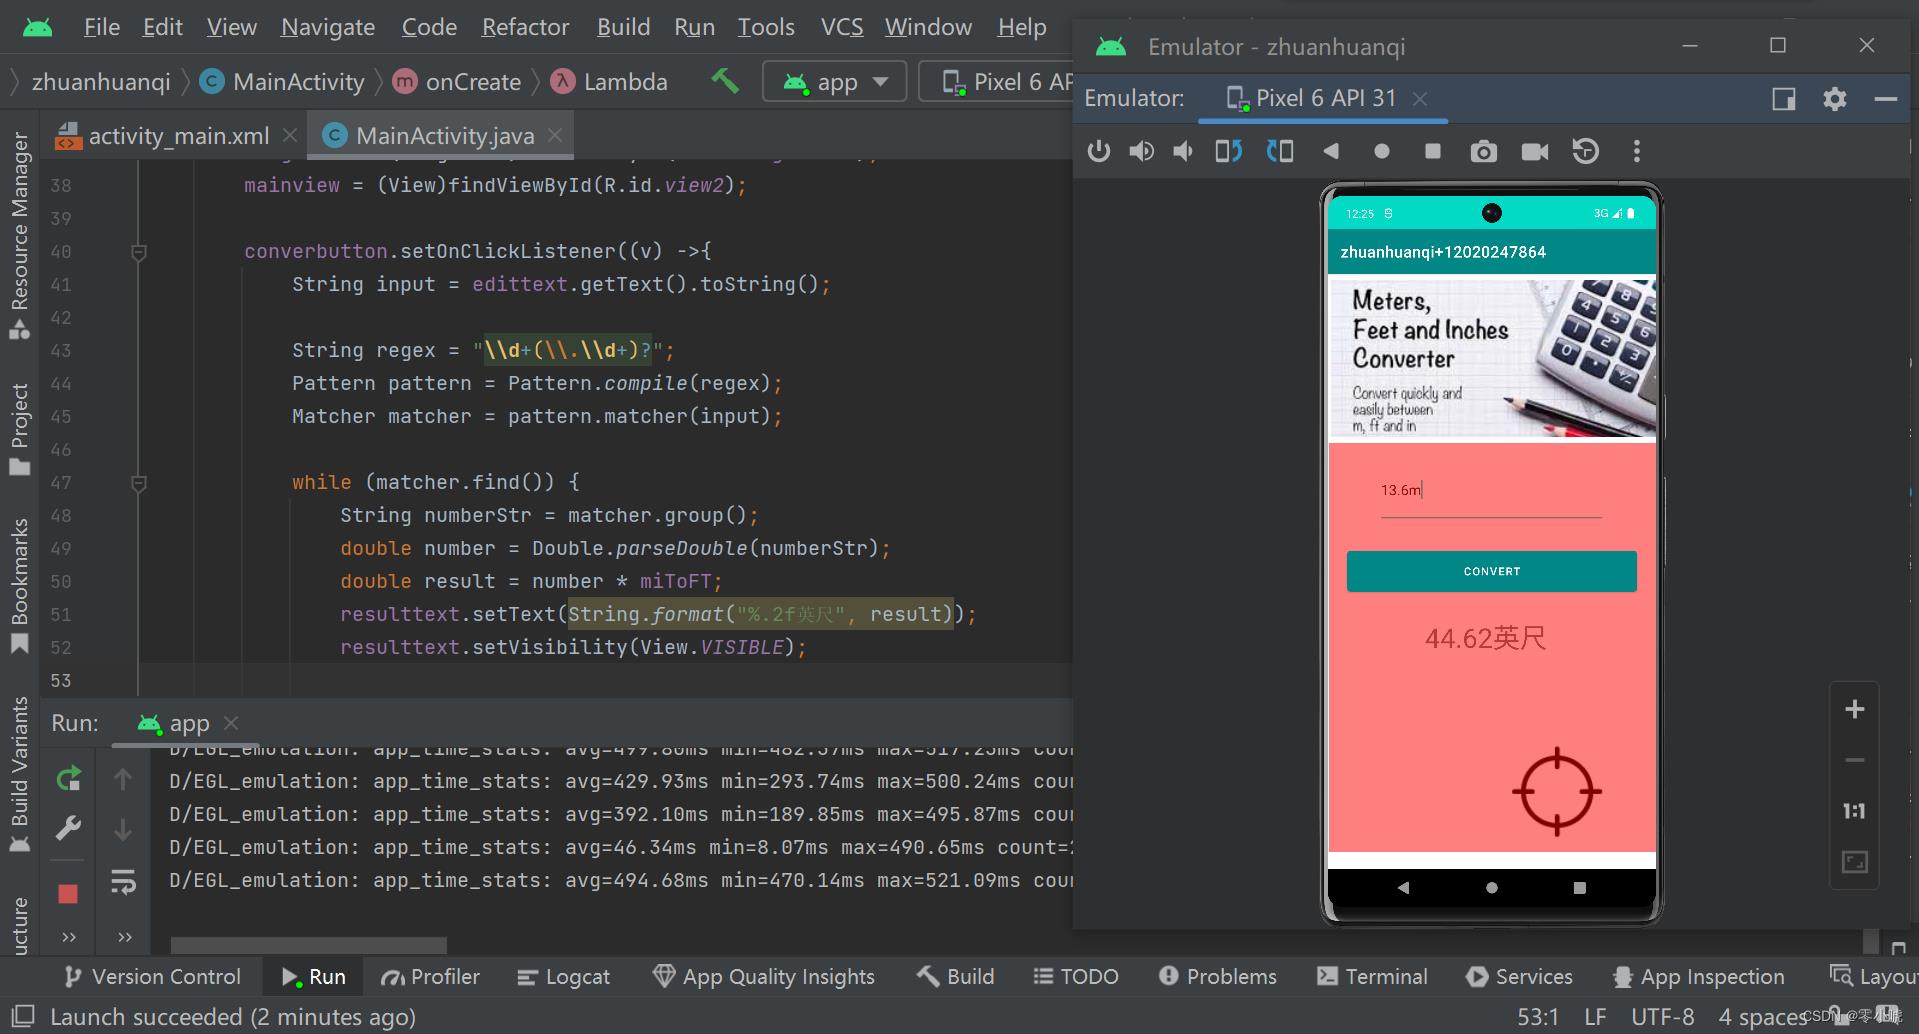
因为上节课的后端正好也讲了正则表达式了,感觉终于派上用场了,就简单的用了一下,嘿嘿嘿,小小的成就感,现在没有问题了,无论你输入XXm或者XX.XX m都可以正确的运行出对应的英尺哦,好了,本次实验已完成,大的问题几乎修改完了!
🎉记录是为了不停的思考,创作更是为了更好的思考,有人说过:2023年以后的中国市场将永远属于长期主义者,bug是改不完的也是写不完的,只能说这次遇到了希望下次不会在出现同样的bug就行,如果你觉得对您有帮助,欢迎一起交流学习,本人也是一名很菜的计算机大三学生,目前还在努力中~
PAT-厘米换算英尺英寸
如果已知英制长度的英尺foot和英寸inch的值,那么对应的米是(foot+inch/12)×0.3048。现在,如果用户输入的是厘米数,那么对应英制长度的英尺和英寸是多少呢?别忘了1英尺等于12英寸。
输入格式:
输入在一行中给出1个正整数,单位是厘米。
输出格式:
在一行中输出这个厘米数对应英制长度的英尺和英寸的整数值,中间用空格分开。
输入样例:
170
输出样例:
5 6
代码如下:
#include<stdio.h>
main()
{
  float n;
  scanf("%f",&n);
  n=n/100;
  int foot=n/0.3048;
  int inch=(n/0.3048-foot)*12;
  printf("%d %d",foot,inch);
}
以上是关于Android Studio:一个简单的米英尺单位转化app的实现过程的主要内容,如果未能解决你的问题,请参考以下文章
