uniapp 引入海康H5player实现视频监控的播放
Posted 我要睡觉了i
tags:
篇首语:本文由小常识网(cha138.com)小编为大家整理,主要介绍了uniapp 引入海康H5player实现视频监控的播放相关的知识,希望对你有一定的参考价值。
uniapp直接调用海康H5player方法,只能在web浏览器页面正常播放,实机运行会因为找不到文件的相对路径而报错无法播放。因此需要通过web-view或iframe引入html的方式来实现实时视频监控的播放。具体步骤如下:
1、首先将海康h5player的相关文件,引入到static文件夹下,文件相对位置保持一致;
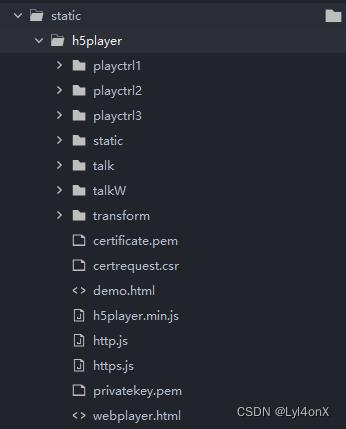
2、在H5player文件夹下新建html页面webplayer.html;
(1)页面元素代码
<div id="h5player" class="myplayer"></div>
(2)页面样式代码
<style type="text/css">
html,
body
width: 100%;
height: 100%;
margin: auto;
overflow: hidden;
background-color: #000000;
-webkit-user-select: none;
user-select: none;
.myplayer
width: 100%;
height: 100%;
</style>
* 此页面用来进行海康方法的调用和视频监控的播放。
* 将页面与h5player.min.js放在同一路径下,防止实机运行出现路径错误的问题。
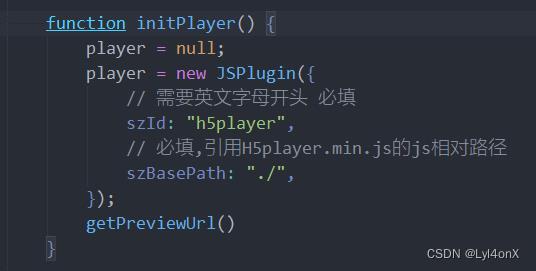
3、在webplayer.html页面引入h5player.min.js,并进行监控视频初始化配置;

4、通过webview或iframe的形式将页面嵌入到需要进行监控视频展示的页面;


5、将接口请求到的视频流地址通过url拼接的方式传给webplayer.html页面;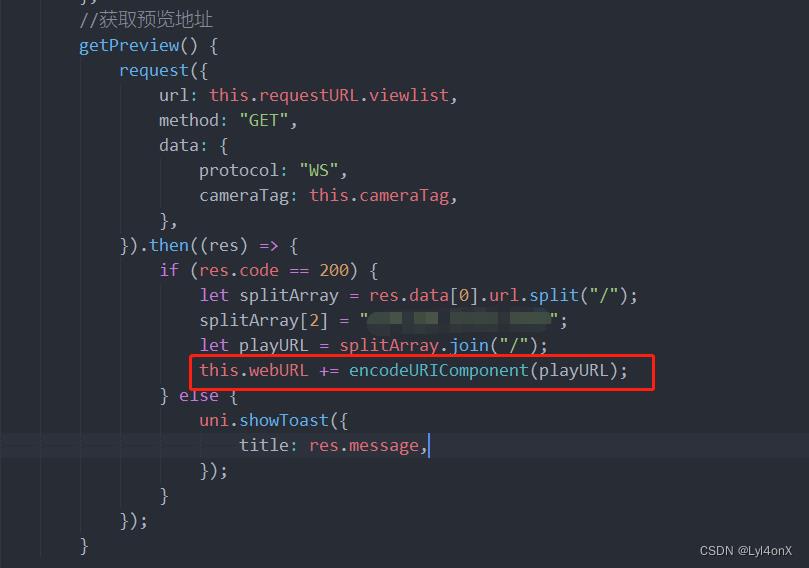
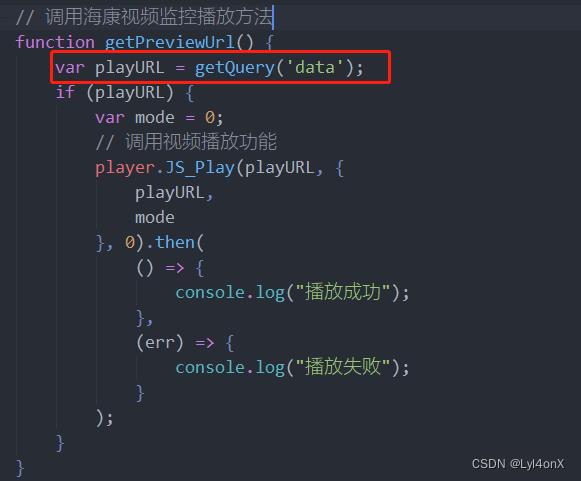
6、在webplayer.html页面通过解析url路径地址的方法获取视频播放流地址,并调用海康api的视频播放方法。
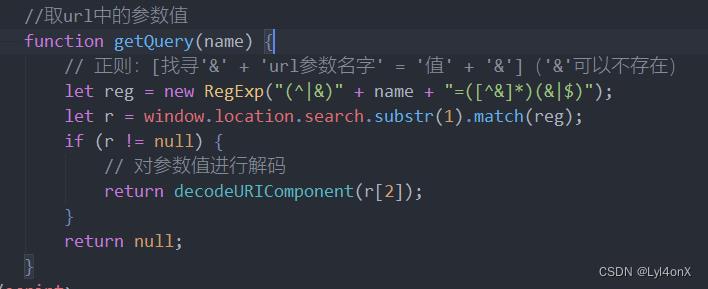
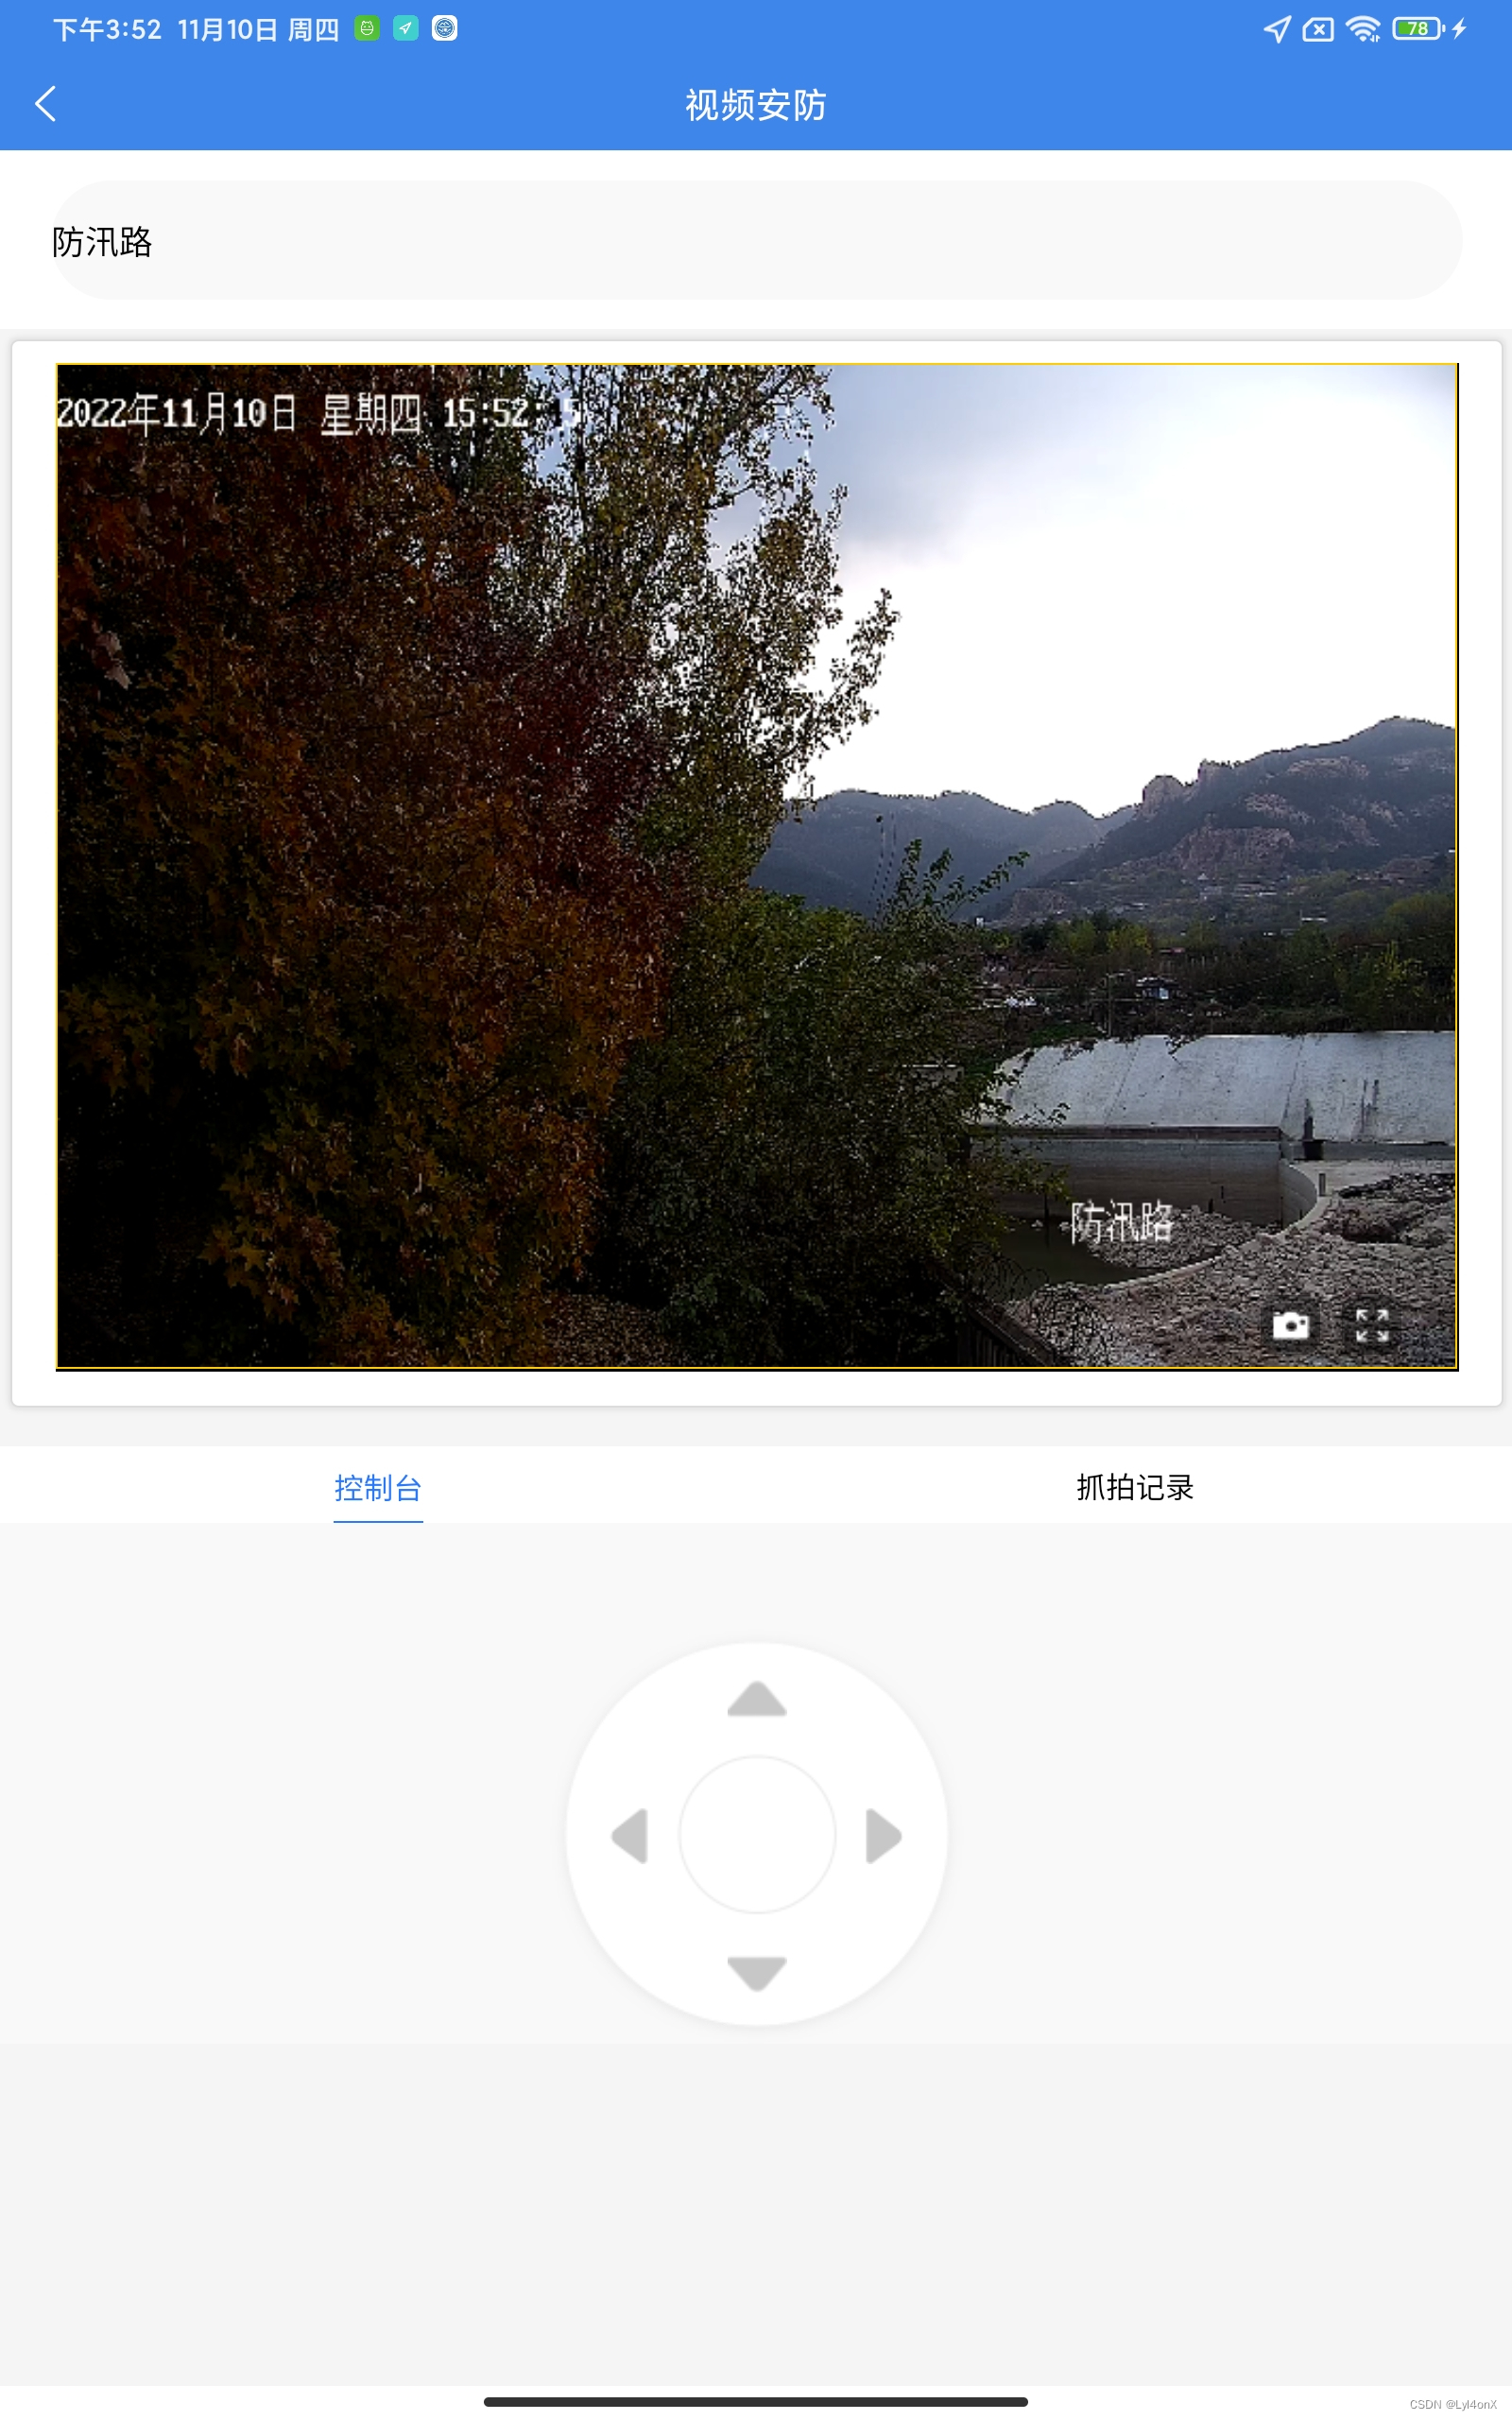
7、实机运行,视频播放成功;(抓拍、摄像头移动等方法直接写在webplayer.html页面进行调用)
uni-app技术分享| 10分钟实现一个简易uniapp视频通话
视频讲解
创建 uniapp 项目
- 创建 uniapp 项目
- 前往 anyRTC 控制台-项目管理 创建新项目,获取 appid
引入插件
- 前往 uniapp插件市场搜索 anyRTC,选中anyRTC音视频SDK插件
- 云打包购买插件(免费引入)引入创建的对应uniapp 项目
- uniapp项目的
manifest.json中App原生插件配置选择云端插件选中anyRTC音视频SDK插件` - 打包自定义基座
- 选择自定义基座运行
代码逻辑

必须在
nvue页面中
<view class="content">
		<button class="button" type="primary" @click="stepOne">步骤一:初始化回调</button>
		<button class="button" type="primary" @click="stepTwo">步骤二:初始化实例</button>
		<button class="button" type="primary" @click="stepThree">步骤三:启用视频模块</button>
		<button class="button" type="primary" @click="stepFour">步骤四:加入频道房间</button>
		<view class="video">
			本地用户 {{localuid}} 音视频渲染
			<AR-CanvasView ref="location" style="flex: 1;" />
		</view>
		<view class="video">
			远端 {{remotenableuid}} 音视频渲染
			<AR-CanvasView ref="remotenable" style="flex: 1;" />
		</view>
	</view>
// rtc 音视频引入
const rtcModule = uni.requireNativePlugin('AR-RtcModule');
export default {
		data() {
			return {
				appid: "177e21c0d1641291c34e46e1198bd49a",
				channel: "123456",
				localuid: "", // 本地用户
				remotenableuid: "", // 远端用户
			}
		},
		onLoad() {

		},
		methods: {
			// 步骤一:
			stepOne() {
				rtcModule.setCallBack(res => {
					switch (res.engineEvent) {
						// 发生警告回调
						case "onWarning":
							console.log("发生警告回调", res);
							break;
							// 发生错误回调
						case "onError":
							console.log("发生错误回调", res);
							break;
							// 加入频道成功回调
						case "onJoinChannelSuccess":
							console.log("加入频道成功回调", res);
							// 本地用户视频渲染
							this.localVideo();
							break;
							// 远端用户加入当前频道回调
						case "onUserJoined":
							uni.showToast({
								title: '用户' + res.uid + '加入频道',
								icon: 'none',
								duration: 2000
							});
							break;
							// 远端用户离开当前频道回调
						case "onUserOffline":
							uni.showToast({
								title: '远端用户' + res.uid + '离开频道',
								icon: 'none',
								duration: 2000
							});
							break;
							// 已显示远端视频首帧回调
						case "onFirstRemoteVideoDecoded":
							console.log("已显示远端视频首帧回调", res);
							// 远端视频渲染
							this.remotenableVideo(res.uid);
							break;
							// 远端用户视频状态发生已变化回调
						case "onRemoteVideoStateChanged":
							console.log("远端用户视频状态发生已变化回调", res);
							break;
					}
				});
			},
			// 步骤二:
			stepTwo() {
				rtcModule.create({
					"appId": this.appid
				}, res => {
					console.log('初始化实例 rtc', res);
				});
				// 智能降噪
				// rtcModule.setParameters({
				// 	Cmd: 'SetAudioAiNoise',
				// 	Enable: 1,
				// }, (res) => {
				// 	console.log('私人定制', res);
				// });
			},
			// 步骤三:
			stepThree() {
				rtcModule.enableVideo((res) => {
					console.log('RTC 启用视频 enableVideo 方法调用', (res.code === 0 ? '成功' : '失败:') +
						res);
				});
			},
			// 步骤四:
			stepFour() {
				this.localuid = this.randomFn(6);
				rtcModule.joinChannel({
					"token": "",
					"channelId": this.channel,
					"uid": this.localuid,
				}, (res) => {
					console.log('RTC joinChannel 方法调用', (res.code === 0 ? '成功' : '失败:') + res);
				});
			},
			// 本地视频渲染
			async localVideo() {
				// 渲染视频
				await this.$refs.location.setupLocalVideo({
					"renderMode": 1,
					"channelId": this.channel,
					"uid": this.localuid,
					"mirrorMode": 0
				}, (res) => {
					console.log('渲染视频', res);
				});
				// 本地预览
				await this.$refs.location.startPreview((res) => {
					console.log('本地预览', res);
				})
			},
			async remotenableVideo(uid) {
				this.remotenableuid = uid;
				this.$refs.remotenable.setupRemoteVideo({
					"renderMode": 1,
					"channelId": this.channel,
					"uid": uid,
					"mirrorMode": 0
				}, (res) => {
					console.log('渲染视频', res);
				});
			},
			// 随机生成
			randomFn(len, charSet) {
				charSet = charSet || 'abcdefghijklmnopqrstuvwxyz0123456789';
				let randomString = '';
				for (let i = 0; i < len; i++) {
					let randomPoz = Math.floor(Math.random() * charSet.length);
					randomString += charSet.substring(randomPoz, randomPoz + 1);
				}
				return randomString;
			},
		}
	}
以上是关于uniapp 引入海康H5player实现视频监控的播放的主要内容,如果未能解决你的问题,请参考以下文章