java后端开发第二篇:springboot定时任务及异步任务简记
Posted 事在人为,幸福从不抱怨开始!
tags:
篇首语:本文由小常识网(cha138.com)小编为大家整理,主要介绍了java后端开发第二篇:springboot定时任务及异步任务简记相关的知识,希望对你有一定的参考价值。
通过Springboot实现定时任务,只要用到在@EnableScheduling 和 @Scheduled 这两个注解即可实现。
- 在程序入口application中添加@EnableScheduling注解
@SpringBootApplication
@EnableScheduling//允许使用定时任务功能
public class DemoApplication

    public static void main(String[] args)
        SpringApplication.run(DemoApplication.class, args);
2.在执行定时任务的代码处添加@Scheduled注解
@Component
public class TimerTaskController
@Scheduled(fixedRate = 5000)
private void excuteTimerTask()
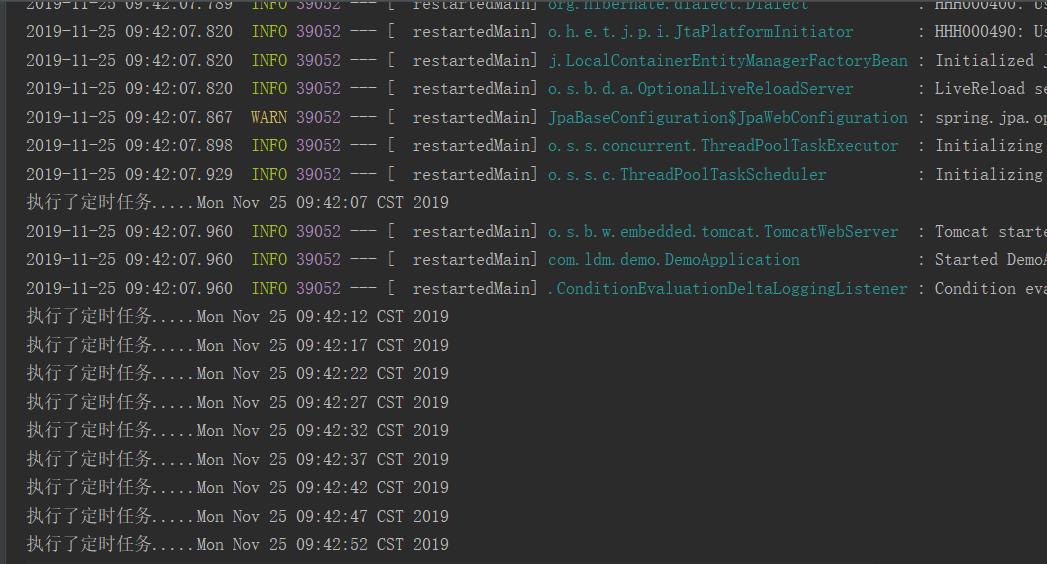
System.out.println("执行了定时任务....." + new Date());
3.运行程序,查看任务执行情况:
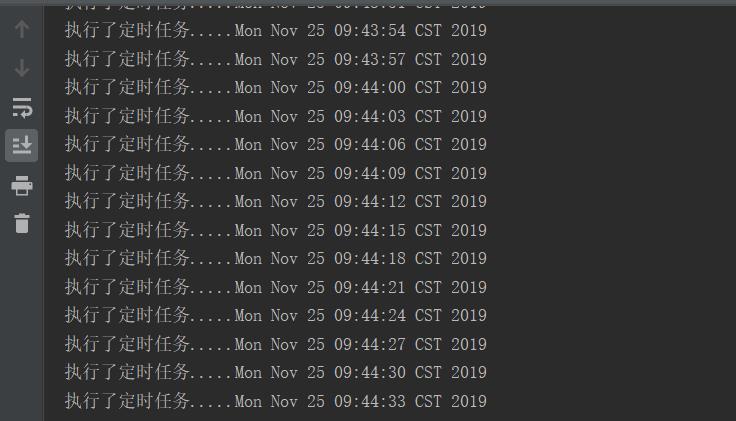
4.使用cron表达式
@Component
public class TimerTaskController
    @Scheduled(cron = "0/3 * * * * ? ")//在线表达式生成方式
    private void excuteTimeCron()
        System.out.println("执行了定时任务....." + new Date());
5查看执行情况:
6.springboot中使用异步任务
6.1.程序入口application中添加允许使用异常任务注解
@SpringBootApplication
@EnableAsync//允许异步任务
public class DemoApplication

    public static void main(String[] args)
        SpringApplication.run(DemoApplication.class, args);
6.2.编写异常任务代码,执行代码块中要添加@Async注解
@Component
public class AsyncTaskRepository
@Async
public void asyncTask01() throws InterruptedException
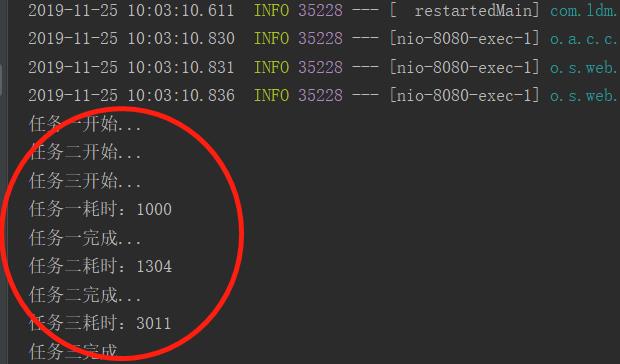
System.out.println("任务一开始...");
long start = System.currentTimeMillis();
Thread.sleep(1000);
System.out.println("任务一耗时:" + (System.currentTimeMillis() - start));
System.out.println("任务一完成...");
@Async
public void asyncTask02() throws InterruptedException
System.out.println("任务二开始...");
long start = System.currentTimeMillis();
Thread.sleep(1300);
System.out.println("任务二耗时:" + (System.currentTimeMillis() - start));
System.out.println("任务二完成...");
@Async
public void asyncTask03() throws InterruptedException
System.out.println("任务三开始...");
long start = System.currentTimeMillis();
Thread.sleep(3000);
System.out.println("任务三耗时:" + (System.currentTimeMillis() - start));
System.out.println("任务三完成...");
6.3.调用 任务方法:
@Component
@RestController
public class TimerTaskController
    @Autowired
    private AsyncTaskRepository asyncTaskRepository;
    @RequestMapping("/testAsyncTask")
    private void testAsyncTask()
        try
            asyncTaskRepository.asyncTask01();
            asyncTaskRepository.asyncTask02();
            asyncTaskRepository.asyncTask03();
         catch (InterruptedException e)
            e.printStackTrace();
6.4.检测结果,在浏览器中输入http://localhost:8080/testAsyncTask并回车,我本地服务端口8080:
以上是关于java后端开发第二篇:springboot定时任务及异步任务简记的主要内容,如果未能解决你的问题,请参考以下文章