Oracle 19c 安装(Linux)
Posted 刘什么同学
tags:
篇首语:本文由小常识网(cha138.com)小编为大家整理,主要介绍了Oracle 19c 安装(Linux)相关的知识,希望对你有一定的参考价值。
操作系统基础配置
本章节所有操作使用root用户
su - root
关闭防火墙和SELINUX
关闭运行中的防火墙
#service iptables stop
关闭操作系统自启动
#chkconfig iptables off
检查关闭情况
# chkconfig  --list iptables
关闭selinux:
编辑/etc/selinux/config 文件
# This file controls the state of SELinux on the system.
# SELINUX= can take one of these three values:
#       enforcing - SELinux security policy is enforced.
#       permissive - SELinux prints warnings instead of enforcing.
#       disabled - SELinux is fully disabled.
SELINUX=disabled
# SELINUXTYPE= type of policy in use. Possible values are:
#       targeted - Only targeted network daemons are protected.
#       strict - Full SELinux protection.
SELINUXTYPE=targeted
RPM包安装
Oracle安装需要以下RPM包:
compat-libcap1-1.10-1 (x86_64)
gcc-4.4.4-13.el6 (x86_64)
gcc-c+±4.4.4-13.el6 (x86_64)
glibc-devel-2.12-1.7.el6 (x86_64)
libaio-devel-0.3.107-10.el6 (x86_64)
libstdc+±devel-4.4.4-13.el6 (x86_64)
sysstat-9.0.4-11.el6 (x86_64)
binutils-2.20.51.0.2-5.11.el6 (x86_64)
compat-libstdc+±33-3.2.3-69.el6 (x86_64)
glibc-2.12-1.7.el6 (x86_64)
libaio-0.3.107-10.el6 (x86_64)
libgcc-4.4.4-13.el6 (x86_64)
libstdc+±4.4.4-13.el6 (x86_64)
make-3.81-19.el6 (x86_64)
compat-libcap1.el6(x86_64)
以上包具体小版本视情况而定,通过rpm –qa| grep 命令查找是否安装了对应的包,例:
[root@hca1 ~]# rpm -qa | grep gcc
安装包
使用命令
yum install binutils compat-libstdc++-33 compat-libstdc++-296 elfutils-libelf elfutils-libelf-devel gcc gcc-c++ glibc glibc-common glibc-devel glibc-headers libaio libaio-devel libgcc libstdc++ libstdc++-devel make openmotif sysstat unixODBC unixODBC-devel compat-libcap1 -y
或可以使用 rpm –ivh *.rpm (*表示rpm包名称)
安装用户创建
创建oracle用户
groupadd oinstall
groupadd  dba
useradd -g oinstall -G dba oracle

passwd oracle   ----修改oracle用户密码
oracle用户环境变量设置
su - oracle
oracle用户:
vi ~/.bash_profile
export ORACLE_BASE=/u01/app/oracle
export ORACLE_HOME=$ORACLE_BASE/product/19.3.0/db_1
export ORACLE_SID=XXX(根据具体需要修改)
export ORACLE_HOSTNAME=XXX
export PATH=$ORACLE_HOME/bin:$PATH
切换回root用户
exit
mkdir -p /u01/app/oracle/product/19.3.0/db_1(由/开头的文件夹都在根目录下,所以需要exit到root用户创建)
chown -R oracle:oinstall /oracle
host修改
注意:如果主机名是localhost(建议不要使用这个默认值),则不需要修改此文件
vi /etc/hosts
主机ip 主机名 (增加这行)
RDBMS软件
上传介质
将oracle的压缩包上传到/u01/app/oracle/product/19.3.0/db_1目录下
解压介质
用oracle用户解压提前上传到目录下的压缩包解压
使用 unzip 命令
解压后生成database目录
开始安装
oracle用户执行安装:
打开Xmanager-passice
到解压开后的database目录执行:
export DISPLAY=xxx.xxx.xxx.xxx:0.0(xxx.xxx.xxx.xxx为Windows主机的IP 0.0为Xmanager-passice的端口)
./runInstaller
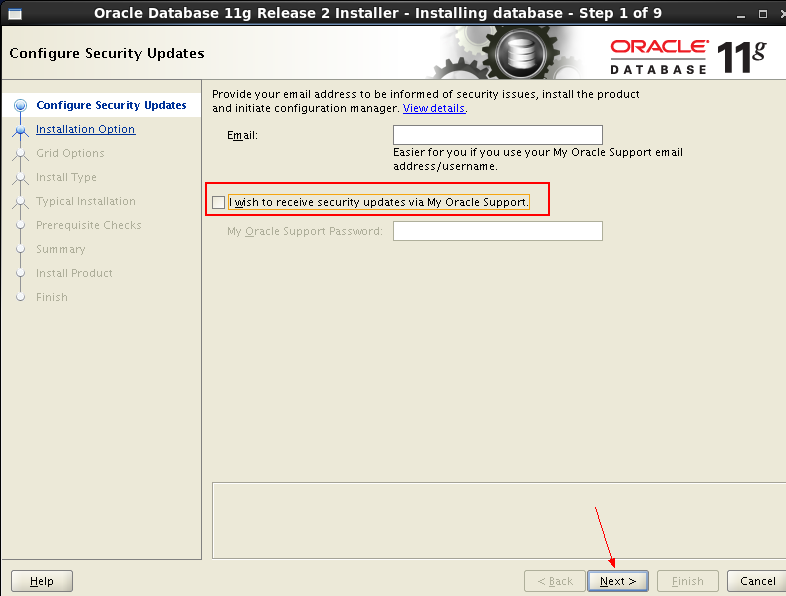
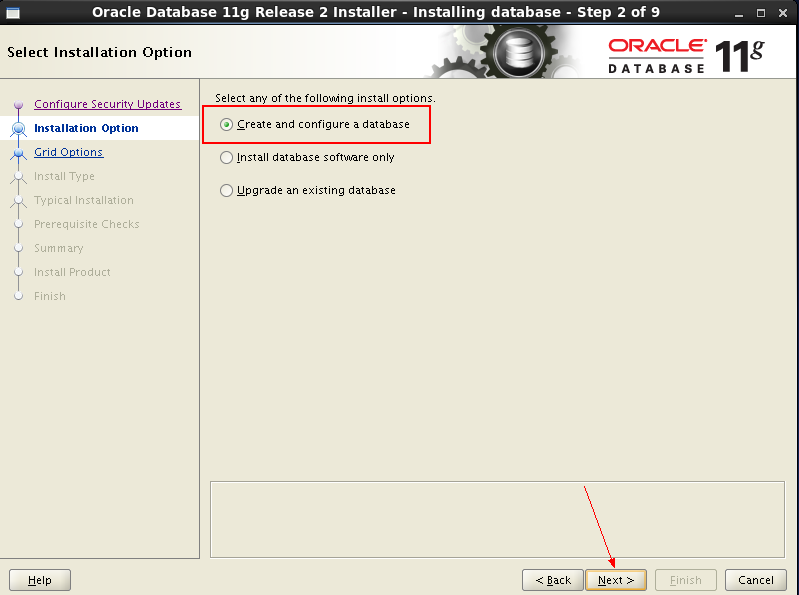
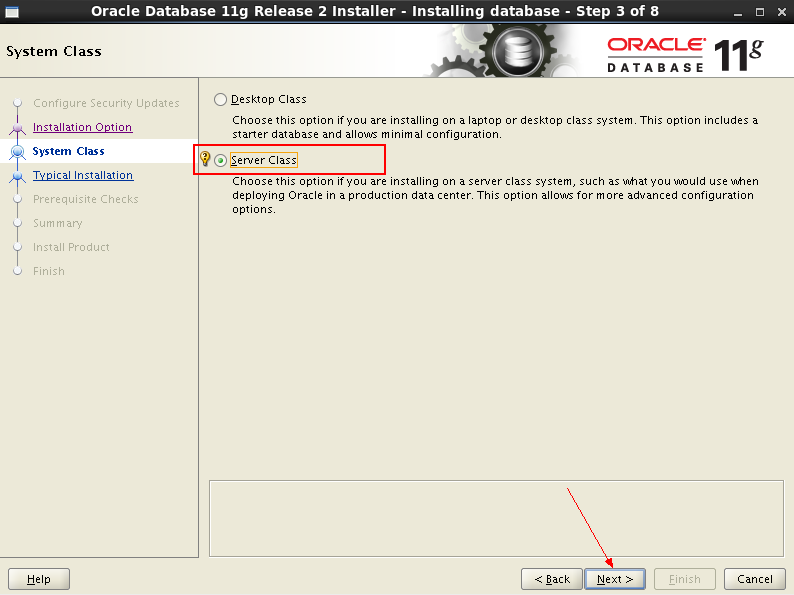
安装截图如下:
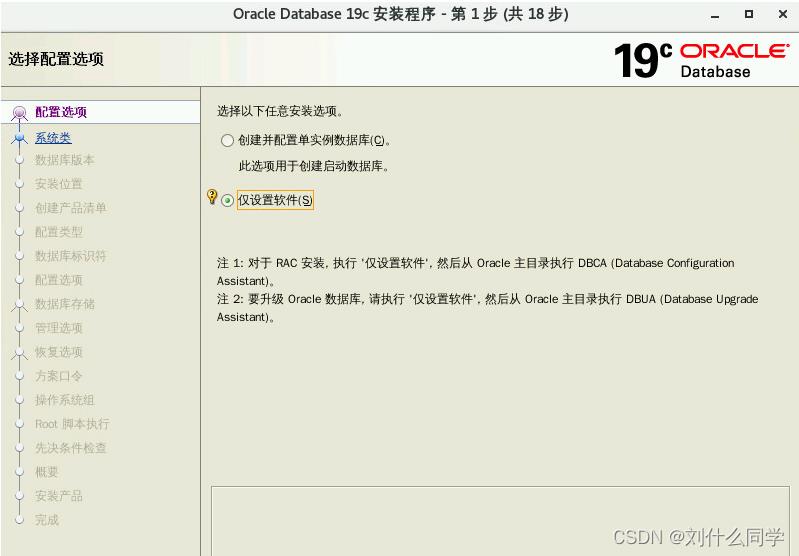
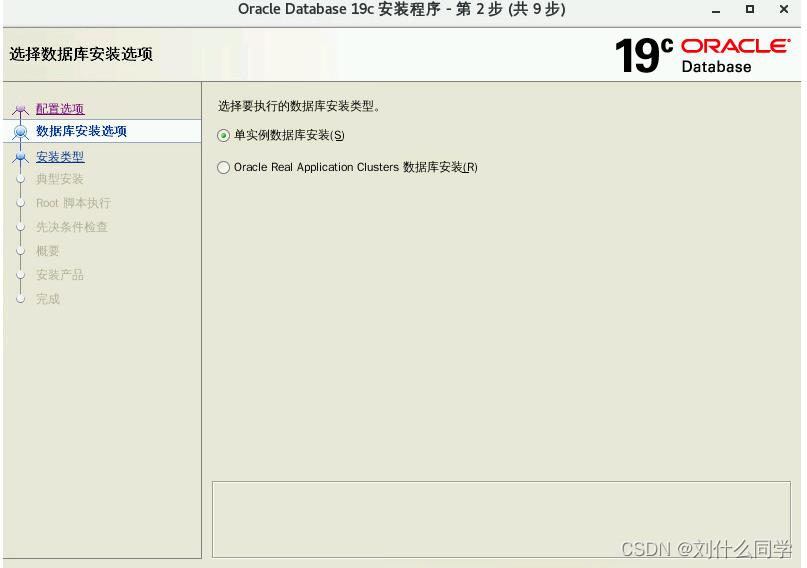
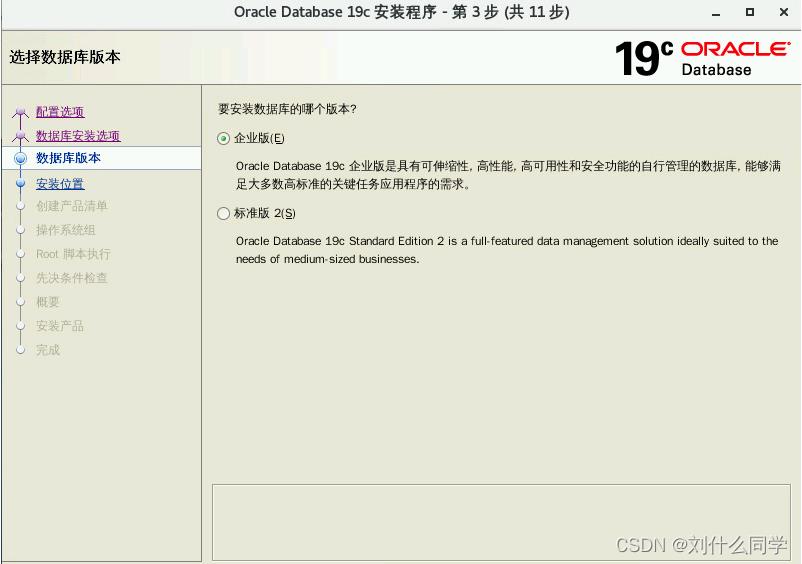
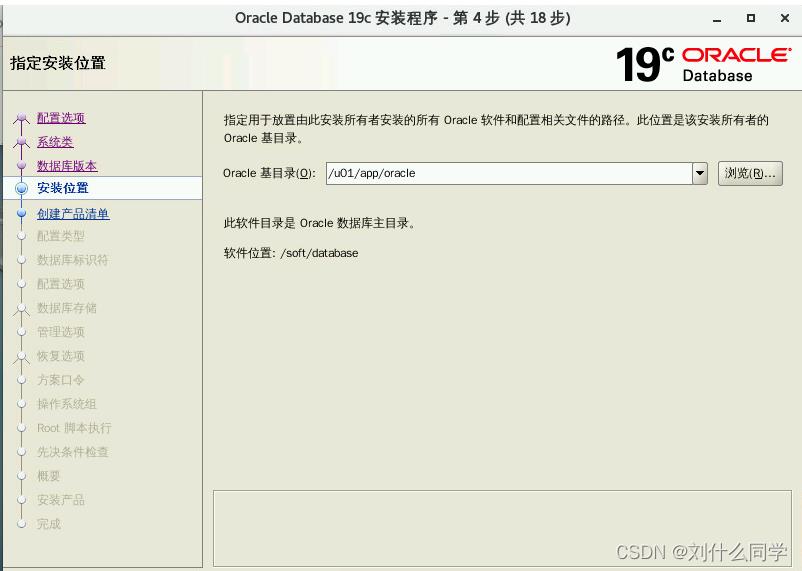
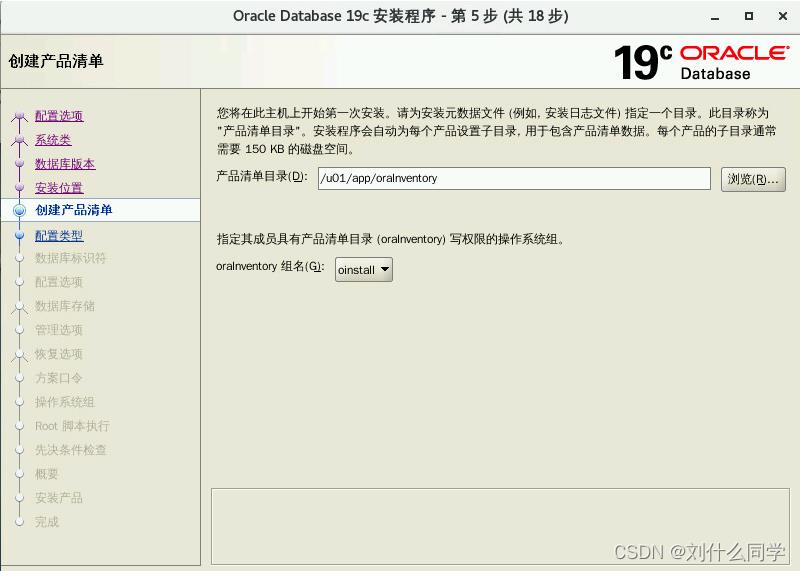
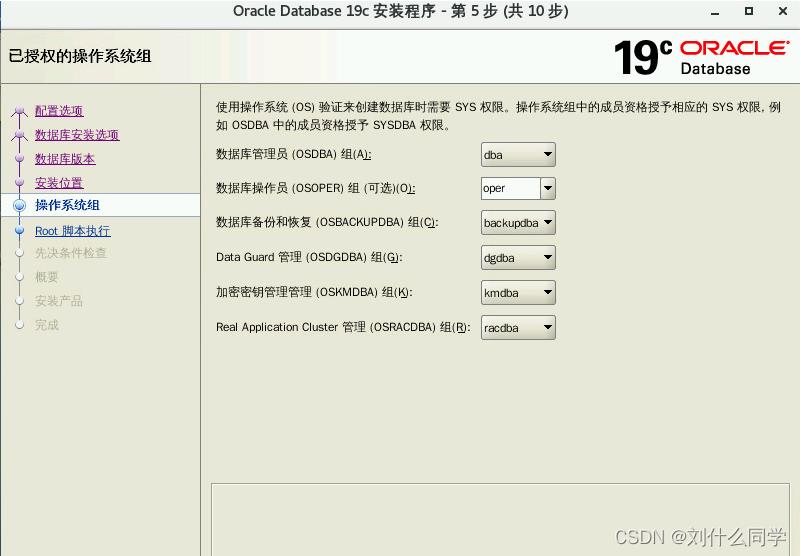
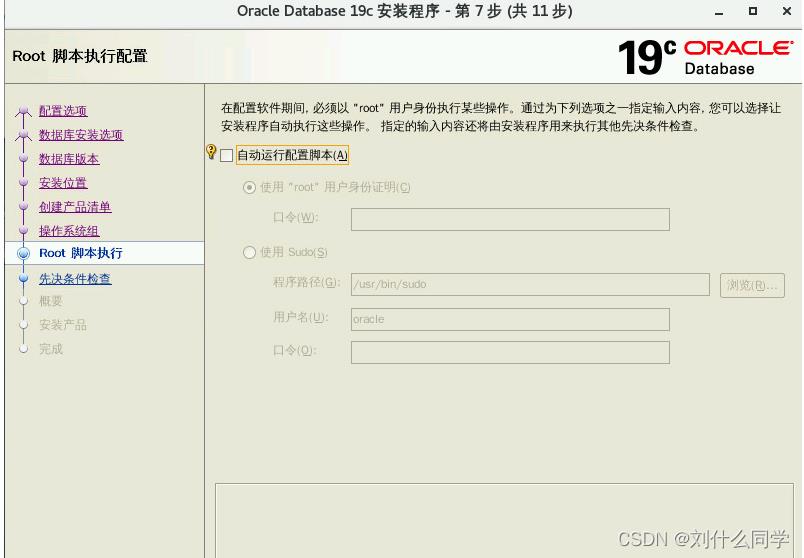

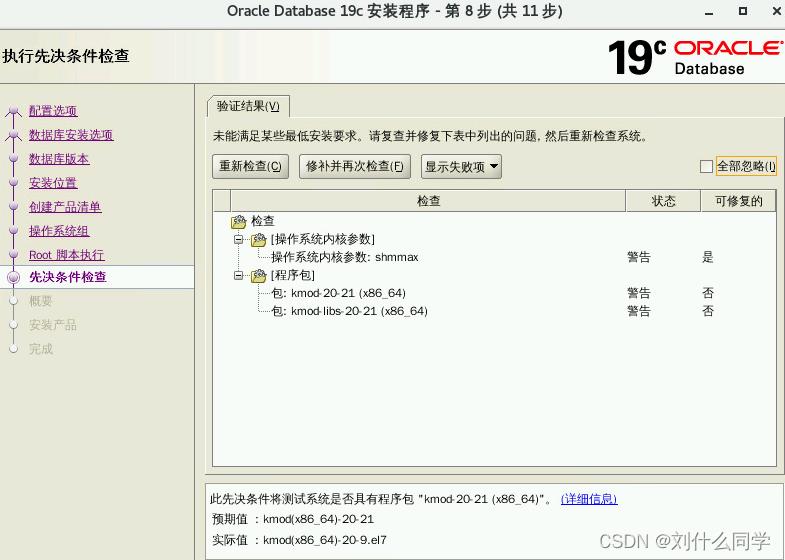
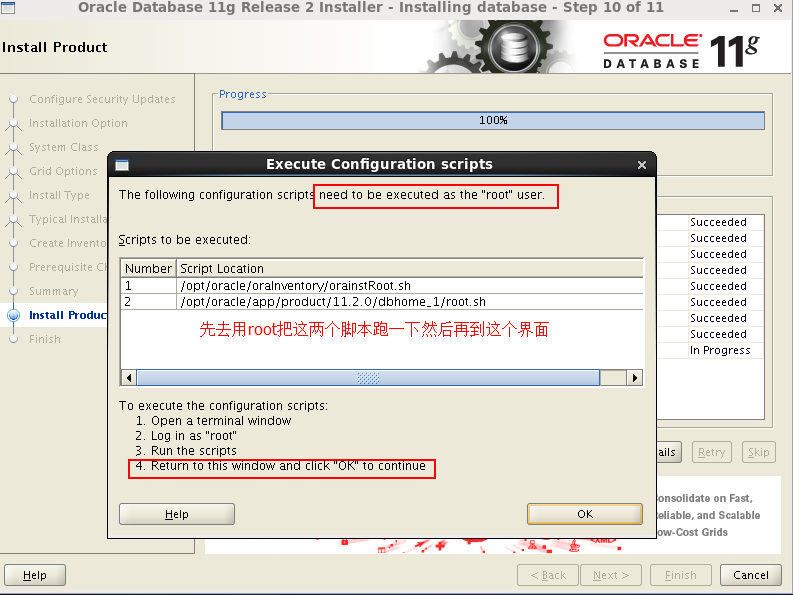
注意这一块,一般就是缺少RPM包,由于我们之前已经所有安装了,故这一步一般不会报错;
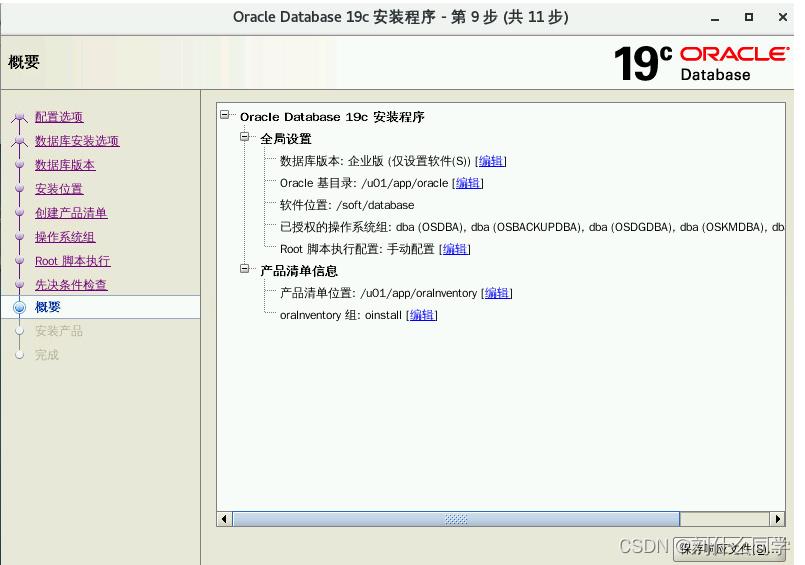
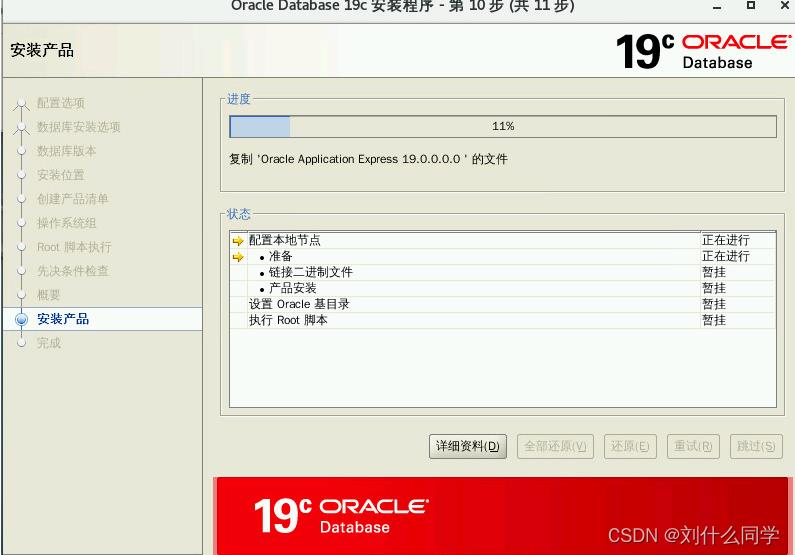
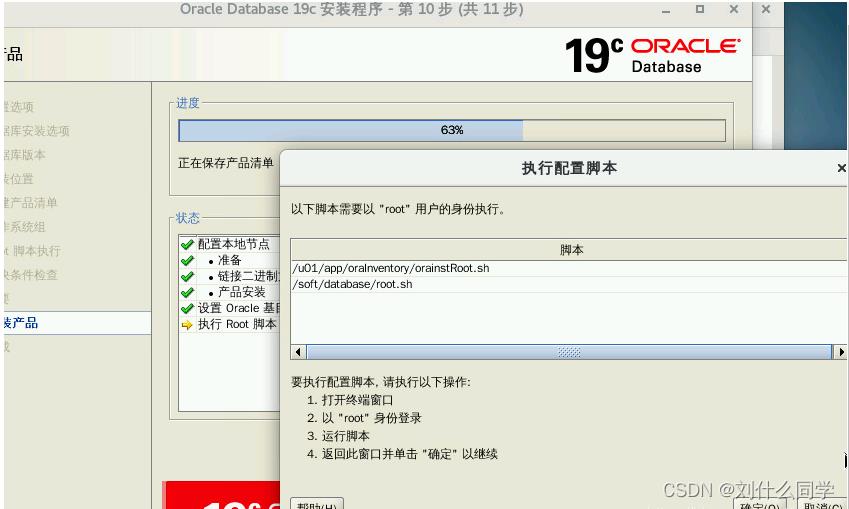
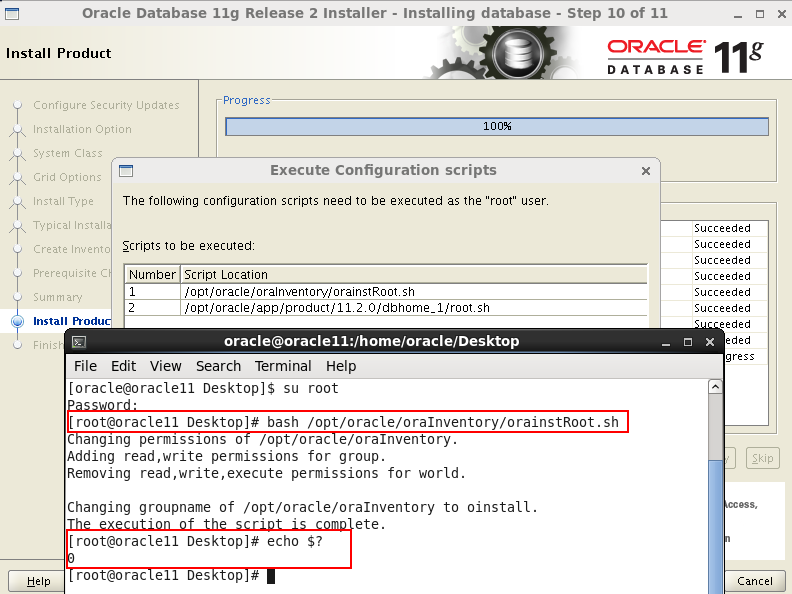
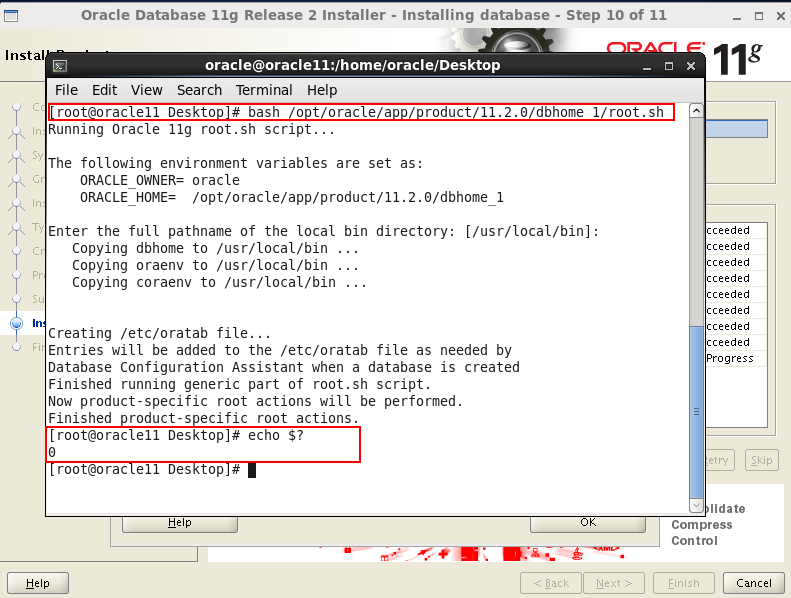
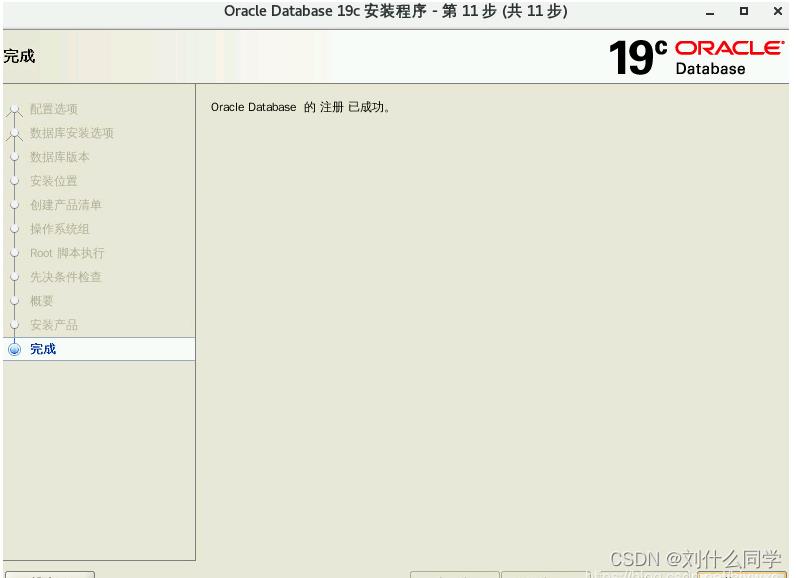
到xshell中用root用户执行即可
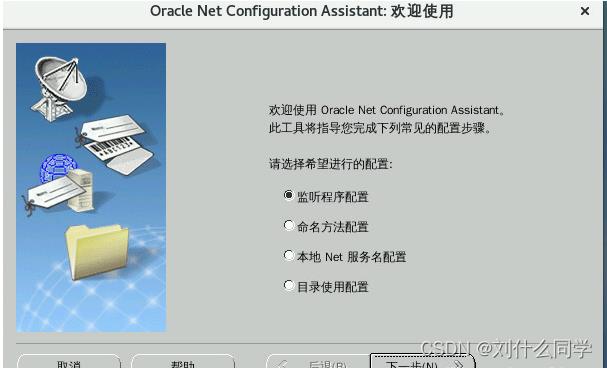
配置监听
同样用xstart连接后oracle用户执行
$netca
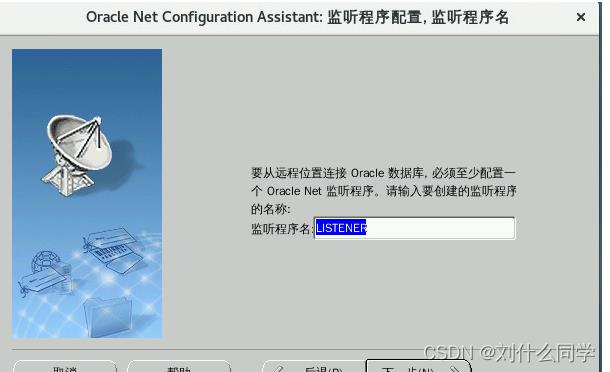
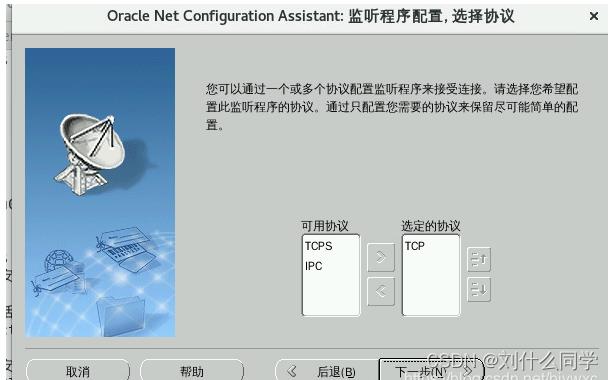
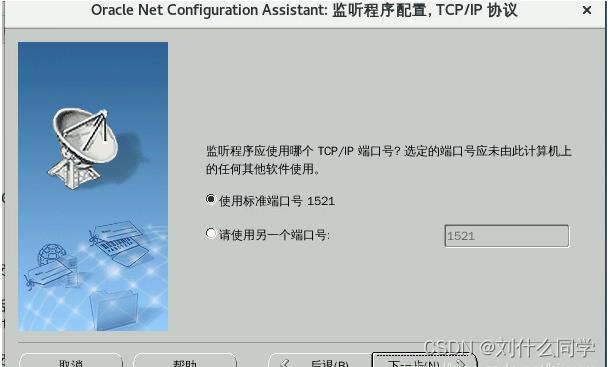

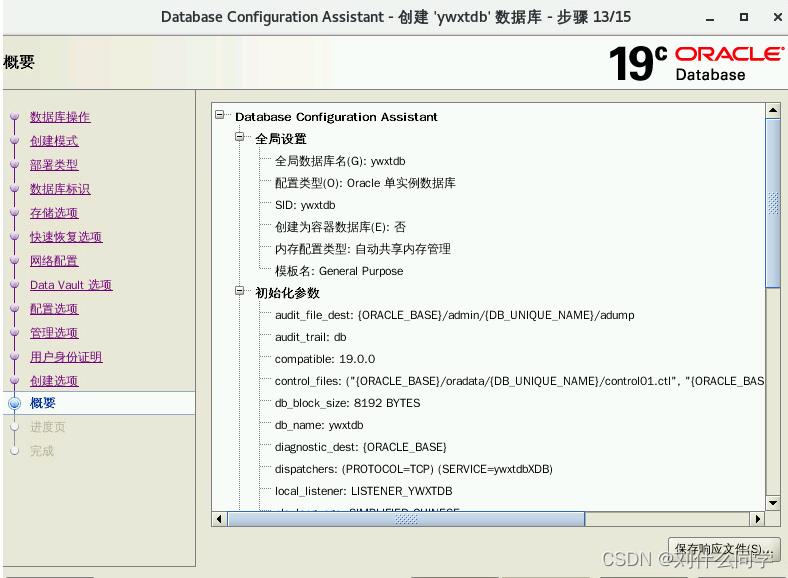
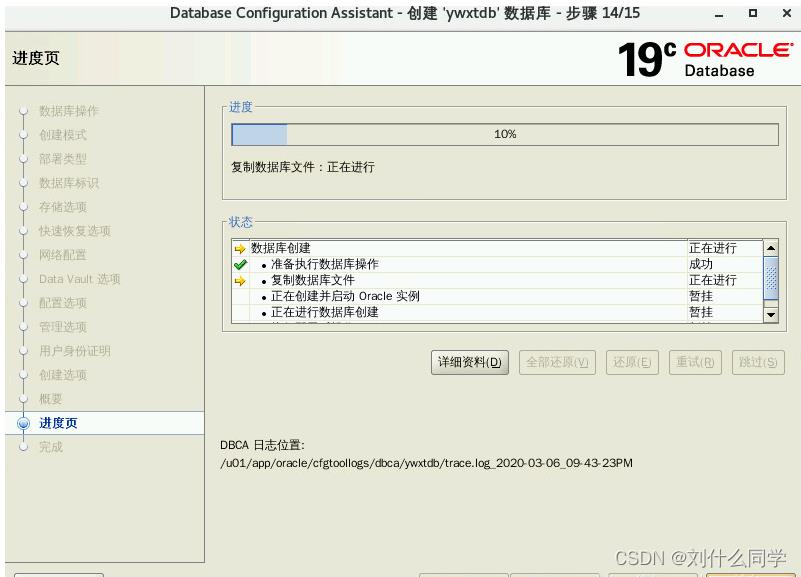
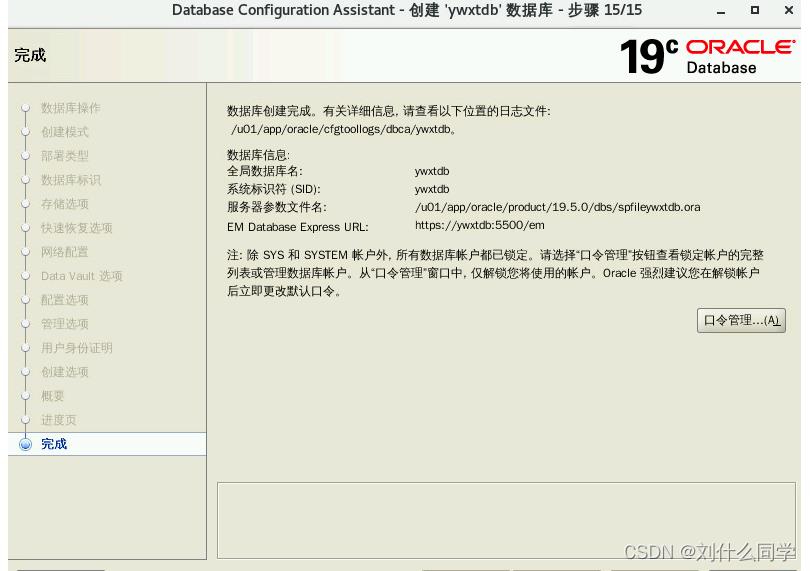
创建数据库
同样用xstart连接后oracle用户执行
$ dbca
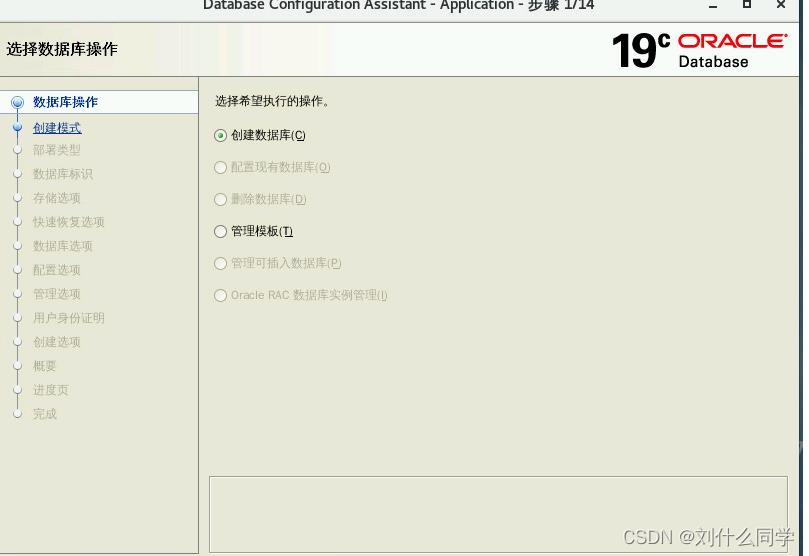
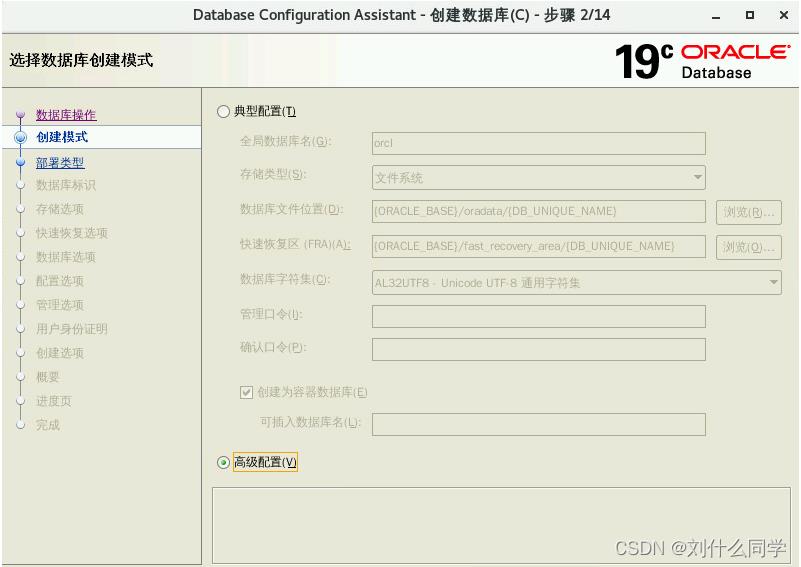
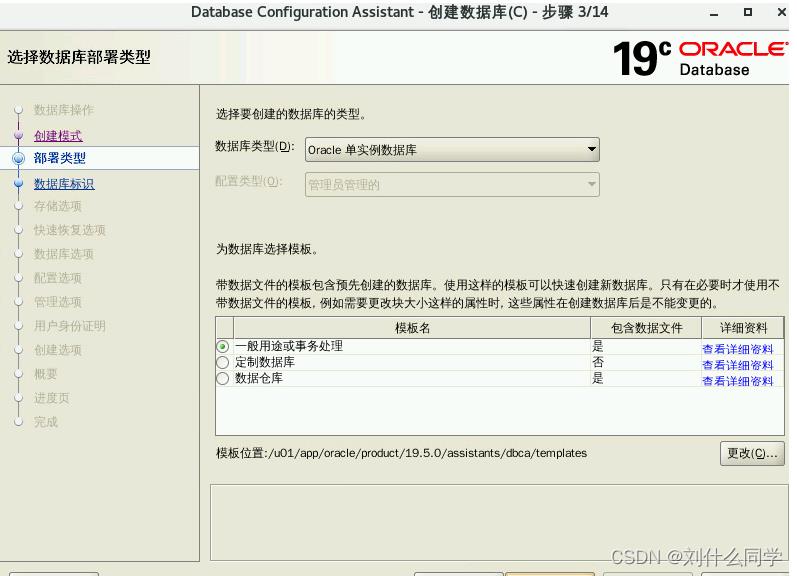
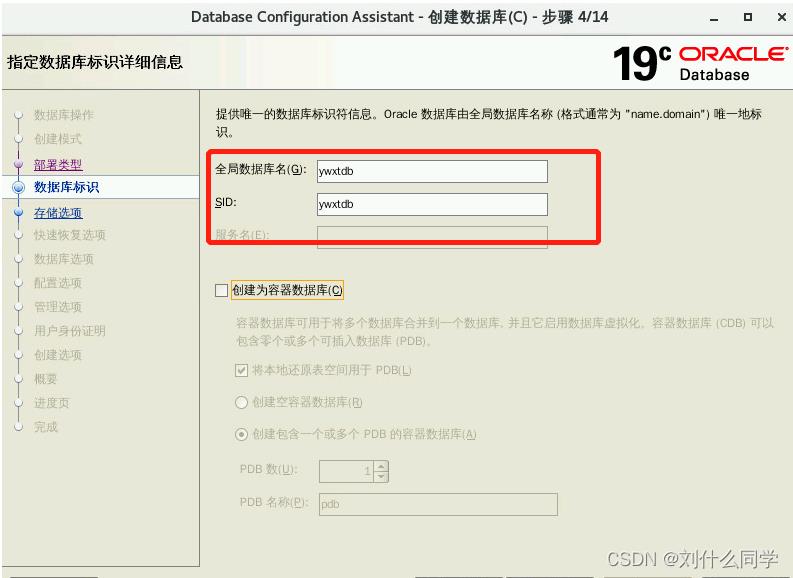
这里和之前配置的对应即可
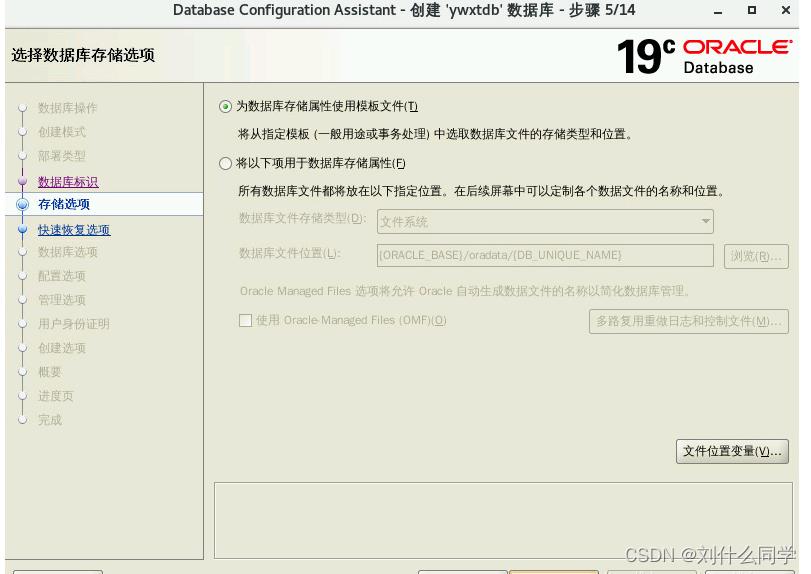
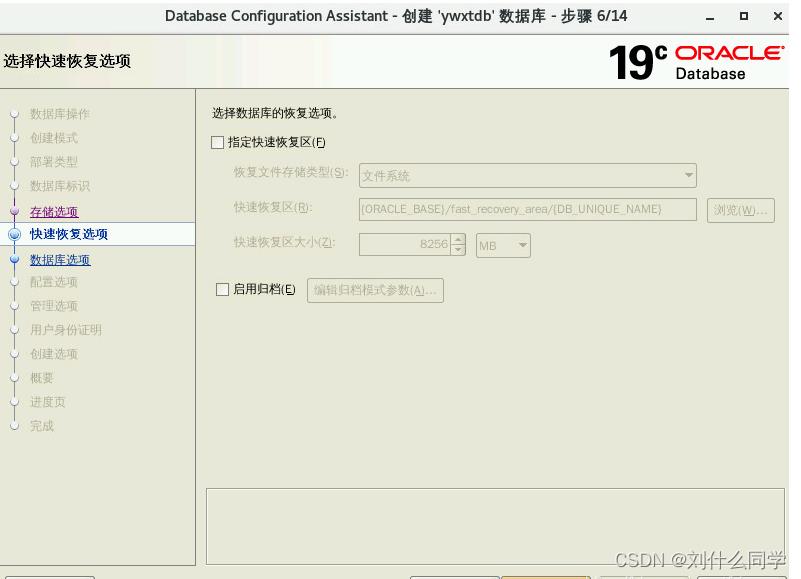
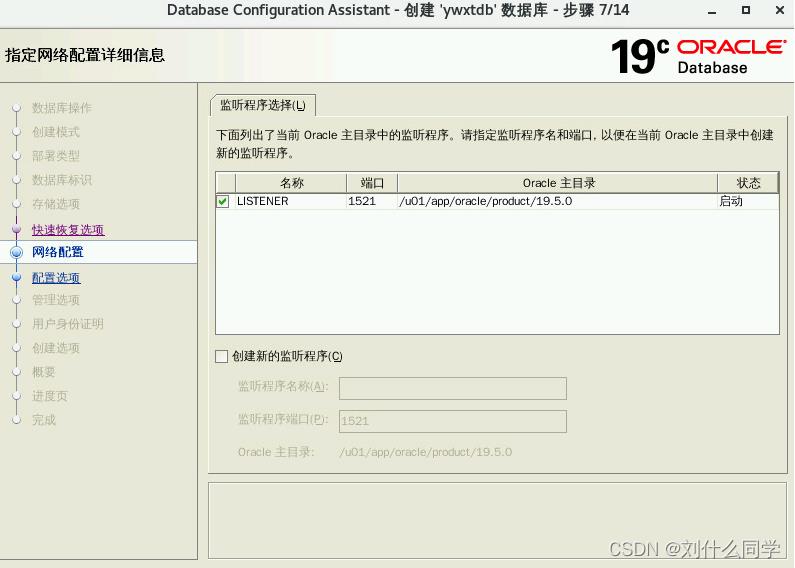
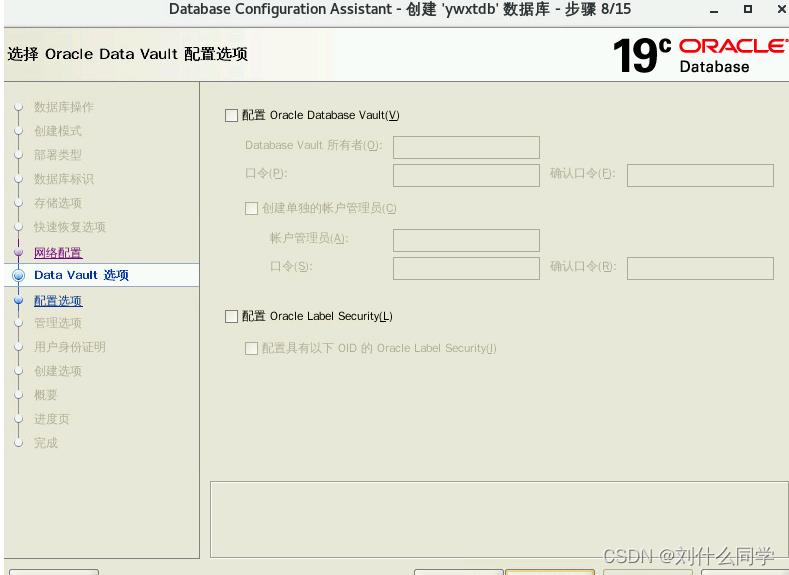
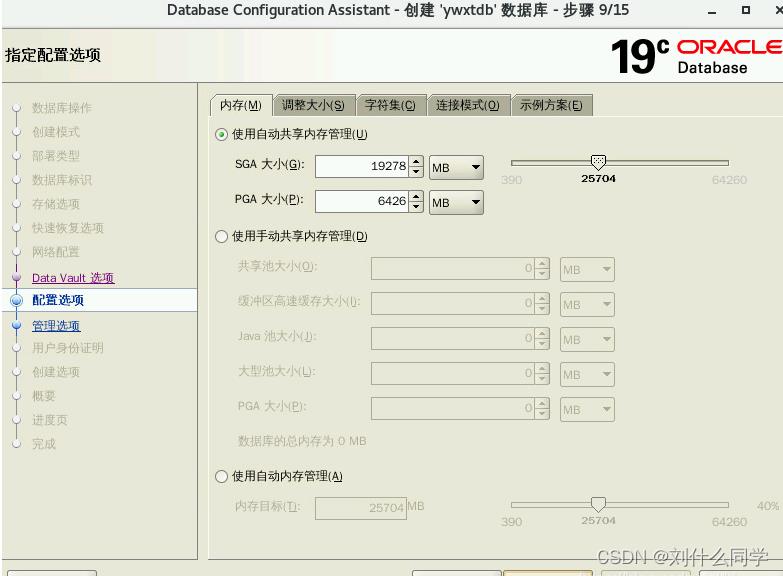
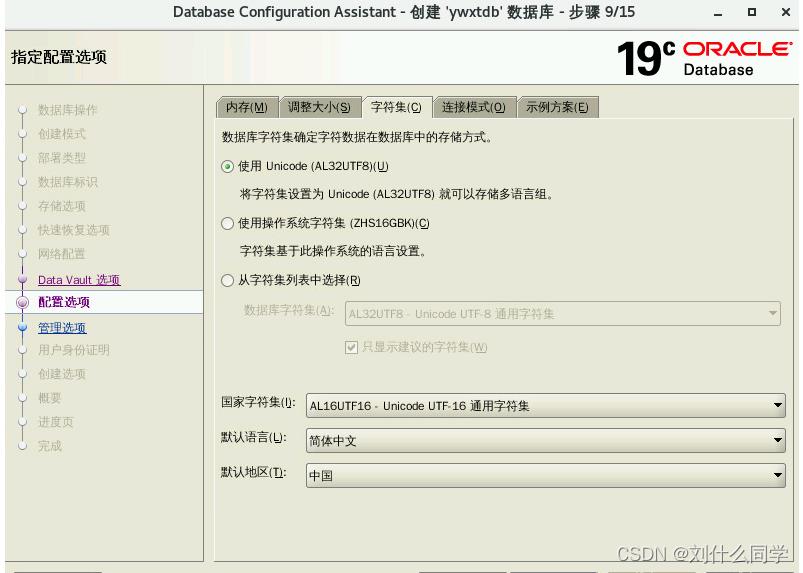
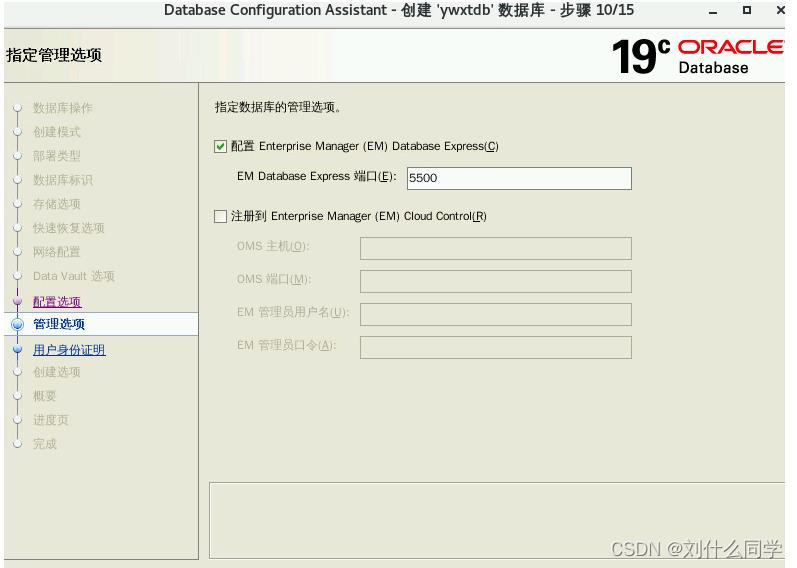
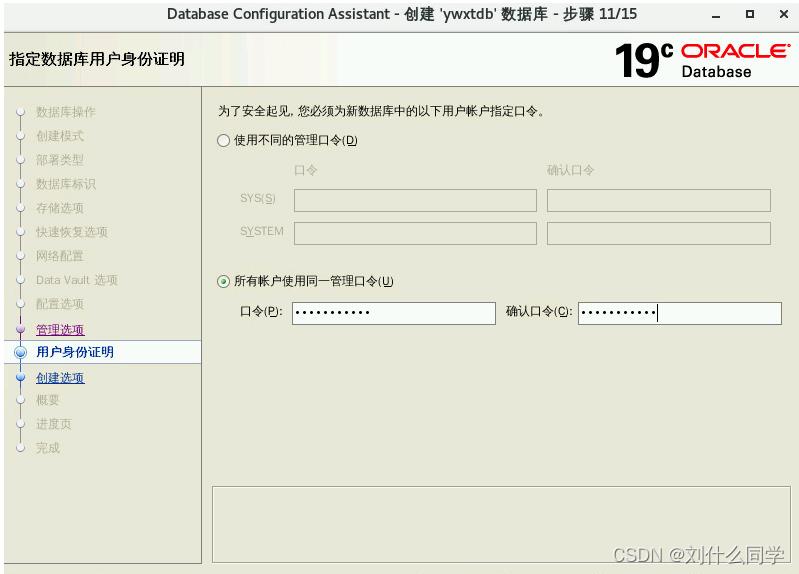
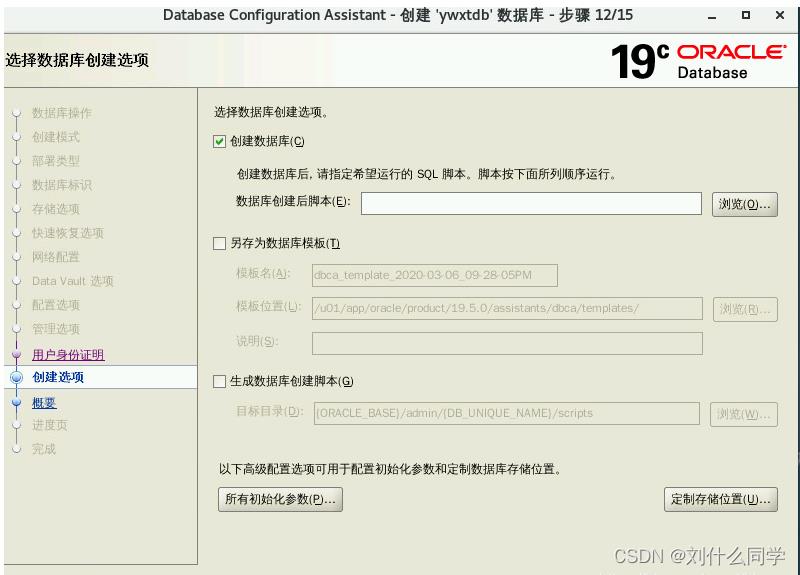
检查
[root@host2 ~]# su - oracle
Last login: Mon Oct 31 15:50:20 CST 2022 on pts/3
[oracle@host2 ~]$ sqlplus /nolog

SQL*Plus: Release 19.0.0.0.0 - Production on Mon Oct 31 16:01:11 2022
Version 19.3.0.0.0

Copyright (c) 1982, 2019, Oracle.  All rights reserved.

SQL> select
  2  *
  3  from
  4  ;
SP2-0640: Not connected
SQL>
因为在安装的时候没有截图,所有这里截图参考了https://blog.csdn.net/bjywxc/article/details/104696121的图片;
前前后后安装了5-6次,无数重装,终于最后平稳的安装起来了。
CentOS安装Oracle11g Linux 搭建Pro*C/C++开发环境
【本文谢绝转载原文来自http://990487026.blog.51cto.com】
系统属性:
CentOS 6.8_X64,基于桌面,附加开发工具包安装.
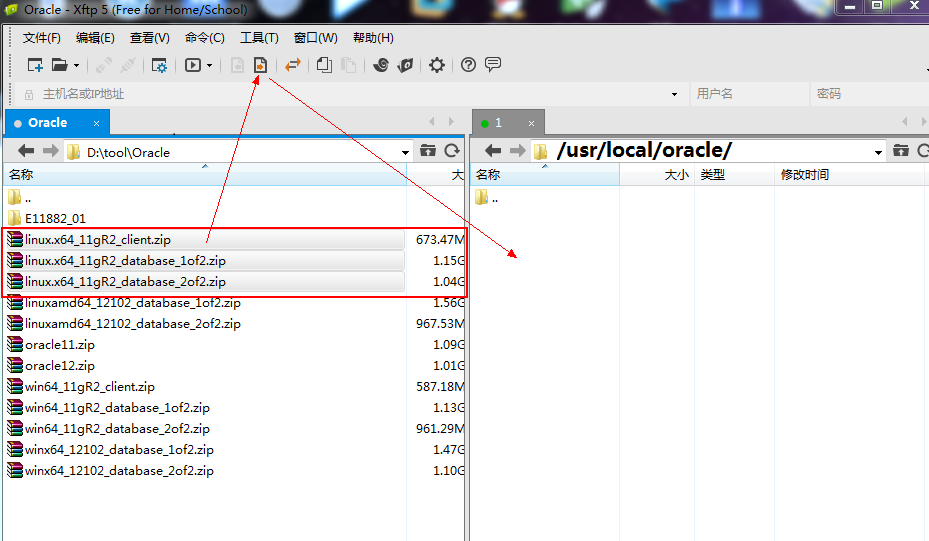
上传Oracle11g安装文件到:/usr/local/oracle/
[[email protected] home]# mkdir -pv /usr/local/oracle
mkdir: created directory `/usr/local/oracle‘
[[email protected] oracle]# ll /usr/local/oracle/
total 2985244
-rw-r--r--. 1 root root 1239269270 Aug 28 20:23 linux.x64_11gR2_database_1of2.zip
-rw-r--r--. 1 root root 1111416131 Aug 28 20:24 linux.x64_11gR2_database_2of2.zip
[[email protected] oracle]#
准备oracle的安装目标目录[重要]
[[email protected] oracle]# mkdir –p /opt/oracle
创建oracle相关用户和用户组
[[email protected] oracle]# groupadd dba
[[email protected] oracle]# groupadd oinstall
[[email protected] oracle]# useradd -g oinstall -G dba oracle
[[email protected] oracle]# passwd oracle
Changing password for user oracle.
New password: oracle
Retype new password:oracle
passwd: all authentication tokens updated successfully.
[[email protected] oracle]# chown -R oracle:oinstall /opt/oracle
[[email protected] oracle]# ll /opt/oracle -d
drwxr-xr-x. 2 oracle oinstall 4096 Aug 28 20:27 /opt/oracle
检查安装ORACLE依赖的RPM软件包
[[email protected] oracle]# mkdir /mnt/cdrom
[[email protected] oracle]# mount /dev/cdrom  /mnt/cdrom/
[[email protected] Packages]# cd /mnt/cdrom/Packages
[[email protected] Packages]# rpm -ivh kernel-headers-2.6.18-164.el5.i386.rpm
[[email protected] Packages]# rpm -ivh glibc-headers-2.5-42.i386.rpm
[[email protected] Packages]# rpm -ivh glibc-devel-2.5-42.i386.rpm
[[email protected] Packages]# rpm -ivh libgomp-4.4.0-6.el5.i386.rpm|
[[email protected] Packages]# rpm -ivh sysstat-7.0.2-3.el5.i386.rpm
[[email protected] Packages]# rpm -ivh libaio-devel-0.3.106-3.2.i386.rpm
[[email protected] Packages]# rpm -ivh libstdc++-devel-4.1.2-46.el5.i386.rpm
[[email protected] Packages]# rpm -ivh unixODBC-2.2.11-7.1.i386.rpm
[[email protected] Packages]# rpm -ivh unixODBC-devel-2.2.11-7.1.i386.rpm
[[email protected] Packages]# rpm -ivh gcc-4.1.2-46.el5.i386.rpm
[[email protected] Packages]# rpm -ivh gcc-c++-4.1.2-46.el5.i386.rpm
[[email protected] Packages]# rpm -ivh elfutils-libelf-devel-0.137-3.el5.i386.rpm
[[email protected] Packages]# rpm -ivh elfutils-libelf-devel-static-0.137-3.el5.i386.rpm|
如果找不到elfutils-libelf-devel-static, yum install elfutils-libelf-devel-static
如果找不到libgomp ,yum install libgomp
设置linux内核参数
[[email protected] Packages]# vim /etc/sysctl.conf 在最后面添加
#kernel.shmall = 4294967296
#kernel.shmall = 2097152
kernel.shmmax = 2147483648
kernel.shmmni = 4096
kernel.sem = 250 32000 100 128
net.core.rmem_default = 4194304
net.core.rmem_max = 4194304
net.core.wmem_default = 262144
fs.file-max = 6815744
net.ipv4.ip_local_port_range = 9000 65500
net.core.wmem_max = 1048576
fs.aio-max-nr = 1048576

[[email protected] Packages]# vim /etc/security/limits.conf 在最后面添加
oracle soft nproc 2047
oracle hard nproc 16384
oracle soft nofile 1024
oracle hard nofile 65536

[[email protected] Packages]# vim /etc/profile在最后面添加
if [ $USER = "oracle" ]; then
    if [ $SHELL = "/bin/bash" ]; then
        ulimit -p 16384
        ulimit -n 65536
    else
        ulimit -u 16384 -n 65536
    fi
fi
重新启动系统,开始安装过程
[[email protected] ~]# reboot
[[email protected] ~]# chown -R oracle: /usr/local/oracle/
[[email protected] ~]# su oracle
[[email protected] oracle]$ cd /usr/local/oracle/
[[email protected] oracle]$ unzip linux.x64_11gR2_database_1of2.zip
[[email protected] oracle]$ unzip linux.x64_11gR2_database_2of2.zip
[[email protected] oracle]$ cd database/
[[email protected] database]$ ./runInstaller
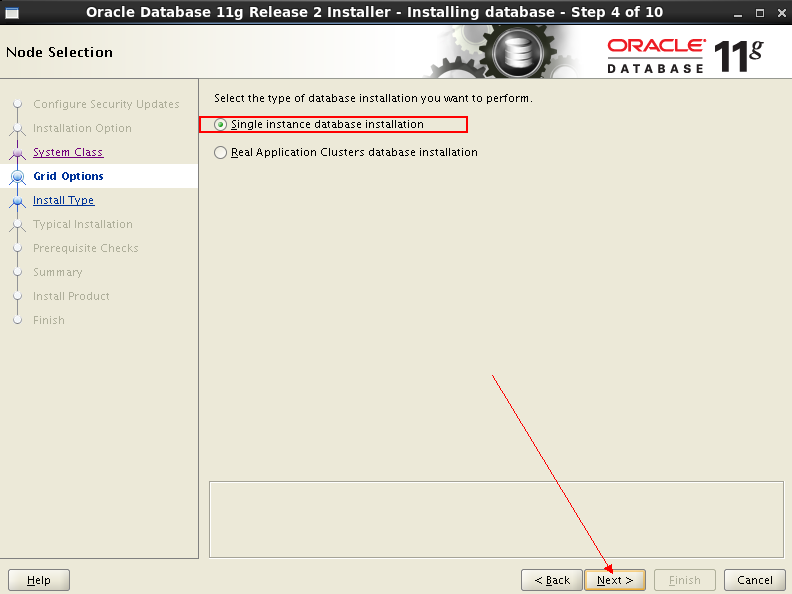
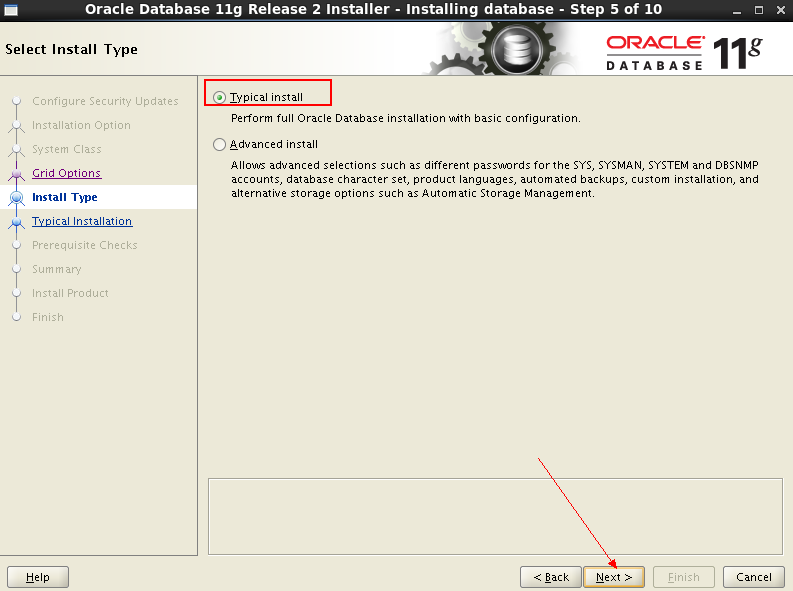
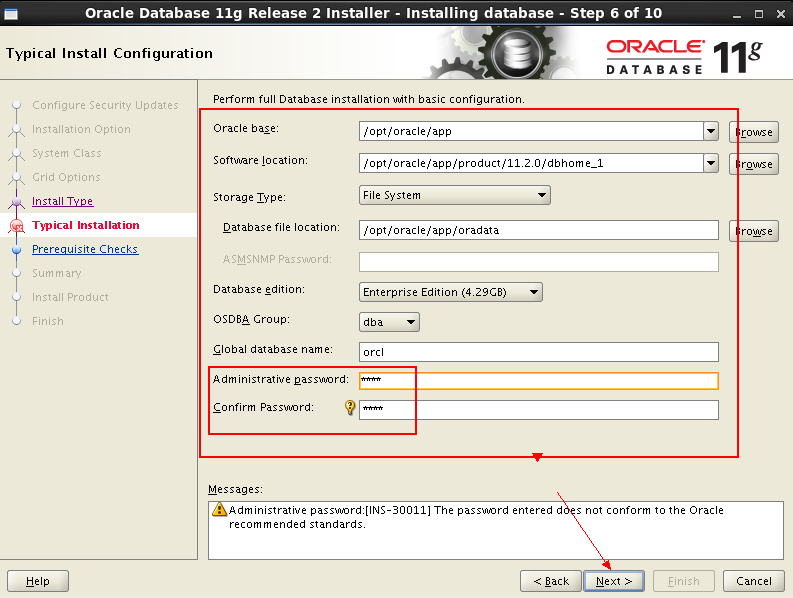
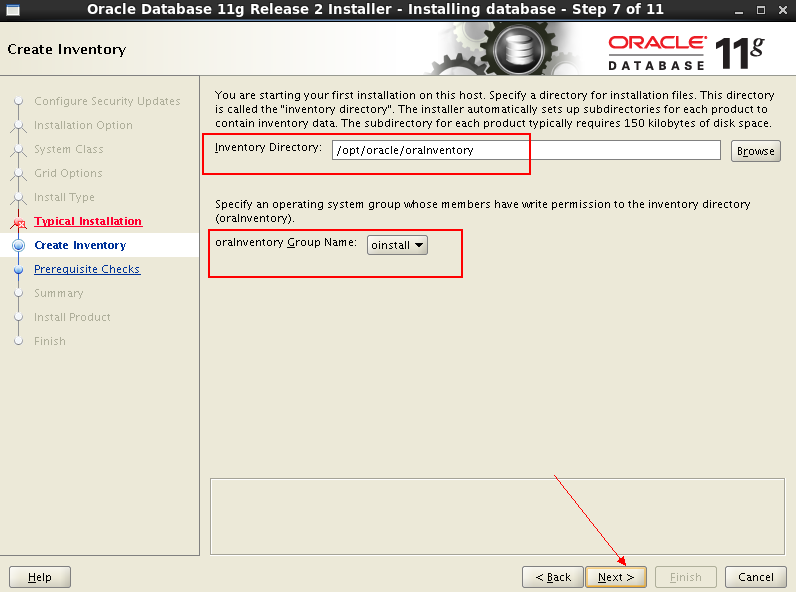
开始加载图形安装程序.......................
高清大图:
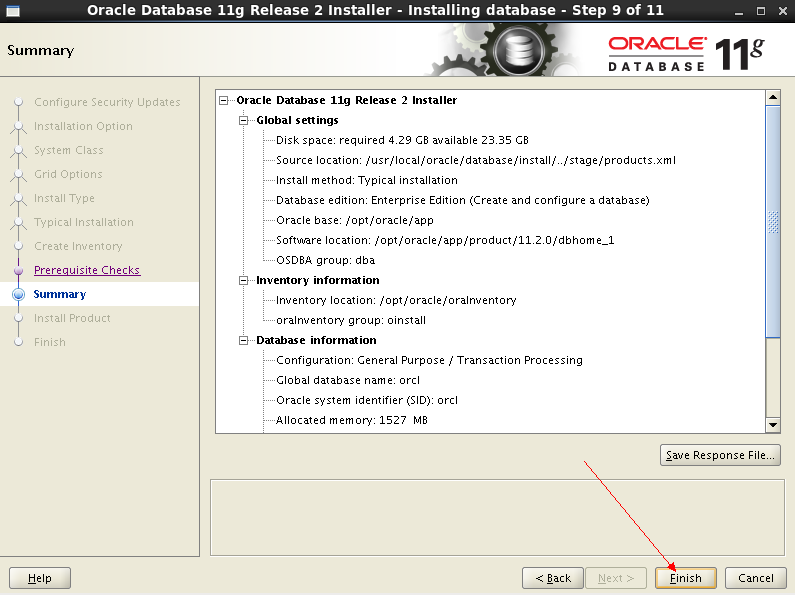
在这里,会自动找到我为oracle分配的安装路径
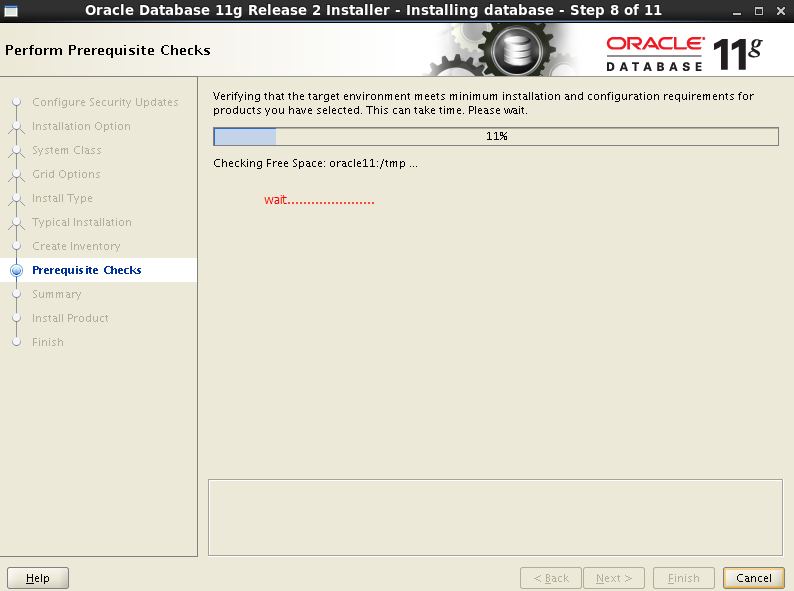
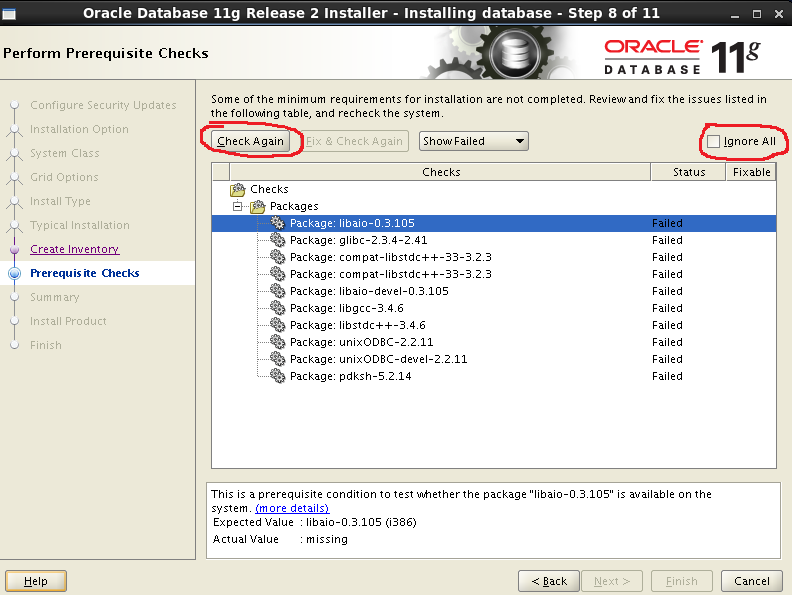
提示找不到依赖库,其实我们都全部安装了,
# rpm -q 包名,是可以查出来我已经安装了的
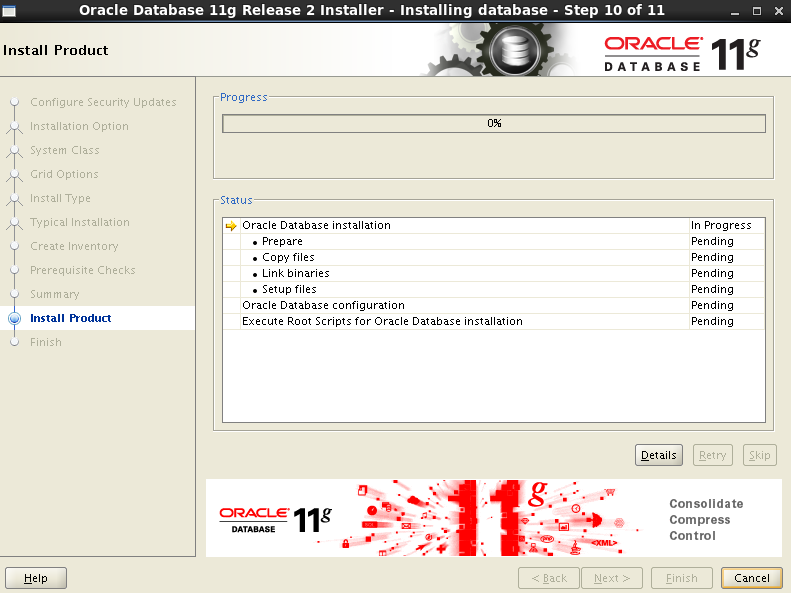
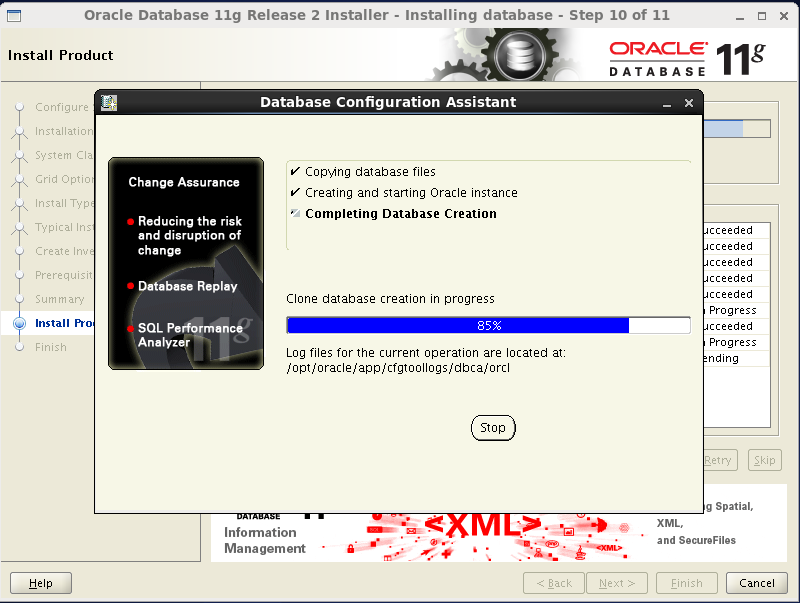
漫长的等待...................
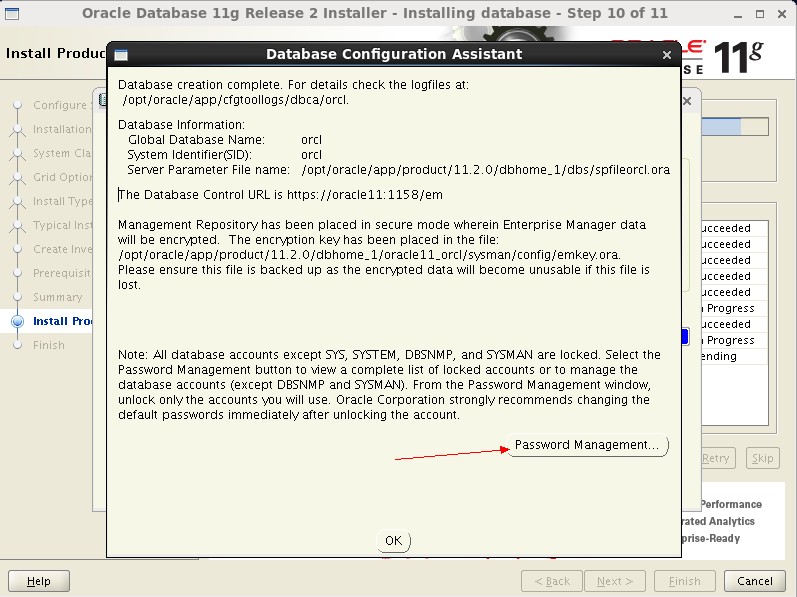
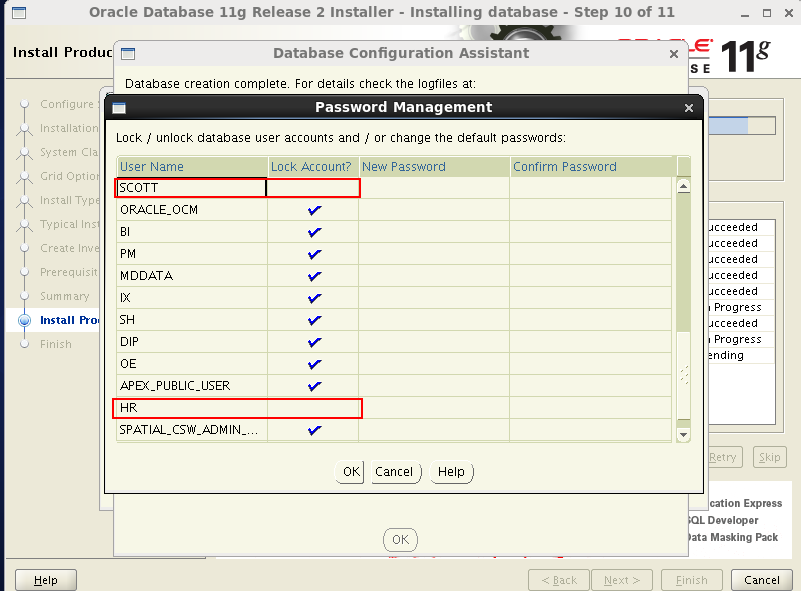
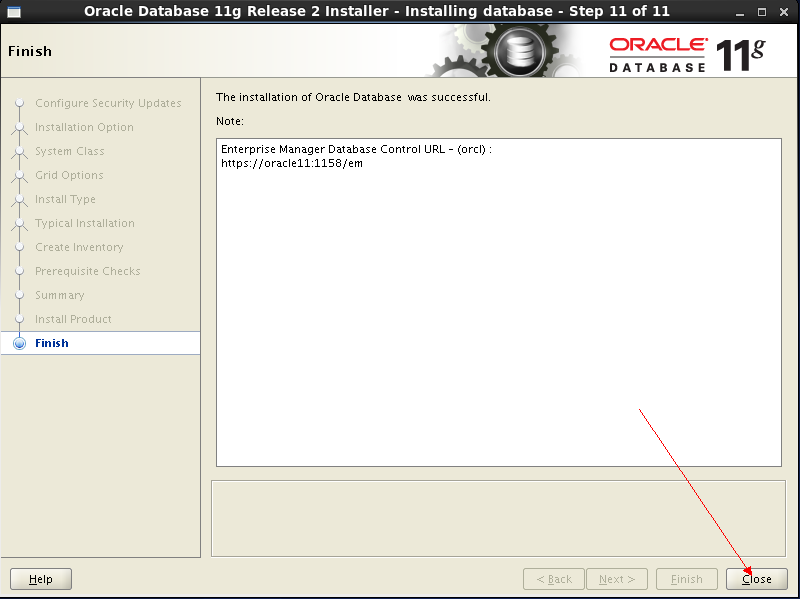
安装完成:
oracle安装的位置:/opt/oracle/
oracle11g的位置:/opt/oracle/app/product/11.2.0/dbhome_1/
设置ORACLE环境变量
[[email protected] ~]$ cat /home/oracle/.bashrc
添加:
export LD_LIBRARY_PATH=$LD_LIBRARY_PATH:/opt/oracle/app/product/11.2.0/dbhome_1/lib/
PATH=$PATH:/opt/oracle/app/product/11.2.0/dbhome_1/bin/
export ORACLE_HOME=/opt/oracle/app/product/11.2.0/dbhome_1/
export ORACLE_SID=orcl
export ORACLE_BASE=/home/oracle/oracle
查看pro*C/C++编译器情况:
[[email protected] ~]$ proc

Pro*C/C++: Release 11.2.0.1.0 - Production on Sun Aug 28 23:31:48 2016

Copyright (c) 1982, 2009, Oracle and/or its affiliates.  All rights reserved.

System default option values taken from: /opt/oracle/app/product/11.2.0/dbhome_1/precomp/admin/pcscfg.cfg

Option Name    Current Value  Description
-------------------------------------------------------------------------------
auto_connect   no             Allow automatic connection to ops$ account
char_map       charz          Mapping of character arrays and strings
close_on_commitno             Close all cursors on COMMIT
cmax           100            CMAX Value for connection pool
cmin           2              CMIN Value for connection pool
cincr          1              CINCR Value for connection pool
ctimeout       0              CTIMEOUT Value for connection pool
cnowait        0              CNOWAIT Value for connection pool
common_parser  no             Parse using Common SQL Front End
code           kr_c           The type of code to be generated
comp_charset   multi_byte     The character set type the C compiler supports
config         default        Override system configuration file with another
cpool          no             Support connection pooling
cpp_suffix     *none*         Override the default C++ filename suffix
db2_array      no             Support DB2 array insert/select syntax
dbms           native         v6/v7/v8 compatibility mode
def_sqlcode    no             Generate ‘#define SQLCODE sqlca.sqlcode‘ macro
define         __x86_64__     Define a preprocessor symbol
               *none*
duration       transaction    Set pin duration for objects in the cache
dynamic        oracle         Specify Oracle or ANSI Dynamic SQL Semantics
errors         yes            Whether error messages are sent to the terminal
errtype        *none*         Name of the list file for intype file errors
events         no             Support publish-subscribe event notifications
fips           none           FIPS flagging of ANSI noncompliant usage
header         *none*         Specify file extension for Precompiled Headers
hold_cursor    no             Control holding of cursors in the cursor cache
implicit_svpt  no             Implicit savepoint prior to buffered insert
iname          *none*         The name of the input file
include        *none*         Directory paths for included files
intype         *none*         The name of the input file for type information
lines          no             Add #line directives to the generated code
lname          *none*         Override default list file name
ltype          short          The amount of data generated in the list file
maxliteral     1024           Maximum length of a generated string literal
maxopencursors 10             Maximum number of cached open cursors
max_row_insert 0              Maximum number of rows to buffer on insert
mode           oracle         Code conformance to Oracle or ANSI rules
native_types   no             Support for native float/double
nls_char       *none*         Specify National Language character variables
nls_local      no             Control how NLS character semantics are done
objects        yes            Support object types
oname          *none*         The name of the output file
oraca          no             Control the use of the ORACA
outline        no             Category in which Outlines are created
                              [yes/no/<category name>]
outlnprefix    *none*         Outline name prefix
pagelen        80             The page length of the list file
parse          full           Control which non-SQL code is parsed
prefetch       1              Number of rows pre-fetched at cursor OPEN time
release_cursor no             Control release of cursors from cursor cache
runoutline     no             If yes, create Outlines in the Database
select_error   yes            Control flagging of select errors
sqlcheck       syntax         Amount of compile-time SQL checking
stmt_cache     0              Size of statement cache
sys_include    /usr/lib64/gcc/Directory where system header files are found
               /usr/lib64/gcc/x86_64-suse-linux/4.1.0/include
               /usr/lib/gcc/x86_64-redhat-linux/4.1.1/include
               /usr/lib/gcc-lib/x86_64-redhat-linux/3.2.3/include
               /usr/include
               $ORACLE_HOME/precomp/public
threads        no             Indicates a multi-threaded application
type_code      oracle         Use Oracle or ANSI type codes for Dynamic SQL
unsafe_null    no             Allow a NULL fetch without indicator variable
userid         *none*         A username/password [@dbname] connect string
utf16_charset  nchar_charset  The character set form used by UTF16 variables
varchar        no             Allow the use of implicit varchar structures
version        recent         Which version of an object is to be returned
PCC-F-02135, CMD-LINE:  User asked for help
[[email protected] ~]$
监听服务启动/关闭
[[email protected] ~]$ lsnrctl start/stop
数据库服务的启动/关闭
[[email protected] root]$ sqlplus /nolog
SQL> conn /as sysdba
SQL> startup  开启
SQL> shutdown immediate 关闭
SQL> conn scott 切换到scott用户
SQL> conn scott/password 切换到scott用户
如果数据库服务启动时报错
SQL> startup
ORA-00845: MEMORY_TARGET not supported on this system

[临时解决办法]
[[email protected] ~]# mount -o remount,size=4G /dev/shm

[永久解决方法]
[[email protected] ~]# vim /etc/fstab
tmpfs                   /dev/shm                tmpfs   defaults,size=4096M 0 0
[[email protected] ~]# reboot
sqlplus操作,增删改查:
[[email protected] ~]$ sqlplus
Enter user-name: scott
Enter password: tiger
Changing password for scott
New password: haha
Retype new password:haha
SQL> select * from tab;

TNAME			       TABTYPE	CLUSTERID
------------------------------ ------- ----------
BONUS			       TABLE
DEPT			       TABLE
EMP			       TABLE
SALGRADE		       TABLE
ed命令的使用
SQL> ed
Wrote file afiedt.buf
20
写好按q
[[email protected] ~]# vim /home/oracle/afiedt.buf
本文出自 “魂斗罗” 博客,谢绝转载!
以上是关于Oracle 19c 安装(Linux)的主要内容,如果未能解决你的问题,请参考以下文章
