Android 圆角闪光遮照效果
Posted AAA啊哈
tags:
篇首语:本文由小常识网(cha138.com)小编为大家整理,主要介绍了Android 圆角闪光遮照效果相关的知识,希望对你有一定的参考价值。
- 效果图
- 实现原理
- 代码
- 创建自定义属性
- 自定义控件
- 使用方法
- PorterDuff.Mode 简介
- 示例图
- 代码示例
- PorterDuff.Mode 效果图示
- 1. ADD
- 2. CLEAR
- 3. DARKEN
- 4. DST
- 5. DST_ATOP
- 6. DST_IN
- 7. DST_OUT
- 8. DST_OVER
- 9. LIGHTEN
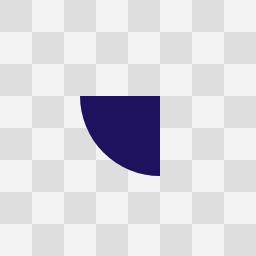
- 10. MULTIPLY
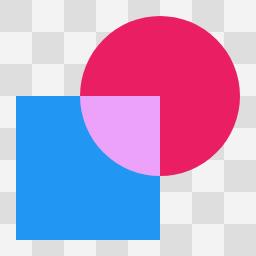
- 11. OVERLAY
- 12. SCREEN
- 13. SRC
- 14. SRC_ATOP
- 15. SRC_IN
- 16. SRC_OUT
- 17. SRC_OVER
- 18. XOR
文章目录
效果图


实现原理
通过设置 xfermode 取光亮与底下的像素的最大亮度,来实现闪光遮照。

代码
创建自定义属性
    <declare-styleable name="MyFlashLightingView">
        <attr name="roundedCornerRadius" format="dimension"/>
        <attr name="animDuration" format="float"/>
    </declare-styleable>
| 属性 | 描述 |
|---|---|
| roundedCornerRadius | 圆角角度,dp |
| animDuration | 闪光从左到右时间,秒,Float |
自定义控件
import android.animation.ValueAnimator
import android.animation.ValueAnimator.INFINITE
import android.content.Context
import android.graphics.*
import android.util.AttributeSet
import android.view.View

/**
 * @author Afra55
 * @date 2020/7/30
 * A smile is the best business card.
 * https://developer.android.com/reference/android/graphics/PorterDuff.Mode
 */
class MyFlashLightingView : View
    constructor(context: Context) : super(context)
        init(null, 0)


    constructor(context: Context, attrs: AttributeSet) : super(context, attrs)
        init(attrs, 0)


    constructor(context: Context, attrs: AttributeSet, defStyleAttr: Int) : super(
        context,
        attrs,
        defStyleAttr
    )
        init(attrs, defStyleAttr)


    var flashPaint: Paint? = null

    /**
     * 圆角大小,px
     */
    var roundedCornerSize = 0F
    var gradient: LinearGradient? = null
    var gradientMatrix: Matrix? = null
    var rect: RectF? = null

    /**
     * 动画,用来让闪光移动
     */
    var valueAnimator: ValueAnimator? = null

    /**
     * 动画时间,秒
     */
    var animDuration = 3F

    private fun init(attrs: AttributeSet?, defStyle: Int)

        val a = context.obtainStyledAttributes(
            attrs, R.styleable.MyFlashLightingView, defStyle, 0
        )

        roundedCornerSize = a.getDimension(
            R.styleable.MyFlashLightingView_roundedCornerRadius,
            roundedCornerSize
        )

        animDuration = a.getFloat(R.styleable.MyFlashLightingView_animDuration, animDuration)

        a.recycle()

        flashPaint = Paint(Paint.ANTI_ALIAS_FLAG)
        gradientMatrix = Matrix()
        rect = RectF()

        valueAnimator = ValueAnimator.ofFloat(0F, 1F)
        valueAnimator?.repeatCount = INFINITE
        valueAnimator?.duration = (animDuration * 1000).toLong()
        valueAnimator?.addUpdateListener
            try
                val v = it.animatedValue as Float
                // 通过 matrix translate 移动闪光, 从 -width 移动到 2 * width, 整个移动长度是 3 * width, 起点是 -width, 高度可以不移动
                // TODO: 整个长度按需修改
                gradientMatrix?.setTranslate(-width + width * 3 * v, height * v)
                gradient?.setLocalMatrix(gradientMatrix)
                postInvalidate()
             catch (e: Exception)


    fun startAnim()
        valueAnimator?.start()


    override fun onSizeChanged(w: Int, h: Int, oldw: Int, oldh: Int)
        super.onSizeChanged(w, h, oldw, oldh)

        // 设置渐变光亮
        gradient = LinearGradient(
            0F,
            0F,
            w / 2F,
            h.toFloat(), // 前面4个参数,渐变角度
            // 一共设置了五种渐变颜色,透明,微白,白,微白,透明
            intArrayOf(0x00ffffff, 0x33ffffff, 0x65ffffff, 0x33ffffff, 0x00ffffff),
            // 五种渐变颜色所在控件的相对位置
            floatArrayOf(0.0f, 0.25f, 0.5f, 0.75f, 1F),
            Shader.TileMode.CLAMP // 如果着色器超出原始边界范围,会复制边缘颜色
        )
        flashPaint?.shader = gradient

        // 设置 xfermode 取光亮与底下的像素的最大值
        flashPaint?.xfermode = PorterDuffXfermode(PorterDuff.Mode.LIGHTEN)

        //  先把光亮放到控件的左边 -width 到 0  处
        // TODO, 如果控件高度高,因为 CLAMP 的原因,起始和结束的闪光不会移出去,这时候需要再往外挪闪光的位置, 同时整个闪光的移动范围也要增大
        gradientMatrix?.setTranslate(-w.toFloat(), h.toFloat())
        gradient?.setLocalMatrix(gradientMatrix)

        // 绘制光亮的宽高,和控件宽高一致
        rect?.set(0F, 0F, w.toFloat(), h.toFloat())

        if (w > 0)
            post
                startAnim()


    override fun onDraw(canvas: Canvas?)
        super.onDraw(canvas)
        try
            if (rect != null && flashPaint != null)
                canvas?.drawRoundRect(
                    rect!!,
                    roundedCornerSize,
                    roundedCornerSize,
                    flashPaint!!
                )

         catch (e: Exception)
使用方法
它可以盖到任何控件上面:
    <FrameLayout
        android:layout_width="wrap_content"
        android:layout_gravity="center_horizontal"
        android:layout_height="wrap_content">
        <TextView
            android:id="@+id/home_3_subscribe"
            android:layout_width="261dp"
            android:layout_gravity="center_horizontal"
            android:layout_height="52dp"
            android:background="@drawable/start_now_bg"
            android:gravity="center"
            android:text="Start now"
            android:textColor="#FFFFFF"
            android:textSize="18sp" />

        <com.xxx.xxx.MyFlashLightingView
            android:layout_width="261dp"
            android:layout_gravity="center_horizontal"
            app:roundedCornerRadius="8dp"
            app:animDuration="2"
            android:layout_height="52dp"/>
    </FrameLayout>
PorterDuff.Mode 简介
https://developer.android.com/reference/android/graphics/PorterDuff.Mode
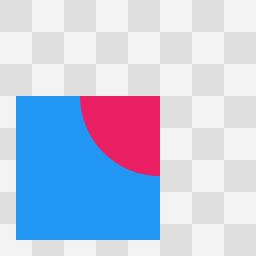
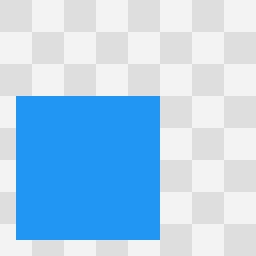
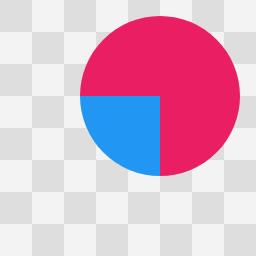
示例图
SRC 图:

DST 图:
代码示例
 Paint paint = new Paint();
 // DST 图
 canvas.drawBitmap(destinationImage, 0, 0, paint);

 PorterDuff.Mode mode = // choose a mode
 paint.setXfermode(new PorterDuffXfermode(mode));

// SRC 图
 canvas.drawBitmap(sourceImage, 0, 0, paint);
PorterDuff.Mode 效果图示
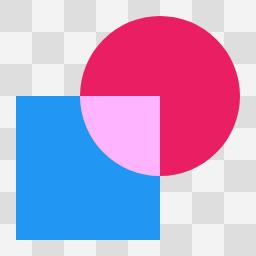
1. ADD
2. CLEAR

3. DARKEN

4. DST

5. DST_ATOP

6. DST_IN

7. DST_OUT

8. DST_OVER

9. LIGHTEN

10. MULTIPLY
11. OVERLAY

12. SCREEN
13. SRC
14. SRC_ATOP
15. SRC_IN

16. SRC_OUT

17. SRC_OVER

18. XOR

以上是关于Android 圆角闪光遮照效果的主要内容,如果未能解决你的问题,请参考以下文章