Java:SpringBoot实现ApplicationEvent事件的监听和发布
Posted 彭世瑜
tags:
篇首语:本文由小常识网(cha138.com)小编为大家整理,主要介绍了Java:SpringBoot实现ApplicationEvent事件的监听和发布相关的知识,希望对你有一定的参考价值。
通过发布订阅模式实现数据的异步处理,比如异步处理邮件发送
新建SpringBoot项目
项目结构
.
├── pom.xml
└── src
    └── main
        ├── java
        │   └── com
        │       └── example
        │           └── demo
        │               ├── Application.java
        │               ├── config
        │               │   └── TaskPoolConfig.java
        │               ├── controller
        │               │   └── IndexController.java
        │               ├── entity
        │               │   └── EmailDto.java
        │               ├── event
        │               │   └── SendEmailEvent.java
        │               ├── listener
        │               │   └── SendEmailListener.java
        │               └── service
        │                   ├── SendEmailService.java
        │                   └── impl
        │                       └── SendEmailServiceImpl.java
        └── resources
            ├── application.yml
            ├── static
            └── templates
pom.xml
<?xml version="1.0" encoding="UTF-8"?>
<project xmlns="http://maven.apache.org/POM/4.0.0" xmlns:xsi="http://www.w3.org/2001/XMLSchema-instance"
    xsi:schemaLocation="http://maven.apache.org/POM/4.0.0 https://maven.apache.org/xsd/maven-4.0.0.xsd">
    <modelVersion>4.0.0</modelVersion>
    <parent>
        <groupId>org.springframework.boot</groupId>
        <artifactId>spring-boot-starter-parent</artifactId>
        <version>2.7.7</version>
        <relativePath/> <!-- lookup parent from repository -->
    </parent>
    <groupId>com.example</groupId>
    <artifactId>demo</artifactId>
    <version>0.0.1-SNAPSHOT</version>
    <name>demo</name>
    <description>Demo project for Spring Boot</description>
    <properties>
        <java.version>1.8</java.version>
    </properties>
    <dependencies>
        <dependency>
            <groupId>org.springframework.boot</groupId>
            <artifactId>spring-boot-starter-web</artifactId>
        </dependency>

        <dependency>
            <groupId>org.springframework.boot</groupId>
            <artifactId>spring-boot-devtools</artifactId>
            <scope>runtime</scope>
            <optional>true</optional>
        </dependency>
        <dependency>
            <groupId>org.projectlombok</groupId>
            <artifactId>lombok</artifactId>
            <optional>true</optional>
        </dependency>
        <dependency>
            <groupId>org.springframework.boot</groupId>
            <artifactId>spring-boot-starter-test</artifactId>
            <scope>test</scope>
        </dependency>
    </dependencies>

    <build>
        <plugins>
            <plugin>
                <groupId>org.springframework.boot</groupId>
                <artifactId>spring-boot-maven-plugin</artifactId>
                <configuration>
                    <excludes>
                        <exclude>
                            <groupId>org.projectlombok</groupId>
                            <artifactId>lombok</artifactId>
                        </exclude>
                    </excludes>
                </configuration>
            </plugin>
        </plugins>
    </build>

</project>
Application.java
package com.example.demo;

import org.springframework.boot.SpringApplication;
import org.springframework.boot.autoconfigure.SpringBootApplication;

@SpringBootApplication
public class Application

    public static void main(String[] args)
        SpringApplication.run(Application.class, args);
TaskPoolConfig.java
package com.example.demo.config;

import org.springframework.context.annotation.Bean;
import org.springframework.context.annotation.Configuration;
import org.springframework.scheduling.annotation.EnableAsync;
import org.springframework.scheduling.concurrent.ThreadPoolTaskExecutor;

import java.util.concurrent.Executor;


/**
 * 线程池参数配置
 **/
@EnableAsync
@Configuration
public class TaskPoolConfig
    /**
     * 自定义线程池
     **/
    @Bean
    public Executor taskExecutor()
        //返回可用处理器的Java虚拟机的数量 12
        int i = Runtime.getRuntime().availableProcessors();
        System.out.println("系统最大线程数  : " + i);

        ThreadPoolTaskExecutor executor = new ThreadPoolTaskExecutor();
        //核心线程池大小
        executor.setCorePoolSize(16);
        //最大线程数
        executor.setMaxPoolSize(20);
        //配置队列容量,默认值为Integer.MAX_VALUE
        executor.setQueueCapacity(99999);
        //活跃时间
        executor.setKeepAliveSeconds(60);
        //线程名字前缀
        executor.setThreadNamePrefix("asyncServiceExecutor -");
        //设置此执行程序应该在关闭时阻止的最大秒数,以便在容器的其余部分继续关闭之前等待剩余的任务完成他们的执行
        executor.setAwaitTerminationSeconds(60);
        //等待所有的任务结束后再关闭线程池
        executor.setWaitForTasksToCompleteOnShutdown(true);

        return executor;
EmailDto.java
package com.example.demo.entity;

import lombok.Data;

@Data
public class EmailDto
    private String email;
    private String subject;
    private String content;
SendEmailEvent.java
package com.example.demo.event;

import com.example.demo.entity.EmailDto;
import org.springframework.context.ApplicationEvent;

/**
 * 自定义事件
 */
public class SendEmailEvent extends ApplicationEvent
    private EmailDto emailDto;

    public SendEmailEvent(EmailDto emailDto)
        super(emailDto);
        this.emailDto = emailDto;


    public EmailDto getEmailDto()
        return this.emailDto;
SendEmailListener.java
package com.example.demo.listener;

import com.example.demo.entity.EmailDto;
import com.example.demo.event.SendEmailEvent;
import com.example.demo.service.SendEmailService;
import org.springframework.beans.factory.annotation.Autowired;
import org.springframework.context.ApplicationListener;
import org.springframework.scheduling.annotation.Async;
import org.springframework.stereotype.Component;

/**
 * 事件监听器
 */
@Component
public class SendEmailListener implements ApplicationListener<SendEmailEvent>
    @Autowired
    private SendEmailService sendEmailService;

    @Async
    @Override
    public void onApplicationEvent(SendEmailEvent event)
        EmailDto emailDto = event.getEmailDto();
        this.sendEmailService.sendEmail(emailDto);
SendEmailService.java
package com.example.demo.service;

import com.example.demo.entity.EmailDto;

public interface SendEmailService
    void sendEmail(EmailDto emailDto);
SendEmailServiceImpl.java
package com.example.demo.service.impl;

import com.example.demo.entity.EmailDto;
import com.example.demo.service.SendEmailService;
import org.springframework.stereotype.Service;

@Service
public class SendEmailServiceImpl implements SendEmailService
    @Override
    public void sendEmail(EmailDto emailDto)
        try
            // 模拟耗时3秒
            Thread.sleep(3 * 1000);
         catch (Exception e)
            System.out.println("Email发送异常");


        System.out.println("Email发送成功 " + emailDto);
IndexController.java
package com.example.demo.controller;

import com.example.demo.entity.EmailDto;
import com.example.demo.event.SendEmailEvent;
import org.springframework.beans.factory.annotation.Autowired;
import org.springframework.context.ApplicationEventPublisher;
import org.springframework.web.bind.annotation.GetMapping;
import org.springframework.web.bind.annotation.RestController;


@RestController
public class IndexController
    @Autowired
    private ApplicationEventPublisher publisher;

    @GetMapping("/sendEmail")
    public String sendEmail()
        EmailDto emailDto = new EmailDto();
        emailDto.setEmail("tom@qq.com");
        emailDto.setSubject("邮件标题");
        emailDto.setContent("邮件内容");

        // 发布事件
        publisher.publishEvent(new SendEmailEvent(emailDto));
        return "success";
参考
Springboot异常--Identify and stop the process that‘s listening on port 9090 or configure this applicat
刚开始入门Springboot运行一些入门案例时遇到的bug
下面是异常信息:
Error starting ApplicationContext. To display the conditions report re-run your application with 'debug' enabled.
2021-10-19 09:22:12.836 ERROR 5368 --- [           main] o.s.b.d.LoggingFailureAnalysisReporter   :
***************************
APPLICATION FAILED TO START
***************************

Description:

Web server failed to start. Port 9090 was already in use.

Action:

Identify and stop the process that's listening on port 9090 or configure this application to listen on another port.

2021-10-19 09:22:12.838  INFO 5368 --- [           main] o.s.s.concurrent.ThreadPoolTaskExecutor  : Shutting down ExecutorService 'applicationTaskExecutor'
异常截图:
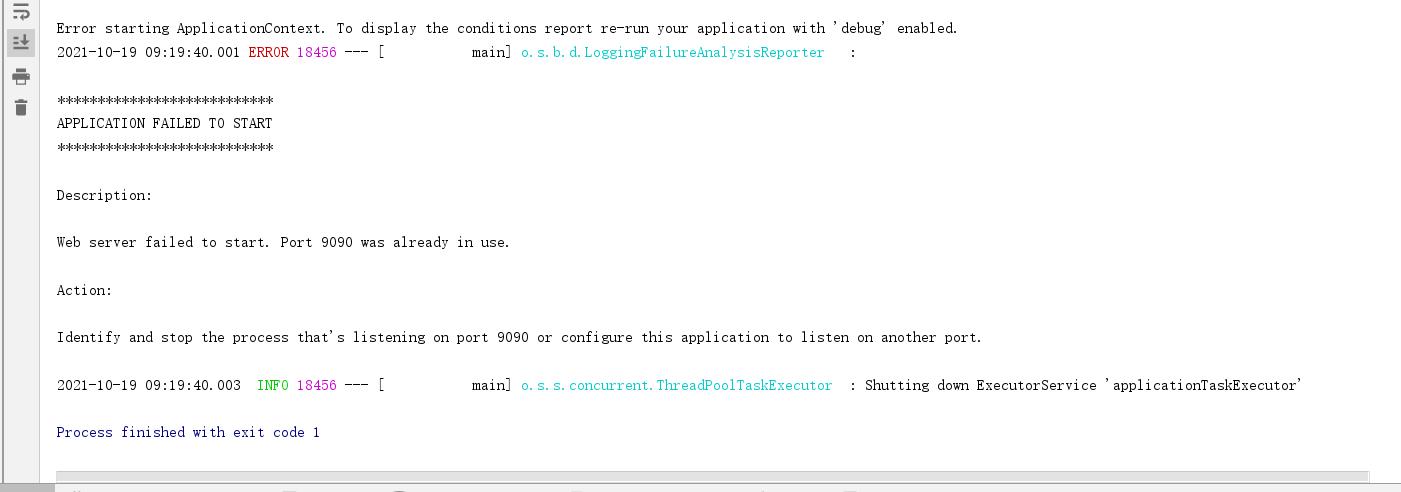
异常是因为我使用的端口9090被占用,是一个入门时很容易遇到的异常
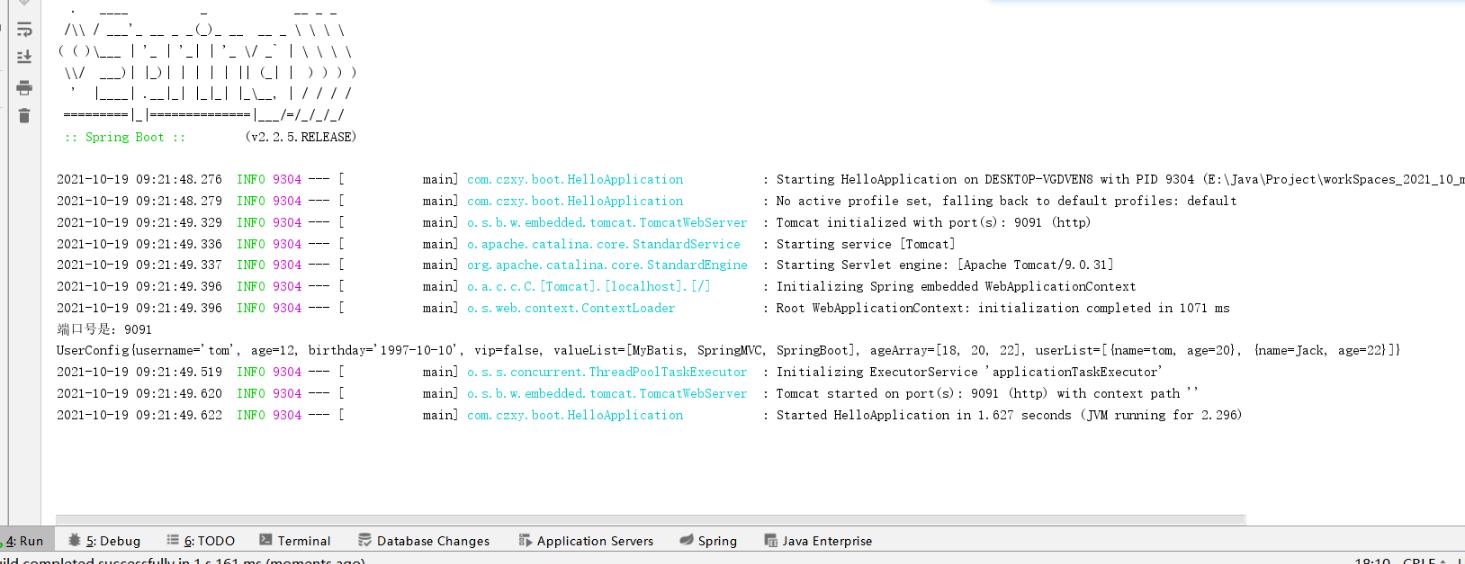
Identify and stop the process that’s listening on port 9090 or configure this applicat
正经翻译:确定并停止正在端口9090上侦听的进程,或将此应用程序配置为在另一个端口上侦听。
人话:你9090端口被占用了,你要不杀掉,要不改个端口
解决办法:
- 我给Springboot的端口是9090,那现在我想要让它的端口不是9090,而是9091,或者说另一个项目占用了9090,需要我们把现在的项目改成9091,那么我们就可以在application.properties文件中修改server.port=9091
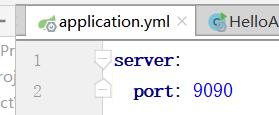
再运行你看他就变量了
在运行时也改成9091

- 杀掉这个端口
- netstat -ano
win+r打开运行,并输入cmd
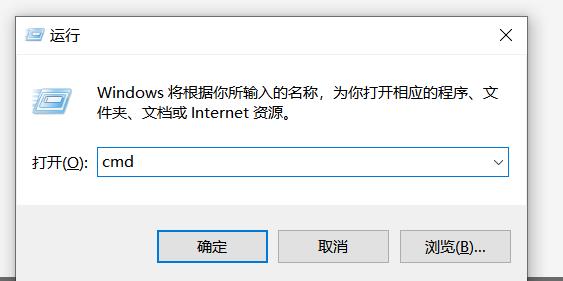
输入netstat -ano
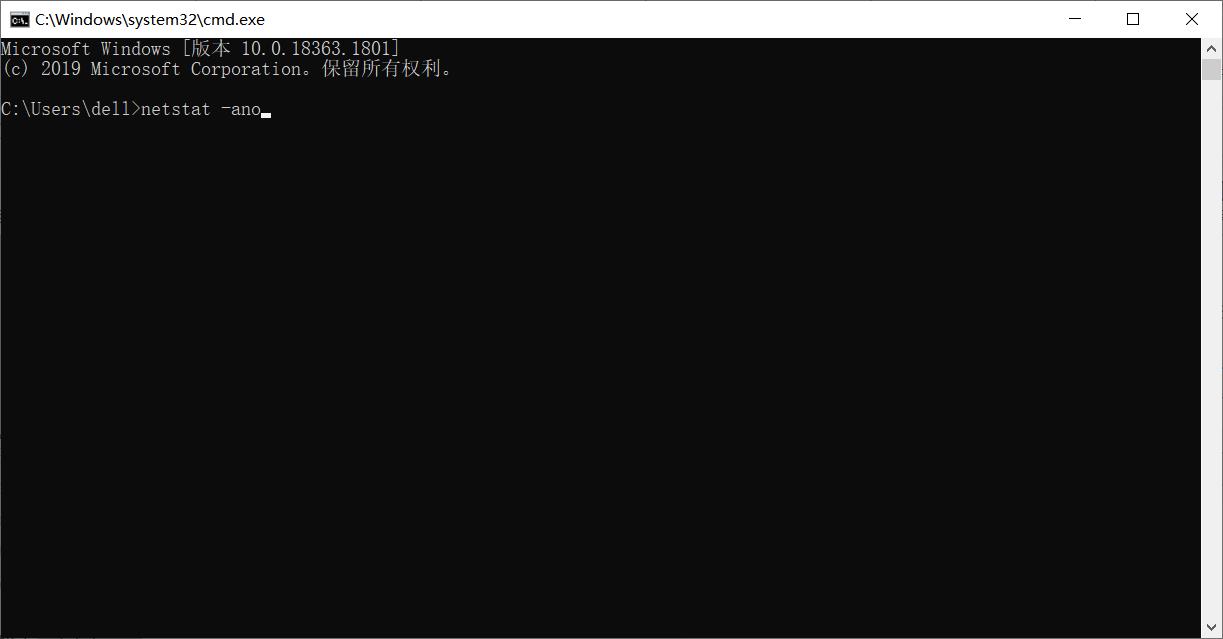
然后一回车!就出来巨多端口

然后你找到9090
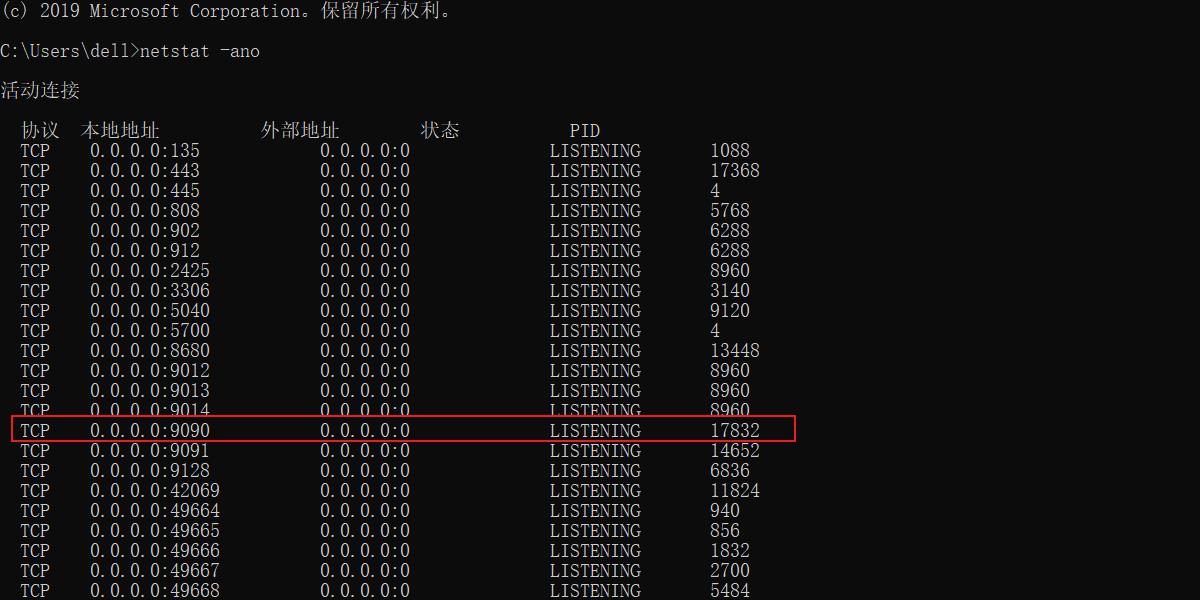
记住对应的17832
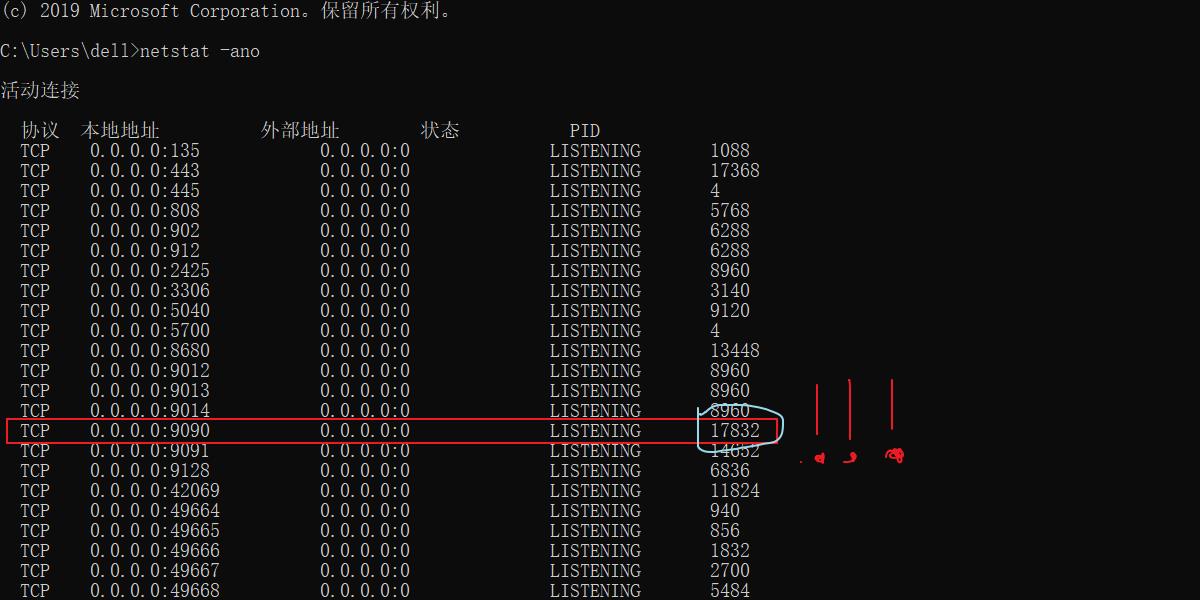
- netstat -ano
输入taskkill /pid 17832 -f 杀掉端口
然后就杀掉了
- netstat -aon|findstr “9090”
直接输入netstat -aon|findstr "9090"并回车

输入taskkill /pid 17832 -f 杀掉端口
然后就杀掉了
以上是关于Java:SpringBoot实现ApplicationEvent事件的监听和发布的主要内容,如果未能解决你的问题,请参考以下文章