用 QuestPDF操作生成PDF更快更高效!
Posted dotNET跨平台
tags:
篇首语:本文由小常识网(cha138.com)小编为大家整理,主要介绍了用 QuestPDF操作生成PDF更快更高效!相关的知识,希望对你有一定的参考价值。

QuestPDF
QuestPDF是一个开源的工具库,可以在.NET或者.Net Core中生成pdf文档
它提供了一个布局引擎,设计时考虑到了完整的分页支持以及灵活性要求!比市面上常见的Aspose和iTextSharp好用太多了!GitHub地址
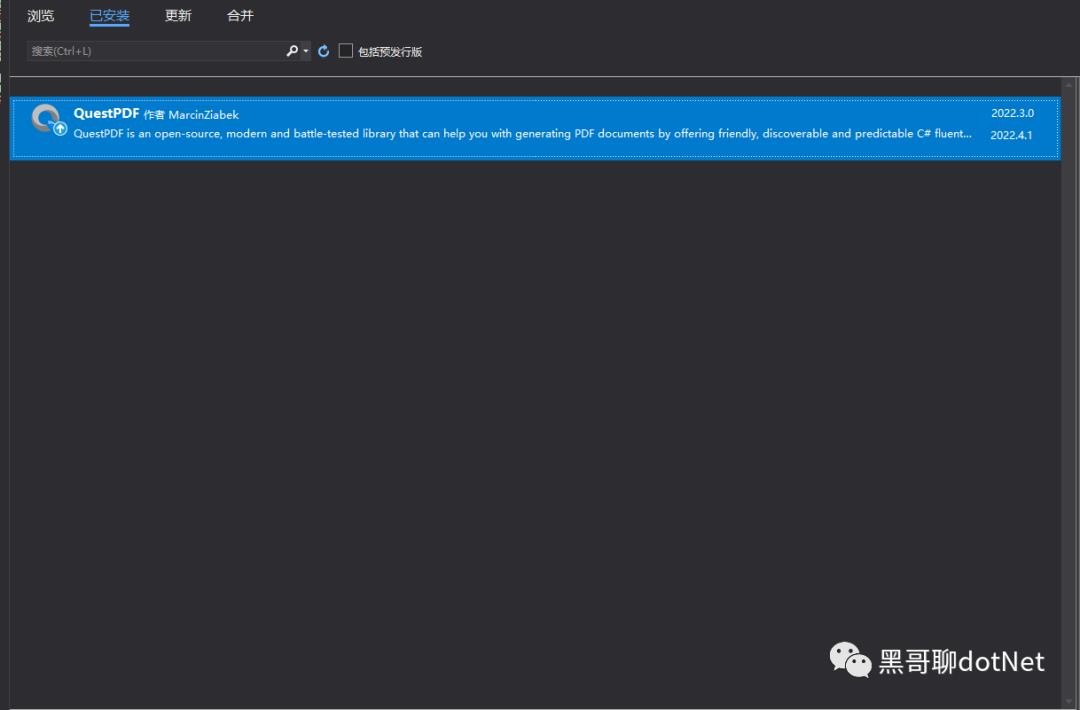
安装
Install-Package QuestPDF
例子
简单例子
生成Pdf文档一共分为三部分,Header(页眉),Content(内容),Footer(页脚)
Document.Create(container =>

    container.Page(page =>

        page.Size(PageSizes.A4);
        page.Margin(2, Unit.Centimetre);
        page.Background(Colors.White);
        page.DefaultTextStyle(x => x.FontSize(20));

        page.Header()
            .Text("Hello PDF!")
            .SemiBold().FontSize(36).FontColor(Colors.Blue.Medium);

        page.Content()
            .PaddingVertical(1, Unit.Centimetre)
            .Column(x =>

                x.Spacing(20);

                x.Item().Text(Placeholders.LoremIpsum());
                x.Item().Image(Placeholders.Image(200, 100));
            );

        page.Footer()
            .AlignCenter()
            .Text(x =>

                x.Span("Page ");
                x.CurrentPageNumber();
            );
    );
)
.GeneratePdf("hello.pdf");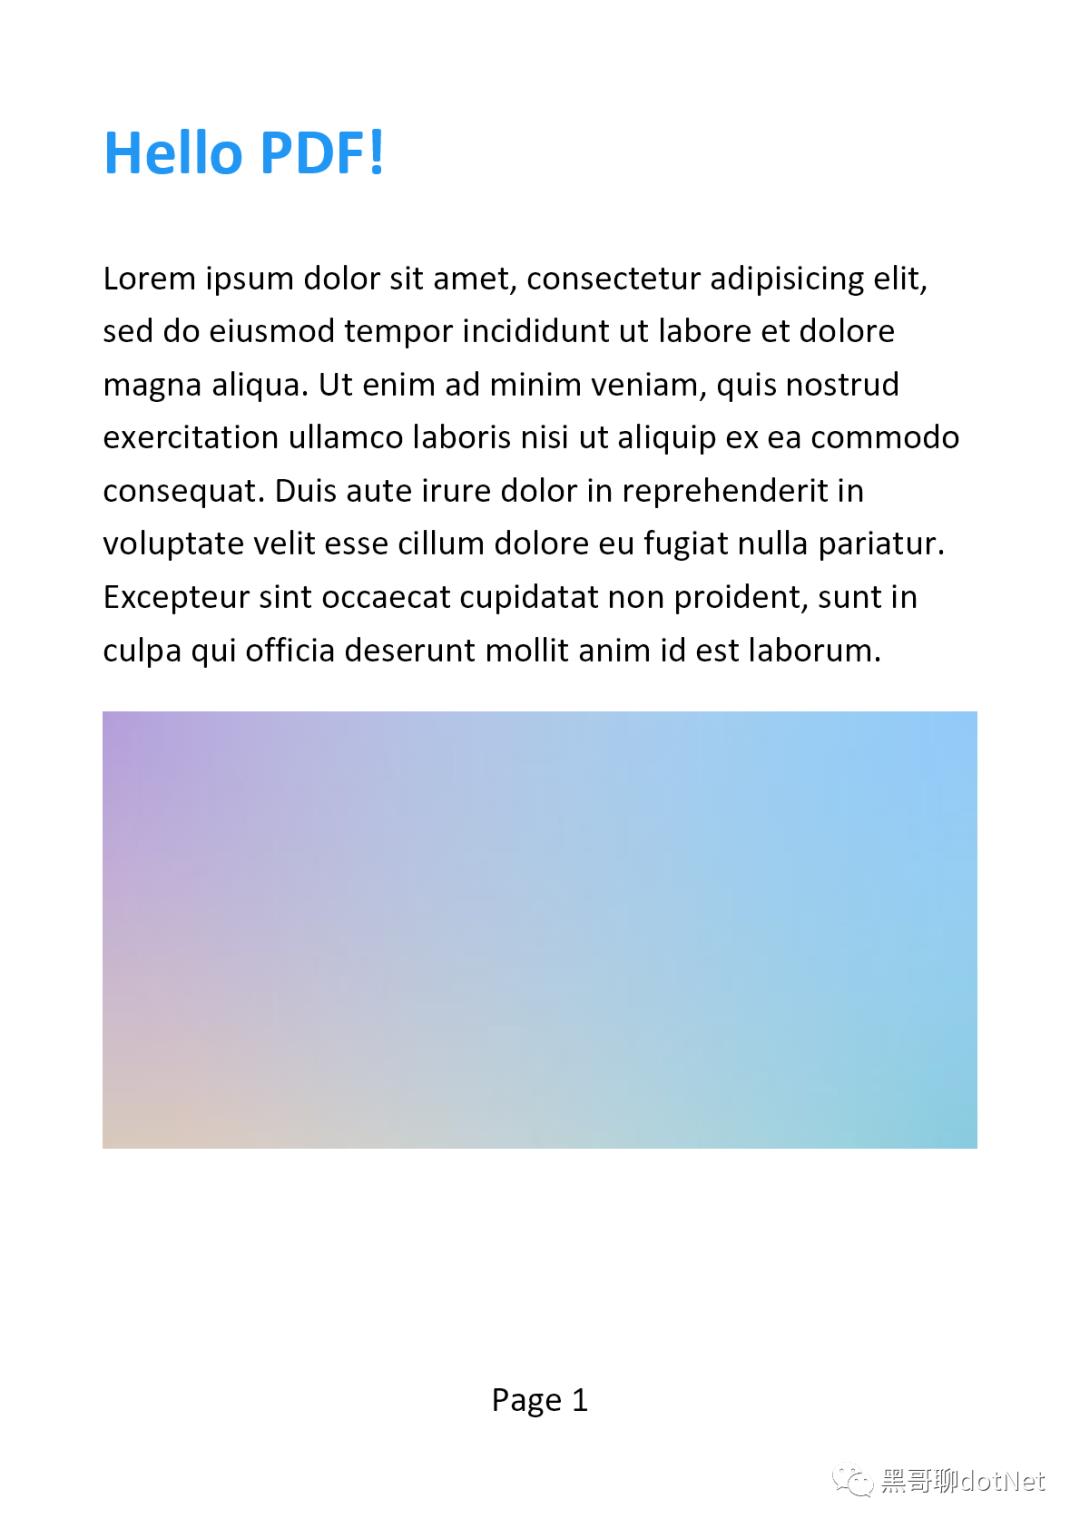
模板生成
使用模板生成一共设计三个应用层的工作:
文档Model(一组描述 PDF 文档内容的类)
数据源(将域实体映射到文档模型的层)
模板(描述如何可视化信息并将其转换为 PDF 文件的表示层)
比如我们设计一个基本的发票信息 要设计一个购物清单,一个卖家买家的地址,以及发票编号等等 我们设计这样的3个Model类
public class InvoiceModel

        public int InvoiceNumber  get; set;
        public DateTime IssueDate  get; set;
        public DateTime DueDate  get; set;

        public Address SellerAddress  get; set;
        public Address CustomerAddress  get; set;

        public List<OrderItem> Items  get; set;
        public string Comments  get; set;


    public class OrderItem

        public string Name  get; set;
        public decimal Price  get; set;
        public int Quantity  get; set;


    public class Address

        public string CompanyName  get; set;
        public string Street  get; set;
        public string City  get; set;
        public string State  get; set;
        public object Email  get; set;
        public string Phone  get; set;
Model定义好了之后我们就定义一些假数据来填充pdf
public static class InvoiceDocumentDataSource

        private static Random Random = new Random();

        public static InvoiceModel GetInvoiceDetails()

            var items = Enumerable
                .Range(1, 8)
                .Select(i => GenerateRandomOrderItem())
                .ToList();

            return new InvoiceModel

                InvoiceNumber = Random.Next(1_000, 10_000),
                IssueDate = DateTime.Now,
                DueDate = DateTime.Now + TimeSpan.FromDays(14),

                SellerAddress = GenerateRandomAddress(),
                CustomerAddress = GenerateRandomAddress(),

                Items = items,
                Comments ="测试备注"
            ;


        private static OrderItem GenerateRandomOrderItem()

            return new OrderItem

                Name = "商品",
                Price = (decimal)Math.Round(Random.NextDouble() * 100, 2),
                Quantity = Random.Next(1, 10)
            ;


        private static Address GenerateRandomAddress()

            return new Address

                CompanyName = "测试商店",
                Street = "测试街道",
                City = "测试城市",
                State = "测试状态",
                Email = "测试邮件",
                Phone = "测试电话"
            ;
然后搭建我们的模板脚手架 我们要使用模板脚手架,就要定义一个实现IDocument接口的新类开始。该接口包含两个方法
DocumentMetadata GetMetadata();
void Compose(IDocumentContainer container);
第一个是模板文档的一些基础信息 第二个是模板的容器 基于这些原则我们设计一个模板层类
public class InvoiceDocument : IDocument

        public InvoiceModel Model  get;

        public InvoiceDocument(InvoiceModel model)

            Model = model;


        public DocumentMetadata GetMetadata() => DocumentMetadata.Default;

        public void Compose(IDocumentContainer container)

            container
                .Page(page =>

                    page.PageColor(Colors.Red.Lighten1);
                    page.Size(PageSizes.A4);
                    page.Margin(10);//外边距


                    page.Header().Height(100).Background(Colors.LightBlue.Lighten1);
                    page.Content().Background(Colors.Grey.Lighten3);
                    page.Footer().Height(50).Background(Colors.Grey.Lighten1);
                );
pdf的page页面总是有三个元素:页眉,页脚,内容。查看一下我们生成的文档
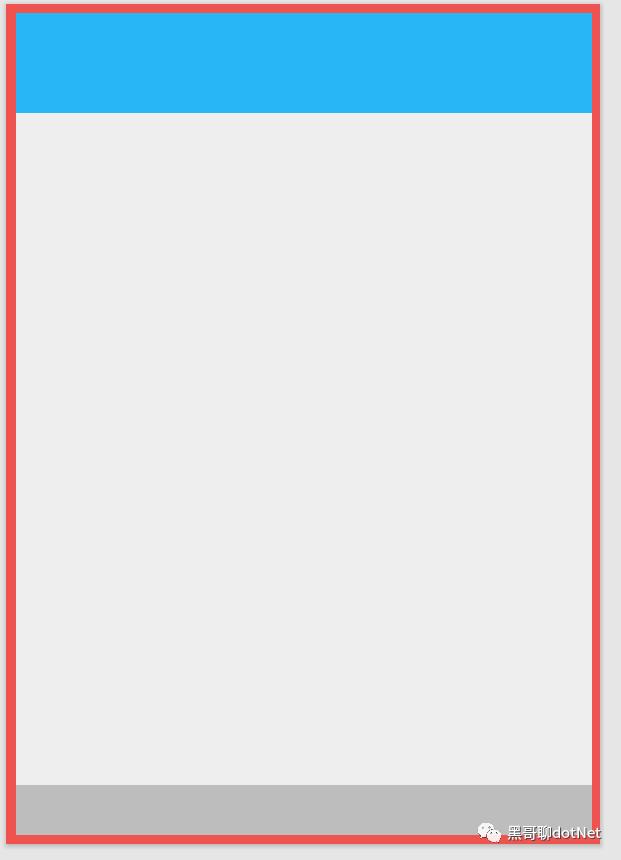
到目前为止,我们已经搭建了一个非常简单的页面,其中每个部分都有不同的颜色或大小
接下来我们来填充他的页眉,我们把数据源整理好了之后,就可以调用Element方法填充
public void Compose(IDocumentContainer container)

            container
                .Page(page =>

                    page.PageColor(Colors.Red.Lighten1);
                    page.Size(PageSizes.A4);
                    page.Margin(10);//外边距


                    page.Header().Height(100).Background(Colors.LightBlue.Lighten1).Element(ComposeHeader);
                    page.Content().Background(Colors.Grey.Lighten3);
                    page.Footer().Height(50).Background(Colors.Grey.Lighten1);
                );


        void ComposeHeader(IContainer container)

            var titleStyle = TextStyle.Default.FontSize(20).SemiBold().FontColor(Colors.Blue.Medium);

            container.Row(row =>

                row.RelativeItem().Column(column =>

                    column.Item().Text($"发票 #Model.InvoiceNumber").FontFamily("simhei").Style(titleStyle);

                    column.Item().Text(text =>

                        text.Span("发行日期: ").SemiBold().FontFamily("simhei");
                        text.Span($"Model.IssueDate:d").FontFamily("simhei");
                    );

                    column.Item().Text(text =>

                        text.Span("支付日期: ").FontFamily("simhei").SemiBold();
                        text.Span($"Model.DueDate:d").FontFamily("simhei");
                    );

                )
                ;

            );
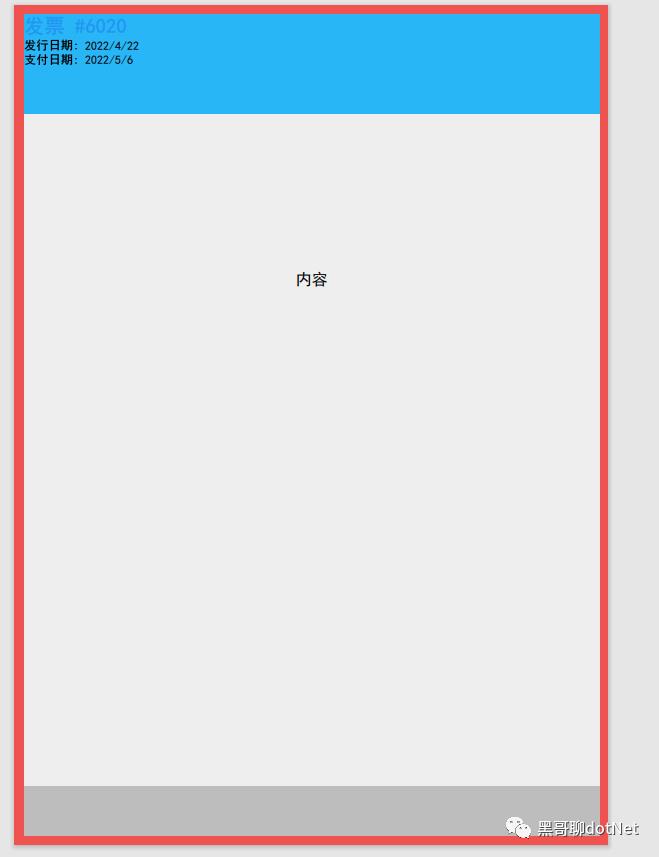
最后我们来实现内容,
public void Compose(IDocumentContainer container)

            container
                .Page(page =>

                    page.PageColor(Colors.Red.Lighten1);
                    page.Size(PageSizes.A4);
                    page.Margin(10);//外边距


                    page.Header().Height(100).Background(Colors.LightBlue.Lighten1).Element(ComposeHeader);
                    page.Content().Background(Colors.Grey.Lighten3).Element(ComposeContent);
                    page.Footer().Height(50).Background(Colors.Grey.Lighten1);
                );


        void ComposeHeader(IContainer container)

            var titleStyle = TextStyle.Default.FontSize(20).SemiBold().FontColor(Colors.Blue.Medium);

            container.Row(row =>

                row.RelativeItem().Column(column =>

                    column.Item().Text($"发票 #Model.InvoiceNumber").FontFamily("simhei").Style(titleStyle);

                    column.Item().Text(text =>

                        text.Span("发行日期: ").SemiBold().FontFamily("simhei");
                        text.Span($"Model.IssueDate:d").FontFamily("simhei");
                    );

                    column.Item().Text(text =>

                        text.Span("支付日期: ").FontFamily("simhei").SemiBold();
                        text.Span($"Model.DueDate:d").FontFamily("simhei");
                    );

                )
                ;

            );


        void ComposeContent(IContainer container)

            container.Table(table =>

                // step 1
                table.ColumnsDefinition(columns =>

                    columns.ConstantColumn(25);
                    columns.RelativeColumn(3);
                    columns.RelativeColumn();
                    columns.RelativeColumn();
                    columns.RelativeColumn();
                );

                // step 2
                table.Header(header =>

                    header.Cell().Text("#").FontFamily("simhei");
                    header.Cell().Text("商品").FontFamily("simhei");
                    header.Cell().AlignRight().Text("价格").FontFamily("simhei");
                    header.Cell().AlignRight().Text("数量").FontFamily("simhei");
                    header.Cell().AlignRight().Text("总价").FontFamily("simhei");

                    header.Cell().ColumnSpan(5)
                        .PaddingVertical(5).BorderBottom(1).BorderColor(Colors.Black);
                );

                // step 3
                foreach (var item in Model.Items)

                    table.Cell().Element(CellStyle).Text(Model.Items.IndexOf(item) + 1).FontFamily("simhei");
                    table.Cell().Element(CellStyle).Text(item.Name).FontFamily("simhei");
                    table.Cell().Element(CellStyle).AlignRight().Text($"item.Price$").FontFamily("simhei");
                    table.Cell().Element(CellStyle).AlignRight().Text(item.Quantity).FontFamily("simhei");
                    table.Cell().Element(CellStyle).AlignRight().Text($"item.Price * item.Quantity$").FontFamily("simhei");

                    static IContainer CellStyle(IContainer container)

                        return container.BorderBottom(1).BorderColor(Colors.Grey.Lighten2).PaddingVertical(5);


            );
在这些准备工作做完了之后我们就可以生成Pdf文档了
var filePath = "invoice.pdf";

            var model = InvoiceDocumentDataSource.GetInvoiceDetails();
            var document = new InvoiceDocument(model);
            document.GeneratePdf(filePath);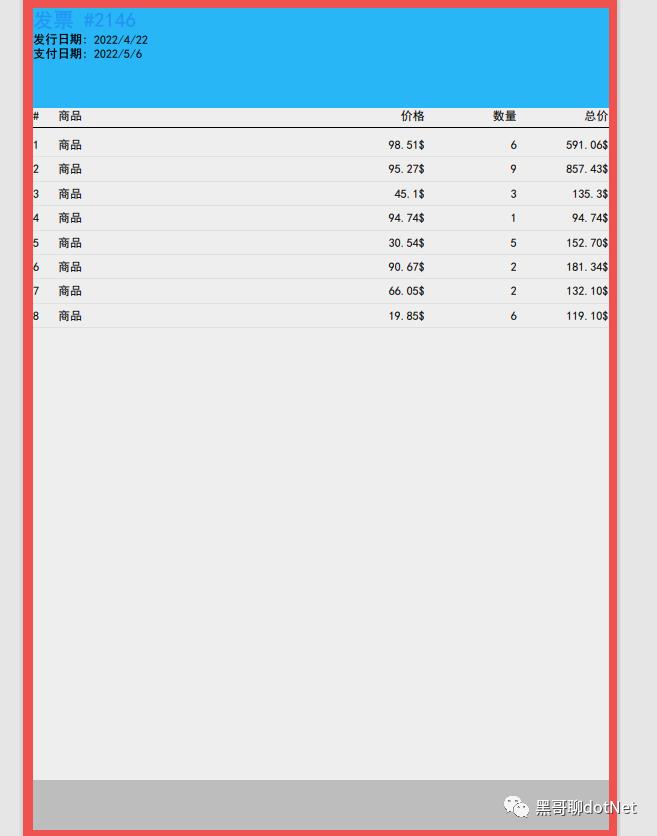
当然还有很多好玩的功能,今天就给大家讲个概念,让大家对这个东西有个印象,后面我会继续输出该库的相关功能。如果你们对该库感兴趣,可以持续关注我!微信公众号【黑哥聊dotNet】
以上是关于用 QuestPDF操作生成PDF更快更高效!的主要内容,如果未能解决你的问题,请参考以下文章
#yyds干货盘点#愚公系列2023年03月 .NET CORE工具案例-.NET Core使用QuestPDF
编程0基础小白,如何自学python更快、更高效!「方法干货」