vue实现思维导图
Posted 平平无奇搬砖小哥
tags:
篇首语:本文由小常识网(cha138.com)小编为大家整理,主要介绍了vue实现思维导图相关的知识,希望对你有一定的参考价值。
介绍
前景: 仿幕布实现思维导图效果
技术实现:jsmind
完整代码:vue-jsmind
参考文章: 在vue中使用jsmind组织架构或思维导图
实现效果:
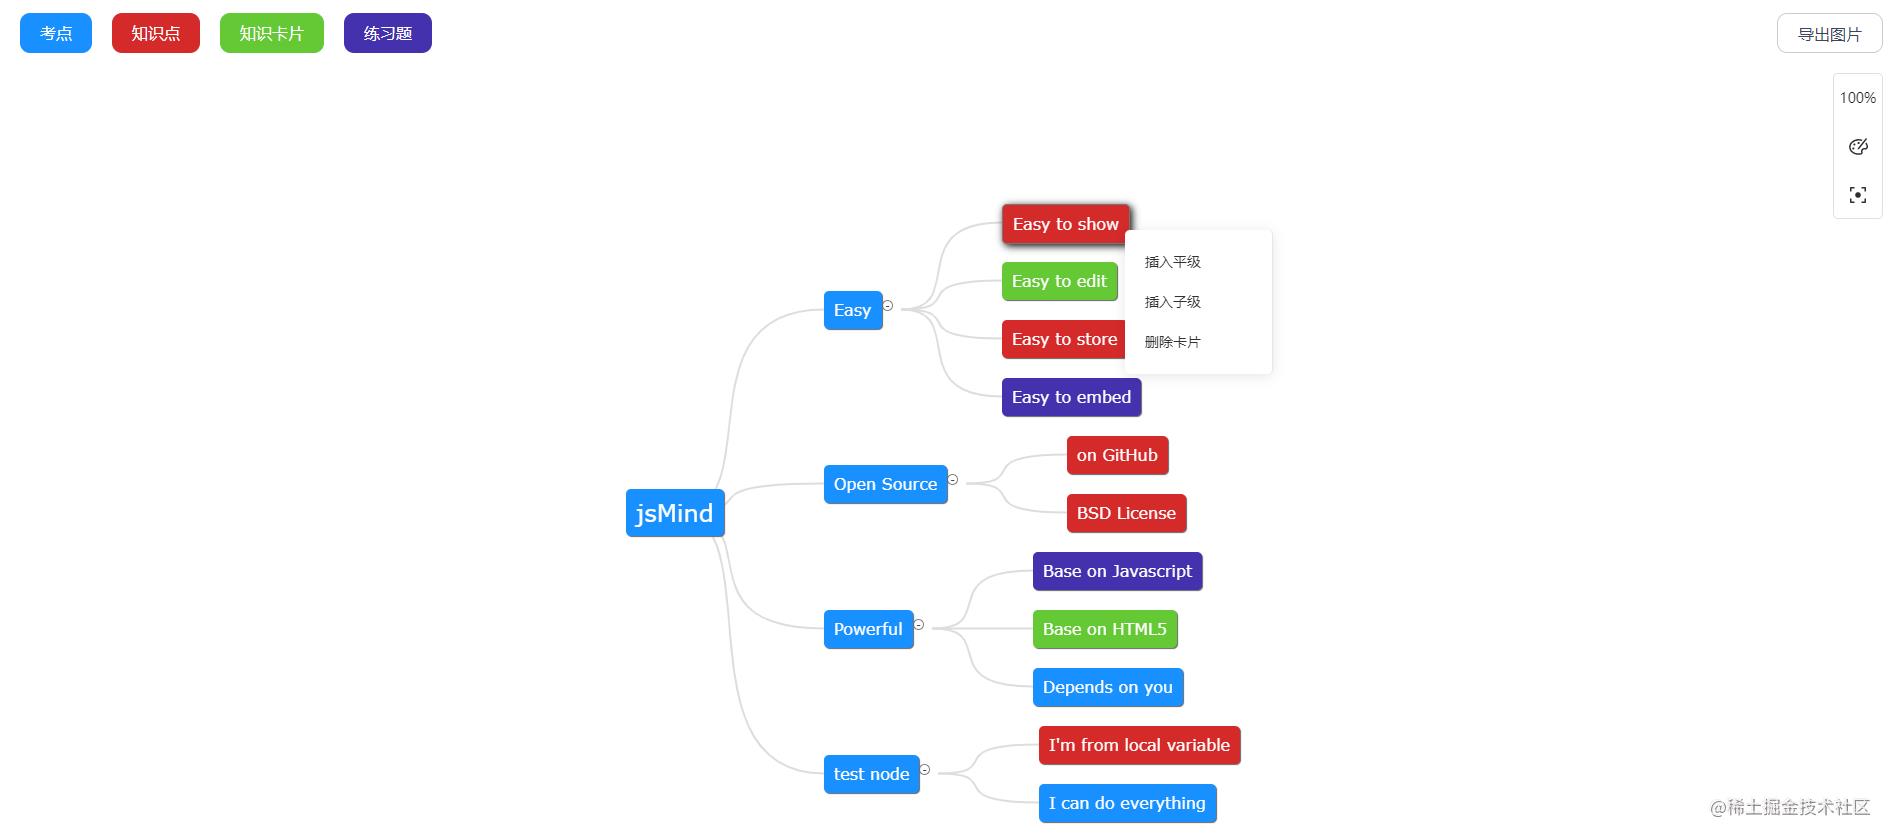
功能描述:
- 编辑、删除、插入、拖拽、展开/收起节点
- 分布结构切换(向左、向右和两边分布)
- 节点类型筛选
- 导出图片
- 鼠标左键拖拽
- 缩放(按钮或鼠标滚轮)
引入
方式一:(推荐,方便拓展)
在index.html引入相关文件:
<link type="text/css" rel="stylesheet" href="./jsmind/style/jsmind.css" />
<script type="text/javascript" src="./jsmind/js/jsmind.js"></script>
<script type="text/javascript" src="./jsmind/js/jsmind.draggable.js"></script>
<script type="text/javascript" src="./jsmind/js/jsmind.screenshot.js"></script>
方式二:
通过npm install jsmind --save安装插件
在vue文件中引入相关文件:
import 'jsmind/style/jsmind.css'
import jsMind from 'jsmind/js/jsmind.js'
require('jsmind/js/jsmind.draggable.js')
require('jsmind/js/jsmind.screenshot.js')
基本使用
<template>
  <div id="jsmind_container"></div>
</template>

<script>
export default
  data ()
    return
      mind:
        /* 元数据,定义思维导图的名称、作者、版本等信息 */
        meta:
          name: '思维导图',
          author: 'hizzgdev@163.com',
          version: '0.2'
        ,
        /* 数据格式声明 */
        format: 'node_tree',
        /* 数据内容 */
        data:
          id: 'root',
          topic: 'jsMind',
          children: [

              id: 'easy', // [必选] ID, 所有节点的ID不应有重复,否则ID重复的结节将被忽略
              topic: 'Easy', // [必选] 节点上显示的内容
              direction: 'right', // [可选] 节点的方向,此数据仅在第一层节点上有效,目前仅支持 left 和 right 两种,默认为 right
              expanded: true, // [可选] 该节点是否是展开状态,默认为 true
              children: [
                 id: 'easy1', topic: 'Easy to show' ,
                 id: 'easy2', topic: 'Easy to edit' ,
                 id: 'easy3', topic: 'Easy to store' ,
                 id: 'easy4', topic: 'Easy to embed'
              ]
            ,

              id: 'open',
              topic: 'Open Source',
              direction: 'right',
              expanded: true,
              children: [
                 id: 'open1', topic: 'on GitHub' ,
                 id: 'open2', topic: 'BSD License'
              ]
            ,

              id: 'powerful',
              topic: 'Powerful',
              direction: 'right',
              children: [
                 id: 'powerful1', topic: 'Base on Javascript' ,
                 id: 'powerful2', topic: 'Base on HTML5' ,
                 id: 'powerful3', topic: 'Depends on you'
              ]
            ,

              id: 'other',
              topic: 'test node',
              direction: 'right',
              children: [
                 id: 'other1', topic: "I'm from local variable" ,
                 id: 'other2', topic: 'I can do everything'
              ]

          ]

      ,
      options:
        container: 'jsmind_container', // [必选] 容器的ID
        editable: true, // [可选] 是否启用编辑
        theme: '', // [可选] 主题
        view:
          engine: 'canvas', // 思维导图各节点之间线条的绘制引擎
          hmargin: 120, // 思维导图距容器外框的最小水平距离
          vmargin: 50, // 思维导图距容器外框的最小垂直距离
          line_width: 2, // 思维导图线条的粗细
          line_color: '#ddd' // 思维导图线条的颜色
        ,
        layout:
          hspace: 100, // 节点之间的水平间距
          vspace: 20, // 节点之间的垂直间距
          pspace: 20 // 节点与连接线之间的水平间距(用于容纳节点收缩/展开控制器)
        ,
        shortcut:
          enable: false // 是否启用快捷键 默认为true


  ,
  mounted ()
    // 初始化
    this.jm = jsMind.show(this.options, this.mind)


</script>

<style lang="less" scoped>
#jsmind_container
  width: 100%;
  height: 100vh;

</style>
踩坑之旅
难点一:增加节点类型筛选功能
思路:由于不同类型的节点对应的背景颜色不一样,可以通过改变背景颜色透明度来设置节点是否高亮显示
效果:
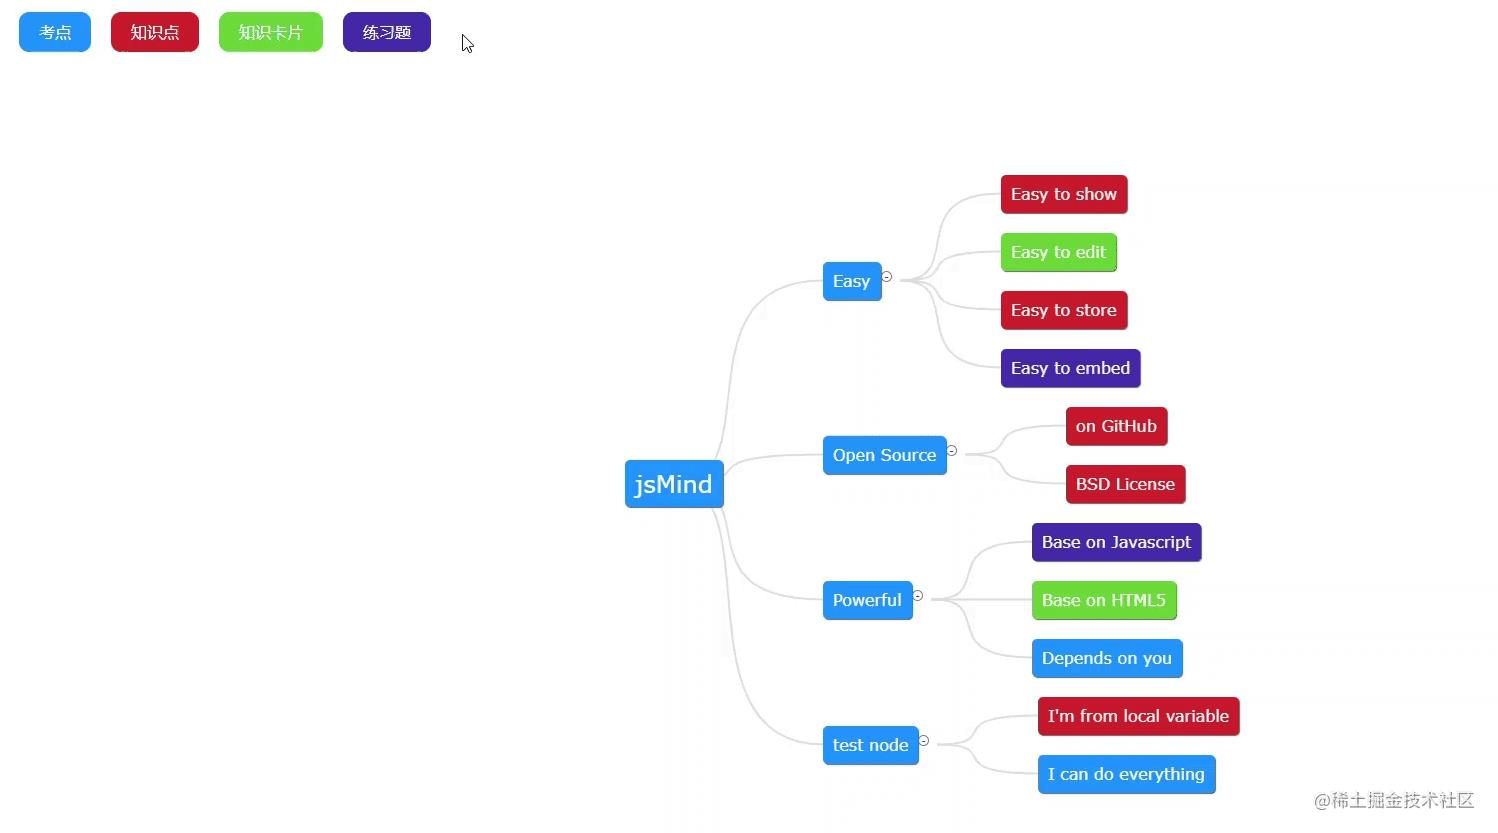
实现:
1.针对不同类型的节点添加一个背景颜色映射表,例:
bgMap:
  1:
    original: 'rgb(212, 42, 42)',
    transparent: 'rgb(212, 42, 42, 0.2)'
  ,
  2:
    original: 'rgb(100, 201, 53)',
    transparent: 'rgb(100, 201, 53, 0.2)'
  ,
  3:
    original: 'rgb(67, 50, 173)',
    transparent: 'rgb(67, 50, 173, 0.2)'
  ,
  4:
    original: 'rgb(25, 144, 255)',
    transparent: 'rgb(25, 144, 255, 0.2)'
2.监听筛选类型变化,设置节点背景颜色:
watch:
  selectTypes (v)
    // 遍历节点
    this.loopTreeData(this.mind.data.children, (item) =>
      if (v.length)
        if (v.includes(item.type))
          this.jm.set_node_color(item.id, this.bgMap[item.type].original, '#fff')
         else
          this.jm.set_node_color(item.id, this.bgMap[item.type].transparent, '#fff')

       else
        this.jm.set_node_color(item.id, this.bgMap[item.type].transparent, '#fff')

    )

,
// 循环树结构
loopTreeData (list, callback)
  (function doOneFloor (list)
    if (Array.isArray(list))
      for (let i = 0; i < list.length; i++)
        const item = list[i]
        callback(item, i)
        if (item.children && item.children.length > 0)
          doOneFloor(item.children)


  )(list)
,
难点二:选中节点不改变背景颜色
思路:由于插件机制问题,选中节点会有默认的背景颜色,由于不同节点类型对应的颜色不尽相同,于是添加点击事件,在选中节点时动态设置对应节点背景
实现:
1.动态设置节点背景
<div
  id="jsmind_container"
  ref="container"
  @click="nodeClick"
  @contextmenu.prevent.stop="nodeClick"
></div>
nodeClick ()
  const selectedId = this.get_selected_nodeid()
  if (!selectedId) return
  const nodeObj = this.jm.get_node(selectedId)
  this.jm.set_node_color(selectedId, nodeObj.data['background-color'], '#fff')
,
// 获取选中标签的 ID
get_selected_nodeid ()
  const selectedNode = this.jm.get_selected_node()
  if (selectedNode)
    return selectedNode.id
   else
    return null
2.加个过渡效果,以避免出现闪烁
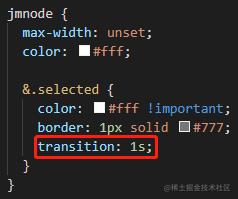
副作用:
由于给选中节点加了过渡效果,在拖拽节点时也会有该效果存在,但问题不大。
难点三:分布结构切换
思路:数据格式有个direction字段用来表示节点方向,如下:
  "id":"open",           // [必选] ID, 所有节点的ID不应有重复,否则ID重复的结节将被忽略
  "topic":"Open Source", // [必选] 节点上显示的内容
  "direction":"right",   // [可选] 节点的方向,此数据仅在第一层节点上有效,目前仅支持 left 和 right 两种,默认为 right
  "expanded":true,       // [可选] 该节点是否是展开状态,默认为 true
在切换不同结构时,动态改变即可
效果:
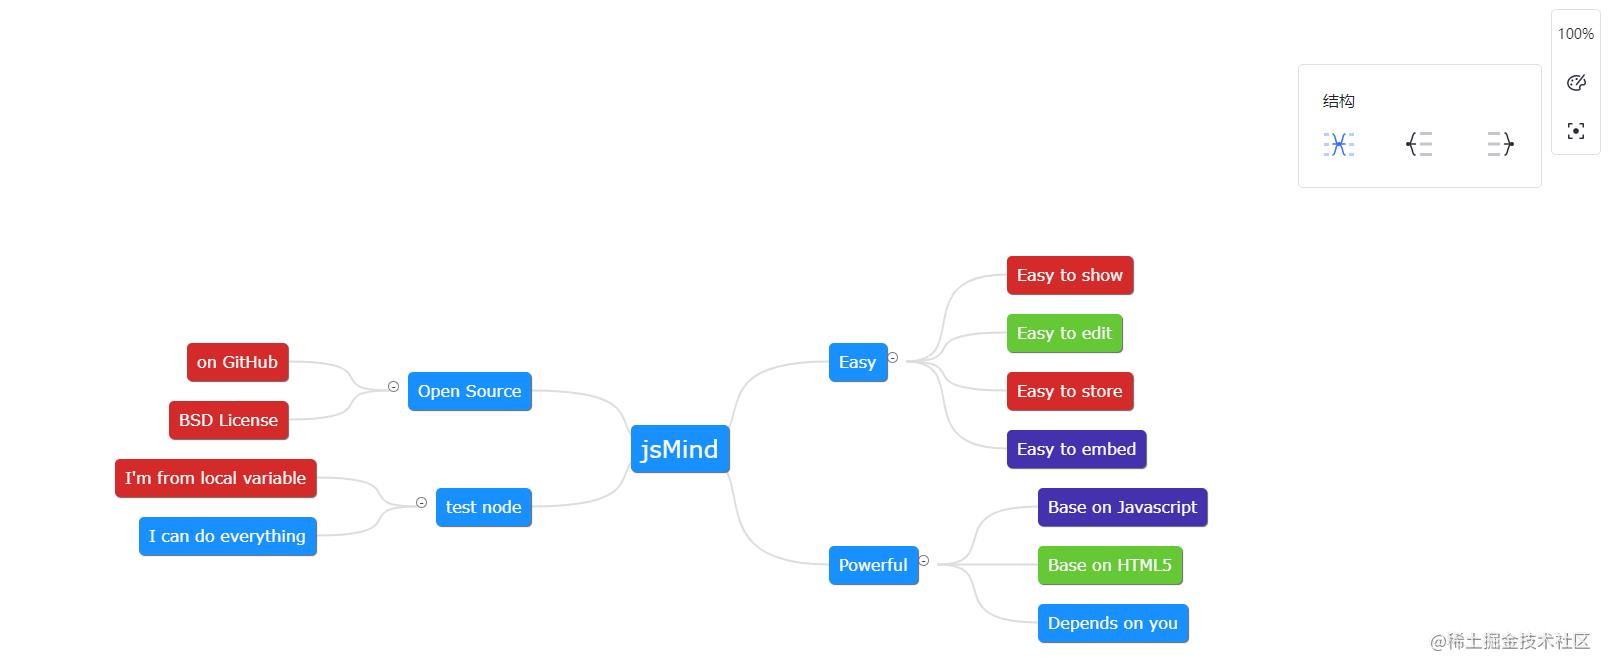
实现:
// 切换思维导图结构
toggleStucture (type)
  if (this.structure.active === type) return
  this.structure.active = type
  switch (type)
    case 'side':
      // 两边分布
      this.loopTreeData(this.mind.data.children, (item, i) =>  item.direction = i % 2 ? 'left' : 'right' )
      break

    case 'left':
      // 向左分布
      this.loopTreeData(this.mind.data.children, (item) =>  item.direction = 'left' )
      break

    case 'right':
      // 向右分布
      this.loopTreeData(this.mind.data.children, (item) =>  item.direction = 'right' )
      break

    default:
      break


  this.jm.show(this.mind)
,
难点四:添加自定义菜单
思路:固定定位自定义菜单项,根据鼠标右键点击位置,动态计算节点的left,top, right, bottom值,需要格外注意越界问题,避免菜单显示不全
效果:
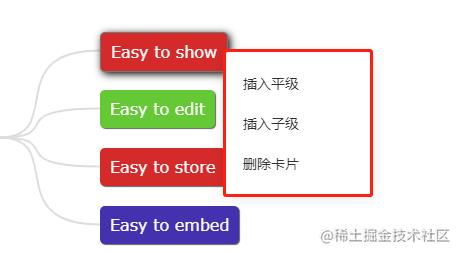
实现:
<el-menu
  class="context-menu"
  v-show="showMenu"
  :style="
    left: menuStyle.left,
    top: menuStyle.top,
    bottom: menuStyle.bottom,
    right: menuStyle.right
  "
  ref="context"
>
  <slot>
    <el-menu-item @click="addBrother">插入平级</el-menu-item>
    <el-menu-item @click="addChild">插入子级</el-menu-item>
    <el-menu-item @click="delCard">删除卡片</el-menu-item>
  </slot>
</el-menu>
this.editor = this.jm.view.e_editor
// jsmind 添加自定义菜单事件
this.jm.view.add_event(this.editor, 'contextmenu', (e) =>
    const selectedNode = this.jm.get_selected_node()
    if (selectedNode && selectedNode.data.type)
      e.preventDefault()
      const el = document.querySelector('.context-menu .el-menu-item')
      const width = parseFloat(window.getComputedStyle(el).width)
      const height = parseFloat(window.getComputedStyle(el).height) * 3 + 12
      const windowHeight = window.innerHeight
      const windowWidth = window.innerWidth

      // 极限位置 避免越界
      if (e.clientY + height > windowHeight)
        this.menuStyle.left = e.clientX + 'px'
        this.menuStyle.top = 'unset'
        this.menuStyle.bottom = 0
       else if (e.clientX + width > windowWidth)
        this.menuStyle.top = e.clientY + 'px'
        this.menuStyle.left = 'unset'
        this.menuStyle.right = 0
       else
        this.menuStyle.left = e.clientX + 'px'
        this.menuStyle.top = e.clientY + 'px'
        this.menuStyle.bottom = 'unset'

      this.showMenu = true
     else
      this.showMenu = false

)
难点五:放大层级后显示不全
效果:
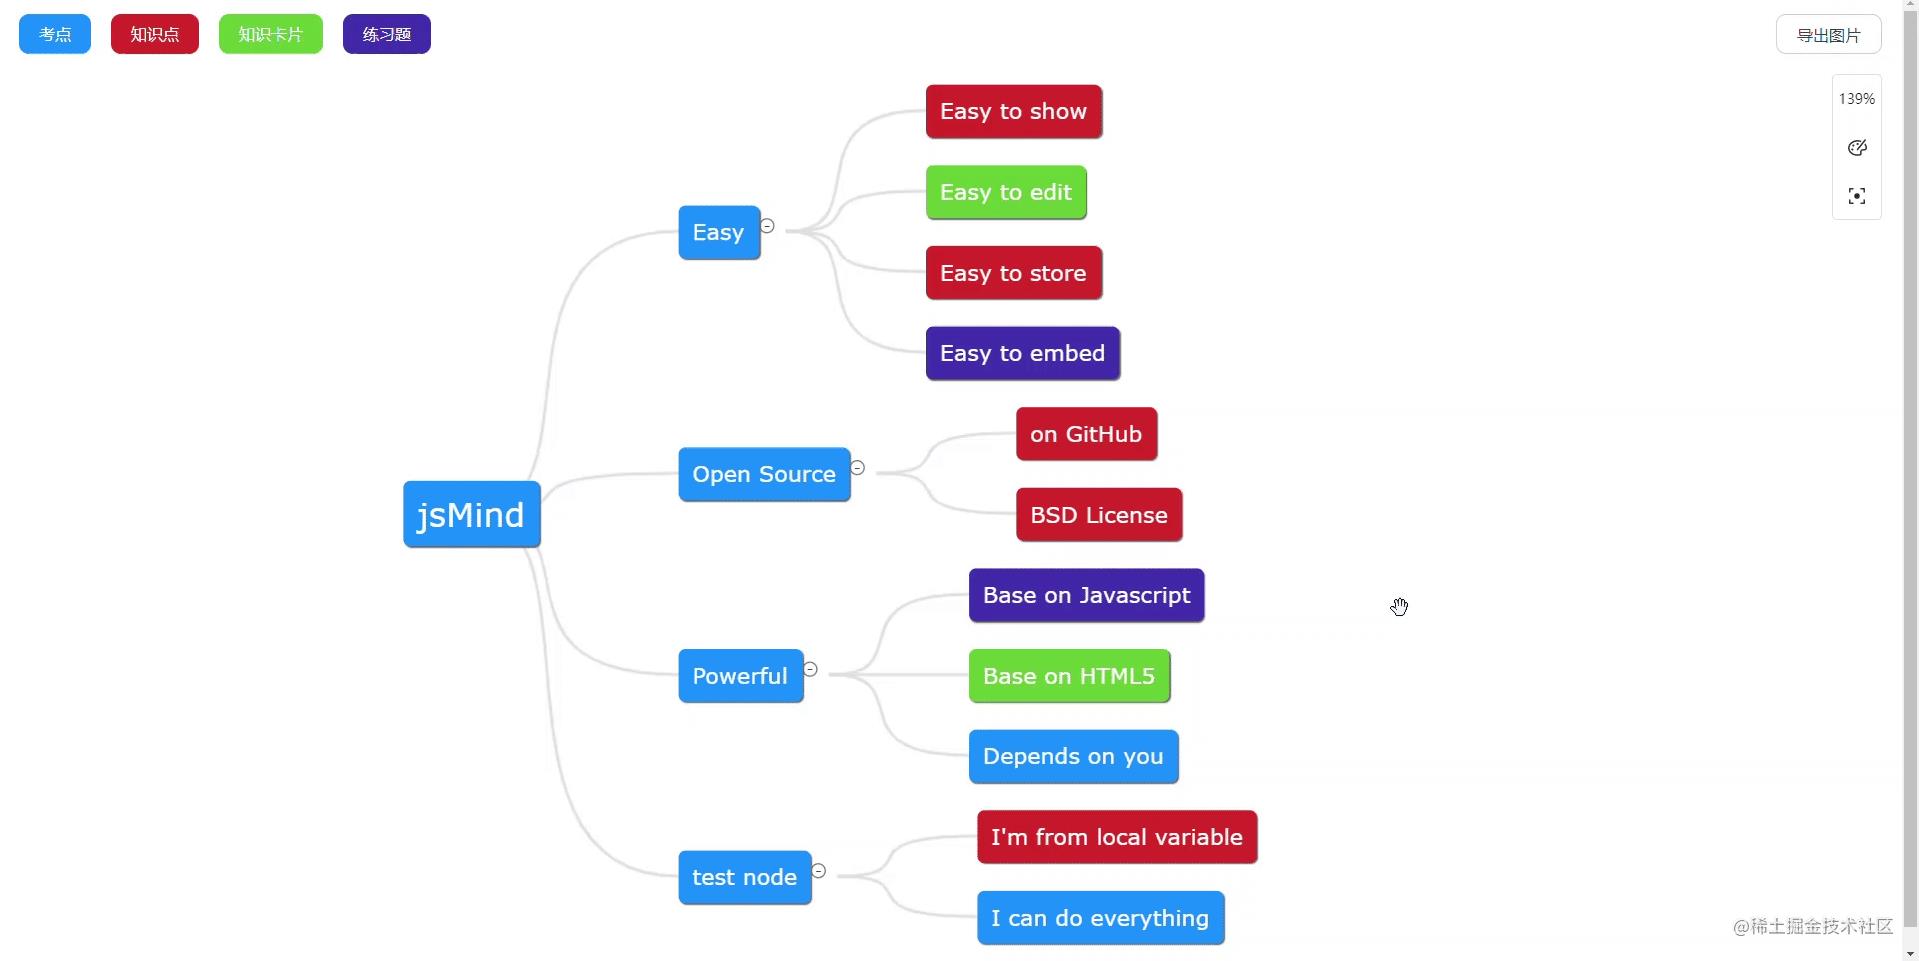
思路:通过查看插件源码发现内部使用transform scale()来实现缩放的,这种方式并不会改变文档流的,也就是说页面元素的宽高布局不会改变,只会在渲染时显示缩放的大小。而zoom缩放可以改变文档流大小
实现:
方式一:(推荐)
直接在jsmind.js找到setZoom()方法进行修改:
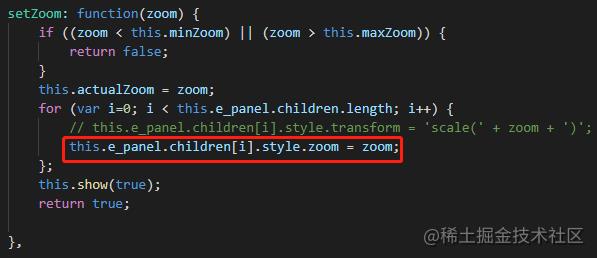
方式二:
直接覆盖setZoom()方法
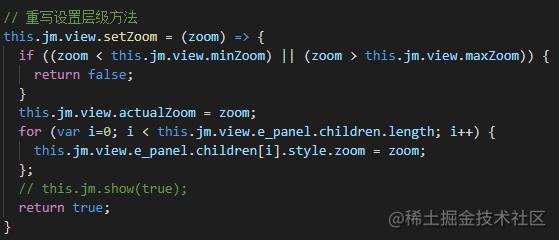
副作用:
transform: scale的缩放默认是居中缩放的,而zoom的大小缩放是相对于左上角的,如此调整会导致缩放效果在视觉上有所变化,主要目的是解决了显示不全的问题。
难点六:编辑节点失焦后保存,且节点内容不能为空
思路:观察源码发现内部有一个edit_node_end()事件,在vue文件中覆盖这个方法,加上自己的业务逻辑
效果:
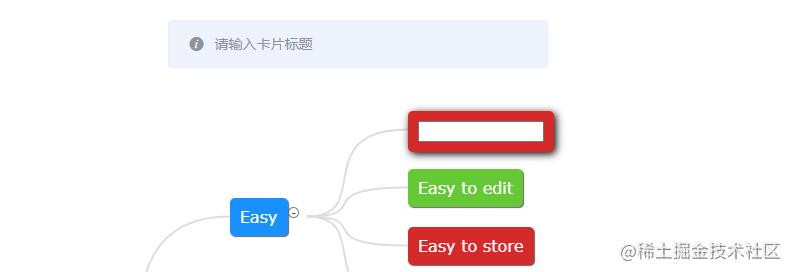
实现:
// 重写编辑完成事件
this.jm.view.edit_node_end = () =>
  const node = this.jm.view.get_editing_node()
  const viewData = node._data.view
  const element = viewData.element
  element.style.zIndex = 'auto'
  if (node.topic === this.editor.value)
    this.jm.update_node(node.id, node.topic)
    return

  node.topic = this.editor.value
  if (!node.topic)
    this.$message.info('请输入卡片标题')

  this.jm.update_node(node.id, node.topic)

  // TODO 调接口
难点七:区分节点拖拽和页面拖拽
思路:在jsmind.draggable.js中有一个拖拽过程中节点移动的方法,可以在此方法之后添加自定义方法,用来获取拖拽的节点信息,然后在vue文件中覆盖该方法,加上自己的业务逻辑。当然也可以在拖拽时判断是否选中节点,根据这个标识来区分
实现:
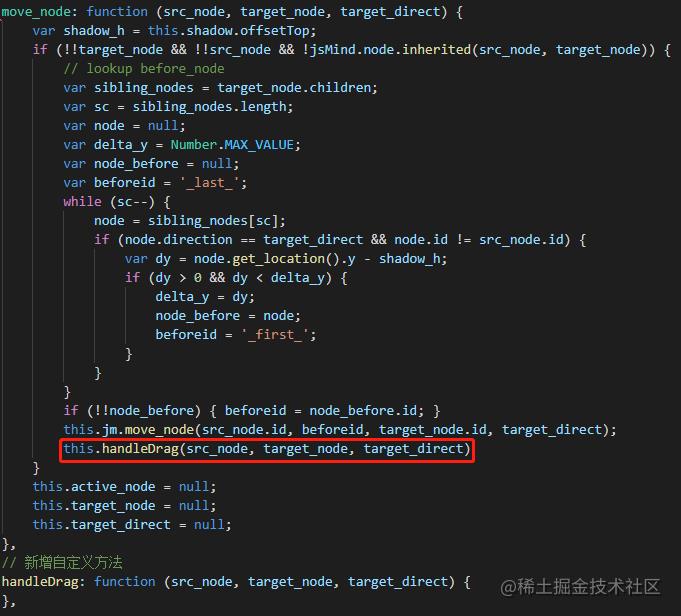
// 自定义拖拽完成事件
jsMind.draggable.prototype.handleDrag = (srcNode, targetNode, targetDirect) =>
  const nextParentId = srcNode.parent.id
  this.handleDrop(nextParentId, srcNode.id)
// 拖拽
handleDrop (draggingNode, dropNode)
  // 前一个兄弟节点
  const prevNode = this.jm.find_node_before(dropNode)
  // 获取移动后的node
  const dragForm =
    modelId: '',
    treeNum: !prevNode ? draggingNode : prevNode.id,
    thisTreeNum: dropNode

  console.log('dragForm', dragForm)

  // TODO 调接口
难点八:通过鼠标滚轮缩放思维导图
思路:监听滑动滚轮事件,动态设置层级
效果:
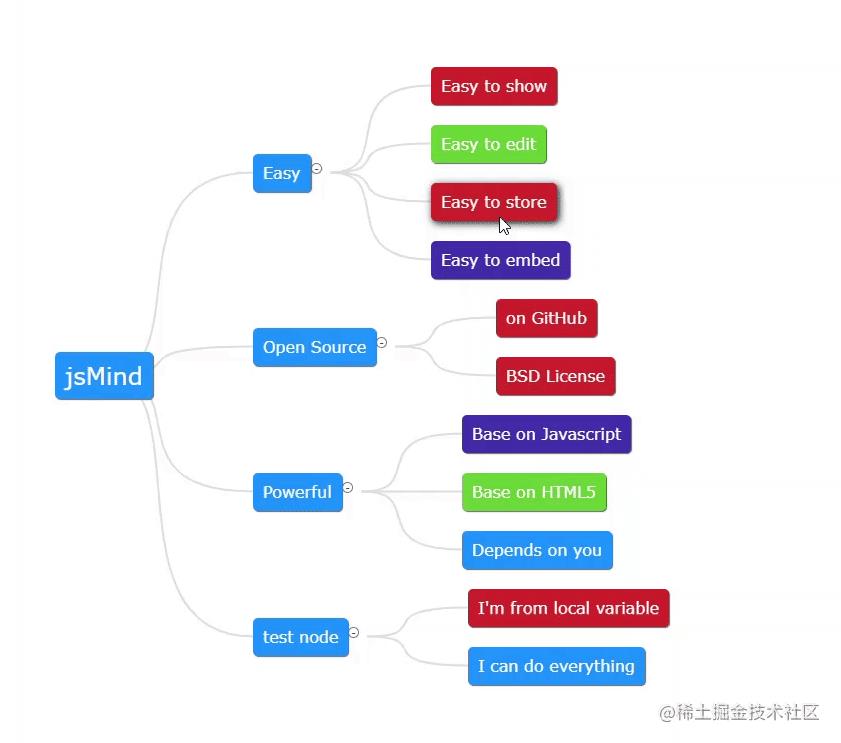
实现:
// 鼠标滚轮放大缩小
mouseWheel ()
if (document.addEventListener)
document.addEventListener('domMouseScroll', this.scrollFunc, false)
this.$refs.container.onmousewheel = this.scrollFunc
,
// 滚轮缩放
scrollFunc (e)
e = e || window.event
if (e.wheelDelta)
if (e.wheelDelta > 0)
this.zoomIn()
else
this.zoomOut()
else if (e.detail)
if (e.detail > 0)
this.zoomIn()vue基础思维导图
以上是关于vue实现思维导图的主要内容,如果未能解决你的问题,请参考以下文章