vue+uniapp瀑布流布局多种实现方式
Posted pixle0
tags:
篇首语:本文由小常识网(cha138.com)小编为大家整理,主要介绍了vue+uniapp瀑布流布局多种实现方式相关的知识,希望对你有一定的参考价值。
文章目录
前言
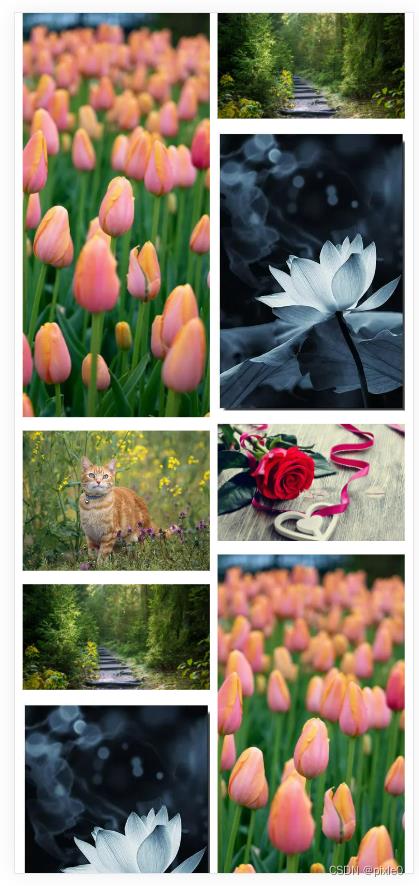
瀑布流布局是网页设计常见的一种布局,一般用于图片多列展示。列宽固定,图片根据自身高度自适应交错排列。
一、实现原理
通过动态计算哪一列高度最低,就把图片放置该列下显示,直至所有图片分列完毕
计算哪一列高度最低具体实现过程又分2种方式:
方式1:通过计算每一列每张图片渲染后高度进行累加就是该列的高度,记录每列累加高度比较大小
方式2:直接通过图片父级元素高度(列div)来判断哪一列最低
区别:方式1无需等待图片真实渲染完成在比较高度,方式2需要等待图片真实渲染完成在获取高度
二、代码实现
以左右2列为例
<template>
  <div class="page">
    <!-- 左图片列表 -->
    <div class="left" ref="left">
      <img
        class="img"
        v-for="(item, index) in leftList"
        :key="index"
        :src="item"
      />
    </div>
    <!-- 右图片列表 -->
    <div class="right" ref="right">
      <img
        class="img"
        v-for="(item, index) in rightList"
        :key="index"
        :src="item"
      />
    </div>
  </div>
</template>
<style scoped>
.page
  width: 100%;
  display: flex;
  align-items: flex-start;
  padding: 0 1%;
  box-sizing: border-box;

.left,
.right
  margin: 0 auto;
  width: 48%;

.img
  width: 100%;
  height: auto;
  margin-bottom: 10px;

</style>
1.方式1(图片高度累加比较法)
<script>
export default
  data()
    return
      imgList: [
        "https://img0.baidu.com/it/u=1345303087,1528317222&fm=253&fmt=auto&app=138&f=JPEG?w=500&h=1082",
        "https://img2.baidu.com/it/u=1893470775,4143435497&fm=253&fmt=auto&app=138&f=JPEG?w=889&h=500",
        "https://img0.baidu.com/it/u=1088754973,1390499664&fm=253&fmt=auto&app=138&f=JPEG?w=335&h=500",
        "https://img1.baidu.com/it/u=3866290852,3566512524&fm=253&fmt=auto&app=138&f=JPEG?w=800&h=500",
        "https://img2.baidu.com/it/u=1114729443,1120710416&fm=253&fmt=auto&app=138&f=JPEG?w=667&h=500",
        "https://img0.baidu.com/it/u=1345303087,1528317222&fm=253&fmt=auto&app=138&f=JPEG?w=500&h=1082",
        "https://img2.baidu.com/it/u=1893470775,4143435497&fm=253&fmt=auto&app=138&f=JPEG?w=889&h=500",
        "https://img2.baidu.com/it/u=1088754973,1390499664&fm=253&fmt=auto&app=138&f=JPEG?w=335&h=500",
      ], //所有图片
      leftList: [], //左边列图片
      rightList: [], //右边列图片
      leftHeight: 0, //左边列高度
      rightHeight: 0, //右边列高度
      columnWidth: 0, //列宽度
    ;
  ,
  mounted()
    this.$nextTick(() =>
      this.columnWidth = this.$refs.left.clientWidth;
      this.setWaterFallLayout();
    );
  ,
  methods:
    //方法1
    async setWaterFallLayout()
      for (let item of this.imgList)
        let img = new Image();
        img.src = item;
        try
          let h = await this.getImgHeight(img);//图片渲染后高度
          if (this.leftHeight <= this.rightHeight) //左边列比右边低,图片放入左边
            this.leftList.push(item);
            this.leftHeight += h;
           else //否则,图片放入右边
            this.rightList.push(item);
            this.rightHeight += h;

        catch(e)
          console.log(e)


    ,
    //获取图片高度
    getImgHeight(img)
      return new Promise((resolve,reject) =>
      //图片加载完成
        img.onload = () =>
          let h = (img.height / img.width) * this.columnWidth;//计算图片渲染后高度
          resolve(h);
        ;
        //加载出错
        img.onerror=()=>
          reject('error')

      );
    ,
  ,
;
</script>
2.方式2(父元素高度比较法)
每次放入图片需要等待渲染后再重新计算父元素高度,关键代码 await this.$nextTick()
<script>
export default
  data()
    return
      imgList: [
        "https://img0.baidu.com/it/u=1345303087,1528317222&fm=253&fmt=auto&app=138&f=JPEG?w=500&h=1082",
        "https://img2.baidu.com/it/u=1893470775,4143435497&fm=253&fmt=auto&app=138&f=JPEG?w=889&h=500",
        "https://img0.baidu.com/it/u=1088754973,1390499664&fm=253&fmt=auto&app=138&f=JPEG?w=335&h=500",
        "https://img1.baidu.com/it/u=3866290852,3566512524&fm=253&fmt=auto&app=138&f=JPEG?w=800&h=500",
        "https://img2.baidu.com/it/u=1114729443,1120710416&fm=253&fmt=auto&app=138&f=JPEG?w=667&h=500",
        "https://img0.baidu.com/it/u=1345303087,1528317222&fm=253&fmt=auto&app=138&f=JPEG?w=500&h=1082",
        "https://img2.baidu.com/it/u=1893470775,4143435497&fm=253&fmt=auto&app=138&f=JPEG?w=889&h=500",
        "https://img2.baidu.com/it/u=1088754973,1390499664&fm=253&fmt=auto&app=138&f=JPEG?w=335&h=500",
      ], //所有图片
      leftList: [], //左边列表图片
      rightList: [], //右边列表图片
    ;
  ,
  mounted()
    this.$nextTick(() =>
      this.setWaterFallLayout2();
    );
  ,
  methods:
    //方法2
    async setWaterFallLayout2()
      for (let item of this.imgList)
        if (this.$refs.left.clientHeight <= this.$refs.right.clientHeight) //左边列比右边低,图片放入左边
          this.leftList.push(item);
         else //否则图片放入右边
          this.rightList.push(item);

        await this.$nextTick();//等待渲染完成后重新比较左右高度

    ,
  ,
;
</script>
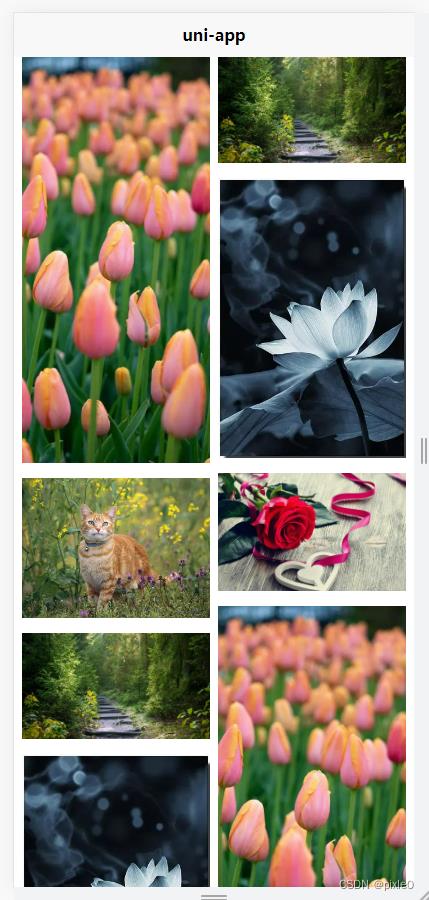
三.uniapp实现
由于uniapp获取元素高度和vue有所区别,造成实现瀑布流方式也需要调整。我们知道uniapp不能通过this.$ref.xx.clientHeight获取元素高度,而需要通过uni.createSelectorQuery().in(this).select(‘.xxxx’).boundingClientRect().exec()来获取,且经过实测当图片动态加入列后通过该api计算出父元素真实高度是不准确的,所以uniapp瀑布流布局实现方式只能通过方法1(也即图片高度累加法)进行实现,除了上面方法1通过img.onload来获取图片高度外,uniapp还提供uni.getImageInfo方法来更方便获取图片高度。
代码实现
<template>
	<view class="page">
		<view class="left" ref="left">
			<image class="image" v-for="(item,i) in leftList" :key="i" :src="item" mode="widthFix"></image>
		</view>
		<view class="right" ref="right">
			<image class="image" v-for="(item,i) in rightList" :key="i" :src="item" mode="widthFix"></image>
		</view>
	</view>
</template>
<style lang="scss">
	.page
		width: 100%;
		display: flex;
		align-items: flex-start;
		padding: 0 1%;
		box-sizing: border-box;


	.left,
	.right
		margin: 0 auto;
		width: 48%;


	.image
		width: 100%;
		height: auto;
		margin-bottom: 10px;

</style>
<script>
	export default
		data()
			return
				imageList: [
					"https://img0.baidu.com/it/u=1345303087,1528317222&fm=253&fmt=auto&app=138&f=JPEG?w=500&h=1082",
					"https://img2.baidu.com/it/u=1893470775,4143435497&fm=253&fmt=auto&app=138&f=JPEG?w=889&h=500",
					"https://img0.baidu.com/it/u=1088754973,1390499664&fm=253&fmt=auto&app=138&f=JPEG?w=335&h=500",
					"https://img1.baidu.com/it/u=3866290852,3566512524&fm=253&fmt=auto&app=138&f=JPEG?w=800&h=500",
					"https://img2.baidu.com/it/u=1114729443,1120710416&fm=253&fmt=auto&app=138&f=JPEG?w=667&h=500",
					"https://img0.baidu.com/it/u=1345303087,1528317222&fm=253&fmt=auto&app=138&f=JPEG?w=500&h=1082",
					"https://img2.baidu.com/it/u=1893470775,4143435497&fm=253&fmt=auto&app=138&f=JPEG?w=889&h=500",
					"https://img0.baidu.com/it/u=1088754973,1390499664&fm=253&fmt=auto&app=138&f=JPEG?w=335&h=500",
				], //所有图片
				leftList: [], //左边列图片
				rightList: [], //右边列图片
				leftHeight: 0, //左边列高度
				rightHeight: 0, //右边列高度
				columnWidth: 0 //列宽度

		,
		mounted()
			this.$nextTick(() =>
				uni.createSelectorQuery().in(this).select('.left').boundingClientRect(res =>
					this.columnWidth = res.width
					//方法1
					this.setWaterFallLayout()
					//方法2
					// this.setWaterFallLayout2()
				).exec()
			)
		,
		methods:
			//方法1通过img.onload
			async setWaterFallLayout()
				for (let item of this.imageList)
					let img = new Image()
					img.src = item
					try
						let h = await this.getImgHeight(img)
						if (this.leftHeight <= this.rightHeight)
							this.leftList.push(item)
							this.leftHeight += h
						 else
							this.rightList.push(item)
							this.rightHeight += h

					 catch (e)
						console.log(e)


			,
			//获取图片高度
			getImgHeight(img)
				return new Promise((resolve, reject) =>
					img.onload = () =>
						let h = img.height / img.width * this.columnWidth
						resolve(h)

					//加载出错
					img.onerror = () =>
						reject('error')

				)
			,
			//方法2通过uni.getImageInfo
			async setWaterFallLayout2()
				for (let item of this.imageList)
					uni.getImageInfo(
						src: item,
						success: e =>
							if (this.leftHeight <= this.rightHeight)
								this.leftList.push(item)
								this.leftHeight += e.height
							 else
								this.rightList.push(item)
								this.rightHeight += e.height


					)


		,


</script>
四、多列实现
多列实现和2列一样,动态生成每列图片数据和记录每列高度

代码实现
以最简单的父元素高度比较法(方式2)为例实现,图片高度累加比较法(方式1)自行类比实现
<template>
  <div class="page">
    <div
      class="column"
      ref="column"
      v-for="(item, index) in columnList"
      :key="index"
    >
      <img class="img" v-for="(n, i) in item" :key="i" :src="n" />
    </div>
  </div>
</template>
<style scoped>
.page
  width: 100%;
  display: flex;
  align-items: flex-start;
  padding: 0 1%;
  box-sizing: border-box;


.column
  flex: 1;
  padding: 0 10px;
  box-sizing: border-box;
  width: 0;


.img
  width: 100%;
  height: auto;
  margin-bottom: 10px;

</style>
<script>
export default
  data()
    return
      imgList: [
        "https://img0.baidu.com/it/u=1345303087,1528317222&fm=253&fmt=auto&app=138&f=JPEG?w=500&h=1082",
					"https://img2.baidu.com/it/u=1893470775,4143435497&fm=253&fmt=auto&app=138&f=JPEG?w=889&h=500",
					"https://img0.baidu.com/it/u=1088754973,1390499664&fm=253&fmt=auto&app=138&f=JPEG?w=335&h=500",
					"https://img1.baidu.com/it/u=3866290852,3566512524&fm=253&fmt=auto&app=138&f=JPEG?w=800&h=500",
					"https://img2.baidu.com/it/u=1114729443,1120710416&fm=253&fmt=auto&app=138&f=JPEG?w=667&h=500",
					"https://img0.baidu.com/it/u=1345303087,1528317222&fm=253&fmt=auto&app=138&f=JPEG?w=500&h=1082",
					"https://img2.baidu.com/it/u=1893470775,4143435497&fm=253&fmt=auto&app=138&f=JPEG?w=889&h=500",
					"https://img0.baidu.com/it/u=1088754973,1390499664&fm=253&fmt=auto&app=138&f=JPEG?w=335&h=500",
					"https://img0.baidu.com/it/u=1345303087,1528317222&fm=253&fmt=auto&app=138&f=JPEG?w=500&h=1082",
					"https://img2.baidu.com/it/u=1893470775,4143435497&fm=253&fmt=auto&app=138&f=JPEG?w=889&h=500",
      ], //所有图片
      columnList: [], //分配后的每列图片
      columWidth: 0, //每列宽度
      columnCount: 5, //显示几列
    ;
  ,
  created()
    //初始化数据
    for (let i = 0; i < this.columnCount; i++)
      this.columnList.push([]);//生成每列图片数组

  ,
  mounted()
    this.$nextTick(()=>
      this
    参考技术A
             瀑布流布局,一般指根据内容高度自适应填充到某一列以使整体页面和谐,常见的有图片网站,比如每一行每一列的内容是错开的。   瀑布流布局一般是下面这个样子                                                                                               css中有这么两个属性:    注意                                             这也是我推荐大家用第一种方法的最主要原因。    这种方案做出来的效果有点奇葩,特殊的应用场景可能会用到,最终效果是横向瀑布流
   flex布局中有一个属性 flex-flow ,指明在哪个方向上在长度不够的情况想拆行,详情大家自己查阅   第一种方法其实是最合适的,也是对开发人员要求最高的,即使有思路与算法在开发过程中也会踩很多坑,比如(1)图片预加载,(2)querySelector取元素居然获取不到,(3)使用box-sizing简化计算过程降低复杂性,等等。 box-sizing 属性用好了非常高效,推荐大家去仔细看看    第二种方法其实也可行,但是不推荐
   第三种方法就有点扯了,估计不常用到,大家看看就行

            以上是关于vue+uniapp瀑布流布局多种实现方式的主要内容,如果未能解决你的问题,请参考以下文章