Activity 与 Fragment通信方式-Android
Posted hequnwang10
tags:
篇首语:本文由小常识网(cha138.com)小编为大家整理,主要介绍了Activity 与 Fragment通信方式-Android相关的知识,希望对你有一定的参考价值。
Fragment 与 Activity 通信存在三种情形:
-
Activity 操作内嵌的 Fragment
-
Fragment 操作宿主 Activity
-
Fragment 操作同属 Activity中的其他 Fragment
Fragment 与 Activity 通信方式:
- Bundle
- 接口回调
- 广播
- EventBus
- Handler
- ViewModel
一、Bundle
1、Activity 传递数据到 Fragment
activity_main.xml
<?xml version="1.0" encoding="utf-8"?>
<LinearLayout xmlns:android="http://schemas.android.com/apk/res/android"
    android:orientation="vertical"
    android:layout_width="match_parent"
    android:layout_height="match_parent">

    <Button
        android:id="@+id/button"
        android:layout_gravity="center"
        android:layout_width="wrap_content"
        android:layout_height="wrap_content"
        android:textSize="20dp"
        android:text="Activity" />

    <FrameLayout
        android:layout_below="@+id/button"
        android:id="@+id/fragment_container"
        android:layout_width="match_parent"
        android:layout_height="match_parent"/>
</LinearLayout>
activity_my_fragment.xml
<LinearLayout xmlns:android="http://schemas.android.com/apk/res/android"
    android:orientation="vertical"
    android:layout_width="match_parent"
    android:layout_height="match_parent"
    >
    <Button
        android:id="@+id/change"
        android:layout_gravity="center"
        android:layout_width="wrap_content"
        android:layout_height="wrap_content"
        android:textSize="20dp"
        android:text="change消息" />

    <Button
        android:id="@+id/get"
        android:layout_gravity="center"
        android:text="get消息"
        android:layout_centerInParent="true"
        android:textSize="20dp"
        android:layout_width="wrap_content"
        android:layout_height="wrap_content" />
</LinearLayout>
MainActivity.java
public class MainActivity extends AppCompatActivity

    Button button;

    @Override
    protected void onCreate(Bundle savedInstanceState)
        super.onCreate(savedInstanceState);
        setContentView(R.layout.activity_main);

        button = (Button) findViewById(R.id.button);

        // 步骤1:获取FragmentManager
        FragmentManager fragmentManager = getFragmentManager();

        // 步骤2:获取FragmentTransaction
        FragmentTransaction fragmentTransaction = fragmentManager.beginTransaction();

        // 步骤3:创建需要添加的Fragment
        final MyFragment fragment = new MyFragment();

        // 步骤4:创建Bundle对象
        // 作用:存储数据,并传递到Fragment中
        Bundle bundle = new Bundle();

        // 步骤5:往bundle中添加数据
        bundle.putString("msg", "change成功");

        // 步骤6:把数据设置到Fragment中
        fragment.setArguments(bundle);

        // 步骤7:动态添加fragment
        // 即将创建的fragment添加到Activity布局文件中定义的占位符中(FrameLayout)
        fragmentTransaction.add(R.id.fragment_container,fragment);
        fragmentTransaction.commit();
MyFragment.java
public class MyFragment extends Fragment

    Button change;
    Button get;
    Bundle bundle;
    String message;

    @Nullable
    @Override
    public View onCreateView(LayoutInflater inflater, @Nullable ViewGroup container, Bundle savedInstanceState)
        View contentView = inflater.inflate(R.layout.activity_my_fragment, container, false);
        // 设置布局文件

        change = (Button) contentView.findViewById(R.id.change);
        get = (Button) contentView.findViewById(R.id.get);

        // 步骤1:通过getArgments()获取从Activity传过来的全部值
        bundle = this.getArguments();

        // 步骤2:获取某一值
        message = bundle.getString("msg");

        // 步骤3:设置按钮,将设置的值显示出来
        get.setOnClickListener(new View.OnClickListener()
            @Override
            public void onClick(View v)
                // 显示传递过来的值
                change.setText(message);

        );
        return contentView;
二、接口回调
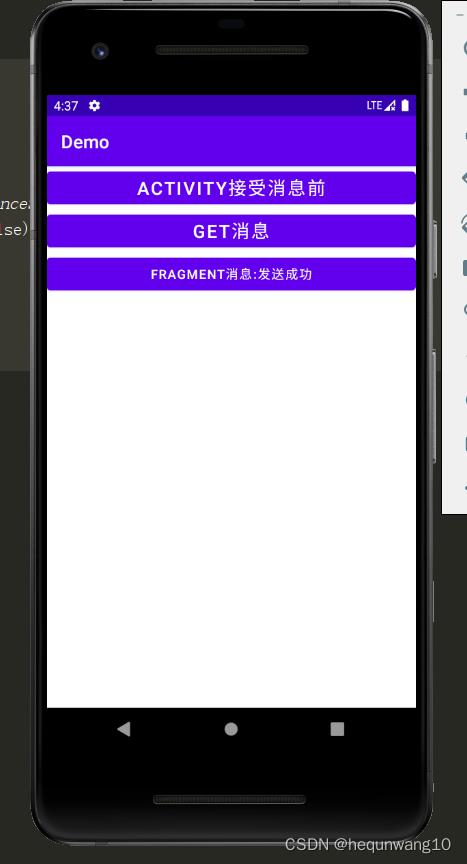
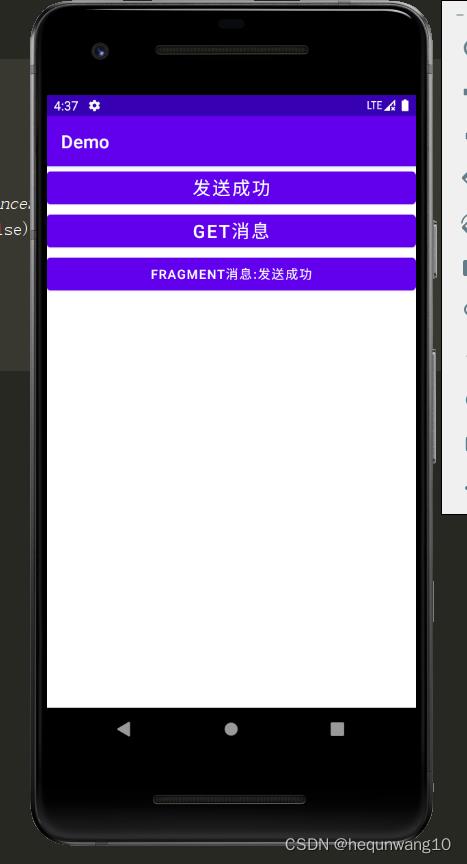
1、Fragment 传递数据到 Activity
方法一:
接口用于Activity与Fragment通信
ICallBack.java
public interface ICallBack
    void get_message_from_Fragment(String string);
activity_main.xml
<?xml version="1.0" encoding="utf-8"?>
<LinearLayout xmlns:android="http://schemas.android.com/apk/res/android"
    android:orientation="vertical"
    android:layout_width="match_parent"
    android:layout_height="match_parent">

    <Button
        android:id="@+id/button"
        android:layout_gravity="center"
        android:layout_width="match_parent"
        android:layout_height="wrap_content"
        android:textSize="20dp"
        android:text="Activity接受消息前" />

    <Button
        android:id="@+id/get"
        android:layout_gravity="center"
        android:layout_width="match_parent"
        android:layout_height="wrap_content"
        android:textSize="20dp"
        android:text="get消息" />

    <FrameLayout
        android:layout_below="@+id/button"
        android:id="@+id/fragment_container"
        android:layout_width="match_parent"
        android:layout_height="match_parent"/>
</LinearLayout>
activity_my_fragment.xml
<LinearLayout xmlns:android="http://schemas.android.com/apk/res/android"
    android:orientation="vertical"
    android:layout_width="match_parent"
    android:layout_height="wrap_content"
    >

    <Button
        android:id="@+id/fragment"
        android:layout_width="match_parent"
        android:layout_height="wrap_content"
        android:gravity="center"
        android:text="fragment消息:发送成功"
        />
</LinearLayout>
MainActivity.java
public class MainActivity extends AppCompatActivity
    Button button;
    Button get;

    @Override
    protected void onCreate(Bundle savedInstanceState)
        super.onCreate(savedInstanceState);
        setContentView(R.layout.activity_main);

        button = (Button) findViewById(R.id.button);
        get = (Button) findViewById(R.id.get);

        // 步骤1:获取FragmentManager
        FragmentManager fragmentManager = getFragmentManager();

        // 步骤2:获取FragmentTransaction
        FragmentTransaction fragmentTransaction = fragmentManager.beginTransaction();

        // 步骤3:创建需要添加的Fragment
        final MyFragment fragment = new MyFragment();

        // 步骤4:动态添加fragment
        // 即将创建的fragment添加到Activity布局文件中定义的占位符中(FrameLayout)
        fragmentTransaction.add(R.id.fragment_container, fragment);
        fragmentTransaction.commit();
        get.setOnClickListener(new View.OnClickListener()
            @Override
            public void onClick(View v)
                fragment.sendMessage(new ICallBack()
                    @Override
                    public void get_message_from_Fragment(String string)
                        button.setText(string);

                );

        );
MyFragment.java
public class MyFragment extends Fragment


    @Nullable
    @Override
    public View onCreateView(LayoutInflater inflater, @Nullable ViewGroup container, Bundle savedInstanceState)
        View contentView = inflater.inflate(R.layout.activity_my_fragment, container, false);
        return contentView;

    public void sendMessage(ICallBack iCallBack)
        iCallBack.get_message_from_Fragment("发送成功");


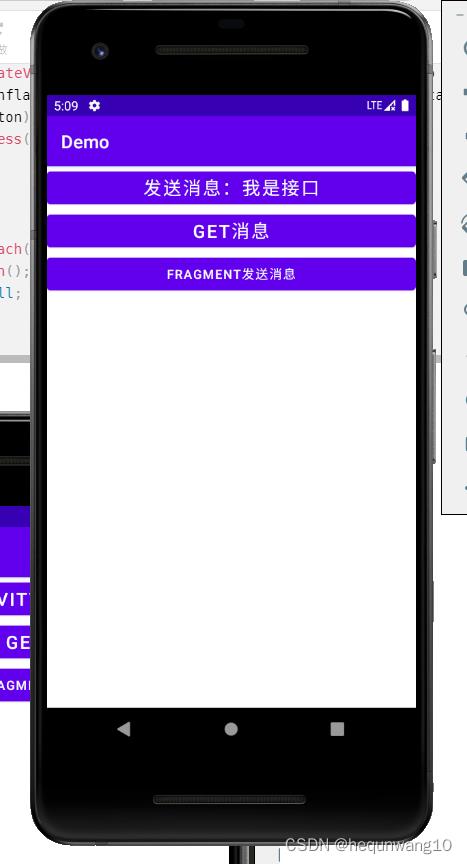
方法二:
FragmentListener.java
public interface FragmentListener
    void process(String str);
activity_main.xml
<?xml version="1.0" encoding="utf-8"?>
<LinearLayout xmlns:android="http://schemas.android.com/apk/res/android"
    android:orientation="vertical"
    android:layout_width="match_parent"
    android:layout_height="match_parent">

    <Button
        android:id="@+id/button"
        android:layout_gravity="center"
        android:layout_width="match_parent"
        android:layout_height="wrap_content"
        android:textSize="20dp"
        android:text="Activity接受消息前" />

    <Button
        android:id="@+id/get"
        android:layout_gravity="center"
        android:layout_width="match_parent"
        android:layout_height="wrap_content"
        android:textSize="20dp"
        android:text="get消息" />

    <FrameLayout
        android:layout_below="@+id/button"
        android:id="@+id/fragment_container"
        android:layout_width="match_parent"
        android:layout_height="match_parent"/>
</LinearLayout>
activity_my_fragment.xml
<LinearLayout xmlns:android="http://schemas.android.com/apk/res/android"
    android:orientation="vertical"
    android:layout_width="match_parent"
    android:layout_height="wrap_content"
    >

    <Button
        android:id="@+id/fragment2"
        android:layout_width="match_parent"
        android:layout_height="wrap_content"
        android:gravity="center"
        android:text="fragment发送消息"
        />
</LinearLayout>
MainActivity.java
public class MainActivity extends AppCompatActivity implements FragmentListener
    Button button;
    Button get;
    String getstring;

    @Override
    protected void onCreate(Bundle savedInstanceState)
        super.onCreate(savedInstanceState);
        setContentView(R.layout.activity_main);

        button = (Button) findViewById(R.id.button);
        get = (Button) findViewById(R.id.get);
        // 步骤1:获取FragmentManager
        FragmentManager fragmentManager = getFragmentManager();
        // 步骤2:获取FragmentTransaction
        FragmentTransaction fragmentTransaction = fragmentManager.beginTransaction();
        final MyFragment2 myFragment2 = new MyFragment2();
        fragmentTransaction.add(R.id.fragment_container,myFragment2);
        fragmentTransaction.commit();
        get.setOnClickListener(new View.OnClickListener()
            @Override
            public void onClick(View v)
                button.setText(getstring);

        );


    @Override
    public void process(String str)
        getstring = str;
MyFragment2.java
public class MyFragment2 extends Fragment
    Button button;
    private FragmentListener listener;
    @Override
    public void onAttach(Activity activity)
        super.onAttach(activity);
        if(activity instanceof FragmentListener)
            listener = (FragmentListener) activity;
        else
            throw new IllegalArgumentException("activity must implements Fragment interface");


    @Nullable
    @Override
    public View onCreateView(LayoutInflater inflater, @Nullable ViewGroup container, Bundle savedInstanceState)
        View view = inflater.inflate(R.layout.activity_my_fragment2, container, false);
        button = (Button) view.findViewById(R.id.fragment2);
        listener.process("发送消息:我是接口");
        return view;


    @Override
    public void onDetach()
        super.onDetach();
        listener = null;


三、EventBus
正常发送消息
- 简化组件之间的通信
- 解耦事件发送者和接收者
- 在活动、片段和后台线程中表现良好
- 避免复杂且容易出错的依赖关系和生命周期问题
- 让你的代码更简单
使用
1、添加依赖
implementation("org.greenrobot:eventbus:3.3.1")
2、EventBus 五步走
- 注册:EventBus.getDefault().register(this);
- 解注册:EventBus.getDefault().unregister(this);
- 构造发送消息类:public class MessageEvent
- 发布消息:EventBus.getDefault().post(new MessageEvent(“Fragment发送成功”));
- 接受消息:显示接受消息
activity_main.xml
<?xml version="1.0" encoding="utf-8"?>
<LinearLayout xmlns:android="http://schemas.android.com/apk/res/android"
    android:orientation="vertical"
    android:layout_width="match_parent"
    android:layout_height="match_parent">

    <Button
        android:id="@+id/button"
        android:layout_gravity="center"
        android:layout_width="match_parent"
        android:layout_height="wrap_content"
        android:textSize="20dp"
        android:text="Activity接受消息前" />

    <Button
        android:id="@+id/get"
        android:layout_gravity="center"
        android:layout_width="match_parent"
        android:layout_height="wrap_content"
        android:textSize="20dp"
        android:text="get消息" />

    <FrameLayout
        android:id="@+id/fragment_container"
        android:layout_width="match_parent"
        android:layout_height="match_parent"
        android:layout_below="@+id/button" />
</LinearLayout>
activity_event_bus_fragment.xml
<?xml version="1.0" encoding="utf-8"?>
<LinearLayout xmlns:android="http://schemas.android.com/apk/res/android"
    android:orientation="vertical"
    android:layout_width="match_parent"
    android:layout_height="match_parent">

    <Button
        android:id="@+id/bt_send"
        android:layout_gravity="center"
        android:layout_width="match_parent"
        android:layout_height="wrap_content"
        android:textSize="20dp"
        android:text="Fragment发送数据" />

    <Button
        android:id="@+id/bt_get"
        android:layout_gravity="center"
        android:layout_width="match_parent"
        android:layout_height="wrap_content"
        android:textSize="20dp"
        android:text="Fragment接受数据" />

    <Button
        android:id="@+id/msg"
        android:layout_width="match_parent"
        android:layout_height="wrap_content"
        android:layout_gravity="center"
        android:textSize="20dp"
        android:text="显示数据"/>
</LinearLayout>
MainActivity.java
public class MainActivity extends AppCompatActivity
    Button button;
    Button get;

    @Override
    protected<以上是关于Activity 与 Fragment通信方式-Android的主要内容,如果未能解决你的问题,请参考以下文章