Love2d从青铜到王者第十五篇:Love2d之角度和距离(Angles and distance)
Posted 森明帮大于黑虎帮
tags:
篇首语:本文由小常识网(cha138.com)小编为大家整理,主要介绍了Love2d从青铜到王者第十五篇:Love2d之角度和距离(Angles and distance)相关的知识,希望对你有一定的参考价值。

系列文章目录
文章目录
前言

🍇一、角度(Angle)
- 让我们画一个沿鼠标光标方向移动的圆。
- 从创建一个圆开始。
function love.load()

    ---创建一个名为circle的对象
    circle=
        x=100,
        y=100,
        radius=25,
        speed=200,


    --[[
    --给它属性x,y,半径和速度
    circle.x=100
    circle.y=100
    circle.radius=25
    circle.speed=200
    --]]
end

function love.update(dt)
end

function love.draw()
    --画圆
    love.graphics.circle("line",circle.x,circle.y,circle.radius)
end
- 注意:刚开始运行 这个love2d程序时出现了以下错误,以后请注意:

- 错误原因是你命名文件夹时候命名的名字有空格,所以出现以上错误,所以命名文件时文件名字不要有空格。

- 要将圆移向光标,我们需要知道角度。我们可以用函数得到角度math.atan2。第一个参数是你要去的y位置,减去你的对象的y位置。第二个参数是相同的,但对于x位置。这是y在x之前出现的罕见情况之一。
- 基本上,atan2所做的是获取一个垂直和水平向量(距离+方向),并根据该信息返回一个角度。

function love.load()

    ---创建一个名为circle的对象
    circle=
        x=100,
        y=100,
        radius=25,
        speed=200,


    --[[
    --给它属性x,y,半径和速度
    circle.x=100
    circle.y=100
    circle.radius=25
    circle.speed=200
    --]]
end

function love.update(dt)
    --love.mouse.getPosition返回光标的x和y位置
    mouse_x,mouse_y=love.mouse.getPosition()
    angle=math.atan2(mouse_y-circle.y,mouse_x-circle.x)
end

function love.draw()
    --画圆
    love.graphics.circle("line",circle.x,circle.y,circle.radius)

    love.graphics.setFont(love.graphics.newFont(30))
    --打印角度
    love.graphics.print("angle:"..angle,10,10)

    --Here are some lines to visualize the velocities这里有一些线来显示速度
    love.graphics.line(circle.x, circle.y, mouse_x, circle.y)
    love.graphics.line(circle.x, circle.y, circle.x, mouse_y)

    --The angle角度
    love.graphics.line(circle.x, circle.y, mouse_x, mouse_y)
end

-
如果atan2让你困惑,不要担心。你只需要知道:math.atan2(target_y - object_y, target_x - object_x)给你一个角度。在我们的例子中,对象是圆,目标是我们的光标。
-
这里就要变得数学化了,但不要让它吓到你。这并不困难,如果你不明白,对初学者来说完全没问题。
-
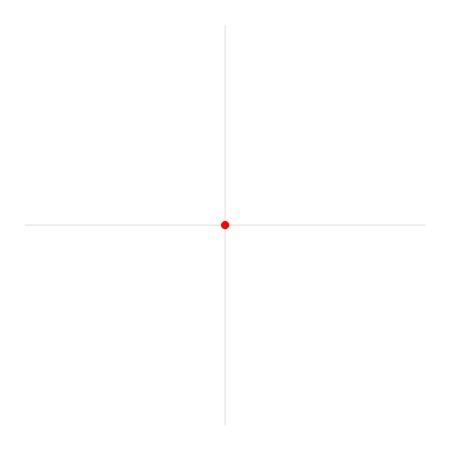
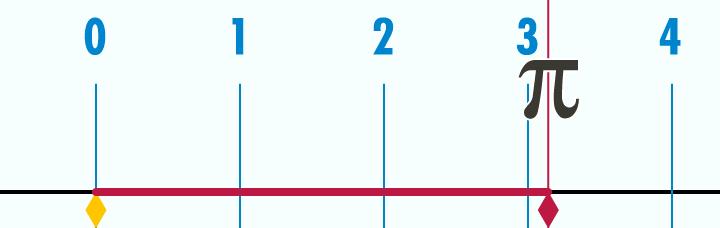
当你运行这个游戏时,你可能会注意到这个角度不会高于3.14 (Pi,π)。这是因为atan2不返回以度为单位的角度,而是返回以弧度为单位的角度。
-
这是解释弧度的gif。
-
如果你仍然困惑,我建议你观看B站视频关于弧度。
一些要点:
math.atan2返回以弧度表示的角度。
返回的角度在-3.14到3.14之间。
360度等于π*2弧度。所以90度等于π/2弧度。 -
数字π,有时写为圆周率,是圆的周长与直径的比值。也就是说,如果我们用一个圆的直径,除以这个圆的周长,我们得到圆周率。
-
在Lua中,我们可以通过使用math.pi。
-
如果你不明白,现在没关系。如果第一次没有得到什么,也不要气馁。
🍊二、正弦和余弦(Sine and cosine)
- 现在我们需要让我们的圆圈向鼠标移动。为此,我们将使用math. cos和math. sin。
- 基于我们传递的角度,这两个函数都将返回一个介于-1和1之间的数字。
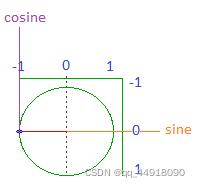
- 这里有一个gif,可以帮助可视化正弦和余弦。
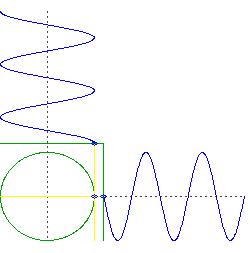
- 这里有一张图片显示了gif中到底发生了什么。
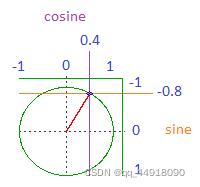
- 正弦和余弦是基于角度的介于-1和1之间的数字。
- 如果角度指向左边,那么余弦值为-1,正弦值为0。
- 如果角度指向下,那么余弦值为0,正弦值为1。

- 那么如何利用这些值让我们的圈子向鼠标移动呢?通过将我们的速度与它们相乘。例如,如果鼠标处于对角线角度,比如说右上,正弦大约是-0.7,余弦是0.7。
- 如果我们这样做:
function love.load()

    ---创建一个名为circle的对象
    circle=
        x=100,
        y=100,
        radius=25,
        speed=200,


    --[[
    --给它属性x,y,半径和速度
    circle.x=100
    circle.y=100
    circle.radius=25
    circle.speed=200
    --]]
end

function love.update(dt)
    --love.mouse.getPosition返回光标的x和y位置
    mouse_x,mouse_y=love.mouse.getPosition()
    angle=math.atan2(mouse_y-circle.y,mouse_x-circle.x)

    sin=math.sin(angle)
    cos=math.sin(angle)

    --让圆圈向鼠标移动
    circle.x=circle.x+circle.speed*dt
    circle.y=circle.y+circle.speed*dt
end

function love.draw()
    --画圆
    love.graphics.circle("line",circle.x,circle.y,circle.radius)

    love.graphics.setFont(love.graphics.newFont(30))
    --打印角度
    love.graphics.print("angle:"..angle,10,10)

    --Here are some lines to visualize the velocities这里有一些线来显示速度
    love.graphics.line(circle.x, circle.y, mouse_x, circle.y)
    love.graphics.line(circle.x, circle.y, circle.x, mouse_y)

    --The angle角度
    love.graphics.line(circle.x, circle.y, mouse_x, mouse_y)
end
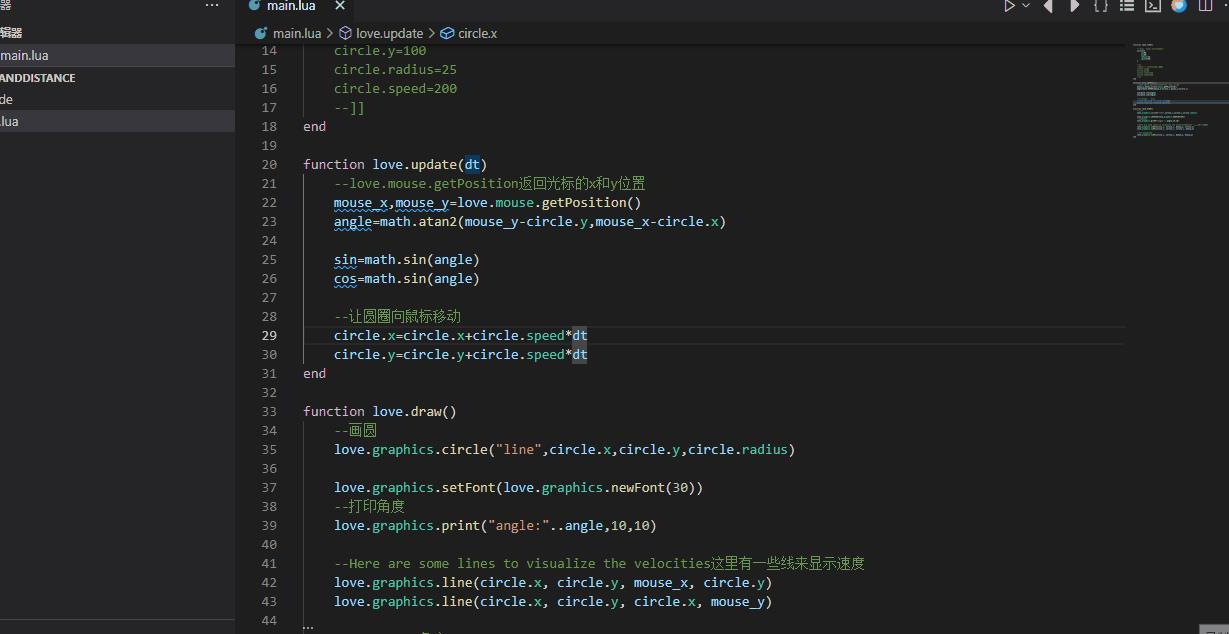
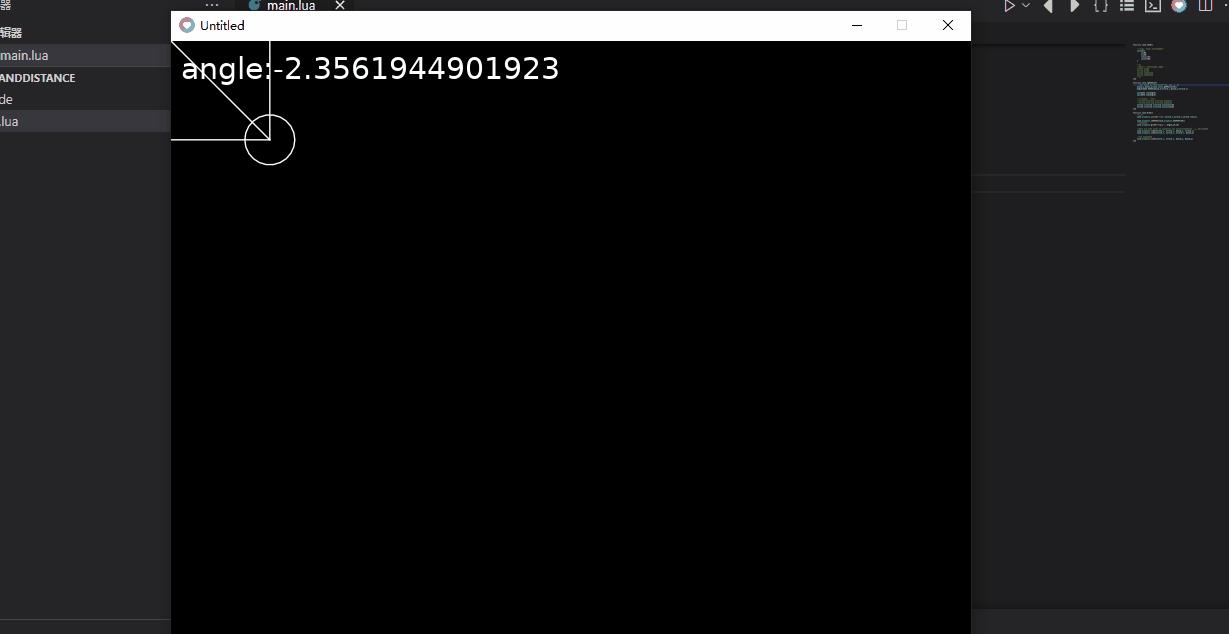
- 我们的圆圈会直接移到右下角。但是乘以正弦和余弦,就像这样:
function love.load()

    ---创建一个名为circle的对象
    circle=
        x=100,
        y=100,
        radius=25,
        speed=200,


    --[[
    --给它属性x,y,半径和速度
    circle.x=100
    circle.y=100
    circle.radius=25
    circle.speed=200
    --]]
end

function love.update(dt)
    --love.mouse.getPosition返回光标的x和y位置
    mouse_x,mouse_y=love.mouse.getPosition()
    angle=math.atan2(mouse_y-circle.y,mouse_x-circle.x)

    sin=math.sin(angle)
    cos=math.sin(angle)

    --让圆圈向鼠标移动
    --circle.x=circle.x+circle.speed*dt
    --circle.y=circle.y+circle.speed*dt
    circle.x=circle.x+circle.speed*cos*dt
    circle.y=circle.y+circle.speed*sin*dt
end

function love.draw()
    --画圆
    love.graphics.circle("line",circle.x,circle.y,circle.radius)

    love.graphics.setFont(love.graphics.newFont(30))
    --打印角度
    love.graphics.print("angle:"..angle,10,10)

    --Here are some lines to visualize the velocities这里有一些线来显示速度
    love.graphics.line(circle.x, circle.y, mouse_x, circle.y)
    love.graphics.line(circle.x, circle.y, circle.x, mouse_y)

    --The angle角度
    love.graphics.line(circle.x, circle.y, mouse_x, mouse_y)
end
-
那么我们的圆圈会水平移动circle.speed * 0.7。
-
并且会垂直移动circle.speed * - 0.7。
-
这意味着它应该直接向我们的鼠标移动。试试吧!
🍑三、距离(Distance)
- 现在,假设我们只想移动光标附近的圆。为此,我们需要计算它们之间的距离。为此我们使用勾股定理。
- 利用勾股定理,你可以计算出直角三角形中最长的直线。
- 基本上你要做的是用短边的长度做两个正方形。然后你把这些方块加起来,形成一个大方块。最后你找到平方根,得到最长线的长度,也就是斜边。
- 那么这如何帮助我们找到距离呢?当你有两个点,在我们的例子中是圆和光标,还有一个看不见的三角形。
- 看看这个:
function love.load()

    ---创建一个名为circle的对象
    circle=
        x=100,
        y=100,
        radius=25,
        speed=200,


    --[[
    --给它属性x,y,半径和速度
    circle.x=100
    circle.y=100
    circle.radius=25
    circle.speed=200
    --]]
end

function love.update(dt)
    --love.mouse.getPosition返回光标的x和y位置
    mouse_x,mouse_y=love.mouse.getPosition()
    angle=math.atan2(mouse_y-circle.y,mouse_x-circle.x)

    sin=math.sin(angle)
    cos=math.sin(angle)

    --让圆圈向鼠标移动
    --circle.x=circle.x+circle.speed*dt
    --circle.y=circle.y+circle.speed*dt
    --circle.x=circle.x+circle.speed*cos*dt
    --circle.y=circle.y+circle.speed*sin*dt
end

function love.draw()
    --画圆
    love.graphics.circle("line",circle.x,circle.y,circle.radius)

    love.graphics.setFont(love.graphics.newFont(30))
    --打印角度
    love.graphics.print("angle:"..angle,10,10)

    --[[
    --Here are some lines to visualize the velocities这里有一些线来显示速度
    love.graphics.line(circle.x, circle.y, mouse_x, circle.y)
    love.graphics.line(circle.x, circle.y, circle.x, mouse_y)

    --The angle角度
    love.graphics.line(circle.x, circle.y, mouse_x, mouse_y)
    --]]
    love.graphics.circle("line", circle.x, circle.y, circle.radius)
    love.graphics.line(circle.x, circle.y, mouse_x, mouse_y)
    love.graphics.line(circle.x, circle.y, mouse_x, circle.y)
    love.graphics.line(mouse_x, mouse_y, mouse_x, circle.y)
end
- 如果我们在这个三角形上使用勾股定理,我们可以算出它的斜边,这样我们就知道两点之间的距离。
- 让我们为此创建一个新函数。首先,我们需要横向(horizontal_distance)和纵向(vertical_distance)。
function getDistance(x1, y1, x2, y2)
    local horizontal_distance = x1 - x2
    local vertical_distance = y1 - y2
end
- 接下来我们需要平方这些数字。我们可以通过乘以它本身或乘以2。
function getDistance(x1, y1, x2, y2)
    local horizontal_distance = x1 - x2
    local vertical_distance = y1 - y2

    --这两个都管用
    local a = horizontal_distance * horizontal_distance
    local b = vertical_distance ^2
end
- 现在我们需要将这些数字相加,得到平方根。如果我们平方5,我们得到5*5,或者5^2,我们得到25,所以25的平方根是5。我们可以得到平方根math.sqrt。
function getDistance(x1, y1, x2, y2)
    local horizontal_distance = x1 - x2
    local vertical_distance = y1 - y2

    --这两个都管用
    local a = horizontal_distance * horizontal_distance
    local b = vertical_distance ^2

    local c = a + b
    local distance = math.sqrt(c)
    return distance
end
-
为了证明这是可行的,让我们以距离为半径画一个圆。

-
有用!现在让我们来玩玩吧。我希望圆圈只在距离小于400像素时移动,距离越近移动越慢。
function love.load()
---创建一个名为circle的对象
circle=
x=100,
y=100,
radius=25,
speed=200,
--[[
--给它属性x,y,半径和速度
circle.x=100
circle.y=100
circle.radius=25
circle.speed=200
--]]
end
function love.update(dt)
--love.mouse.getPosition返回光标的x和y位置
mouse_x,mouse_y=love.mouse.getPosition()
angle=math.atan2(mouse_y-circle.y,mouse_x-circle.x)
sin=math.sin(angle)
cos=math.sin(angle)
--让圆圈向鼠标移动
--circle.x=circle.x+circle.speed*dt
--circle.y=circle.y+circle.speed*dt
--circle.x=circle.x+circle.speed*cos*dt
--circle.y=circle.y+circle.speed*sin*dt
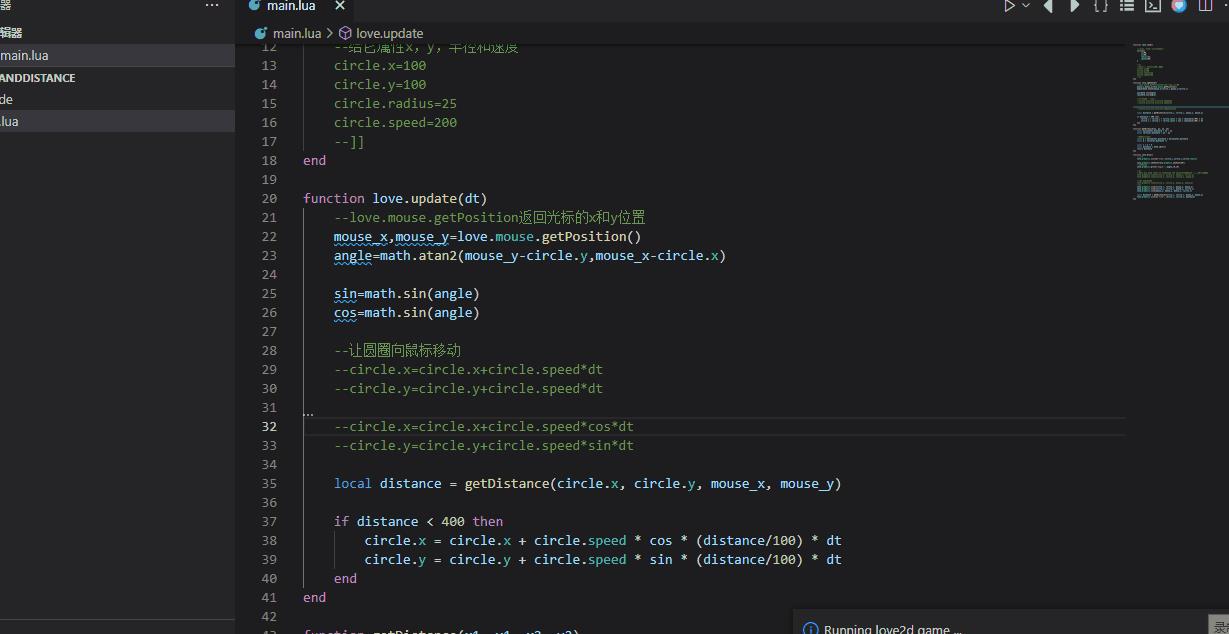
local distance = getDistance(circle.x, circle.y, mouse_x, mouse_y)
if distance < 400 then
circle.x = circle.x + circle.speed * cos * (distance/100) * dt
circle.y = circle.y + circle.speed * sin * (distance/100) * dt
end
end
function getDistance(x1, y1, x2, y2)
local horizontal_distance = x1 - x2
local vertical_distance = y1 - y2
--这两个都管用
local a = horizontal_distance * horizontal_distance
local b = vertical_distance ^2
local c = a + b
local distance = math.sqrt(c)
return distance
end
function love.draw()
--画圆
love.graphics.circle("line",circle.x,circle.y,circle.radius)
love.graphics.setFont(love.graphics.newFont(30))
--打印角度
love.graphics.print("angle:"..angle,10,10)
--[[
--Here are some lines to visualize the velocities这里有一些线来显示速度
love.graphics.line(circle.x, circle.y, mouse_x, circle.y)
love.graphics.line(circle.x, circle.y, circle.x, mouse_y)
--The angle角度
love.graphics.line(circle.x, circle.y, mouse_x, mouse_y)
--]]
love.graphics.line(circle.x, circle.y, mouse_x, mouse_y)
love.graphics.line(circle.x, circle.y, mouse_x, circle.y)
love.graphics.line(mouse_x, mouse_y, mouse_x, circle.y)
local distance = getDistance(circle.x, circle.y, mouse_x, mouse_y)
love.graphics.circle("line", circle.x, circle.y, distance)
end
🍈四、图像(Image)
- 让我们使用一个图像,让它看着光标。

- 默认情况下,rotation的选项参数为0。
- 角度为0时,余弦为1,正弦为0,这意味着对象将向右移动。
- 所以当你使用图像时,你应该让它默认向右看。
function love.load()
    arrow =
    arrow.x = 200
    arrow.y = 200
    arrow.speed = 300
    arrow.angle = 0
    arrow.image = love.graphics.newImage("arrow_right.png")
end

function love.update(dt)
    mouse_x, mouse_y = love.mouse.getPosition()
    arrow.angle = math.atan2(mouse_y - arrow.y, mouse_x - arrow.x)
    cos = math.cos(arrow.angle)
    sin = math.sin(arrow.angle)以上是关于Love2d从青铜到王者第十五篇:Love2d之角度和距离(Angles and distance)的主要内容,如果未能解决你的问题,请参考以下文章