Android 开发 -- 开发第一个安卓程序Android UI开发(布局的创建:相对布局和线性布局控件单位:px pt dp sp常用控件 常见对话框ListView)
Posted CodeJiao
tags:
篇首语:本文由小常识网(cha138.com)小编为大家整理,主要介绍了Android 开发 -- 开发第一个安卓程序Android UI开发(布局的创建:相对布局和线性布局控件单位:px pt dp sp常用控件 常见对话框ListView)相关的知识,希望对你有一定的参考价值。
文章目录
1. 开发第一个Hello World程序
1.1 开发程序
-
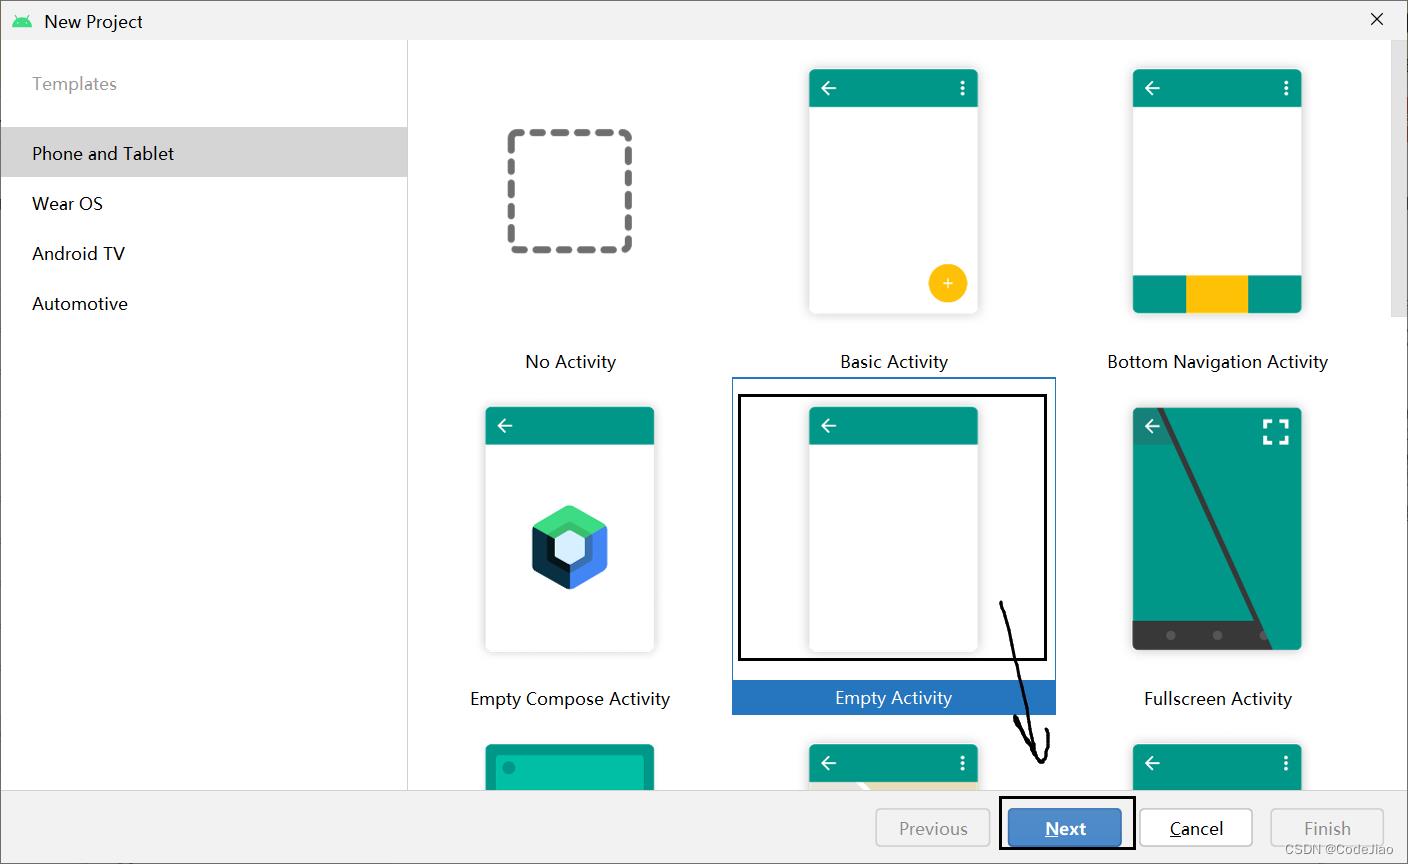
进入New Project界面

-
选择Empty Activity即可
-
填写基本信息

-
运行项目
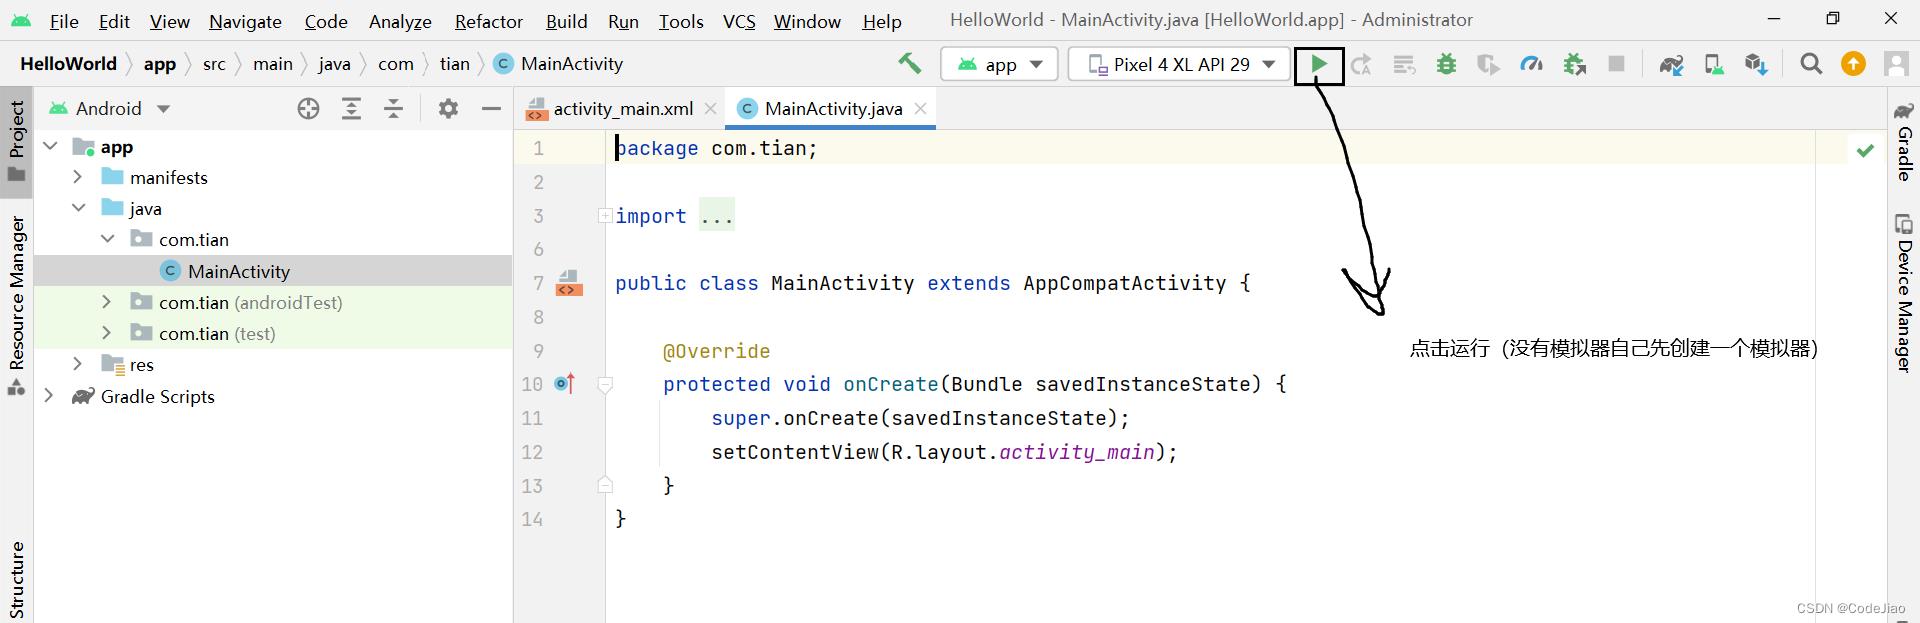
-
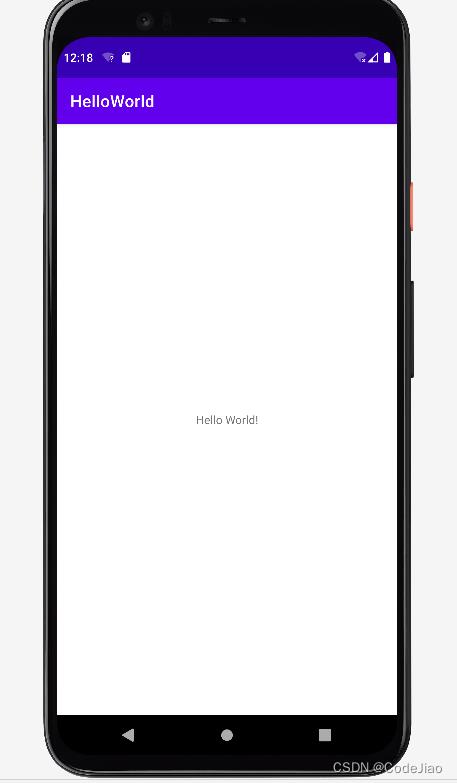
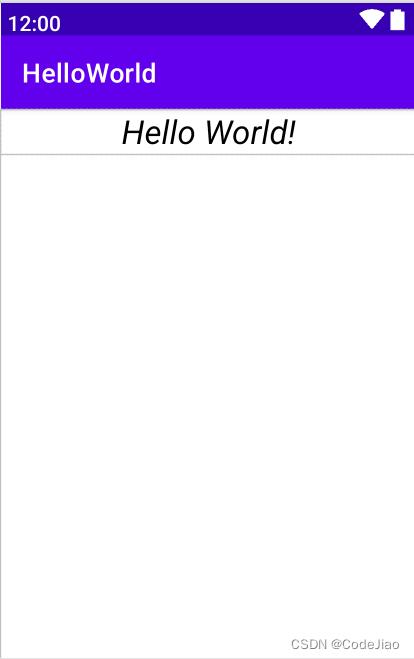
到这里项目就创建完成了,此时在android Studio中会显示创建好的HelloWorld程序
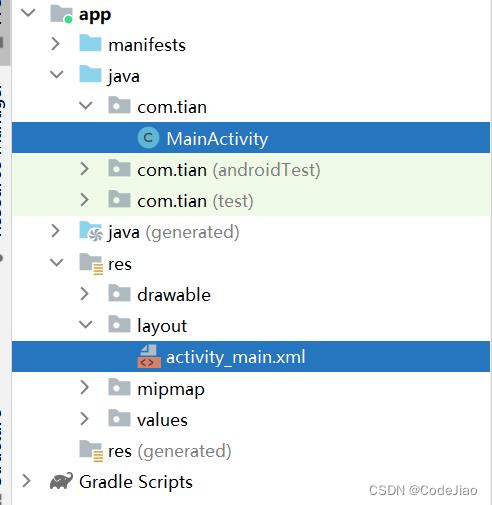
1.2 认识程序中的文件
当HelloWorld项目创建成功后,Android Studio会自动生成两个默认的文件,那就是布局文件和Activity文件,布局文件主要用于展示Android项目的界面,Activity文件主要用于完成界面的交互功能。
activity_main.xml
<?xml version="1.0" encoding="utf-8"?>
<androidx.constraintlayout.widget.ConstraintLayout xmlns:android="http://schemas.android.com/apk/res/android"
    xmlns:app="http://schemas.android.com/apk/res-auto"
    xmlns:tools="http://schemas.android.com/tools"
    android:layout_width="match_parent"
    android:layout_height="match_parent"
    tools:context=".MainActivity">

    <TextView
        android:layout_width="wrap_content"
        android:layout_height="wrap_content"
        android:text="Hello World!"
        app:layout_constraintBottom_toBottomOf="parent"
        app:layout_constraintLeft_toLeftOf="parent"
        app:layout_constraintRight_toRightOf="parent"
        app:layout_constraintTop_toTopOf="parent" />

</androidx.constraintlayout.widget.ConstraintLayout>
上述代码就是 HelloWorld 程序的布局文件,在该布局中可以添加任意的按钮和文本框或者其他组件,好的布局文件可以让程序看起来赏心悦目。
MainActivity.java
package com.tian;

import androidx.appcompat.app.AppCompatActivity;

import android.os.Bundle;

public class MainActivity extends AppCompatActivity

    @Override
    protected void onCreate(Bundle savedInstanceState)
        super.onCreate(savedInstanceState);
        setContentView(R.layout.activity_main);
MainActivity继承自AppCompatActivity,当Activity执行时首先会调用onCreate()方法,在该方法中通过setContentView(R.layout.activity_hello_world)将布局文件转换成View对象,显示在界面上。
每个 Android 程序创建成功后,都会自动生成一个清单文件AndroidManifest.xml(位于manifests文件夹),该文件是整个项目的配置文件,程序中定义的四大组件(Activity、Broadcast Receiver、Service、ContentProvider)都需要在该文件中进行注册。下面就来看一下清单文件中的默认内容,具体代码如下所示。
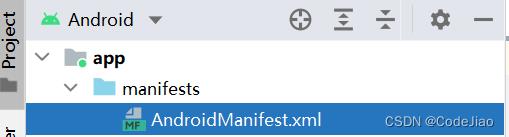 AndroidManifest.xml
<?xml version="1.0" encoding="utf-8"?>
<manifest xmlns:android="http://schemas.android.com/apk/res/android"
    package="com.tian">

    <application
        android:allowBackup="true"
        android:icon="@mipmap/ic_launcher"
        android:label="@string/app_name"
        android:roundIcon="@mipmap/ic_launcher_round"
        android:supportsRtl="true"
        android:theme="@style/Theme.HelloWorld">
        <activity
            android:name=".MainActivity"
            android:exported="true">
            <intent-filter>
                <action android:name="android.intent.action.MAIN" />

                <category android:name="android.intent.category.LAUNCHER" />
            </intent-filter>
        </activity>
    </application>

</manifest>
在上述代码中,<application>标签中的allowBackup属性用于设置是否允许备份应用数据;icon属性用于设置应用程序图标;label属性用来指定显示在标题栏上的名称;supportsRtl属性设置为true时,应用将支持RTL(Right-to-Left)布局;theme属性用于指定主题样式,就是能够应用于此程序中所有的Activity或者application的显示风格。
<activity android:name=".MainActivity" >标签用于注册一个Activity,<intent-filter>标签中设置的action属性表示当前Activity最先启动,category属性表示当前应用显示在桌面程序列表中。
1.3 Android程序结构
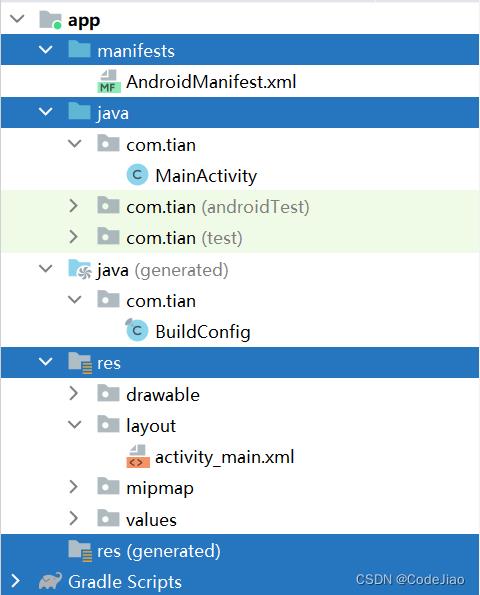
- manifests:用于存放AndroidManifest.xml文件(又称清单文件),该文件是整个项目的配置文件。在程序中定义的四大组件都需要在这个文件中注册,另外在该文件中还可以给程序添加权限。在清单文件中配置的信息会添加到 Android 系统中,当程序运行时,系统会找到清单文件中的配置信息,然后根据配置信息打开相应组件。
- java:用于存放所有的Java代码,在该文件夹中可以创建多个包,每个包中可以存放不同的文件或Activity。
- res:用于存放Android程序所用到的资源,例如图片、布局文件、字符串等。drawable目录用于存放图片及XML 文件,layout 目录用于存放布局文件,mipmap 目录通常用于存放应用程序图标,系统会根据手机屏幕分辨率(hdpi/mdpi/xhdpi/xxhdpi/xxxhdpi)匹配相应大小的图标, values目录用于放置定义的字符串。
- Gradle Scripts:用于存放项目创建的相关文件,无须修改。
1.4 安卓程序打包

示例:

2. Android UI开发
UI(User Interface)界面是人与手机之间数据传递、信息交互的重要媒介和对话窗口,是Android系统的重要组成部分。界面的美观度直接影响用户的第一印象,因此,开发一个整齐、美观的界面至关重要。
下面演示的案例基于上面的 Hello World 程序
2.1 布局的创建
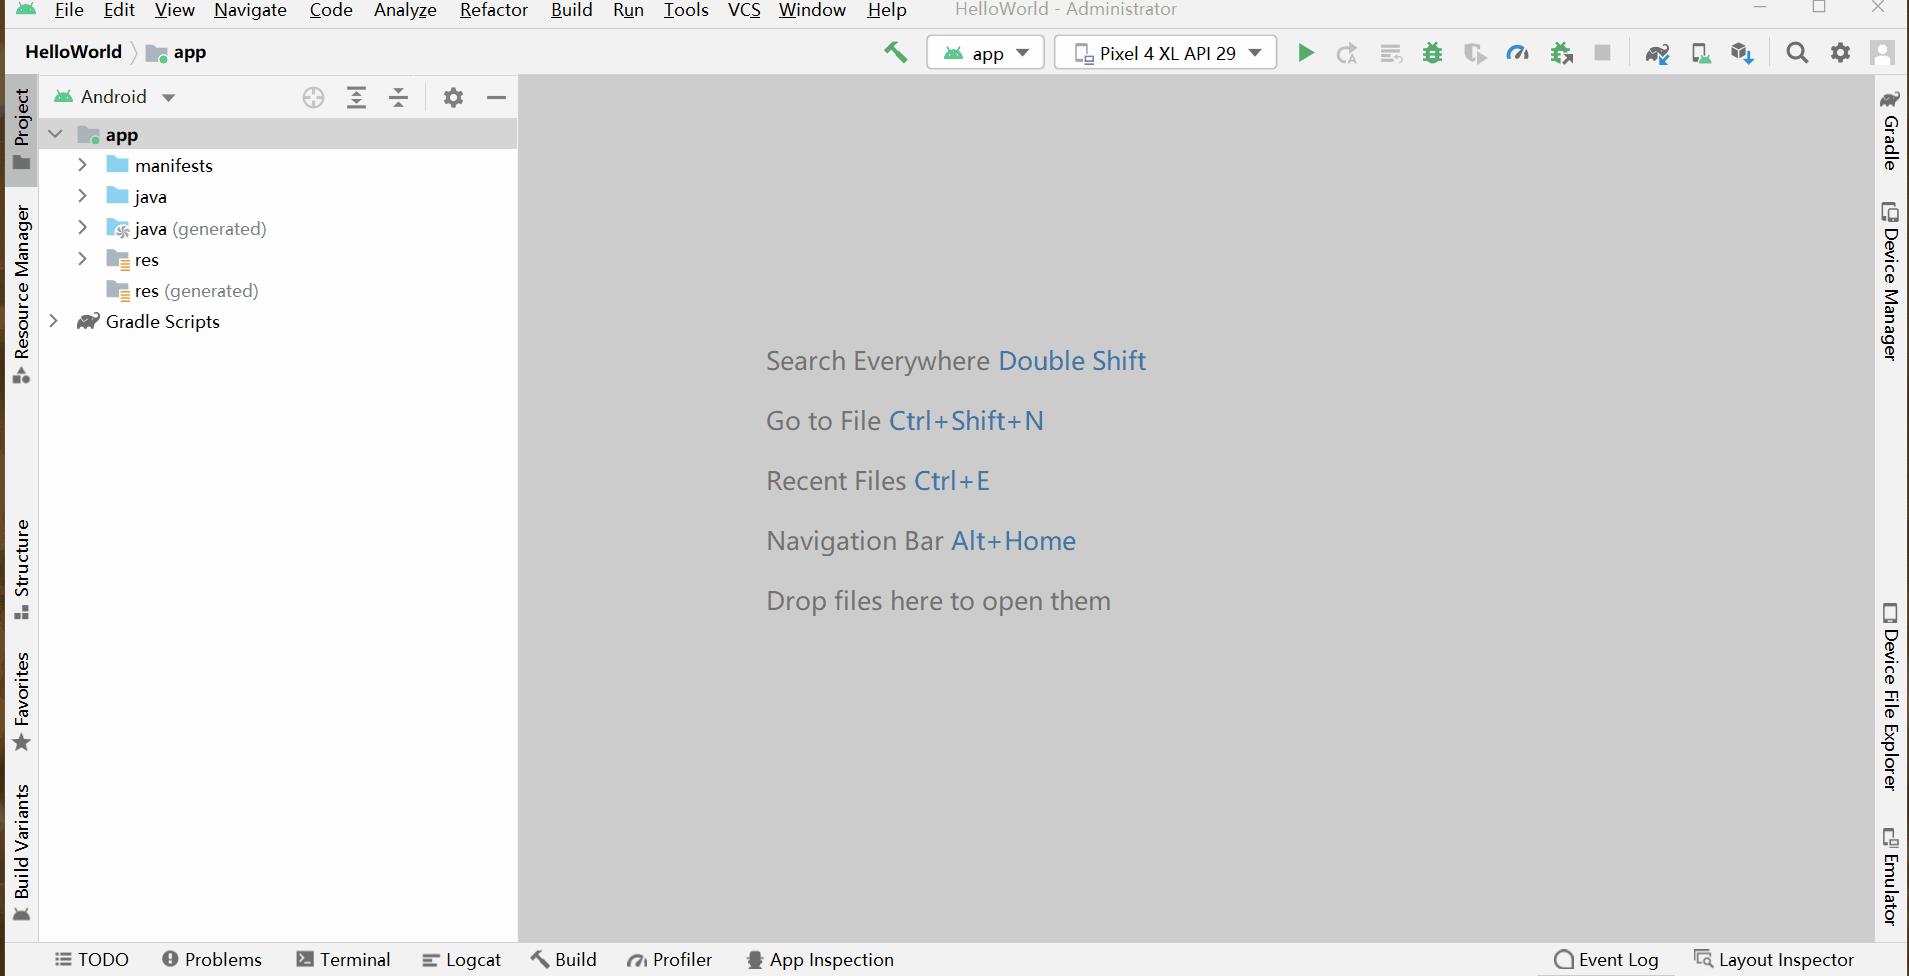
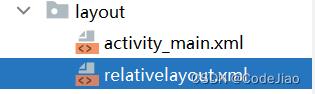
添加布局的过程非常简单,首先选中layout文件夹并单击右键,依次选中【New】→【XML】→【Layout XML File】选项

单击该选项后会弹出New Android Activity界面
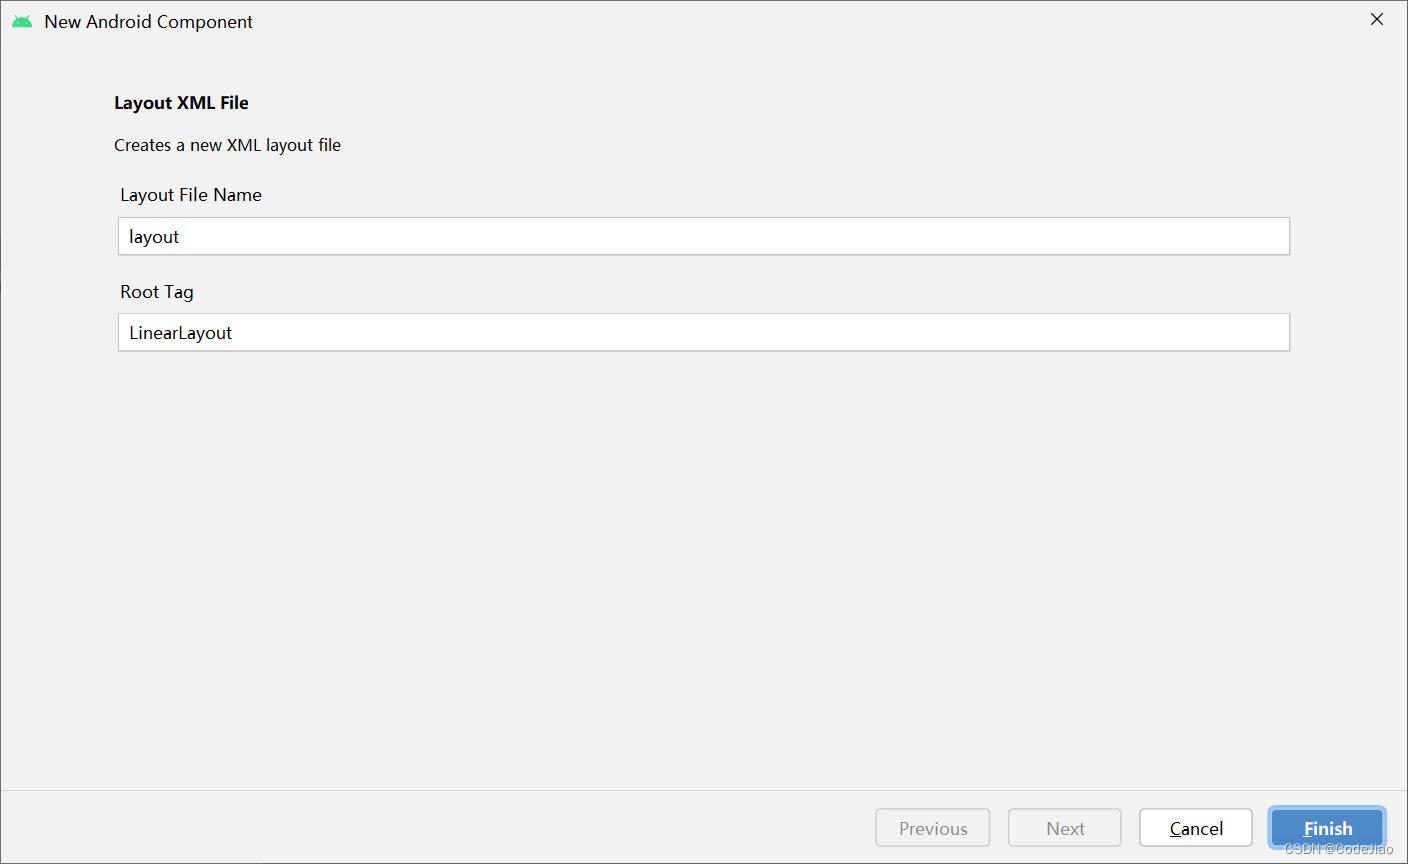
- Layout File Name:文件的名称,该名称只能包含小写字母a~z,数字0~9或下划线“_”,若命名不符合要求,则下方会出现错误提示。
- Root Tag:表示根元素标签,默认为LinearLayout(线性布局)。单击【Finish】按钮,新布局就创建完成了。

2.2 布局的类型
为了适应不同的界面风格,Android 系统为开发人员提供了5种常用布局,分别是
- Linear Layout(线性布局)
- RelativeLayout(相对布局)
- FrameLayout(帧布局)
- TableLayout(表格布局)
- AbsoluteLayout(绝对布局)
下面介绍2种最常用的布局。
2.2.1 线性布局
线性布局(LinearLayout)在实际开发中比较常用,它主要以水平和垂直方式来显示界面中的控件。当控件水平排列时,显示顺序依次为从左到右;当控件垂直排列时,显示顺序依次为从上到下。
在线性布局中,有一个非常重要的属性 orientation,用于控制控件的排列方向,该属性有vertical和horizontal(默认)两个值,其中,vertical表示线性布局垂直显示,horizontal表示线性布局水平显示。接下来通过orientation属性,设置3个按钮垂直排列,具体代码如下所示。
linearlayout1.xml
<?xml version="1.0" encoding="utf-8"?>
<LinearLayout xmlns:android="http://schemas.android.com/apk/res/android"
    android:layout_width="match_parent"
    android:layout_height="match_parent"
    android:orientation="vertical">

    <Button
        android:id="@+id/btn_1"
        android:layout_width="wrap_content"
        android:layout_height="wrap_content"
        android:text="按钮1" />

    <Button
        android:id="@+id/btn_2"
        android:layout_width="wrap_content"
        android:layout_height="wrap_content"
        android:text="按钮2" />

    <Button
        android:id="@+id/btn_3"
        android:layout_width="wrap_content"
        android:layout_height="wrap_content"
        android:text="按钮3" />
</LinearLayout>
在上述代码中,将 orientation 属性值设置为 vertical,控件垂直显示。若将该值修改为horizontal(默认),则控件会水平显示,预览效果如图所示。
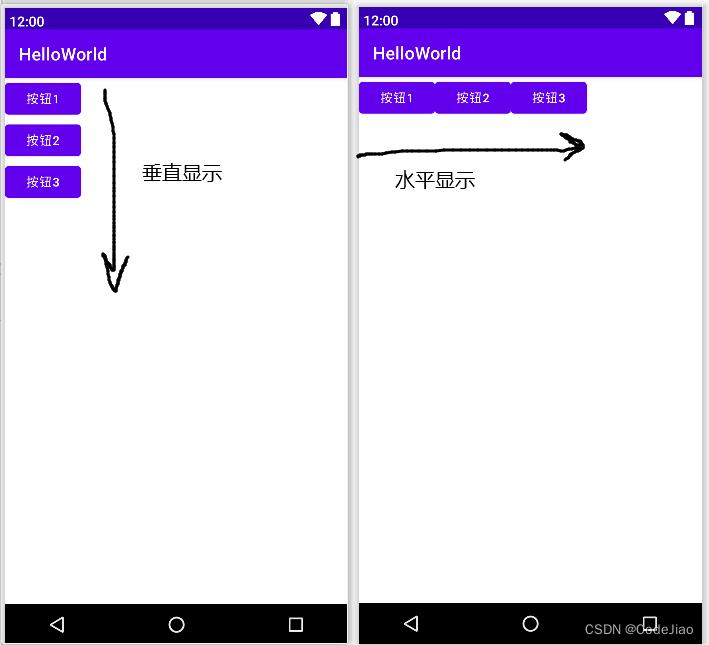
需要注意的是,当控件水平排列时,控件属性 layout_width 只能设置为 wrap_content(包裹内容让当前控件根据控件内容大小自动伸缩),不能设置为match_parent(填充父窗体由父容器大小决定控件大小),否则其余控件会被挤出屏幕右侧不显示。同理,如果控件垂直排列也会出现同样情况。
如上图所示:当控件水平排列时,3个Button未占满一行,右侧留有空白区域,这样既不美观又浪费空间。此时,利用layout_weight属性可完美解决这个问题,该属性被称为权重,通过比例调整布局中所有控件的大小,在进行屏幕适配时起到关键作用,示例代码如下
linearlayout1.xml
<?xml version="1.0" encoding="utf-8"?>
<LinearLayout xmlns:android="http://schemas.android.com/apk/res/android"
    android:layout_width="match_parent"
    android:layout_height="match_parent"
    android:orientation="horizontal">

    <Button
        android:id="@+id/btn_1"
        android:layout_width="0dp"
        android:layout_height="wrap_content"
        android:layout_weight="1"
        android:text="按钮1" />

    <Button
        android:id="@+id/btn_2"
        android:layout_width="0dp"
        android:layout_height="wrap_content"
        android:layout_weight="1"
        android:text="按钮2" />

    <Button
        android:id="@+id/btn_3"
        android:layout_width="0dp"
        android:layout_height="wrap_content"
        android:layout_weight="2"
        android:text="按钮3" />
</LinearLayout>
在上述代码中,需将父控件的 layout_width 的属性值设置为“match_parent”,Button 中 layout_weight 的属性值可直接填写数字,1表示在整个控件中占据权重值为1。原理是Android先会把布局内所有控件 layout_weight 属性值相加得到总值,然后用该控件layout_weight属性值除以总值,得到每个控件的占比,根据占比分配控件所占大小。以上述代码为例,“按钮1”和“按钮2”权重值是1,“按钮3”权重值是2。
“按钮1”的计算方式是:1 / (1 + 1 + 2) = 1 / 4 ,因此占用1 / 4 的位置。
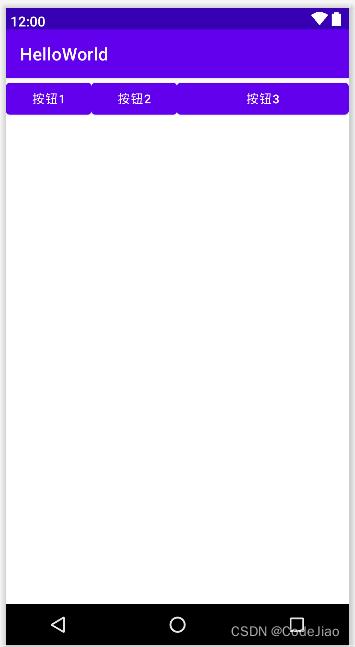
需要注意的是,在上述代码中线性布局 layout_width 的属性值不可设为wrap_content,因为LinearLayout的优先级比Button高,所以Button标签中layout_weight属性会失去作用。当Button标签中使用layout_weight时,控件宽度不再由layout_width来决定,所以指定为0dp不会影响效果,这样写也是一种规范。
2.2.2 相对布局
在Android程序创建时,默认采用的就是相对布局(RelativeLayout)。相对布局是通过相对定位的方式指定控件位置,即以其他控件或父容器为参照物,摆放控件位置。在设计相对布局时要遵循控件之间的依赖关系,后放入控件的位置依赖于先放入的控件。
相对布局属性较多,但都是有规律的,所以不难理解,下面先来介绍在布局内控件摆放位置的属性:
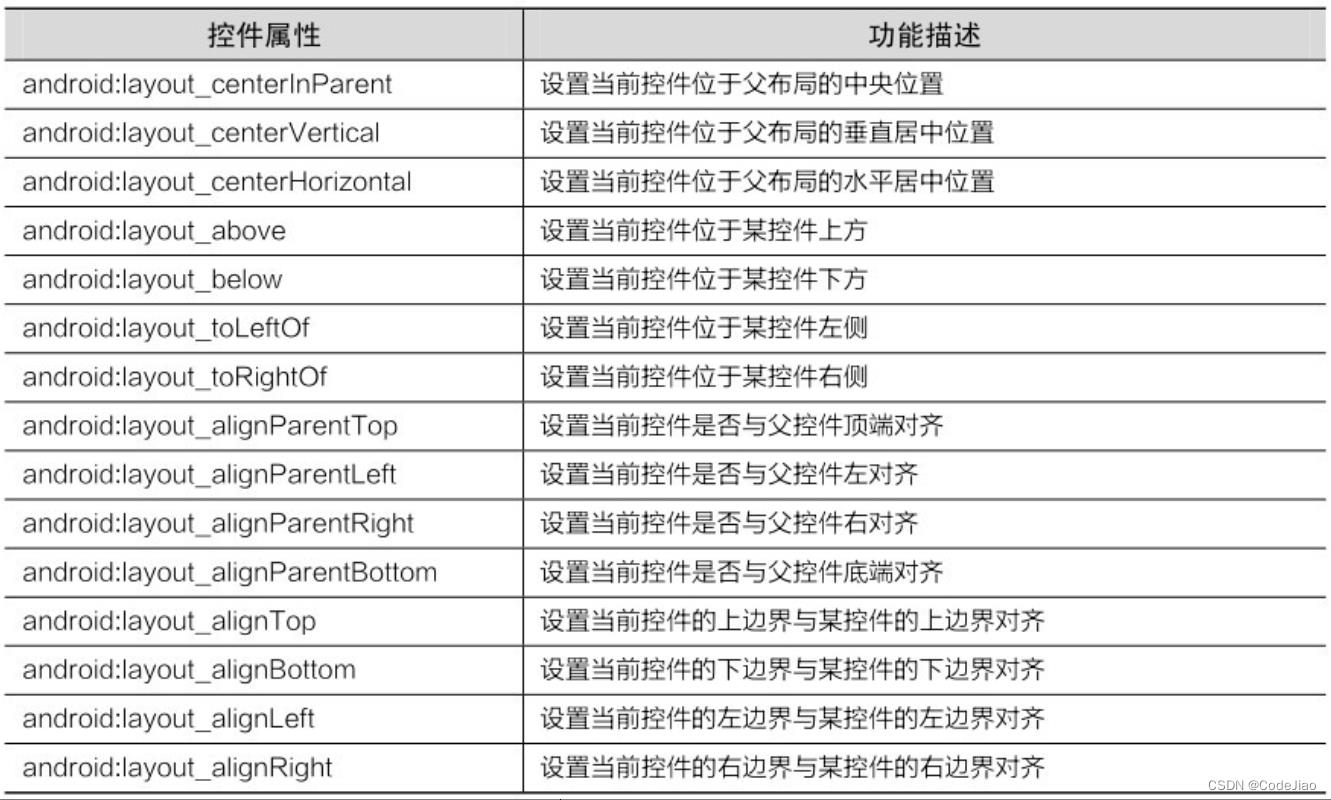
再来看一下相对于某控件间距的属性:
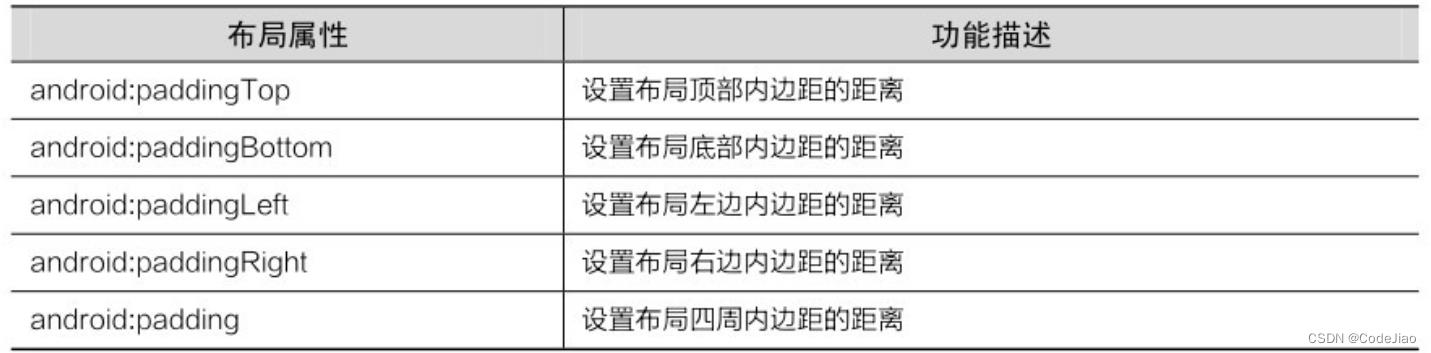
 最后介绍在布局中设置内边距的属性:
 下面通过上述属性设置3个按钮的位置,通过效果图对比更好地理解其作用,代码如下:

relativelayout.xml
<?xml version="1.0" encoding="utf-8"?>
<RelativeLayout xmlns:android="http://schemas.android.com/apk/res/android"
android:layout_width="match_parent"
android:layout_height="match_parent"
android:paddingBottom="20dp">
<Button
android:id="@+id/btn_1"
android:layout_width="wrap_content"
android:layout_height="wrap_content"
android:layout_alignParentBottom="true"
android:text="按钮1" />
<Button
android:id="@+id/btn_2"
android:layout_width="wrap_content"
android:layout_height="wrap_content"
android:layout_centerHorizontal="true"
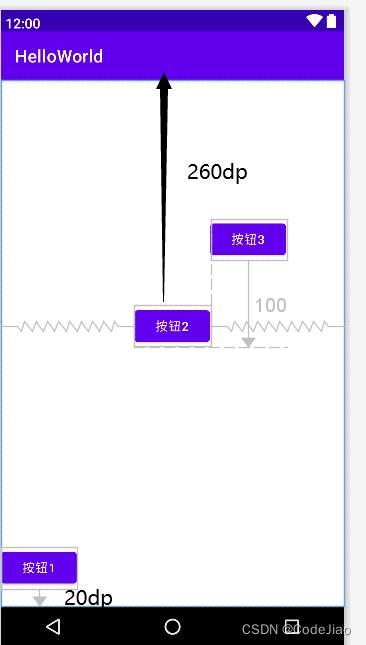
android:layout_marginTop="260dp"
android:text="按钮2" />
<Button
android:id="@+id/btn_3"
android:layout_width="wrap_content"
android:layout_height="wrap_content"
android:layout_alignBottom="@+id/btn_2"
android:layout_marginBottom="100dp"
android:layout_toRightOf="@+id/btn_2"
android:text="按钮3" />
</RelativeLayout>
在上述代码中,使用 RelativeLayout 标签定义了一个相对布局,并在该布局中添加3个按钮,通过设置属性控制每个控件位置,预览效果如图所示:
2.3 控件的单位
为了让程序拥有更好的屏幕适配能力,在指定控件和布局宽高时最好使用“match_parent”或“wrap_content”,尽量避免将控件宽高设置固定值。因为在控件很多的情况下会相互挤压,使控件变形。但特殊情况下需要使用指定宽高值时,可以选择使用px、pt、dp、sp四种单位。
- px:代表像素,即在屏幕中可以显示的最小元素单位,应用程序中任何控件都是由一个个像素点组成的。分辨率越高的手机,屏幕的像素点就越多。因此,如果使用 px 控制控件的大小,在分辨率不同的手机上控件显示的大小也会不同。
- pt:代表磅数,一磅等于1/72英寸,一般pt都会作为字体的单位来显示。pt和px的情况类似,在不同分辨率的手机上,用pt控件的字体大小也会不同。
- dp:一种基于屏幕密度的抽象单位。不同设备有不同的显示效果,它是根据设备分辨率的不同来确定控件的尺寸。
- sp:代表可伸缩像素,采用与dp相同的设计理念,推荐设置文字大小时使用。
2.3 常用控件
控件是界面组成的主要元素,例如TextView(文本框)、EditText(编辑框)和Button(按钮)等,这些控件与用户进行直接交互,因此掌握这些控件的使用对日后开发工作至关重要。
2.3.1 TextView
使用手机时,经常会看见一些文本信息(字符串),这些文本信息通常是由TextView控件显示的。下面列举TextView常用属性:
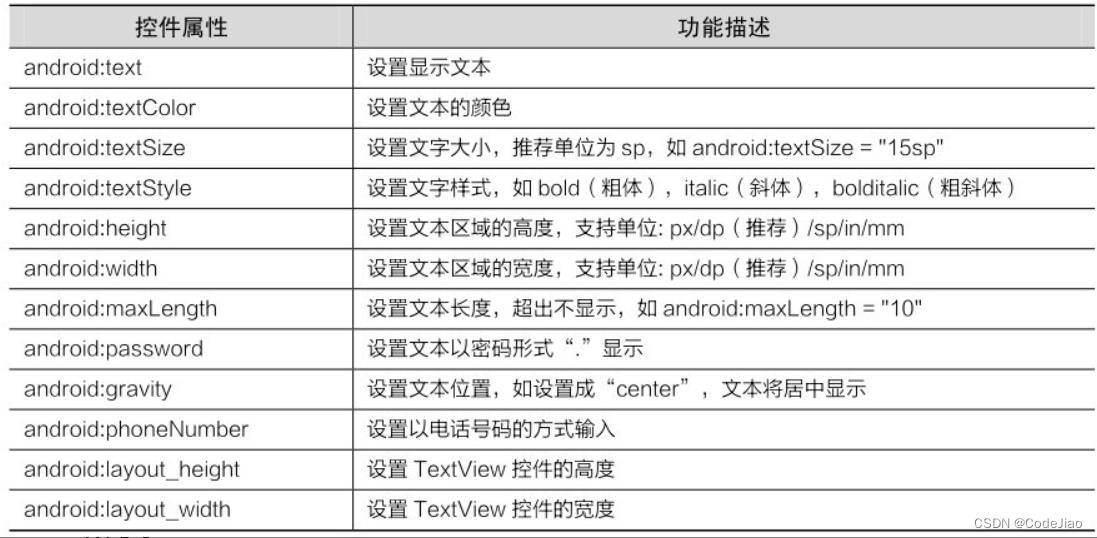
TextView控件其实还有很多属性,这里就不一一列举了。下面看一下如何为TextView控件设置宽、高、文本颜色(黑色)、字体大小等属性,具体代码如下所示:
relativelayout.xml
<?xml version="1.0" encoding="utf-8"?>
<RelativeLayout xmlns:android="http://schemas.android.com/apk/res/android"
    android:layout_width="match_parent"
    android:layout_height="match_parent"
    android:paddingBottom="20dp">

    <!--    下面是TextView和它的常用属性示例 -->
    <TextView
        android:layout_width="match_parent"
        android:layout_height="wrap_content"
        android:text="Hello World!"
        android:textColor="#000"
        android:textStyle="italic"
        android:textSize="25sp"
        android:gravity="center" />
</RelativeLayout>
效果图:
layout_width、layout_height和width、height属性的区别:
在Android系统中,layout_width、layout_height属性和width、height属性的功能是相同的,都用于设置控件的宽、高,只不过带“layout”前缀的属性通常是相对父控件而言的,而width、height属性是相对于控件本身而言的。下面对比一下它们在使用时的区别。
- layout_width和layout_height属性可以单独使用,而width和height属性不能,如果单独使用width和height属性,此时的控件是不显示的。
- layout_width 和 layout_height 可以设置为 wrap_content 或者match_parent,而 width和height只能设置固定值,否则会产生编译错误。
- 如果要使用 width和 height,就必须同时设置 layout_width和layout_height属性,把width和height作为组件的微调使用。综上所述,在设置TextView控件宽、高时,通常直接使用layout_width和layout_height,简单方便。
2.3.2 EditText
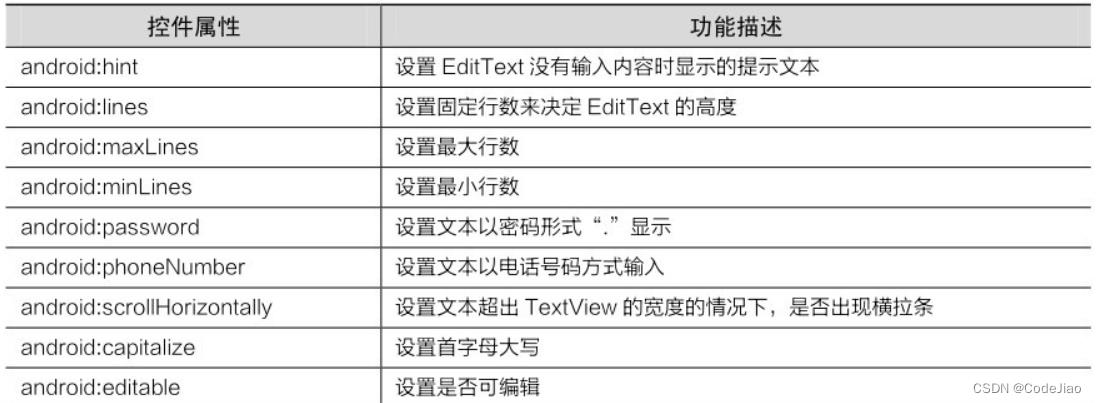
使用Android程序时,用户经常会向程序中输入数据,此时就会用到文本编辑控件EditText,接收用户输入信息,该控件类似一个运输工具,将用户信息传递给Android程序。EditText继承自TextView,与TextView最大的不同就是用户可以在设备上对EditText控件进行操作,同时还可以为 EditText 控件设置监听器,用来测试用户输入的内容是否合法。EditText 除了具有TextView的一些属性外,还有自己的特有属性,具体如表所示:
具体代码如下所示:

activity_main.xml
<?xml version="1.0" encoding="utf-8"?>
<RelativeLayout xmlns:android="http://schemas.android.com/apk/res/android"
    xmlns:app="http://schemas.android.com/apk/res-auto"
    xmlns:tools="http://schemas.android.com/tools"
    android:layout_width="match_parent"
    android:layout_height="match_parent"
    tools:context=".MainActivity">

    <!--    下面是EditText和它的常用属性示例 -->
    <EditText
        android:layout_width="match_parent"
        android:layout_height="wrap_content"
        android:hint="请输入姓名"
        android:maxLines="2"
        android:textColor="#000"
        android:textSize="20sp"
        android:textStyle="bold" />

</RelativeLayout>
运行结果:

在上述代码中,EditText控件有一个特有属性hint,其作用是在EditText没有输入内容时,显示提示信息,当单击EditText输入内容时,提示文本消失。
需要注意的是,上述代码中将EditText高度设置为wrap_content(包裹内容),如果输入内容过多,EditText会被拉伸,影响界面美观。此时,使用maxLines属性就可以解决这个问题,代码中设置的android:maxLines="2"表示EditText这个空间最大行数是两行,如果输入的内容超过了两行,文本就会出现上下滚动的效果,EditText不会被拉伸。
2.3.3 Button(含3种点击事件)
Button(按钮)是程序开发中必不可少的一个控件,其作用是用于响应用户的一系列点击事件,使程序更加流畅和完整。Button控件常用的点击方式有3种,分别是在布局中指定onClick属性、使用匿名内部类、在当前Activity中实现OnClickListener接口。接下来针对这前种点击事件进行讲解。第三种方式在CheckBox控件中展示。
首先创建一个布局,放置2个按钮:
activity_main.xml
<?xml version="1.0" encoding="utf-8"?>
<RelativeLayout xmlns:android="http://schemas.android.com/apk/res/android"
xmlns:app="http://schemas.android.com/apk/res-auto"
xmlns:tools="http://schemas.android.com/tools"
android:layout_width="match_parent"
android:layout_height="match_parent"
tools:context=".MainActivity">
<Button
android:id="@+id/btn_one"
android:text="按钮1"
android:layout_width="match_parent"
android:layout_height="wrap_content"
android:onClick="click"/>
<Button
android:id="@+id/btn_two"
android:text="按钮2"
android:layout_width