BottomNavigationView + fragment底部导航栏简单实现
Posted mercyT
tags:
篇首语:本文由小常识网(cha138.com)小编为大家整理,主要介绍了BottomNavigationView + fragment底部导航栏简单实现相关的知识,希望对你有一定的参考价值。
BottomNavigationView + fragment实现底部导航栏
- 底部导航栏的实现方式可以说有很多种,但是随着技术的不断更新换代,在jetpack横行的时代,古老的实现方式已经逐步被替代了。我也由于两年多没有触碰原生开发,对jetpack的接触很少,因此开始通过边学习变记录一下自己的脚印。
效果图
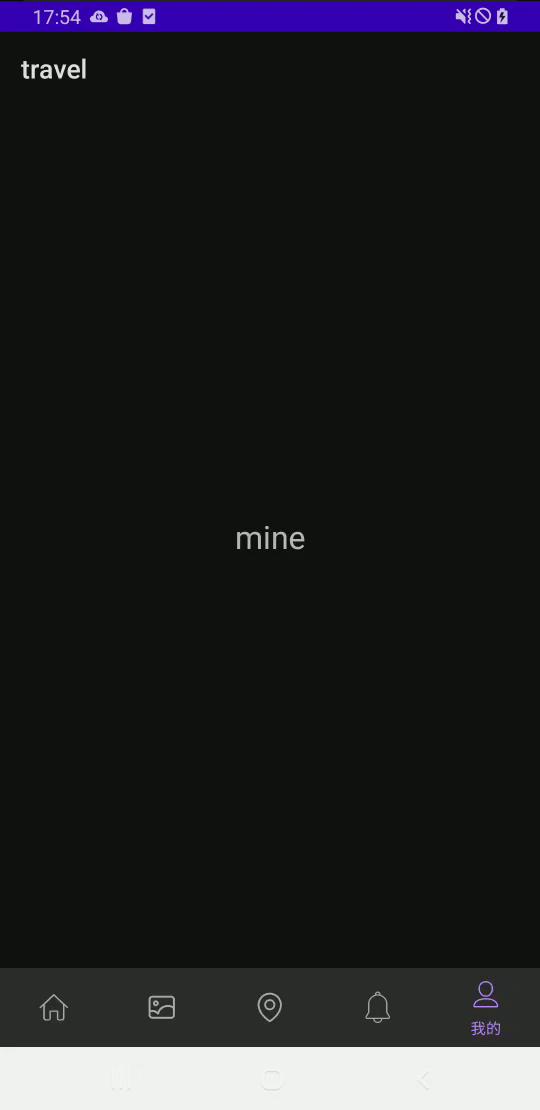
大致过程
- 创建一个空项目(这个步骤就直接略过了)
- 创建Fragment + layout
- 创建drawable(底部所有icon)
- 创建navigation
- 在Activity中关联navigation和fragment
1.创建fragment
创建fragment
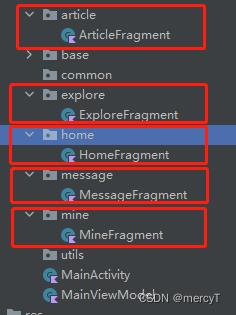
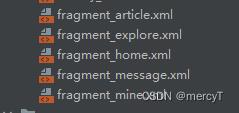
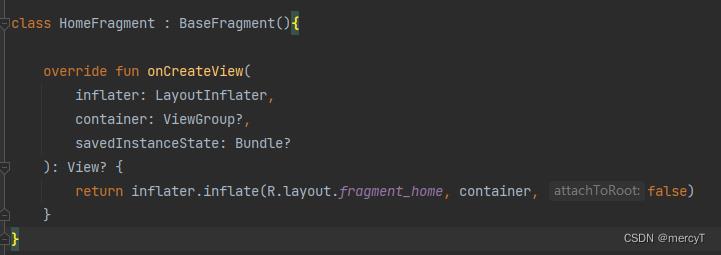
这部分代码没啥好解释的,就是最基础的创建fragment,然后通过databinding的方式将fragment和layout绑定起来。
2.创建底部导航栏按钮
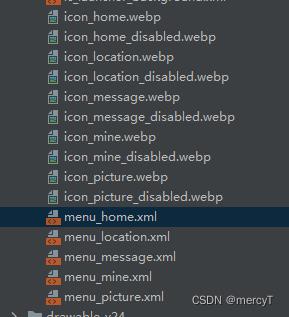


以下是main_nav_menu的代码
<?xml version="1.0" encoding="utf-8"?>
<menu xmlns:android="http://schemas.android.com/apk/res/android"
    xmlns:app="http://schemas.android.com/apk/res-auto">

    <item
        android:id="@+id/home_fragment"
        android:enabled="true"
        android:title="首页"
        android:checked="true"
        android:icon="@drawable/menu_home"
        app:showAsAction="ifRoom"/>

    <item
        android:id="@+id/picture_fragment"
        android:enabled="true"
        android:title="图片"
        android:icon="@drawable/menu_picture"
        app:showAsAction="ifRoom"/>

    <item
        android:id="@+id/explore_fragment"
        android:enabled="true"
        android:title="打卡点"
        android:icon="@drawable/menu_location"
        app:showAsAction="ifRoom"/>

    <item
        android:id="@+id/message_fragment"
        android:enabled="true"
        android:title="消息"
        android:icon="@drawable/menu_message"
        app:showAsAction="ifRoom"/>

    <item
        android:id="@+id/mine_fragment"
        android:enabled="true"
        android:title="我的"
        android:icon="@drawable/menu_mine"
        app:showAsAction="ifRoom"/>
</menu>
3.关联底部导航栏和fragment
首先在res文件夹下创建一个navigation文件,
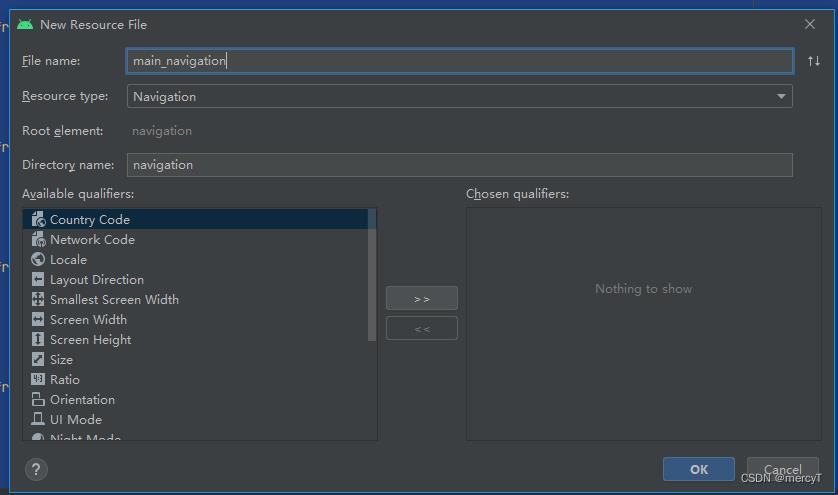
内容如下:
<?xml version="1.0" encoding="utf-8"?>
<navigation xmlns:android="http://schemas.android.com/apk/res/android"
    xmlns:app="http://schemas.android.com/apk/res-auto"
    xmlns:tools="http://schemas.android.com/tools"
    app:startDestination="@id/home_fragment"
    android:id="@+id/main_navigation">

    <fragment
        android:id="@+id/home_fragment"
        android:name="com.richard.travel.home.HomeFragment"
        tools:layout="@layout/fragment_home"/>

    <fragment
        android:id="@+id/picture_fragment"
        android:name="com.richard.travel.article.ArticleFragment"
        tools:layout="@layout/fragment_article"/>

    <fragment
        android:id="@+id/explore_fragment"
        android:name="com.richard.travel.explore.ExploreFragment"
        tools:layout="@layout/fragment_explore"/>

    <fragment
        android:id="@+id/message_fragment"
        android:name="com.richard.travel.message.MessageFragment"
        tools:layout="@layout/fragment_message"/>

    <fragment
        android:id="@+id/mine_fragment"
        android:name="com.richard.travel.mine.MineFragment"
        tools:layout="@layout/fragment_mine"/>

</navigation>
这里有一个需要注意的地方,menu中每个item的id和navigation中每个fragment的id需要保持一致,否则在切换页面的时候点击了没反应。
然后在activity_main.xml中添加布局,代码如下:
<?xml version="1.0" encoding="utf-8"?>
<layout xmlns:tools="http://schemas.android.com/tools"
    xmlns:android="http://schemas.android.com/apk/res/android"
    xmlns:app="http://schemas.android.com/apk/res-auto">

    <data>

        <variable
            name="vm"
            type="com.richard.travel.MainViewModel" />
    </data>

    <androidx.constraintlayout.widget.ConstraintLayout
        android:layout_width="match_parent"
        android:layout_height="match_parent"
        tools:context=".MainActivity">

        <androidx.fragment.app.FragmentContainerView
            android:id="@+id/container"
            android:name="androidx.navigation.fragment.NavHostFragment"
            android:layout_width="match_parent"
            android:layout_height="wrap_content"
            app:layout_constraintTop_toTopOf="parent"
            app:layout_constraintStart_toStartOf="parent"
            app:layout_constraintEnd_toEndOf="parent"
            app:layout_constraintBottom_toTopOf="@id/navigation"/>

        <com.google.android.material.bottomnavigation.BottomNavigationView
            android:id="@+id/navigation"
            android:layout_width="match_parent"
            android:layout_height="60dp"
            app:menu="@menu/main_nav_menu"
            app:layout_constraintStart_toStartOf="parent"
            app:layout_constraintEnd_toEndOf="parent"
            app:layout_constraintBottom_toBottomOf="parent"/>

    </androidx.constraintlayout.widget.ConstraintLayout>
</layout>
MainActivity中的代码
class MainActivity : BaseActivity()
    override fun onCreate(savedInstanceState: Bundle?)
        super.onCreate(savedInstanceState)
        val binding = DataBindingUtil.setContentView<ActivityMainBinding>(MainActivity@this, R.layout.activity_main)
        val vm = MainViewModel()
        lifecycle.addObserver(vm)
        binding.vm = vm
        val navHostFragment = supportFragmentManager.findFragmentById(R.id.container) as NavHostFragment
        val navController = navHostFragment.navController
        navController.setGraph(R.navigation.main_navigation)
        binding.navigation.setupWithNavController(navController)
到此结束了。
以上每个步骤都很重要,步骤顺序不一定要按照我这个来,可以打乱,只要在最后运行的时候保证这些内容就行。
以上是关于BottomNavigationView + fragment底部导航栏简单实现的主要内容,如果未能解决你的问题,请参考以下文章
安卓。具有单一活动方法的 BottomNavigationView
BottomNavigationView - 阴影和波纹效果
如何使用 material.BottomNavigationView 设置 Jetpack 导航