Elasticsearch7.10.0集群搭建
Posted zhenghuasheng
tags:
篇首语:本文由小常识网(cha138.com)小编为大家整理,主要介绍了Elasticsearch7.10.0集群搭建相关的知识,希望对你有一定的参考价值。
1,环境准备
- 物理机:CentOS 7.7 64位,4核,8G
- JDK:jdk-8u171-linux-x64.tar.gz
- Elasticsearch: elasticsearch-7.10.0-linux-x86_64.tar.gz (下载地址:https://www.elastic.co/cn/downloads/elasticsearch)
2,环境配置
- jdk安装:
tar -zxvf jdk-8u171-linux-x64.tar.gz
vim  /etc/profile
profile最后加入配置
export JAVA_HOME=/usr/local/src/jdk1.8.0_171
export CLASSPATH=.:$JAVA_HOME/jre/lib/rt.jar:$JAVA_HOME/lib/dt.jar:$JAVA_HOME/lib/tools.jar
export PATH=$PATH:$JAVA_HOME/bin
执行生效命令
source profile
- 系统变量修改
vim etc/sysctl.conf
#加入配置 vm.max_map_count=655360
sysctl -p
#es无法使用root用户运行,需新增用户
useradd qtyj
#设置密码
passwd qtyj
3,es安装
#解压安装包
tar -zxvf elasticsearch-7.10.0-linux-x86_64.tar.gz
启用安全模块
在elasticsearch.yml中加入配置
xpack.security.enabled: true
生成证书
1,bin/elasticsearch-certutil ca
2,bin/elasticsearch-certutil cert --ca elastic-stack-ca.p12
# elastic-stack-ca.p12为1生成文件,2生成的证书文件是无状态的,一台机器生产后 其他机器拷贝就可以使用。
#设置密码后需要更新密码到keystory
3,bin/elasticsearch-keystore add xpack.security.transport.ssl.keystore.secure_password
4,bin/elasticsearch-keystore add xpack.security.transport.ssl.truststore.secure_password

#查阅文档: https://www.elastic.co/guide/en/elasticsearch/reference/7.x/security-basic-setup.html
xpack.security.transport.ssl.enabled: true
xpack.security.transport.ssl.verification_mode: certificate
xpack.security.transport.ssl.keystore.path: certs/elastic-certificates.p12
xpack.security.transport.ssl.truststore.path: certs/elastic-certificates.p12
给认证的集群创建用户密码(只需在一台机器执行,其他同集群机器内部会同步):
bin/elasticsearch-setup-passwords interactive

#可以给ES中许多内置的用户创建密码

#elastic 账号:拥有 superuser 角色,是内置的超级用户。
#kibana 账号:拥有 kibana_system 角色,用户 kibana 用来连接 elasticsearch 并与之通信。Kibana 服务器以该用户身份提交请求以访问集群监视 API 和 .kibana 索引。不能访问 index。
#logstash_system 账号:拥有 logstash_system 角色。用户 Logstash 在 Elasticsearch 中存储监控信息时使用。
#beats_system账号:拥有 beats_system 角色。用户 Beats 在 Elasticsearch 中存储监控信息时使用。
#elastic是超级用户,它可以做任何事情
完整配置:
# ======================== Elasticsearch Configuration =========================
#
# NOTE: Elasticsearch comes with reasonable defaults for most settings.
#       Before you set out to tweak and tune the configuration, make sure you
#       understand what are you trying to accomplish and the consequences.
#
# The primary way of configuring a node is via this file. This template lists
# the most important settings you may want to configure for a production cluster.
#
# Please consult the documentation for further information on configuration options:
# https://www.elastic.co/guide/en/elasticsearch/reference/index.html
#
# ---------------------------------- Cluster -----------------------------------
#
# Use a descriptive name for your cluster:
#
cluster.name: qt-es-application
#
# ------------------------------------ Node ------------------------------------
#
# Use a descriptive name for the node:
#
node.name: node-1
node.data: true
#
# Add custom attributes to the node:
#
#node.attr.rack: r1
#
# ----------------------------------- Paths ------------------------------------
#
# Path to directory where to store the data (separate multiple locations by comma):
#
path.data: /data/elastic
#
# Path to log files:
#
path.logs: /usr/local/src/logs
#
# ----------------------------------- Memory -----------------------------------
#
# Lock the memory on startup:
#
#bootstrap.memory_lock: true
#
# Make sure that the heap size is set to about half the memory available
# on the system and that the owner of the process is allowed to use this
# limit.
#
# Elasticsearch performs poorly when the system is swapping the memory.
#
# ---------------------------------- Network -----------------------------------
#
# Set the bind address to a specific IP (IPv4 or IPv6):
#
network.host: 0.0.0.0
network.publish_host: 172.16.16.8
#
# Set a custom port for HTTP:
#
http.port: 9200
#
# For more information, consult the network module documentation.
#
# --------------------------------- Discovery ----------------------------------
#
# Pass an initial list of hosts to perform discovery when this node is started:
# The default list of hosts is ["127.0.0.1", "[::1]"]
#
discovery.seed_hosts: ["172.16.16.8", "172.16.16.4","172.16.16.7"]
#
# Bootstrap the cluster using an initial set of master-eligible nodes:
#
cluster.initial_master_nodes: ["node-1", "node-2","node-3"]
#
# For more information, consult the discovery and cluster formation module documentation.
#
# ---------------------------------- Gateway -----------------------------------
#
# Block initial recovery after a full cluster restart until N nodes are started:
#
#gateway.recover_after_nodes: 3
#
# For more information, consult the gateway module documentation.
#
# ---------------------------------- Various -----------------------------------
#
# Require explicit names when deleting indices:
#
#action.destructive_requires_name: true
#
#
http.cors.enabled: true
http.cors.allow-origin: "*"
http.cors.allow-headers: Authorization,X-Requested-With,Content-Length,Content-Type
xpack.security.enabled: true
xpack.license.self_generated.type: basic
xpack.security.transport.ssl.enabled: true
xpack.security.transport.ssl.verification_mode: certificate
xpack.security.transport.ssl.keystore.path: elastic-certificates.p12
xpack.security.transport.ssl.truststore.path: elastic-certificates.p12
为账号配置目录权限
chown -R qtyj:qtyj /usr/local/src/
chown -R qtyj:qtyj /data/elastic/
配置es jvm参数
 vim jvm.options
#根据实际情况调整
#-Xms10g
#-Xmx10g
启动应用
bin/elasticsearch &
#bin/elasticsearch -d
4,查看,验证 (https://www.jianshu.com/p/433d821f9667)
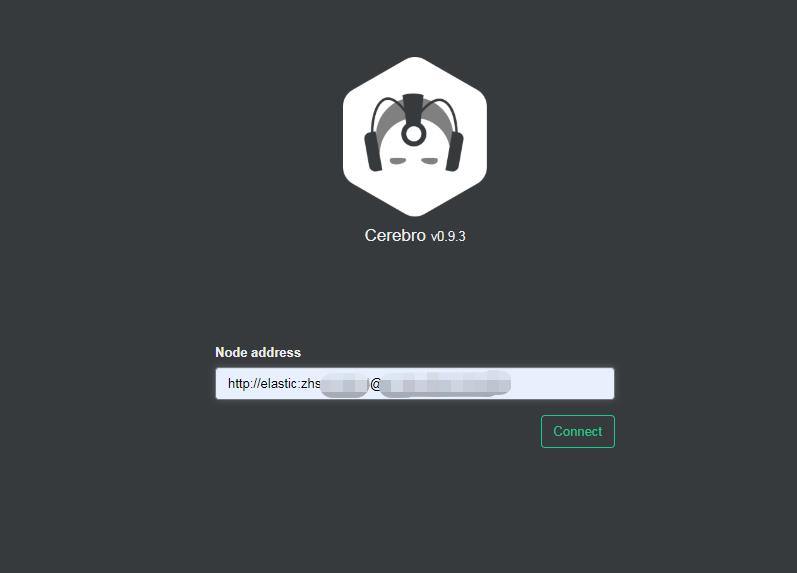
cerebro下载:https://github.com/lmenezes/cerebro/releases
默认端口 9000,访问方式:http://IP+port


以上是关于Elasticsearch7.10.0集群搭建的主要内容,如果未能解决你的问题,请参考以下文章