ESP32上手笔记 | 02 - ESP32-Arduino开发环境搭建
Posted Mculover666
tags:
篇首语:本文由小常识网(cha138.com)小编为大家整理,主要介绍了ESP32上手笔记 | 02 - ESP32-Arduino开发环境搭建相关的知识,希望对你有一定的参考价值。
ESP32-Devkitc-v4

一、arduino-esp32
Arduino core for the ESP32, ESP32-S2 and ESP32-C3 是乐鑫官方为ESP32提供的Arduino内核引擎。
- 开源仓库地址: Arduino core for the ESP32, ESP32-S2 and ESP32-C3。
- 在线文档地址:Getting Started。
目前支持以下ESP32系列:
| Soc | Stable | Development | Datasheet |
|---|---|---|---|
| ESP32 | YES | YES | ESP32 |
| ESP32-S2 | YES | YES | ESP32-S2 |
| ESP32-C3 | YES | YES | ESP32-C3 |
| ESP32-S3 | NO | YES | ESP32-S3 |
Arduino Reference:https://www.arduino.cc/reference/en/。
二、借助Arudio IDE 安装Arduino-ESP32
1. 安装Arduino IDE
下载地址:https://www.arduino.cc/en/software。
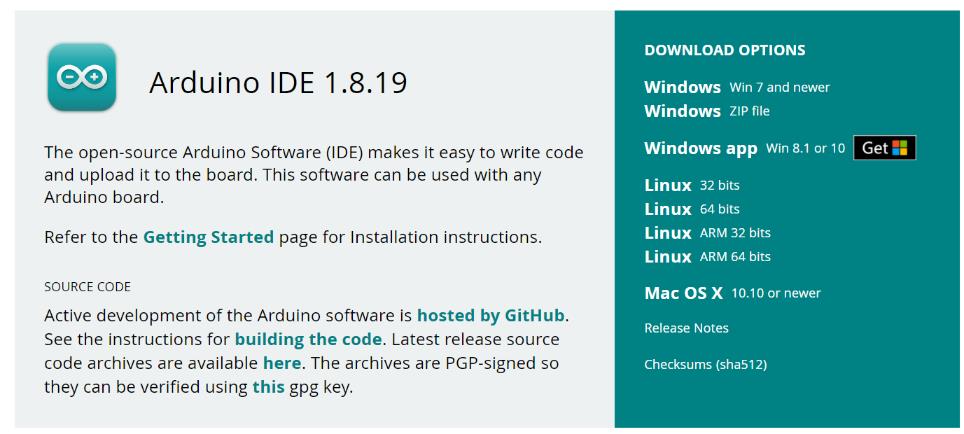
下载之后解压即可。
2. 安装Arduino-ESP32
打开 Arduino IDE 首选项:
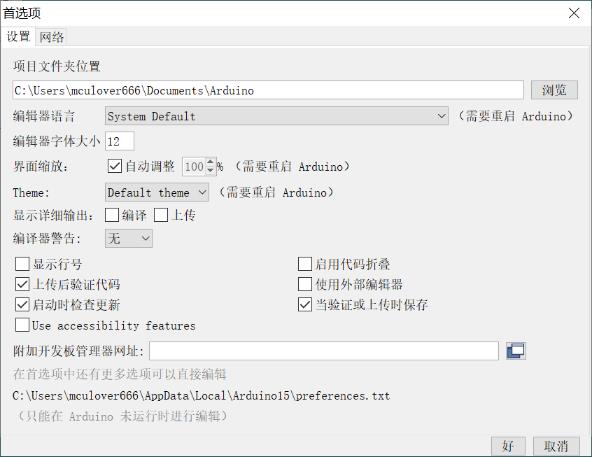
在【附加开发板管理器网址】中填入url:
- 稳定版发布链接:
https://raw.githubusercontent.com/espressif/arduino-esp32/gh-pages/package_esp32_index.json
- 开发板发布链接:
https://raw.githubusercontent.com/espressif/arduino-esp32/gh-pages/package_esp32_dev_index.json
这里我选择稳定版:
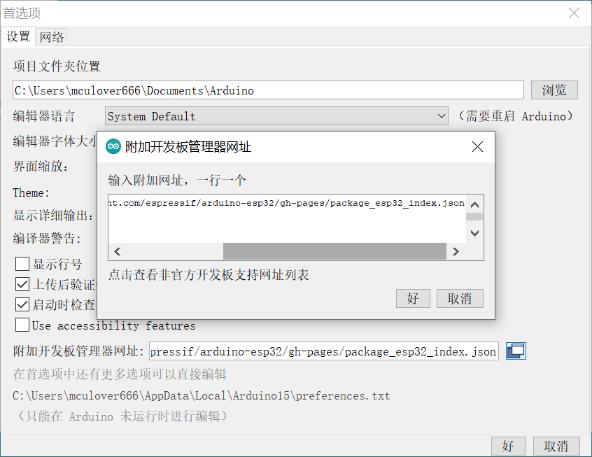
打开【工具】【开发板管理器】,安装esp32平台:
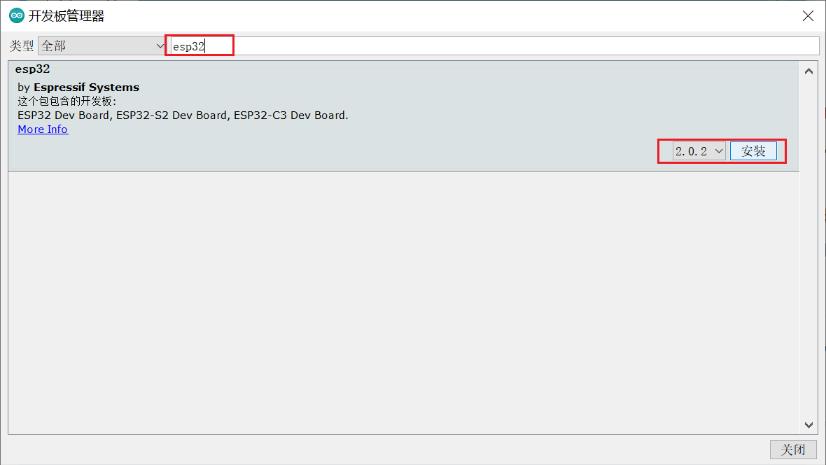
这里需要自己处理一下网络,你懂的,否则连json文件都拉不到。(点这里)
安装之后在开发板可以看到,选择ESP32-C3F开发板:

安装完成,重启Arduino IDE。
三、HelloWorld
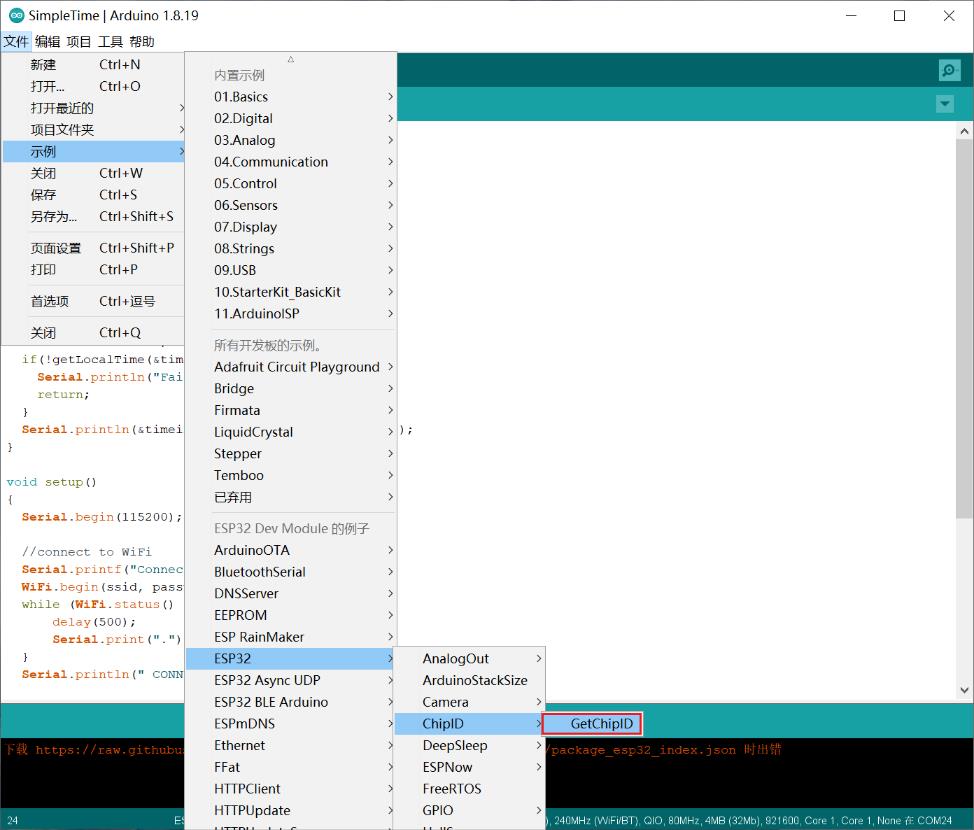
1. 导入示例
ESP32-Arduino库中带了很多示例,这里以获取芯片ID为例:
2. 示例代码
/* The true ESP32 chip ID is essentially its MAC address.
This sketch provides an alternate chip ID that matches
the output of the ESP.getChipId() function on ESP8266
(i.e. a 32-bit integer matching the last 3 bytes of
the MAC address. This is less unique than the
MAC address chip ID, but is helpful when you need
an identifier that can be no more than a 32-bit integer
(like for switch...case).

created 2020-06-07 by cweinhofer
with help from Cicicok */

uint32_t chipId = 0;

void setup()
	Serial.begin(115200);


void loop()
	for(int i=0; i<17; i=i+8)
	  chipId |= ((ESP.getEfuseMac() >> (40 - i)) & 0xff) << i;


	Serial.printf("ESP32 Chip model = %s Rev %d\\n", ESP.getChipModel(), ESP.getChipRevision());
	Serial.printf("This chip has %d cores\\n", ESP.getChipCores());
  Serial.print("Chip ID: "); Serial.println(chipId);

	delay(3000);
不得不说,这玩意的代码是真简洁。
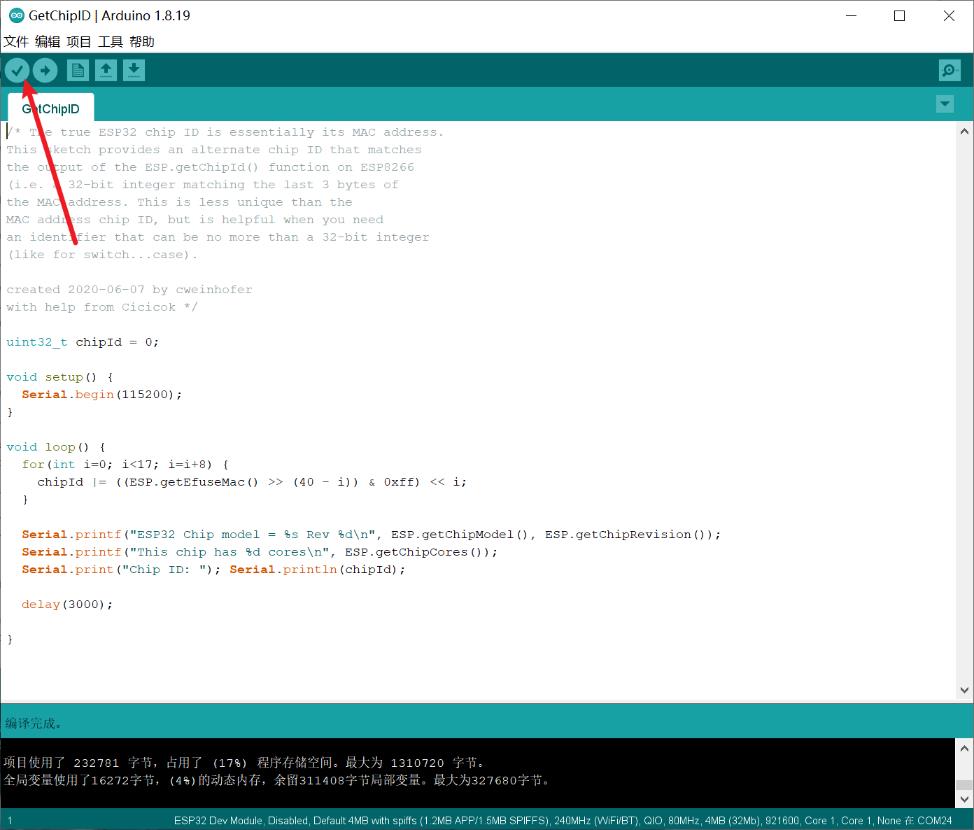
3. 编译
4. 下载
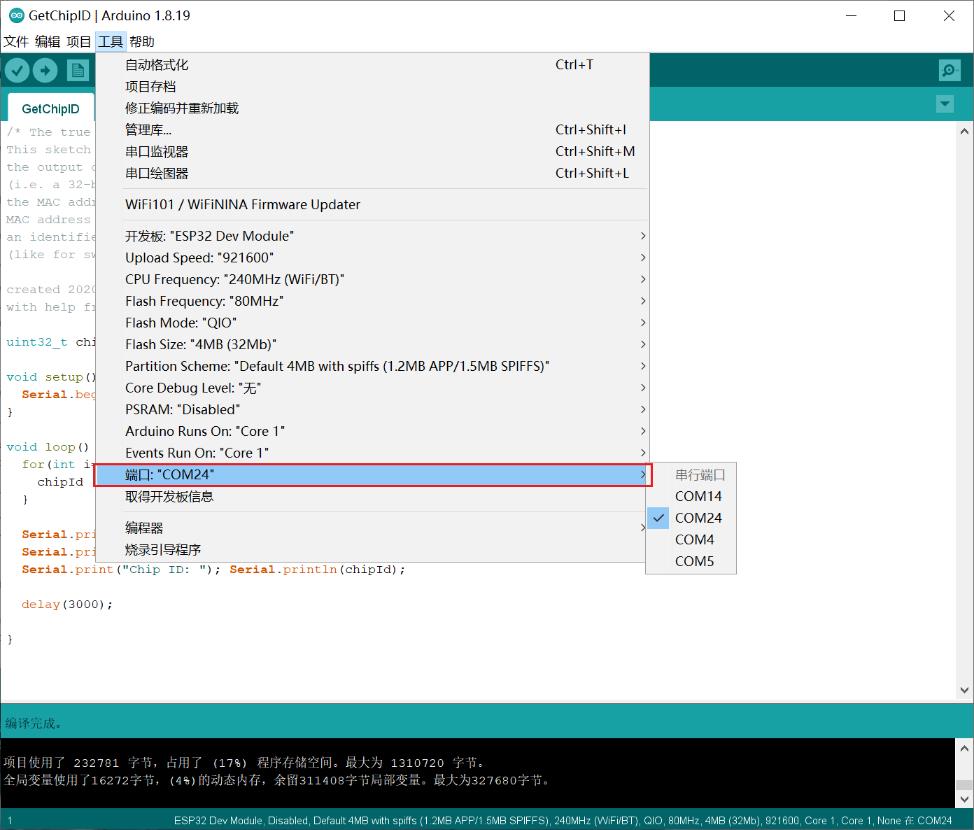
选择开发板连接的串口:
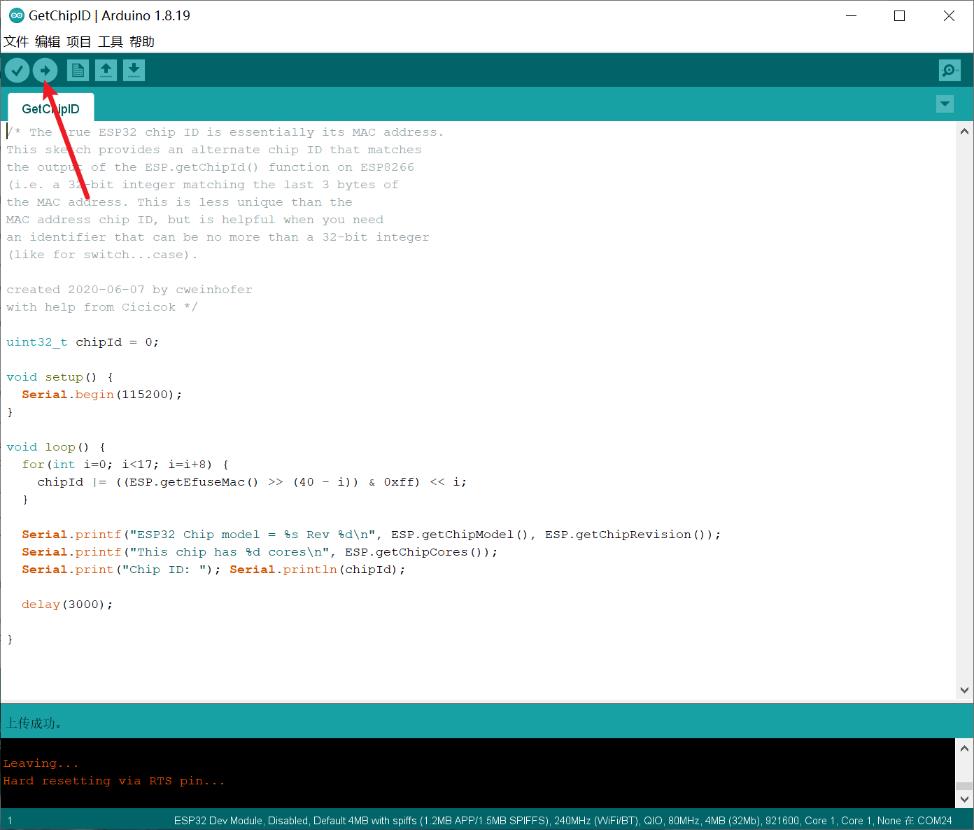
点击下载(Arduino中叫上传):
5. 串口监视器
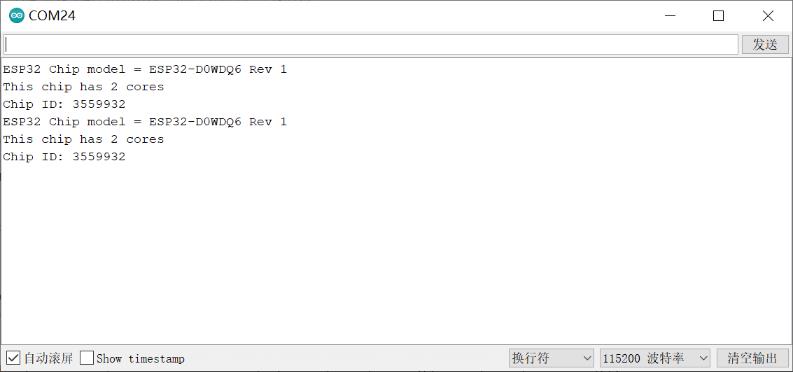
打开串口监视器,即可看到ESP32输出的日志:
四、借助 PlatformIO 安装Arduino-ESP32
1. 安装PlatformIO(PIO)
打开VS Code,搜索platformio ide扩展,安装扩展:

2. 快速开始
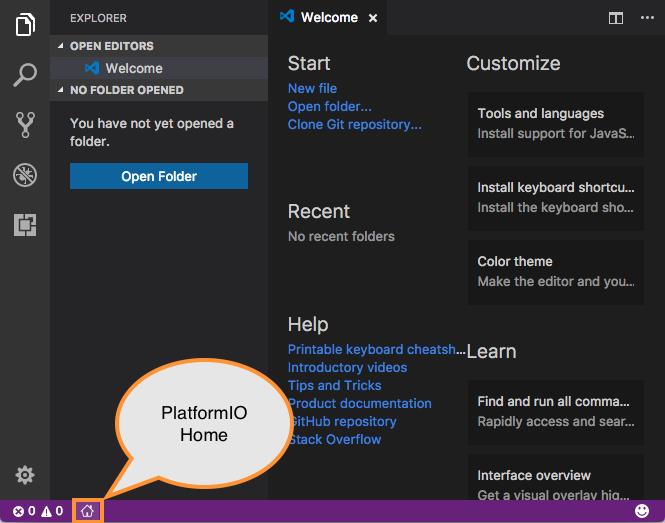
(1)点击底部状态栏的【PlatformIO Home】按钮:
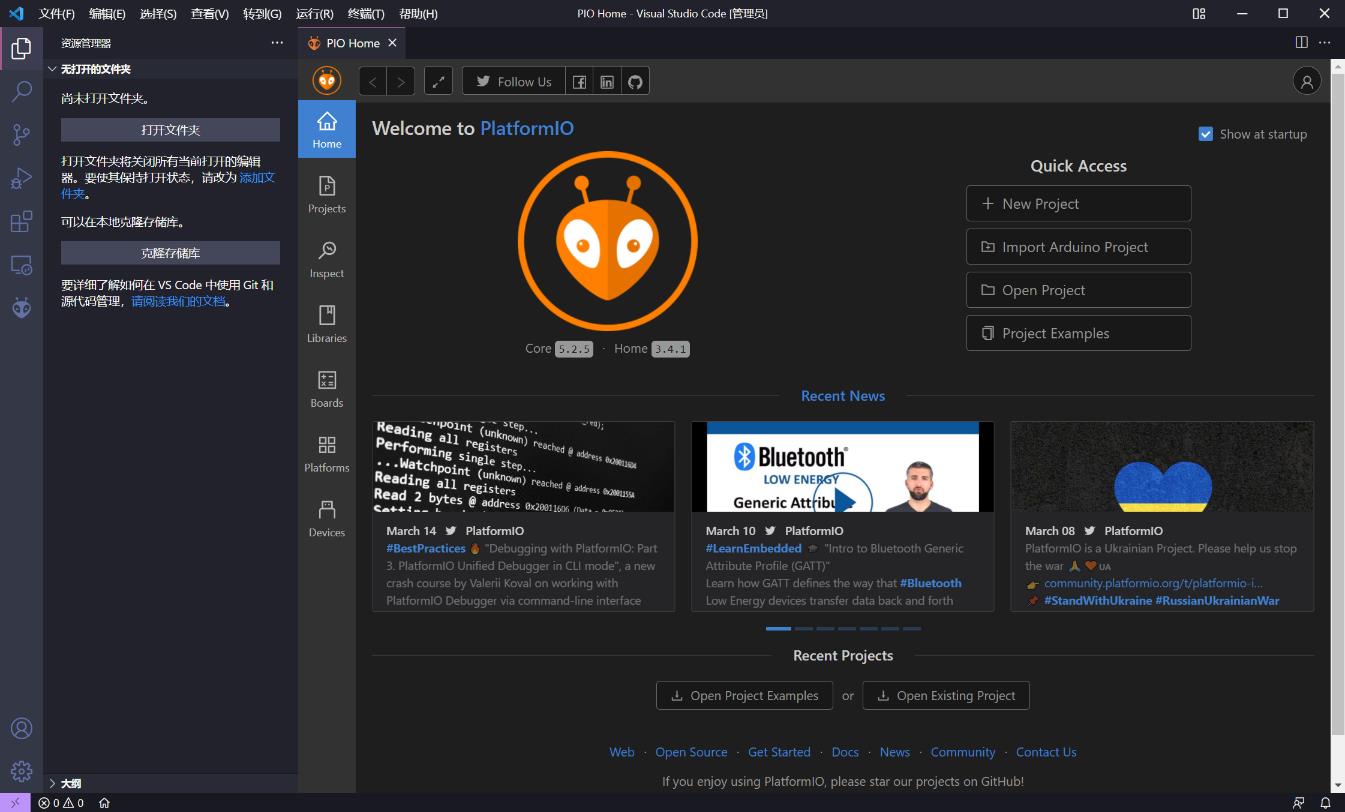
(2)点击【New Project】,选择开发板并创建一个新的PlatformIO项目:

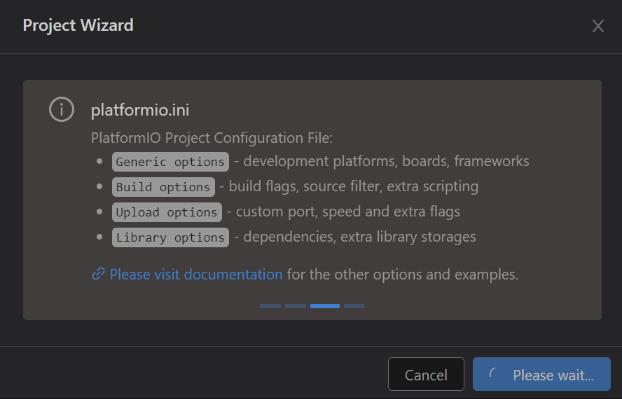
第一次新建工程会比较久:
工程创建完成后,如图:
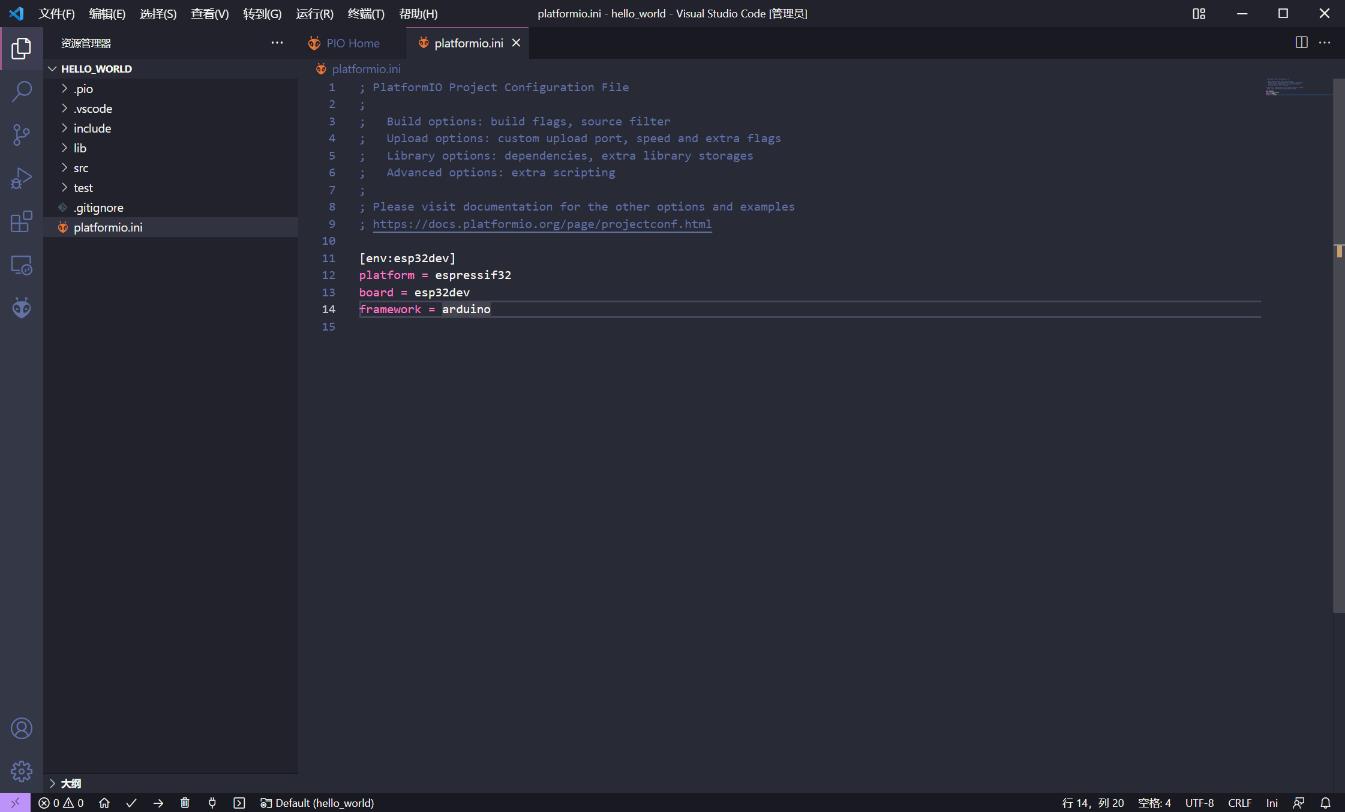
(3)编写测试代码:
#include <Arduino.h>

void setup()

	Serial.begin(115200);


void loop()

	Serial.println("Hello World");
	delay(1000);
3. 编译下载
(1)点击编译按钮,编译代码
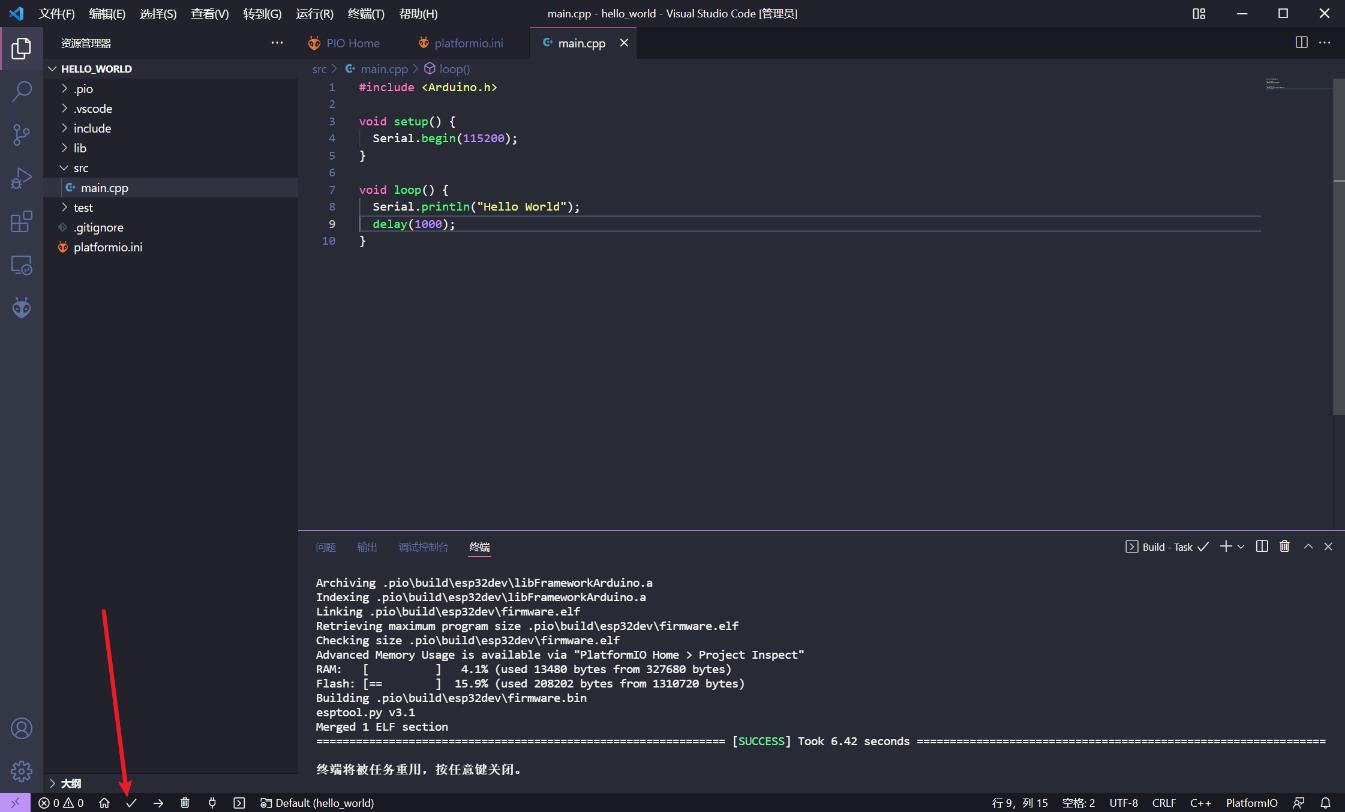
(2)点击上传按钮,上传代码
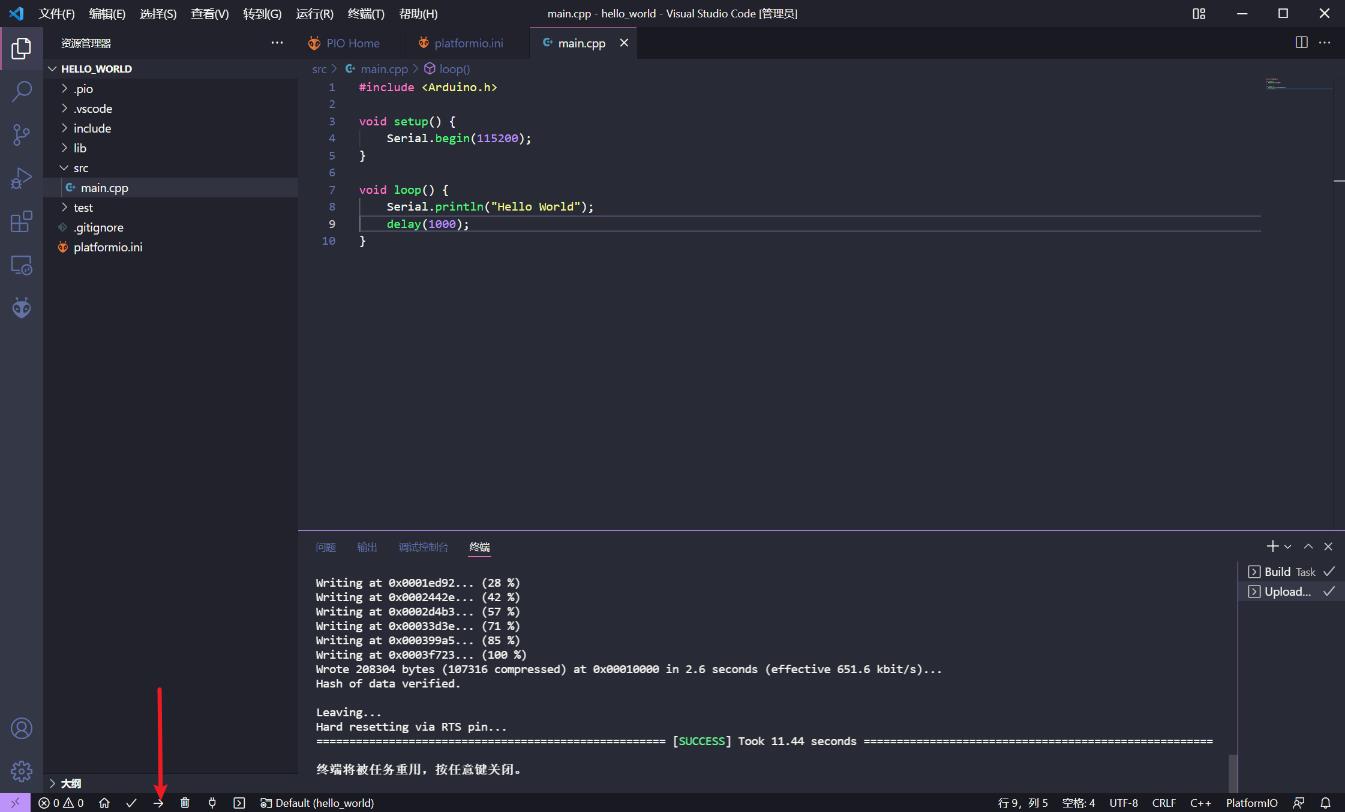
4. 串口终端
PlatformIO自带的串口Monitor太难用了,还是串口助手香:

以上是关于ESP32上手笔记 | 02 - ESP32-Arduino开发环境搭建的主要内容,如果未能解决你的问题,请参考以下文章