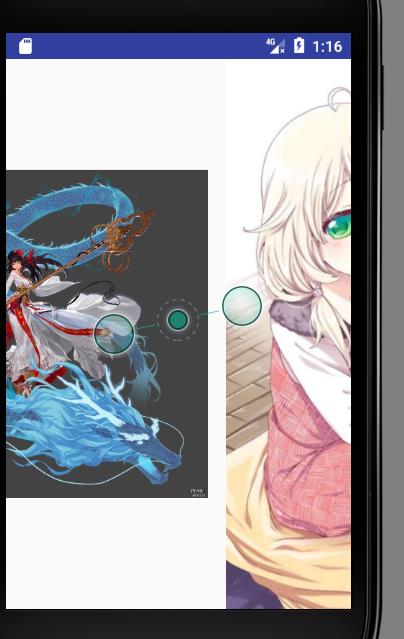
Android课程设计第五天欢迎界面(滑动)
Posted 樱花落舞
tags:
篇首语:本文由小常识网(cha138.com)小编为大家整理,主要介绍了Android课程设计第五天欢迎界面(滑动)相关的知识,希望对你有一定的参考价值。
注意:课程设计只为完成任务,不做细节描述~
滑动界面
 1 package com.example.myapplication;
 2
 3 import android.content.Intent;
 4 import android.os.Handler;
 5 import android.os.Message;
 6 import android.support.v7.app.AppCompatActivity;
 7 import android.os.Bundle;
 8
 9 import Utils.AboutVersion;
10
11 public class MainActivity extends AppCompatActivity {
12     private Handler handle=null;
13     @Override
14     protected void onCreate(Bundle savedInstanceState) {
15         super.onCreate(savedInstanceState);
16         setContentView(R.layout.activity_main);
17         //得到Handler的对象,默认接收消息
18         handle = new Handler(){
19             @Override
20             public void handleMessage(Message msg) {
21                 super.handleMessage(msg);
22                 int a=msg.what;
23                 AboutVersion aboutAboutVersion = new AboutVersion();
24                 int ver= aboutAboutVersion.getSaveVersion(MainActivity.this);
25                 int saveServison= aboutAboutVersion.getSaveVersion(MainActivity.this);
26                 if(ver==saveServison){
27                     //没有更新 跳转到主界面
28                         Intent intent = new Intent(MainActivity.this,HomeActivity.class);
29                         startActivity(intent);
30                 }else{
31                     aboutAboutVersion.saveVersion(MainActivity.this);
32                     Intent intent=new Intent(MainActivity.this,WelcomeActivity.class);
33                     //貌似获取版本失败了
34                     startActivity(intent);
35                 }
36             }
37         };
38         new FirstThread().start();
39     }
40     class FirstThread extends Thread{
41         @Override
42         public void run() {
43             super.run();
44             try {
45                 Thread.sleep(1000);
46                 handle.sendEmptyMessage(11);
47             } catch (InterruptedException e) {
48                 e.printStackTrace();
49             }
50         }
51     }
52 }
package com.example.myapplication;

import android.app.FragmentManager;
import android.app.FragmentTransaction;
import android.support.v7.app.AppCompatActivity;
import android.os.Bundle;
import android.view.View;
import android.widget.Button;

public class HomeActivity extends AppCompatActivity {
    private Button btn_first,btn_theme,btn_person;
    private FirstFragment first;
    private ThemFragment ThemFragment;
    private PersonFragment PersonFragment;
    @Override
    protected void onCreate(Bundle savedInstanceState) {
        super.onCreate(savedInstanceState);
        setContentView(R.layout.activity_home);
        initView();
        //开启碎片管理器
        FragmentManager manager =getFragmentManager();
        //开启碎片事物
        FragmentTransaction action =manager.beginTransaction();
        first = new FirstFragment();
        //将fragment的对象添加到帧布局中
        action.add(R.id.frame,first);
        action.commit();
    }
    public void initView(){
        btn_first= (Button) findViewById(R.id.firstPage);
        btn_theme= (Button) findViewById(R.id.mainTheme);
        btn_person=(Button) findViewById(R.id.My);
        btn_first.setSelected(true);
        btn_person.setSelected(false);
        btn_theme.setSelected(false);
    }
    /*
        该方法是由布局文件的Onclick属性指定过来的,修饰符需要pubilc,方法名需要和Onclick的值相同
     */

    public  void Click(View v){
        btn_first.setSelected(false);
        btn_person.setSelected(false);
        btn_theme.setSelected(false);
        FragmentManager mananger = getFragmentManager();
        FragmentTransaction action=mananger.beginTransaction();
        switch (v.getId()){
            case  R.id.firstPage:
                btn_first.setSelected(true);
                if(first==null){
                    first= new FirstFragment();
                }
                action.replace(R.id.frame,first);
                action.commit();
                break;
            case R.id.mainTheme:
                btn_theme.setSelected(true);
                if(ThemFragment ==null){
                    ThemFragment =new ThemFragment();
                }
                action.replace(R.id.frame, ThemFragment);
                action.commit();
                break;
            case R.id.My:
                btn_person.setSelected(true);
                if(PersonFragment ==null){
                    PersonFragment =new PersonFragment();
                }
                action.replace(R.id.frame, PersonFragment);
                action.commit();
                break;
        }
    }

}
package com.example.myapplication;

import android.app.Fragment;
import android.os.Bundle;
import android.support.annotation.Nullable;
import android.view.LayoutInflater;
import android.view.View;
import android.view.ViewGroup;

/**
 * Created by 樱花落舞 on 2017/6/15.
 */

public class PersonFragment extends Fragment {
    @Nullable
    @Override
    public View onCreateView(LayoutInflater inflater, @Nullable ViewGroup container, Bundle savedInstanceState) {
        View view=inflater.inflate(R.layout.fragment_person,container,false);
        return view;
    }
}
package com.example.myapplication;

import android.app.Fragment;
import android.os.Bundle;
import android.support.annotation.Nullable;
import android.view.LayoutInflater;
import android.view.View;
import android.view.ViewGroup;

/**
 * Created by 樱花落舞 on 2017/6/15.
 */

public class ThemFragment extends Fragment {
    @Nullable
    @Override
    public View onCreateView(LayoutInflater inflater, @Nullable ViewGroup container, Bundle savedInstanceState) {
        View view=inflater.inflate(R.layout.fragment_them,container,false);
        return view;
    }
}
package com.example.myapplication;

import android.app.Activity;
import android.os.Bundle;
import android.provider.ContactsContract;
import android.support.annotation.Nullable;
import android.support.v4.view.ViewPager;
import android.view.View;
import android.widget.ImageView;

import Adapter.WeclomeAdapter;

/**
 * Created by 樱花落舞 on 2017/6/13.
 *          1.创建java文件继承Activity或者activity子类
 *          2.重写OnCreate()方法
 *          3.添加布局文件
 *          4.在清单文件中进行注册
 */

public class WelcomeActivity extends Activity {
    private ViewPager pager;
    private int images[]={R.mipmap.b,R.mipmap.c,R.mipmap.a};
    private ImageView views[]=new ImageView[3];
    @Override
    protected void onCreate(Bundle savedInstanceState) {
        super.onCreate(savedInstanceState);
        setContentView(R.layout.activity_welcome);
        pager= (ViewPager) findViewById(R.id.viewapger);
        for(int i=0;i<3;i++){
            ImageView view=new ImageView(WelcomeActivity.this);
            view.setImageResource(images[i]);
            views[i]=view;
        }
        WeclomeAdapter adapter= new WeclomeAdapter(views);
        pager.setAdapter(adapter);
    }
}
<?xml version="1.0" encoding="utf-8"?>
<selector xmlns:android="http://schemas.android.com/apk/res/android">
    <item android:state_selected="true"
        android:color="#ffff0000"/>

    <item android:color="#0fffff" android:state_selected="false"/>
</selector>
<?xml version="1.0" encoding="utf-8"?>
<selector xmlns:android="http://schemas.android.com/apk/res/android">
    <item android:state_selected="true" android:drawable="@mipmap/ico_screen"  />

    <item android:drawable="@mipmap/ico_screen_pred" android:state_selected="false"/>
</selector>
<?xml version="1.0" encoding="utf-8"?>
<selector xmlns:android="http://schemas.android.com/apk/res/android">
    <item android:state_selected="true" android:drawable="@mipmap/ico_personal_pred"/>
    <item android:drawable="@mipmap/ico_personal" android:state_selected="false"/>
</selector>
<?xml version="1.0" encoding="utf-8"?>
<RelativeLayout xmlns:android="http://schemas.android.com/apk/res/android"
    xmlns:app="http://schemas.android.com/apk/res-auto"
    xmlns:tools="http://schemas.android.com/tools"
    android:layout_width="match_parent"
    android:layout_height="match_parent"
    tools:context="com.example.myapplication.HomeActivity">

    <LinearLayout
        android:id="@+id/bottomBar"
        android:layout_width="match_parent"
        android:layout_height="40dp"
        android:layout_alignParentBottom="true"
        android:orientation="horizontal"
        android:background="#0ccfff"
        >
        <Button
            android:id="@+id/firstPage"
            android:drawableTop="@drawable/picture"
            android:text="首页"
            style="@style/bottomStyle"
            android:textColor="@color/barcolor"
            android:onClick="Click"
            />
        <Button
            android:id="@+id/mainTheme"
            style="@style/bottomStyle"
            android:drawableTop="@drawable/picture2"
            android:text="专题"
            android:textColor="@color/barcolor"
            android:onClick="Click"
            />
        <Button
            android:id="@+id/My"
            style="@style/bottomStyle"
            android:drawableTop="@drawable/picture3"
            android:text="我的"
            android:textColor="@color/barcolor"
            android:onClick="Click"
            />
    </LinearLayout>
    <FrameLayout
        android:layout_width="match_parent"
        android:layout_height="match_parent"
        android:id="@+id/frame"
        android:layout_above="@id/bottomBar"
        ></FrameLayout>
</RelativeLayout>
<?xml version="1.0" encoding="utf-8"?>
<RelativeLayout xmlns:android="http://schemas.android.com/apk/res/android"
    xmlns:app="http://schemas.android.com/apk/res-auto"
    xmlns:tools="http://schemas.android.com/tools"
    android:layout_width="match_parent"
    android:layout_height="match_parent"
    tools:context="com.example.myapplication.MainActivity"
    android:background="@mipmap/xiaomai">


</RelativeLayout>
<?xml version="1.0" encoding="utf-8"?>
<RelativeLayout xmlns:android="http://schemas.android.com/apk/res/android"
    android:layout_width="match_parent" android:layout_height="match_parent">
    <android.support.v4.view.ViewPager
        android:layout_width="match_parent"
        android:layout_height="match_parent"
        android:id="@+id/viewapger">

    </android.support.v4.view.ViewPager>
</RelativeLayout>
<?xml version="1.0" encoding="utf-8"?>
<RelativeLayout xmlns:android="http://schemas.android.com/apk/res/android"
    android:layout_width="match_parent" android:layout_height="match_parent"
    android:background="#075f3a">
    <ListView
        android:layout_width="match_parent"
        android:layout_height="match_parent"
        android:id="@+id/list"
        ></ListView>
</RelativeLayout>
<?xml version="1.0" encoding="utf-8"?>
<RelativeLayout xmlns:android="http://schemas.android.com/apk/res/android"
    android:layout_width="match_parent"
    android:layout_height="match_parent"
    android:background="#8b844c">

</RelativeLayout>
<?xml version="1.0" encoding="utf-8"?>
<RelativeLayout xmlns:android="http://schemas.android.com/apk/res/android"
    android:layout_width="match_parent"
    android:layout_height="match_parent"
    android:background="#4c648b">

</RelativeLayout>
<resources>

    <!-- Base application theme. -->
    <style name="AppTheme" parent="Theme.AppCompat.Light.DarkActionBar">
        <!-- Customize your theme here. -->
        <item name="colorPrimary">@color/colorPrimary</item>
        <item name="colorPrimaryDark">@color/colorPrimaryDark</item>
        <item name="colorAccent">@color/colorAccent</item>
    </style>
    <style name="bottomStyle">
        <item name="android:layout_height">match_parent</item>
        <item name="android:layout_width">0dp</item>
        <item name="android:layout_weight">1</item>
        <item name="android:background">@null</item>
        <item name="android:color">@color/barcolor</item>
        <item name="android:textSize">12sp</item>
        <item name="android:paddingTop">8dp</item>
    </style>
</resources>
以上是关于Android课程设计第五天欢迎界面(滑动)的主要内容,如果未能解决你的问题,请参考以下文章