IDEA maven SSH Oracle 整合实现简易用户登录
Posted Eli Shaw
tags:
篇首语:本文由小常识网(cha138.com)小编为大家整理,主要介绍了IDEA maven SSH Oracle 整合实现简易用户登录相关的知识,希望对你有一定的参考价值。
本方大部分内容来自 http://blog.csdn.net/sysushui/article/details/73722870?locationNum=11&fps=1因为我使用的Oracle12c数据库,一些配置不同,导致遇到很多坑,因此将我遇到的问题与解决办法分享,希望大家少走弯路
前言
a)使用maven搭建一个SSH项目(基本的项目框架)
b)实现一个简易的登录程序,涉及到Oracle12c,Hibernate, Spring, Struts
c)如何使用IDEA2017搭建maven项目
所有的代码都可以在 github 下载
一. 前期准备
1)环境
a)安装IDEA
b)安装Oracle
二. 建立项目
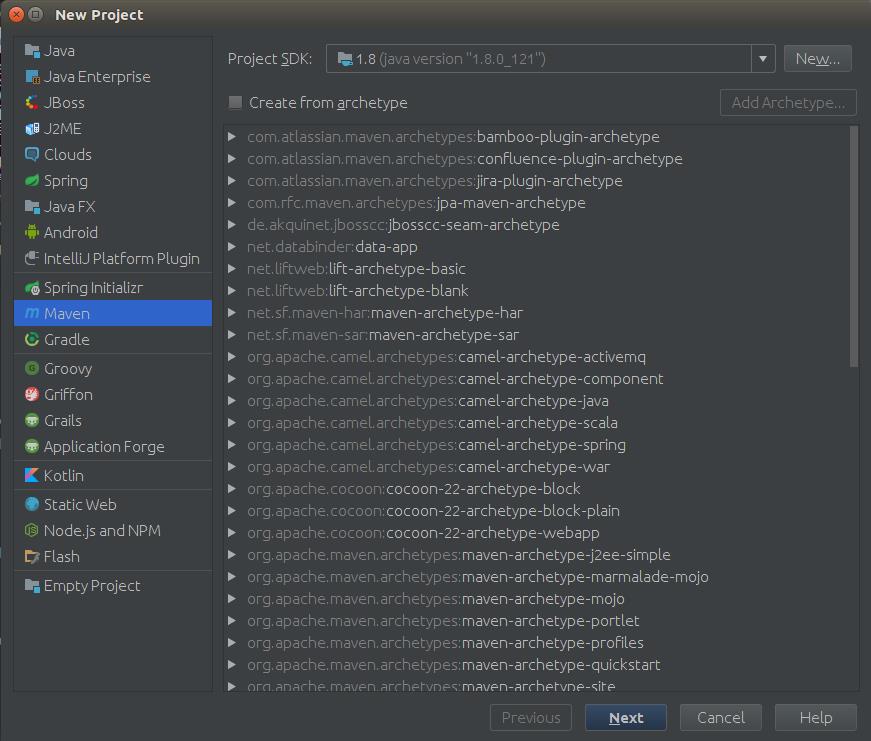
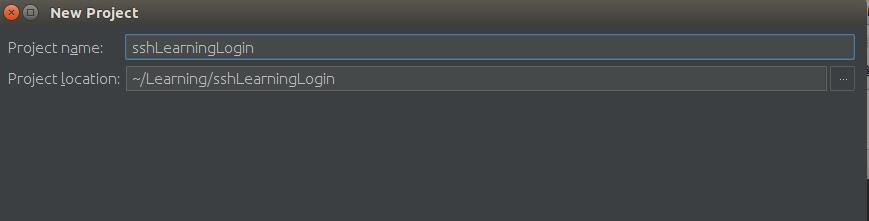
1)IDEA新建maven项目,相关截图如下:


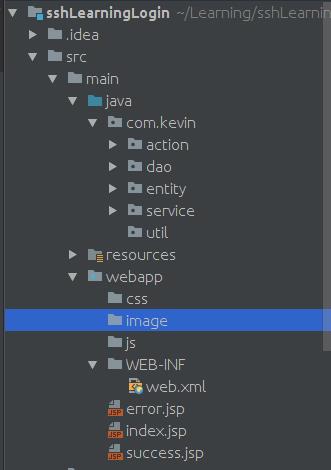
2)完善目录结构,主要完善如下:
2.1)在src/main/java目录下新建四个包文件,分别为com.kevin.action, com.kevin.dao, com.kevin.entity, com.kevin.service, com.kevin.util; 建议方式为右击src/main/java目录--->New---->Package---->(输入)com.kevin.action;这四个包文件主要是用来存放我们的java文件,其中com.kevin.entity用来存放数据库映射对象文件,com.kevin.dao用来存放dao文件(data access object),com.kevin.service用来存放service文件(服务类文件),com.kevin.action用来存放action文件(供struts2调用);这了更好地理解这个目录结构,这里补充一下entity, dao ,service, action之间的关系
2.1.1)entity是hibernate对于数据库表抽象出来的类,它和数据库中的表是完全对应的;
2.1.2)dao类是针对数据库进行直接操作(调用entity);
2.1.3)service是业务逻辑层(通过调用dao层类来进行修改数据库数据);
2.1.4)action是表示层,控制页面的跳转(负责调用业务逻辑的服务组件);
具体可以参考 链接
2.2)在src/main目录下建立一个webapp目录, 在webapp目录下建立一个WEB-INF目录,在WEB-INF目录再建立web.xml文件,然后在webapp目录下建立 css, image, js目录,再建立index.jsp文件;这个目录就是我们的tomcat目录了;
如下是我们的整体的目录结构
三. 修改maven的pom.xml
直接修改pom.xml文件,内容如下
<?xml version="1.0" encoding="UTF-8"?>
<project xmlns="http://maven.apache.org/POM/4.0.0"
         xmlns:xsi="http://www.w3.org/2001/XMLSchema-instance"
         xsi:schemaLocation="http://maven.apache.org/POM/4.0.0 http://maven.apache.org/xsd/maven-4.0.0.xsd">
    <modelVersion>4.0.0</modelVersion>

    <groupId>cn.eli</groupId>
    <artifactId>sshTest</artifactId>
    <version>1.0-SNAPSHOT</version>

    <properties>
        <project.build.sourceEncoding>UTF-8</project.build.sourceEncoding>
        <spring.version>3.1.1.RELEASE</spring.version>
        <hibernate.version>3.6.5.Final</hibernate.version>
        <struts2.version>2.3.1</struts2.version>
    </properties>

    <dependencies>
        <!-- junit -->
        <dependency>
            <groupId>junit</groupId>
            <artifactId>junit</artifactId>
            <version>3.8.1</version>
            <scope>test</scope>
        </dependency>

        <!-- spring -->
        <dependency>
            <groupId>org.springframework</groupId>
            <artifactId>spring-core</artifactId>
            <version>$spring.version</version>
        </dependency>
        <dependency>
            <groupId>org.springframework</groupId>
            <artifactId>spring-context</artifactId>
            <version>$spring.version</version>
        </dependency>
        <dependency>
            <groupId>org.springframework</groupId>
            <artifactId>spring-jdbc</artifactId>
            <version>$spring.version</version>
        </dependency>
        <dependency>
            <groupId>org.springframework</groupId>
            <artifactId>spring-beans</artifactId>
            <version>$spring.version</version>
        </dependency>
        <dependency>
            <groupId>org.springframework</groupId>
            <artifactId>spring-web</artifactId>
            <version>$spring.version</version>
        </dependency>
        <dependency>
            <groupId>org.springframework</groupId>
            <artifactId>spring-expression</artifactId>
            <version>$spring.version</version>
        </dependency>
        <dependency>
            <groupId>org.springframework</groupId>
            <artifactId>spring-orm</artifactId>
            <version>$spring.version</version>
        </dependency>
        <dependency>
            <groupId>cglib</groupId>
            <artifactId>cglib-nodep</artifactId>
            <version>2.1_3</version>
        </dependency>


        <!-- hibernate -->
        <dependency>
            <groupId>org.hibernate</groupId>
            <artifactId>hibernate-core</artifactId>
            <version>$hibernate.version</version>
        </dependency>

        <!-- struts2 -->
        <dependency>
            <groupId>org.apache.struts</groupId>
            <artifactId>struts2-core</artifactId>
            <version>$struts2.version</version>
        </dependency>
        <!--config-browser-plugin插件,使用了这个插件之后,就可以很方便的浏览项目中的所有action及其与 jsp view的映射 -->
        <dependency>
            <groupId>org.apache.struts</groupId>
            <artifactId>struts2-junit-plugin</artifactId>
            <version>$struts2.version</version>
            <scope>test</scope>
        </dependency>
        <dependency>
            <groupId>org.apache.struts</groupId>
            <artifactId>struts2-spring-plugin</artifactId>
            <version>$struts2.version</version>
        </dependency>

        <!-- 添加对数据源的支持 -->
        <dependency>
            <groupId>c3p0</groupId>
            <artifactId>c3p0</artifactId>
            <version>0.9.1.2</version>
        </dependency>

    </dependencies>
    <build>
        <plugins>
            <plugin>
                <groupId>org.apache.maven.plugins</groupId>
                <artifactId>maven-war-plugin</artifactId>
                <version>2.2</version>
                <configuration>
                    <webResources>
                        <resource>
                            <directory>src\\main\\webapp</directory>
                        </resource>
                    </webResources>
                </configuration>
            </plugin>
            <plugin>
                <groupId>org.apache.maven.plugins</groupId>
                <artifactId>maven-compiler-plugin</artifactId>
                <configuration>
                    <source>1.6</source>
                    <target>1.6</target>
                </configuration>
            </plugin>
        </plugins>
        <finalName>com</finalName>
    </build>
</project>
四. Java代码层面
1)Entity层
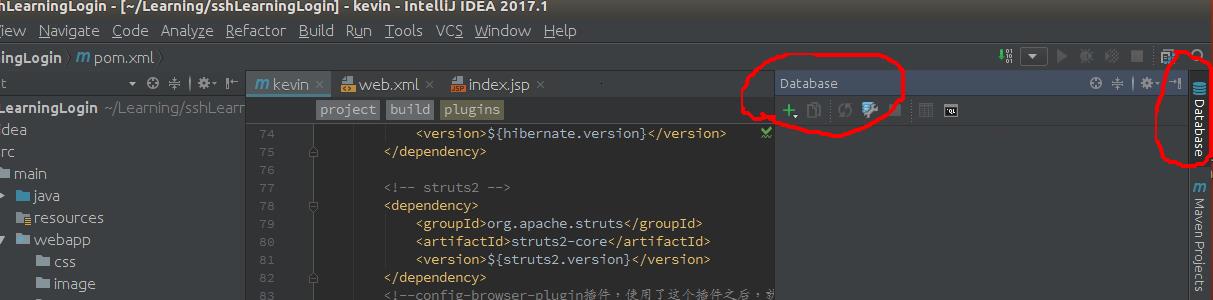
1.1)先建立一个Database,位置在IDEA界面的右面点击Database---->点击界面的加号------->Data Source
-----> mysql---->根据自己的情况进行配置,相关截图如下:
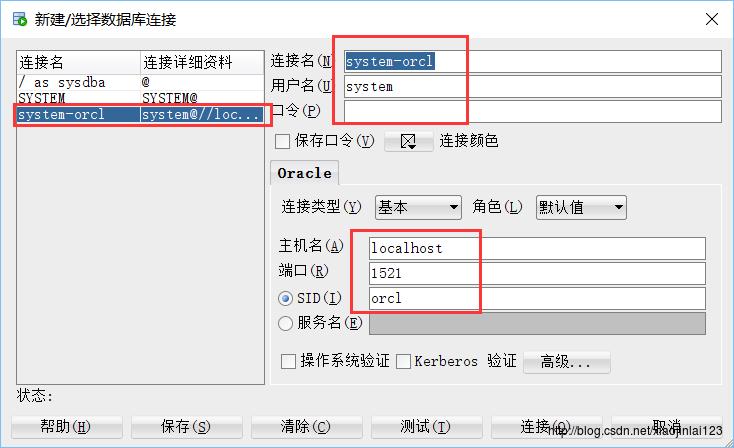
这里补充一点,就是在建立自己的 Oracle 的时候,一定要点击里面的 Test Connection,确认自己的配置是正确的;

其中 Name 不用管(任意),Host 是数据库的主机名,SID 、User、Password 可在你要使用的数据库中查看,查看方法如下:
打开 SQL Developer —— 右键查看的数据库 —— 属性 —— 左边选中要查看的数据库(system-orcl) —— 右面显示的是数据库信息,其中 SID 就是 IDEA 连接时使用的 SID
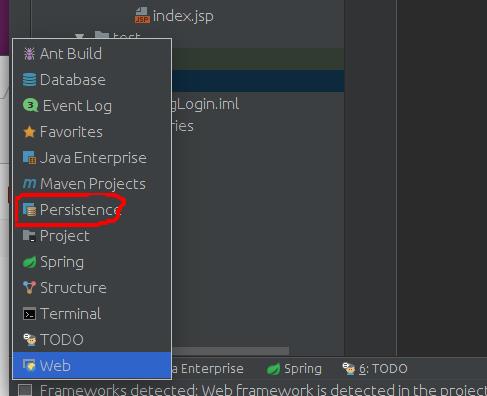
1.2)操作 Persistence,自动生成 Entity;我们可以看到在 Idea 界面里面看不到 Persistence 选项(将鼠标悬浮在左下角的正方形那里,截图如下)
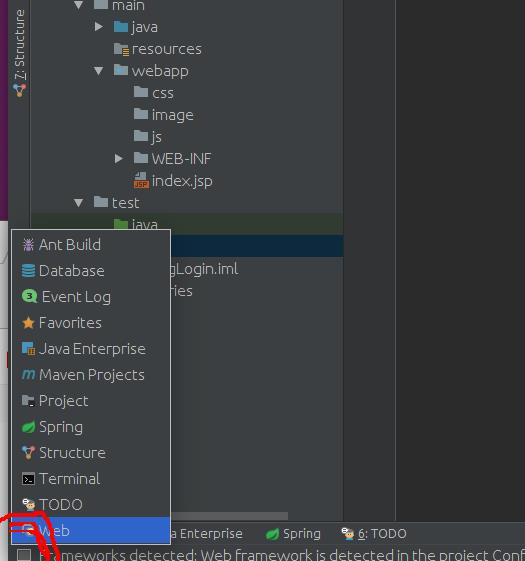
因为一开始使用 maven 来搭建项目,我们并没有显示引入 hibernate,所以没有 Persistence 界面,所以我们作如
下操作来显示加入 Hibernate; 点击 File -----> Project Structure ------> Modules -----> 点击+ -------->
选择 Hibernate(如果此处没有 Hibernate 选项,到 File —— Settings —— Plugins —— Hibernate Support
后面的框勾选 —— 重启后就可以了) ------> Apply ------>OK; 看界面,我们可以看到 Persistence 出现了,
截图如下:
1.3)配置 applicationContext.xml,applicationContext.xml 是 spring 的配置文件,因为在这个项目中我们需要让 spring 接管 Hibernate 的配置工作,所以我们直接建立 applicationContext.xml 文件并配置数据库信息, 为了方便数据库信息的管理,我们同时建立 db.properties。所以我们的操作是在 src/main/resources 下面建立两个文件,一个是 applicationContext.xml,一个是 db.properties;
1.3.1) db.properties文件内容如下(是 Oracle 数据库的配置信息)
database.database=oracle
database.driverClassName=oracle.jdbc.driver.OracleDriver
database.username=xxx
database.password=xxx
database.show_sql=true
database.url=jdbc:oracle:thin:@localhost:1521:orcl
1.3.2)applicationContext.xml内容如下
<?xml version="1.0" encoding="UTF-8"?>
<beans xmlns="http://www.springframework.org/schema/beans"
       xmlns:xsi="http://www.w3.org/2001/XMLSchema-instance"
       xmlns:context="http://www.springframework.org/schema/context"
       xmlns:tx="http://www.springframework.org/schema/tx"
       xsi:schemaLocation="http://www.springframework.org/schema/beans http://www.springframework.org/schema/beans/spring-beans.xsd http://www.springframework.org/schema/context http://www.springframework.org/schema/context/spring-context.xsd http://www.springframework.org/schema/tx http://www.springframework.org/schema/tx/spring-tx.xsd">
<!-- 引入数据库配置文件 db.properties -->
<context:property-placeholder location="classpath:db.properties" />
<!--<bean id="placeholderConfig"
      class="org.springframework.beans.factory.config.PropertyPlaceholderConfigurer">
    <property name="location">
        <value>classpath:db.properties</value>
    </property>
</bean>-->

<!-- 使用annotation -->
<context:annotation-config/>
<!-- 使用annotation自动注册bean,并检查@Controller, @Service, @Repository注解已被注入 -->
<context:component-scan base-package="cn.eli.action"/>
<context:component-scan base-package="cn.eli.service"/>
<context:component-scan base-package="cn.eli.dao" />

<!-- data connection setting -->
<bean id="dataSource" class="com.mchange.v2.c3p0.ComboPooledDataSource">
    <property name="driverClass" value="$database.driverClassName"></property>
    <property name="jdbcUrl" value="$database.url"></property>
    <property name="user" value="$database.username"></property>
    <property name="password" value="$database.password"></property>
    <!-- 设置数据库连接池的最大连接数 -->
    <property name="maxPoolSize">
        <value>50</value>
    </property>
    <!-- 设置数据库连接池的最小连接数 -->
    <property name="minPoolSize">
        <value>5</value>
    </property>
    <!-- 设置数据库连接池的初始化连接数 -->
    <property name="initialPoolSize">
        <value>5</value>
    </property>
    <!-- 设置数据库连接池的连接最大空闲时间 -->
    <property name="maxIdleTime">
        <value>20</value>
    </property>
    <!-- c3p0缓存Statement的数量数 -->
    <property name="maxStatements">
        <value>50</value>
    </property>
    <!-- 当连接池里面的连接用完的时候,C3P0一下获取新的连接数 -->
    <property name="acquireIncrement">
        <value>20</value>
    </property>

</bean>

<!-- hibernate 管理-->
<bean id="sessionFactory" class="org.springframework.orm.hibernate3.annotation.AnnotationSessionFactoryBean">
    <!-- 引用上面设置的数据源 -->
    <property name="dataSource">
        <ref bean="dataSource" />
    </property>

    <property name="hibernateProperties">
        <props>
            <prop key="hibernate.dialect">org.hibernate.dialect.Oracle10gDialect</prop>
            <prop key="hibernate.autoReconnect">true</prop>
            <prop key="hibernate.hbm2ddl.auto">update</prop>
            <prop key="hibernate.show_sql">true</prop>
            <prop key="hibernate.format_sql">true</prop>
            <!-- 解决session关闭问题 -->
            <prop key="hibernate.enable_lazy_load_no_trans">true</prop>
            <prop key="current_session_context_class">thread</prop>

            <prop key="hibernate.cache.provider_class">org.hibernate.cache.HashtableCacheProvider</prop>
            <prop key="hibernate.max_fetch_depth">3</prop>
            <prop key="hibernate.connection.url">jdbc:oracle:thin:@localhost:1521:orcl</prop>
            <prop key="hibernate.connection.driver_class">oracle.jdbc.driver.OracleDriver</prop>
        </props>

    </property>

    <!-- 包扫描的方式加载注解类 -->
    <property name="packagesToScan">
        <list>
            <value>cn.eli.entity</value>
        </list>
    </property>
</bean>

<!-- 用注解来实现事物管理 -->
<bean id="transactionManager" class="org.springframework.orm.hibernate3.HibernateTransactionManager">
    <property name="sessionFactory" ref="sessionFactory" />
</bean>
<tx:annotation-driven transaction-manager="transactionManager" proxy-target-class="true"/>
</beans>
上面是这个项目完成的pom.xml文件,在这一步主要要配置的是 dataSource 这个 bean 和 sessionFactory 这个bean 这里有一个要注意的,我们刚建立 applicationContext.xml 的时候,会在编辑界面出现一个黄条,如下
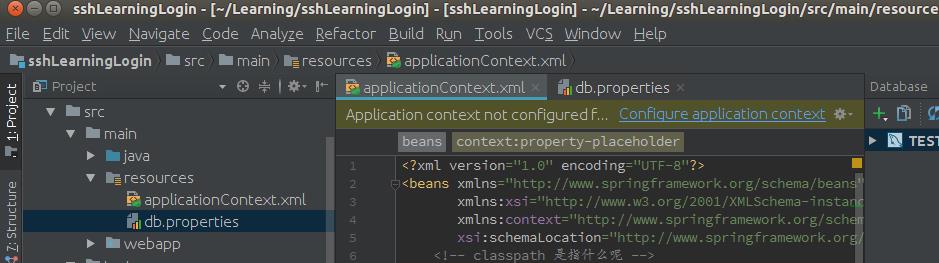
这个时候我们要点击“Configure application context”然后编辑,apply
注1:如果在上面的操作中找不到黄条,并且无法看到下面的sessionFactory文件,不要急接着往下看,注2
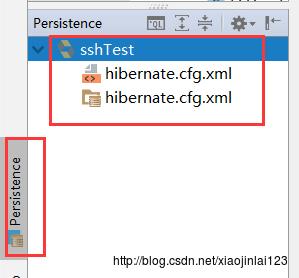
1.4) 生成 Entity 类;这个时候,如果上面正确的话,点击 Persistence,会出现如下的界面:

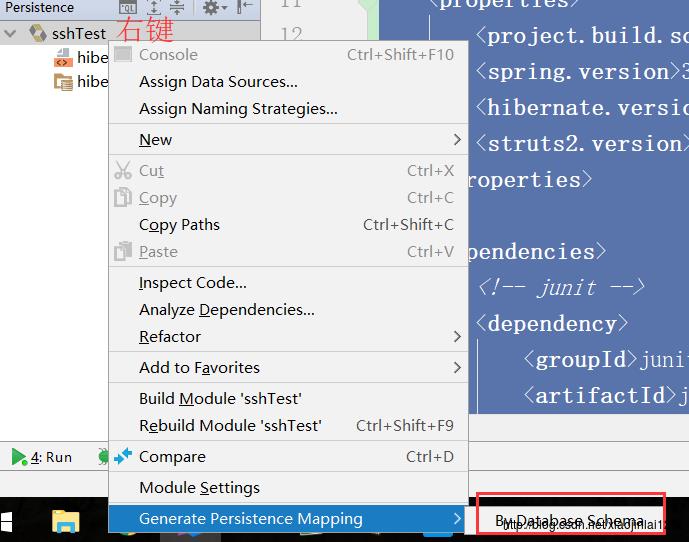
我们右击sessionFactory--->Generate Persistence Mapping----> By Database Schema; 在Import Database Schema界面进行如下的选择:
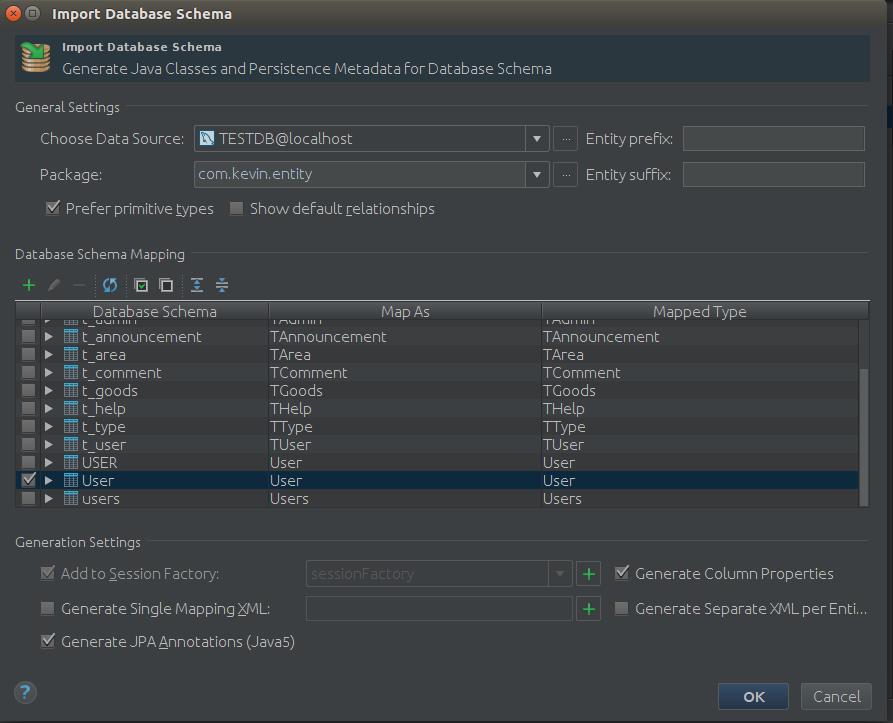
成功的话,可看我们src/main/java/com/kevin/entity下面应该有一个User类
注2:我在这里使用 Persistence 生成实体类,始终创建不了,因为没有sessionFactory文件,
在创建时缺少 Add to Session Factory
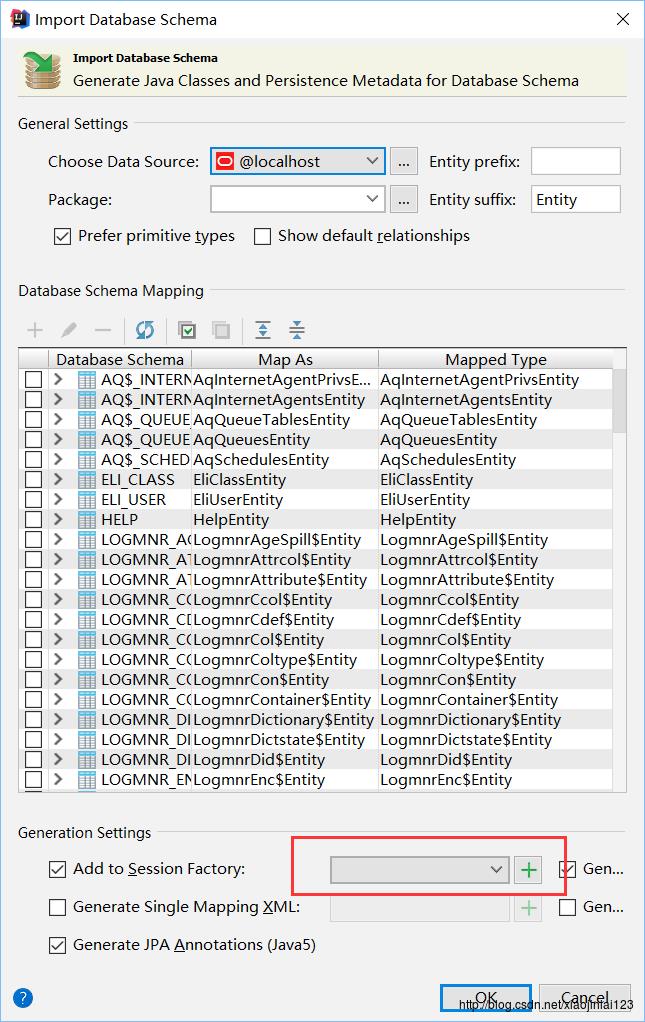
我的办法是创建一个 hibernate.cfg.xml,操作如下

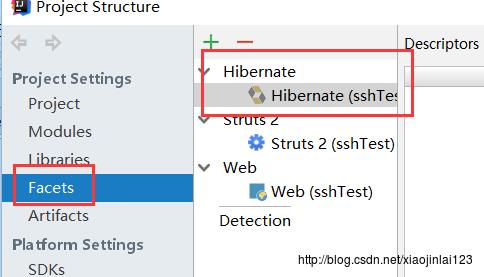

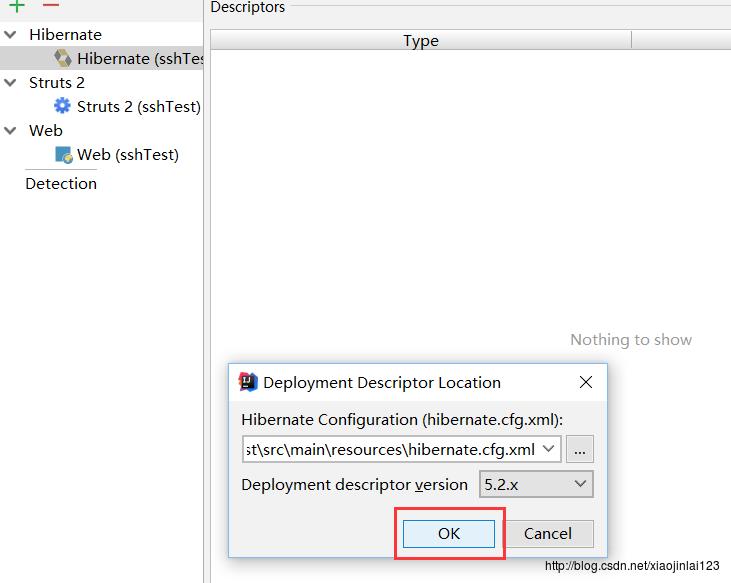


就会生成相应的实体类,实体类生成后将 hibernate.cfg.xml 文件删除即可

2) DAO层代码
为了代码的可拓展性,我们把实现与定义分离;在src/main/java/com/kevin/dao下面再建立一个impl包,存放接口的实现类;在dao目录下新建一个UserDao.java接口类(记住是接口,在选择类型的时候要选择接口), 在impl放这个接口的实现类,UserDaoImpl.java
UserDao.java文件内容
[java] view plain copy
- package com.kevin.dao;
- import com.kevin.entity.User;
- import java.util.List;
- /**
- * Created by kinthon on 17-6-23.
- */
- public interface UserDao
- /**
- * 添加并保存用户
- * @param user
- */
- public void add(User user);
- /**
- * 进行登录
- */
- public boolean login(User user);
- /**
- * 获取用户列表
- */
- public List getUser();
- /**
- * 根据用户Id获取用户信息
- * @param id
- * @return
- */
- public User getUser(int