SpringBoot2:基础篇(黑马程序员:P1~P53)
Posted Scean周
tags:
篇首语:本文由小常识网(cha138.com)小编为大家整理,主要介绍了SpringBoot2:基础篇(黑马程序员:P1~P53)相关的知识,希望对你有一定的参考价值。
基础篇
1、SpringBoot入门案例
1.1 IDEA联网版
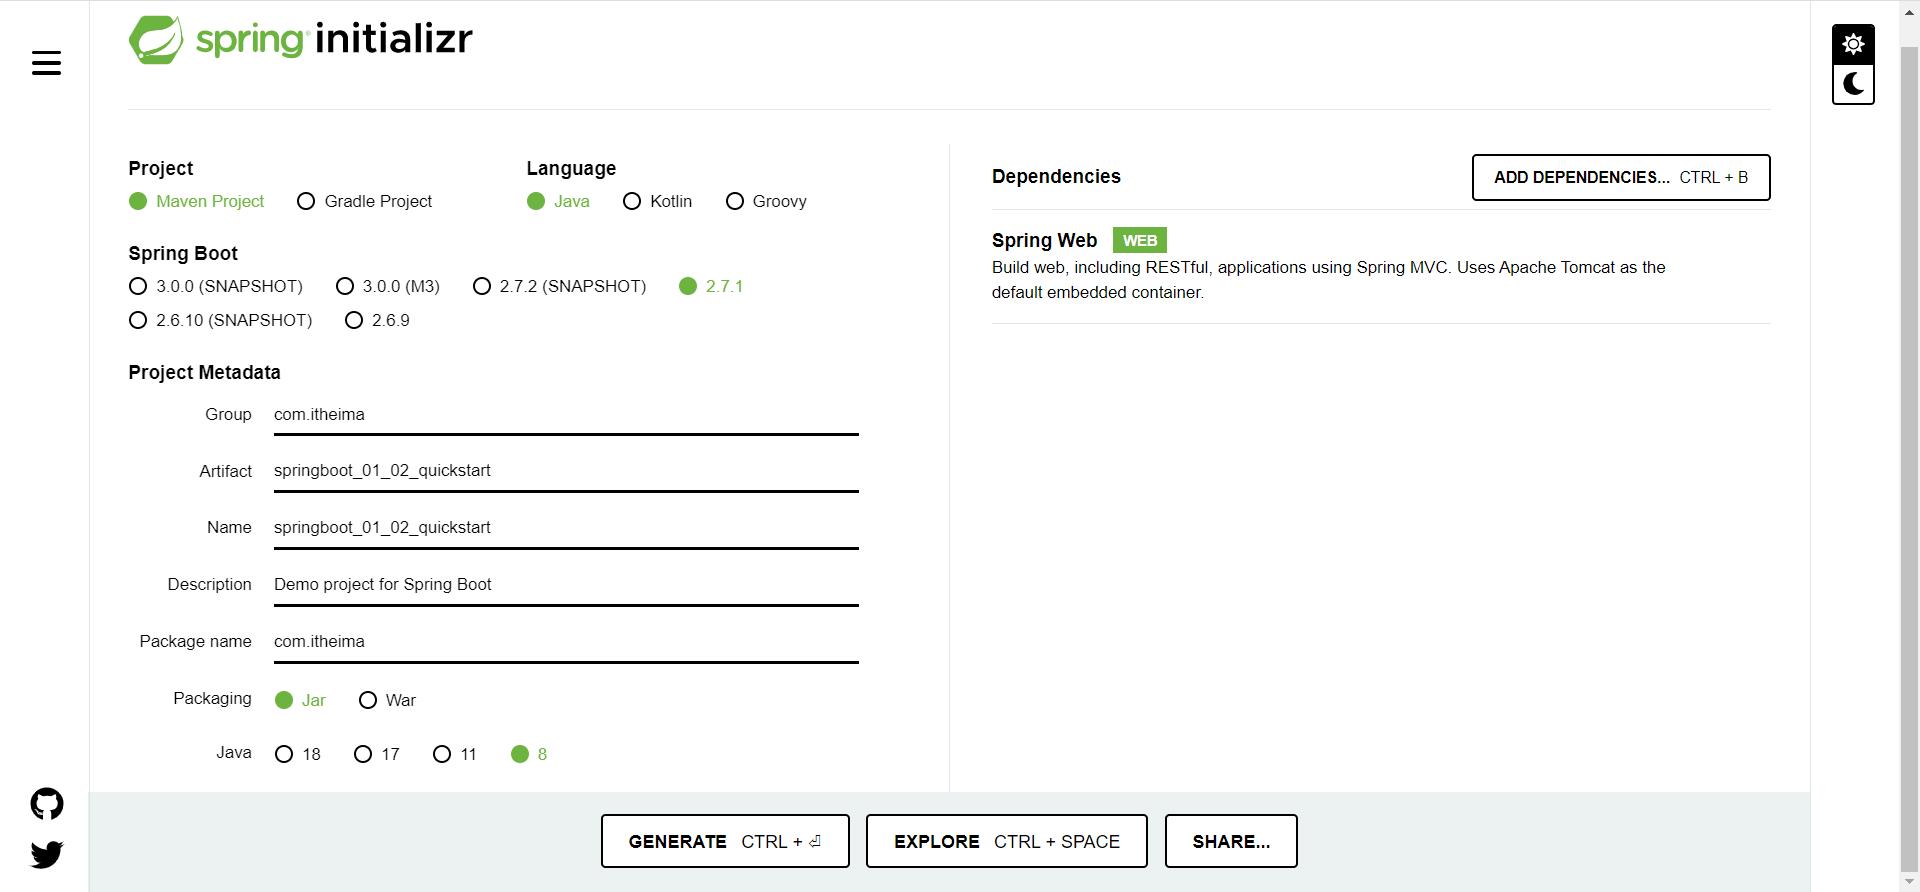
官方URL https://start.spring.io
注:如果创建不了,更改URL https://start.aliyun.com
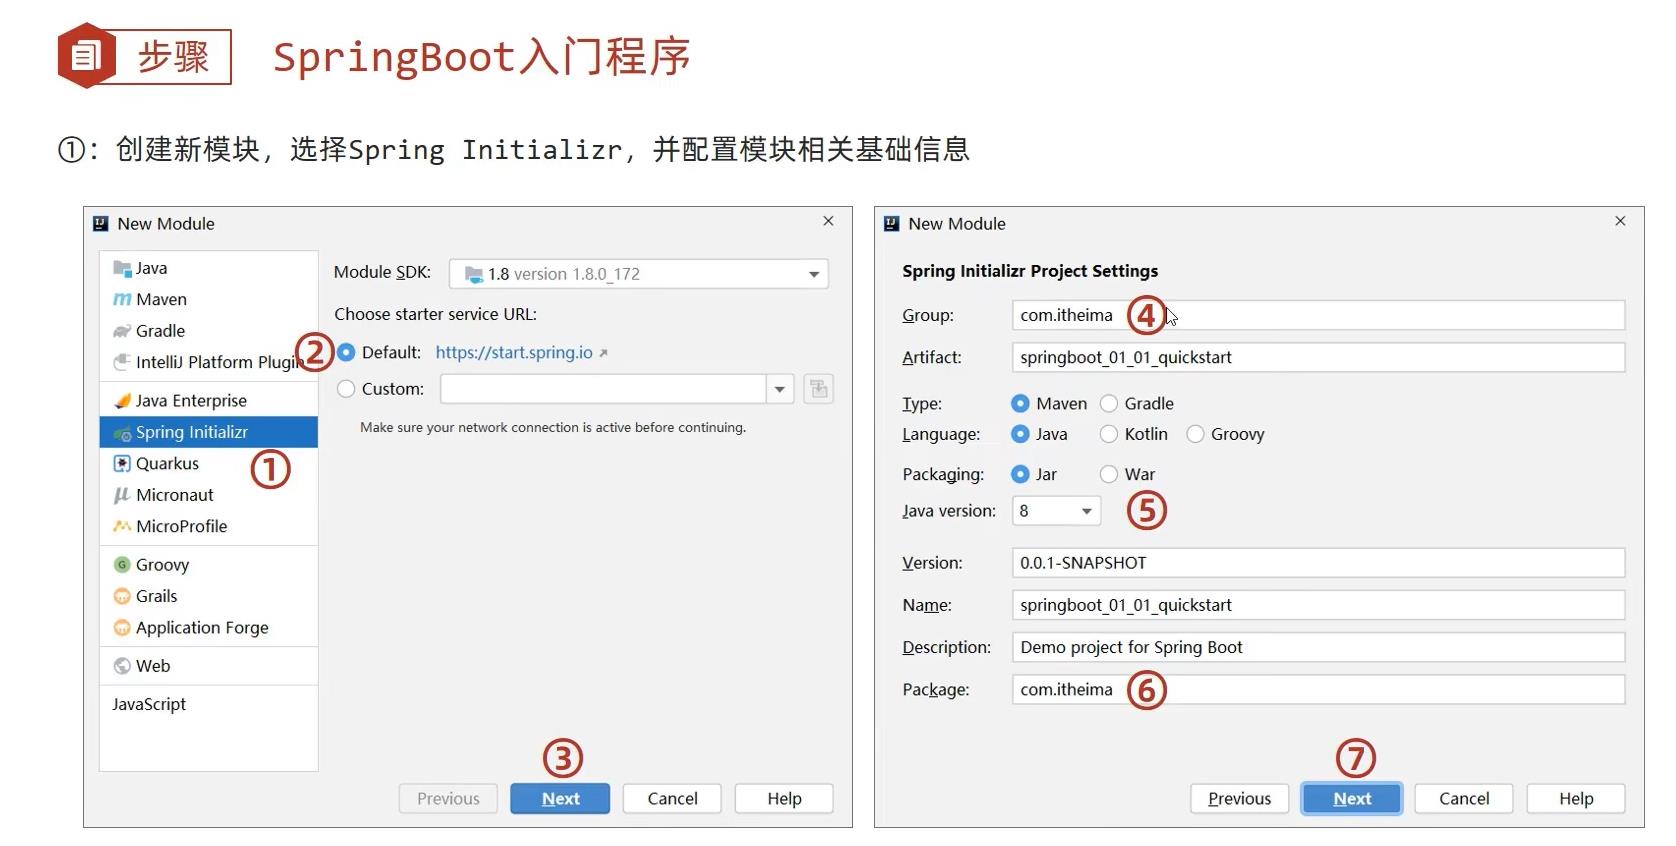
① 创建新模块
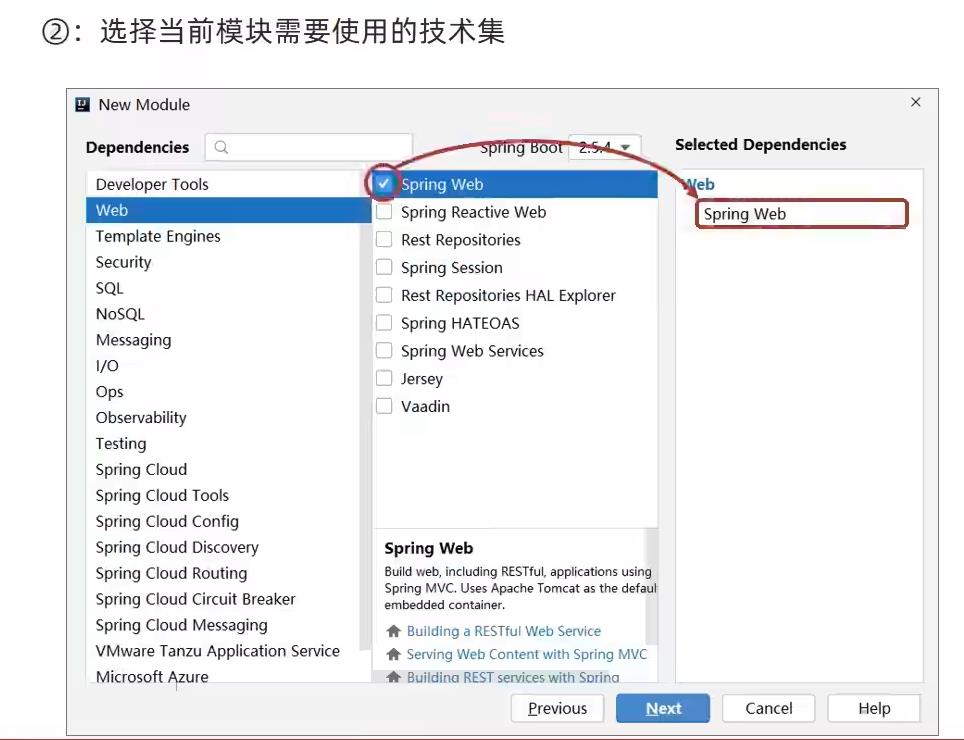
② 选择当前模块需要使用的技术集
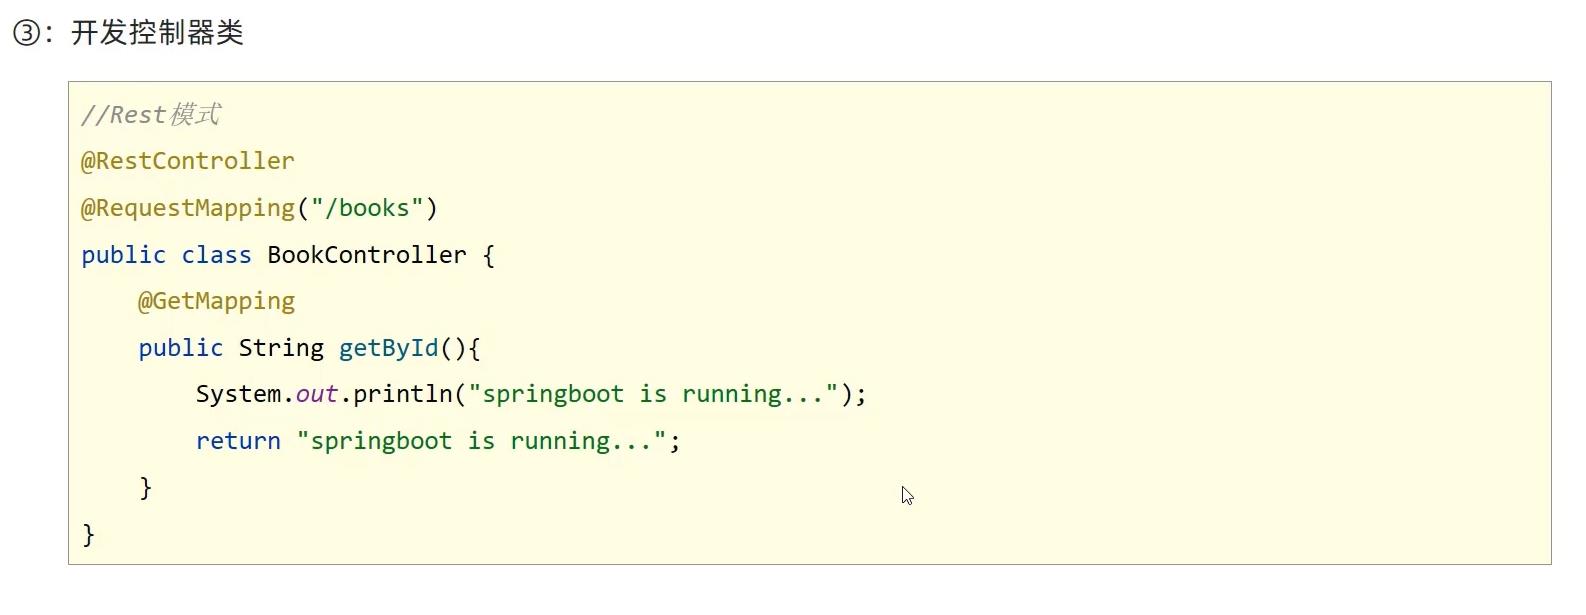
③ 开发控制器类
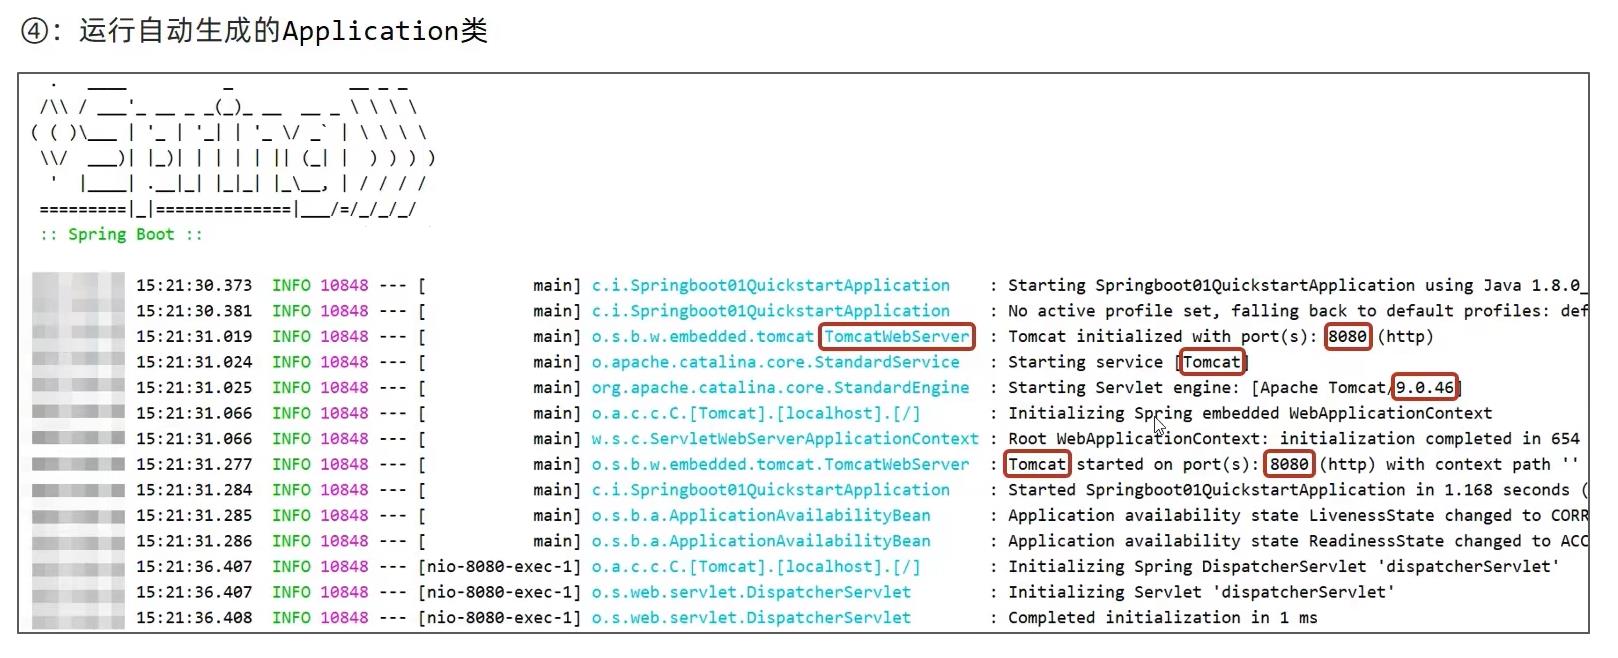
④ 运行自动生成的Application类
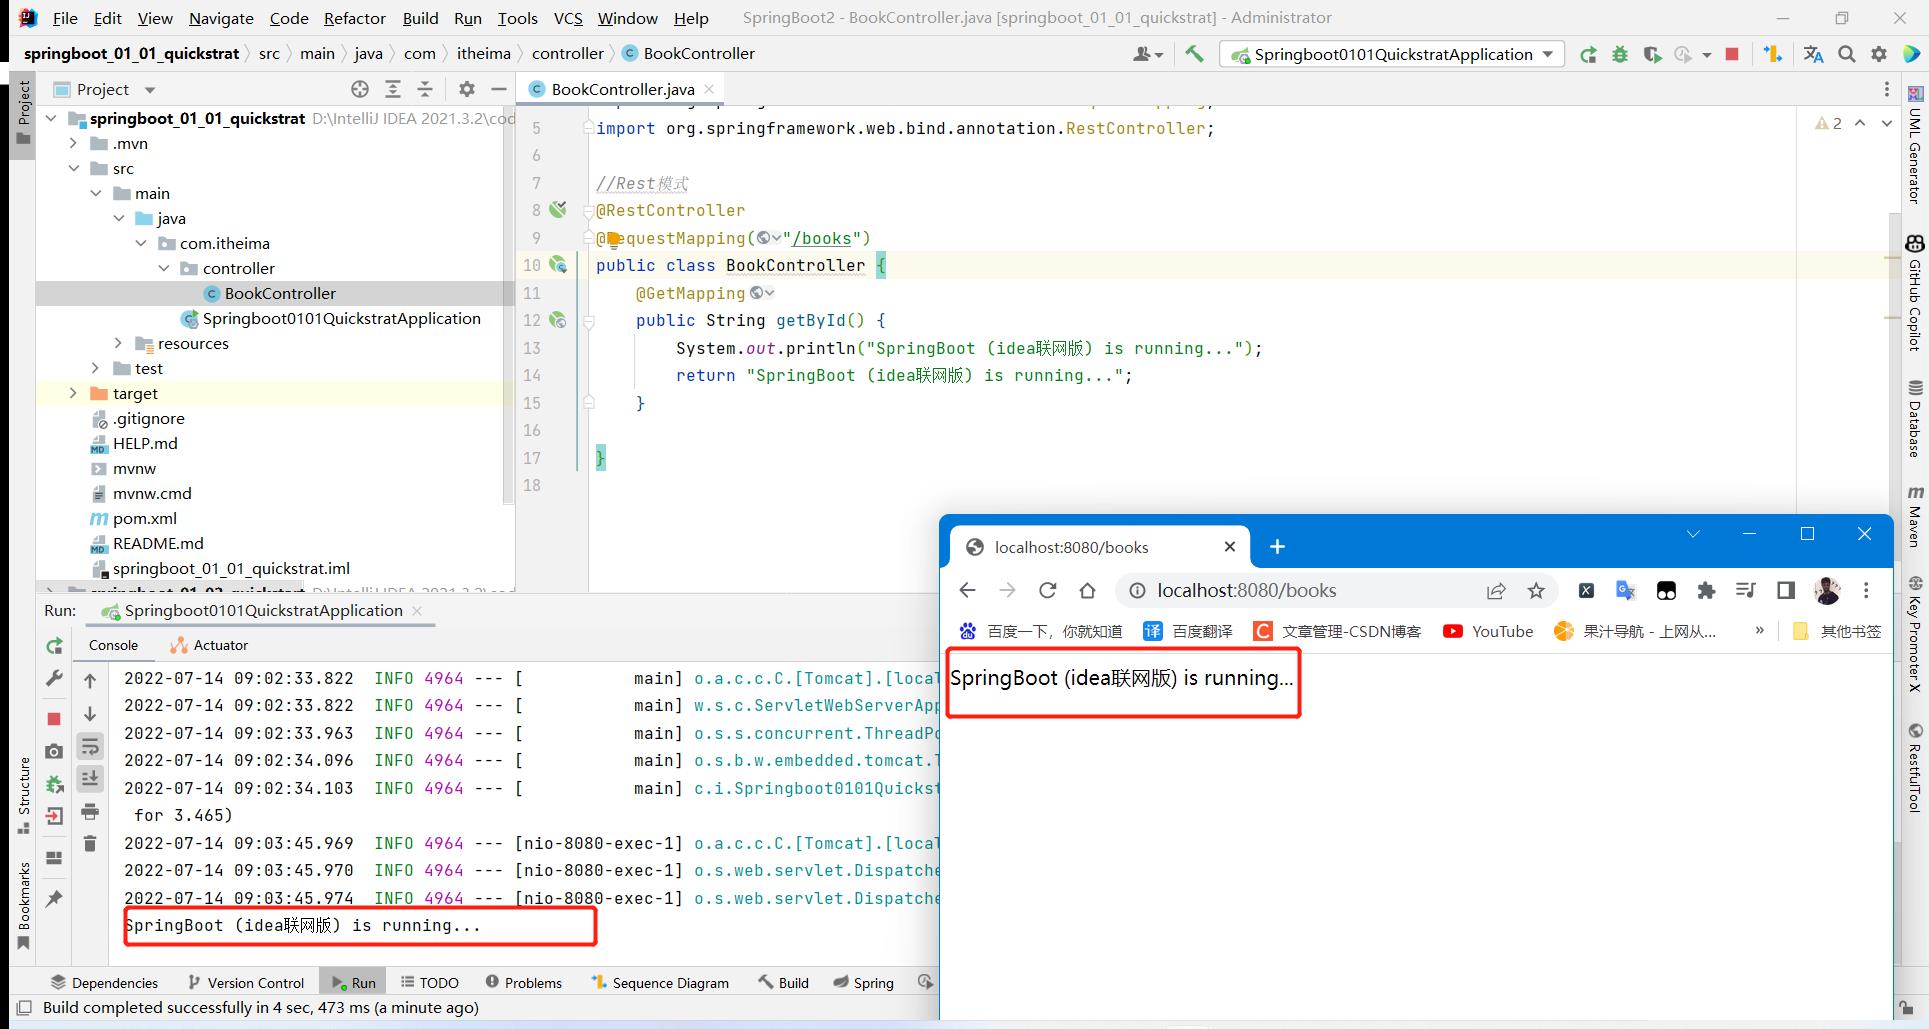
⑤ 运行测试
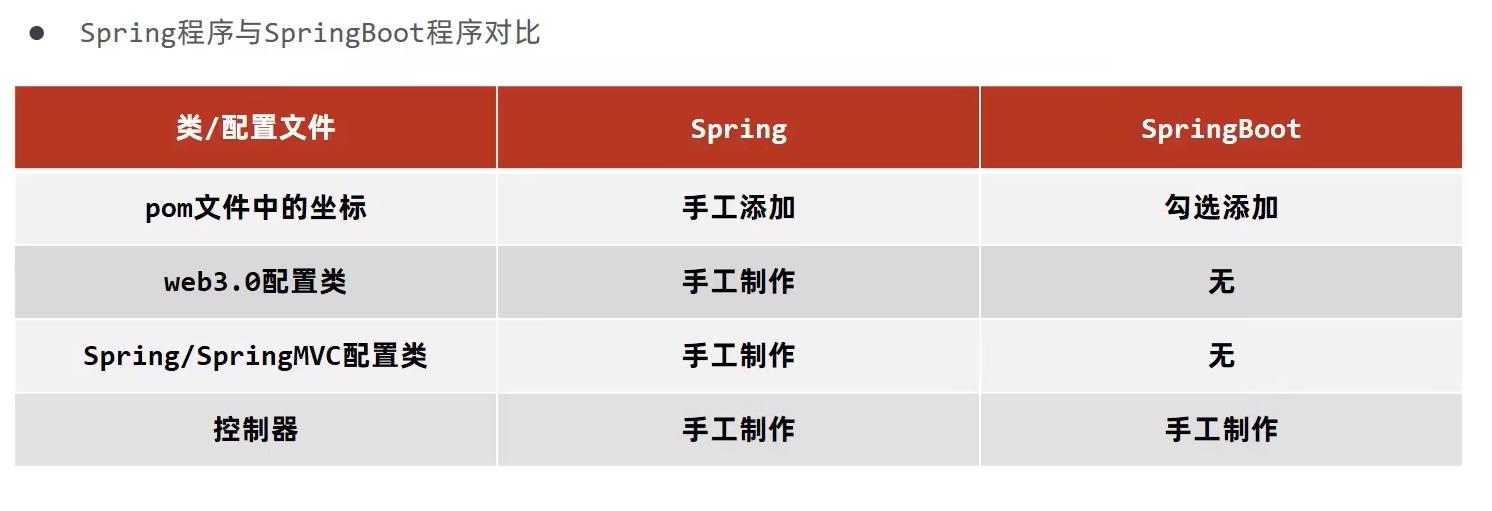
注:Spring程序与SpringBoot程序对比
1.2 官网创建版
1.3 手工制作版
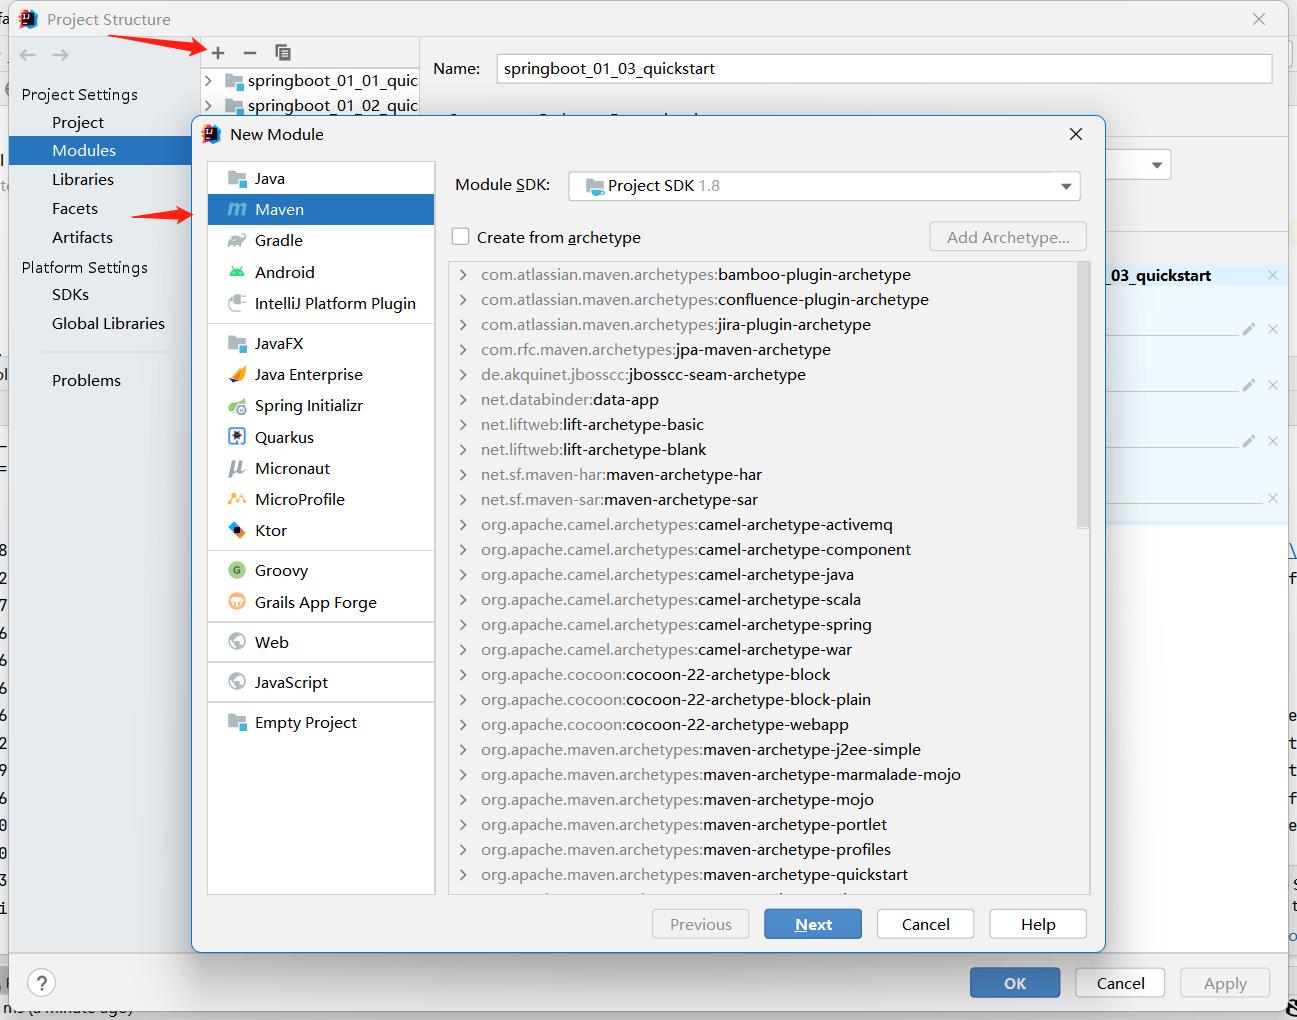
① 创建新模块
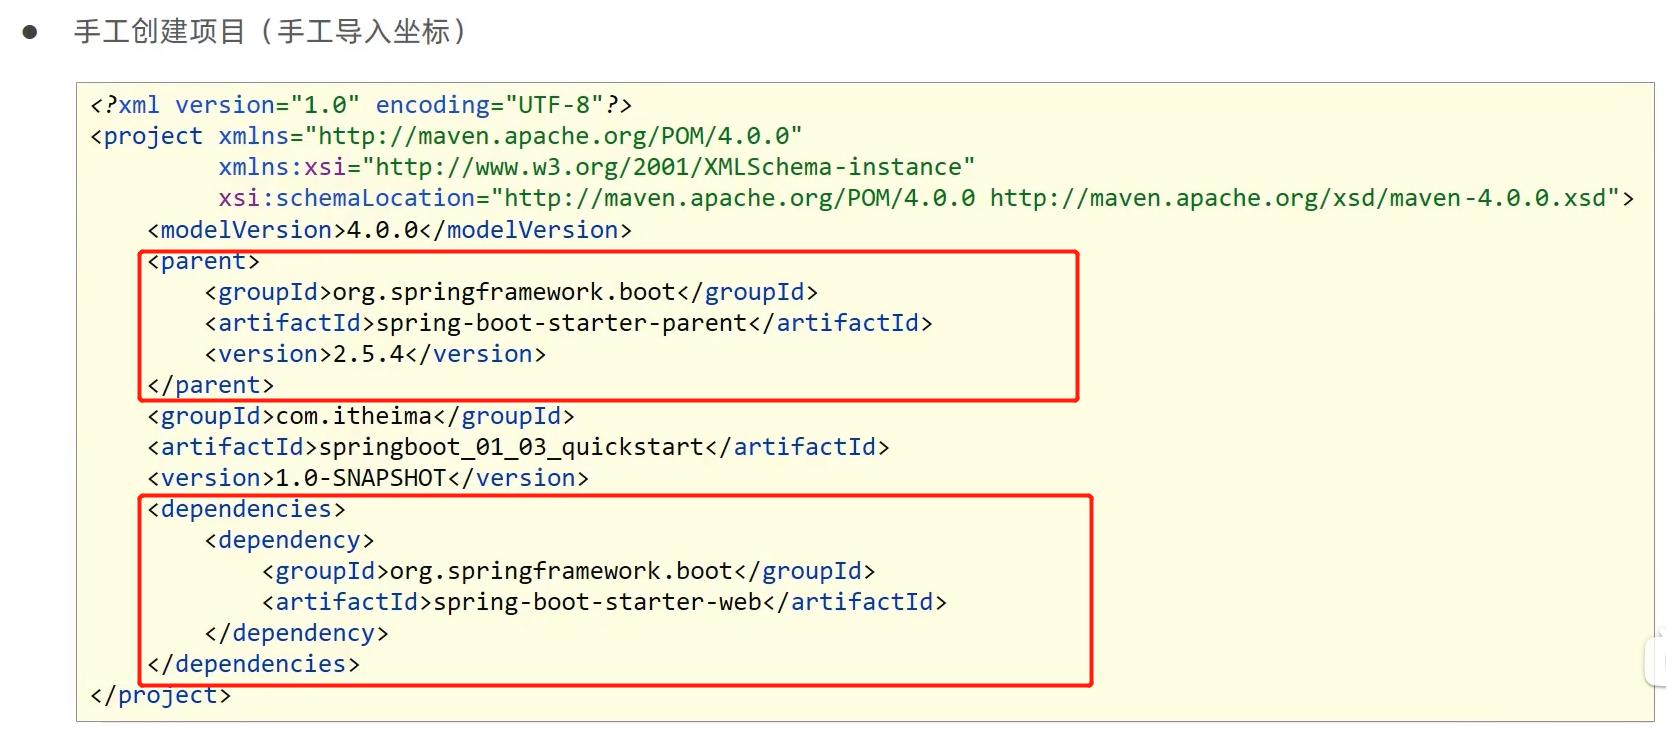
② 导入坐标
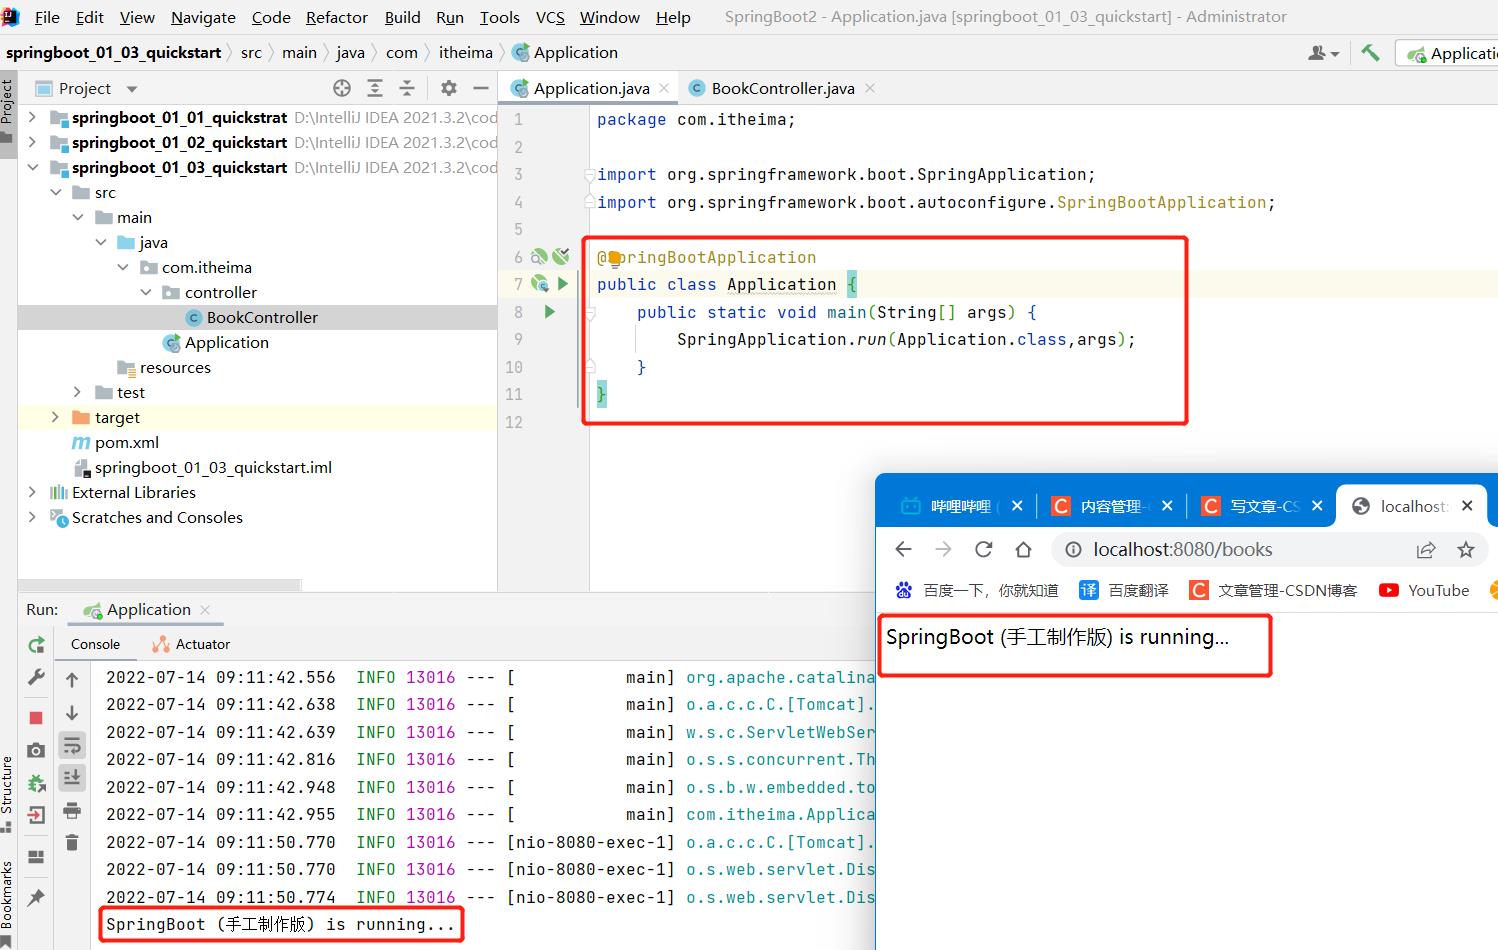
③ 制作引导类

④ 运行测试
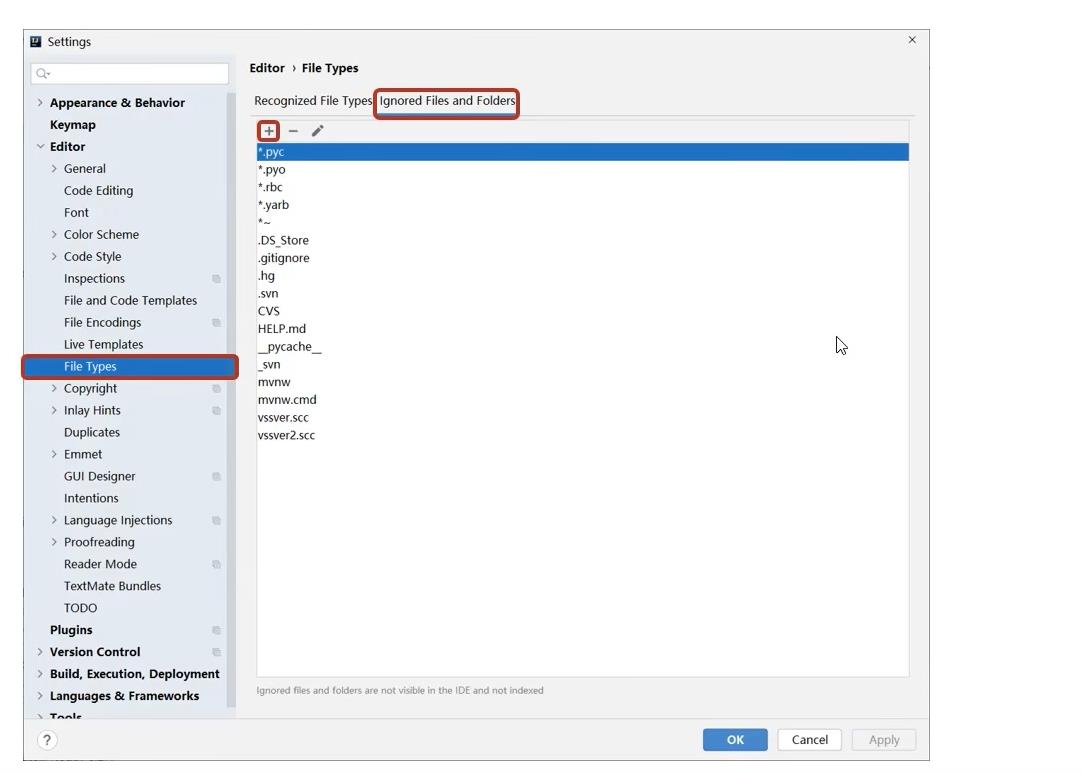
1.4 隐藏指定文件/文件夹

2、入门案例解析
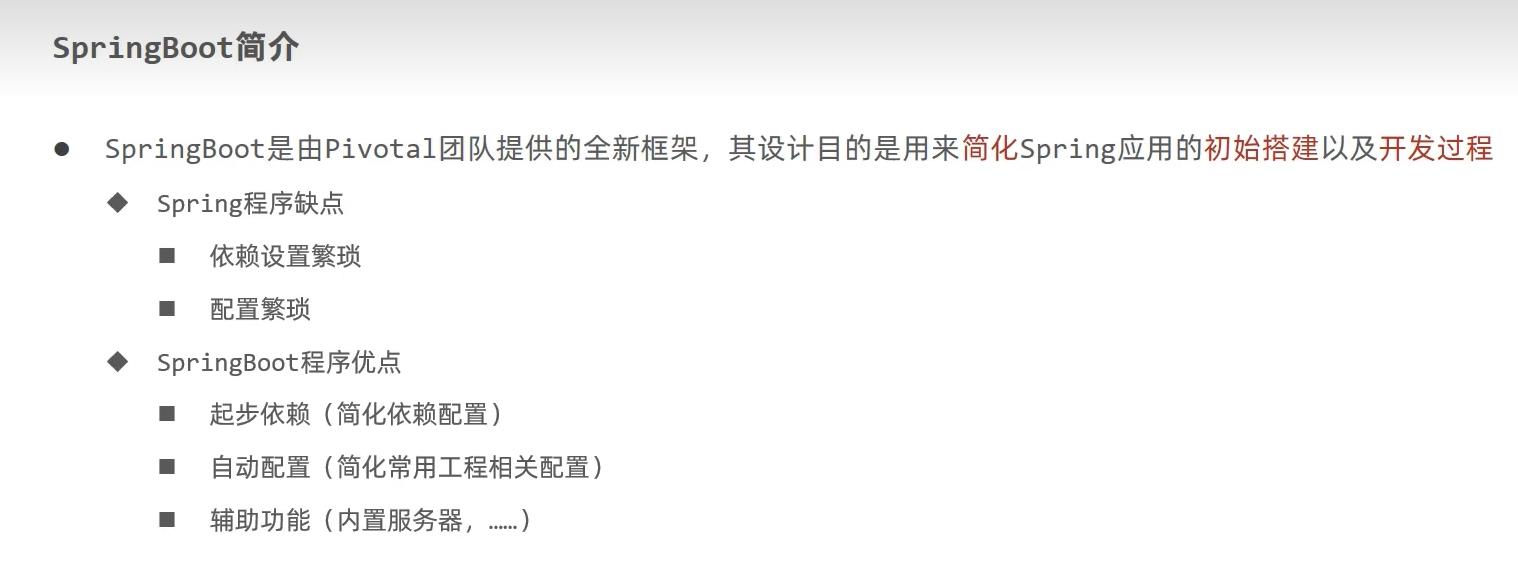
2.1 SpringBoot简介
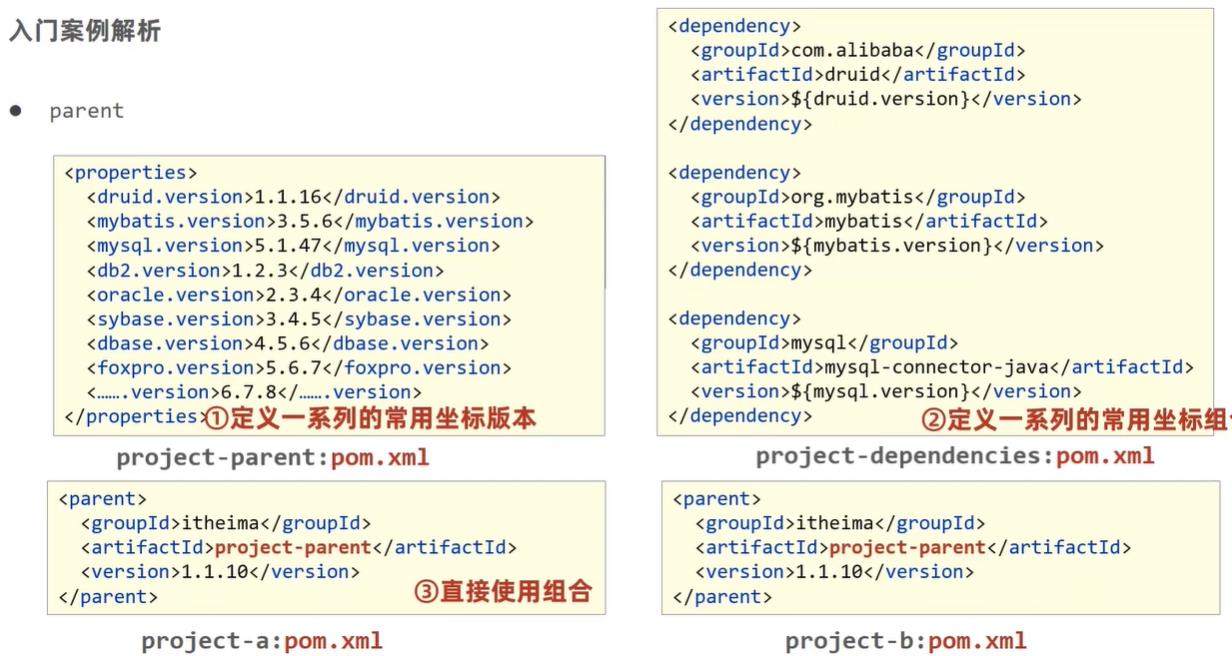
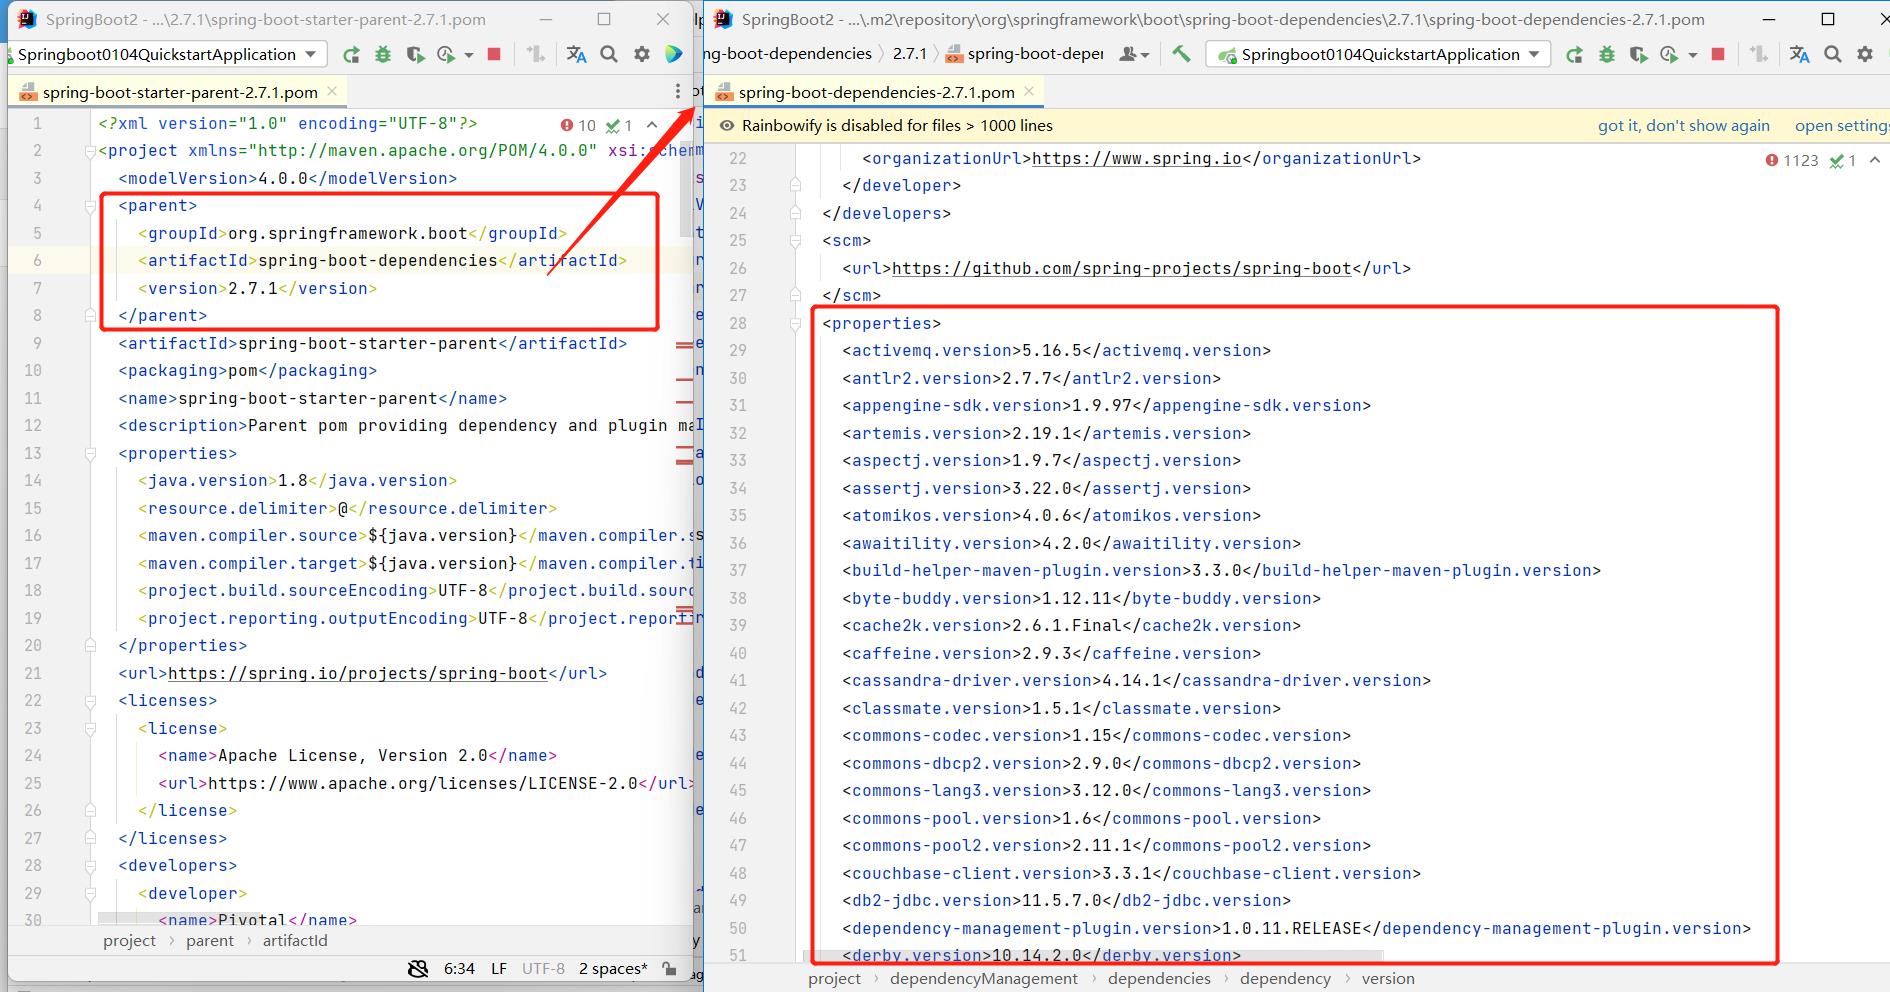
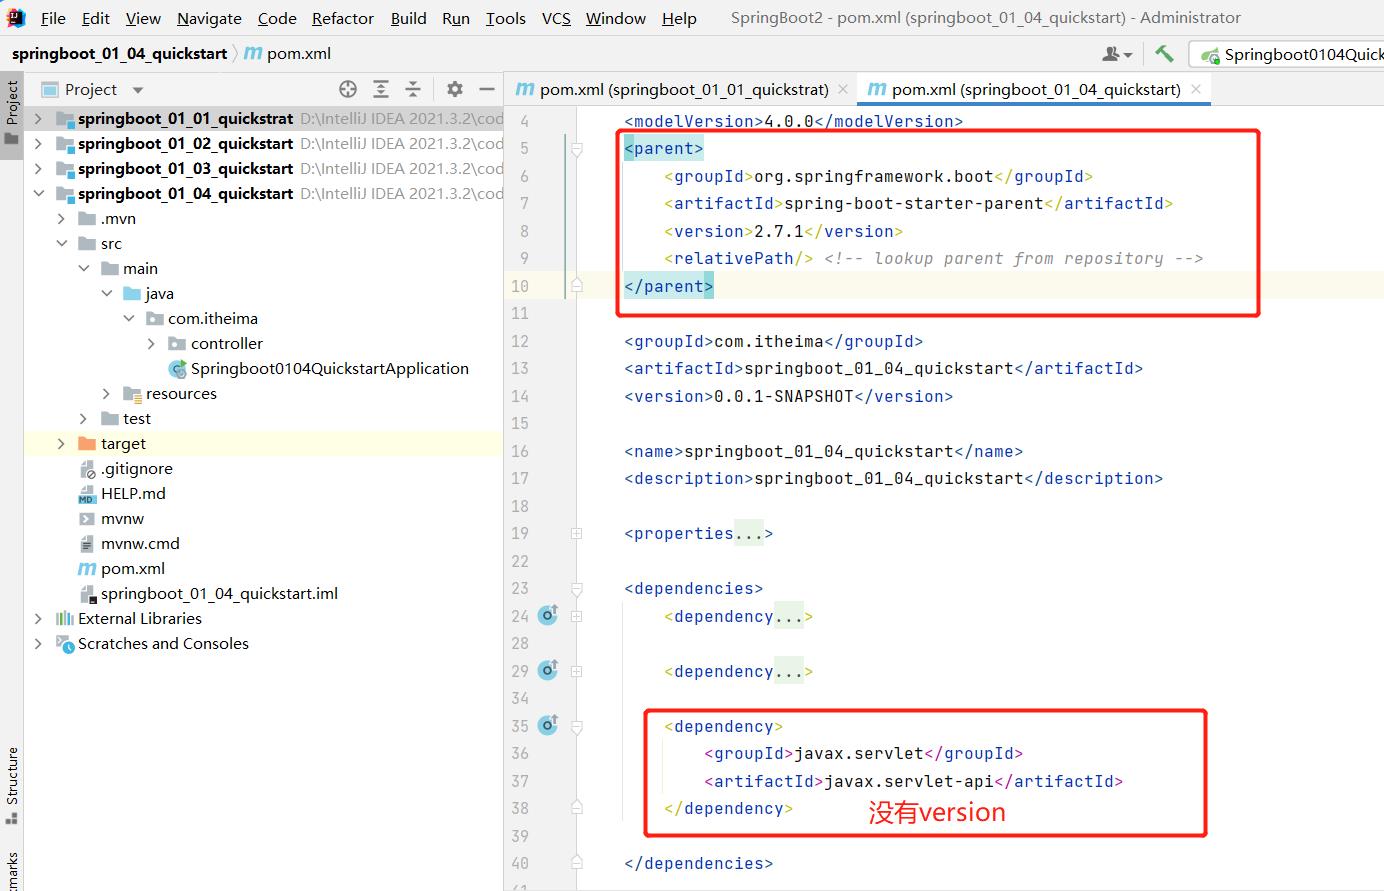
2.2 parent
2.3 starter
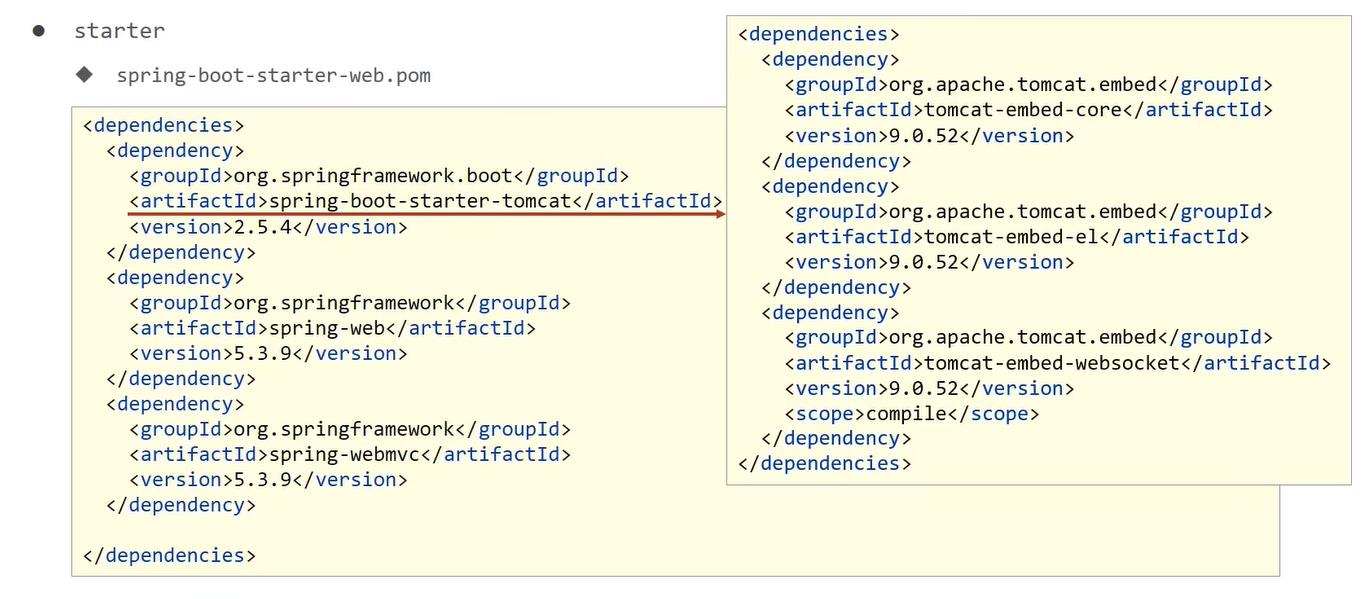
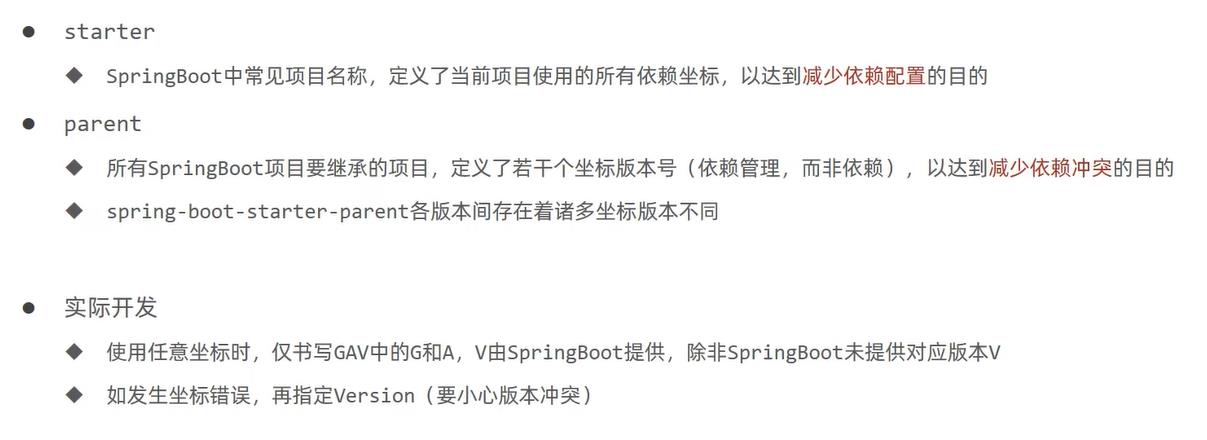
2.4 parent和starter对比
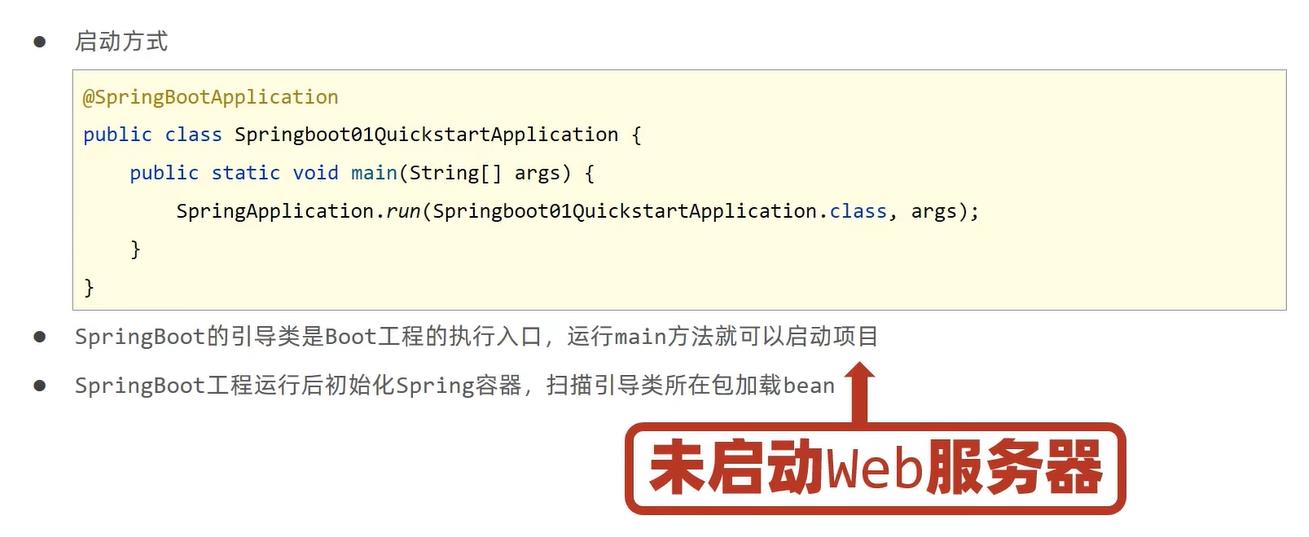
2.5 引导类
2.6 内嵌tomcat
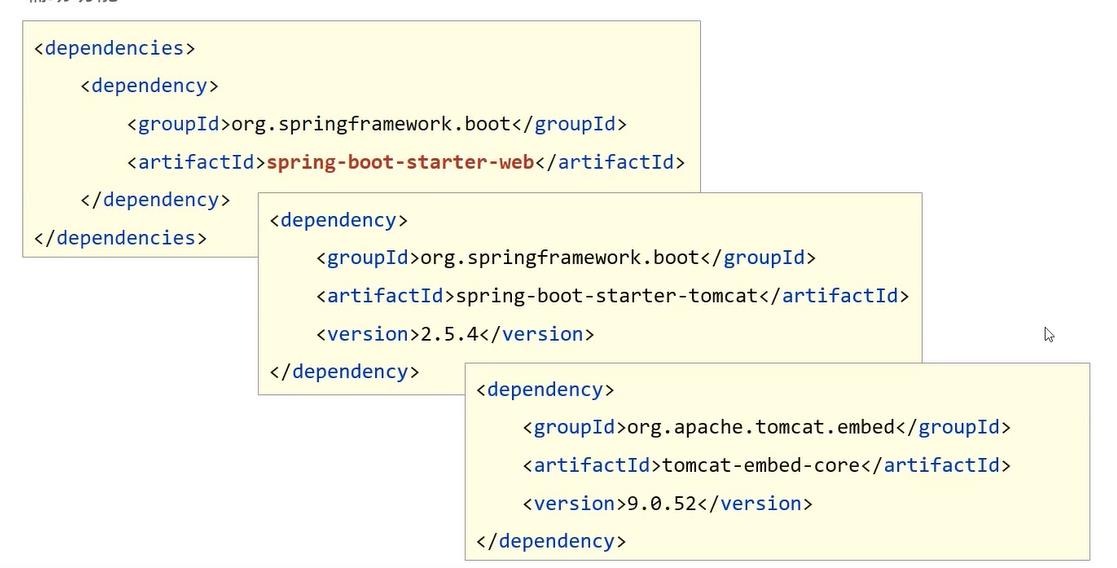
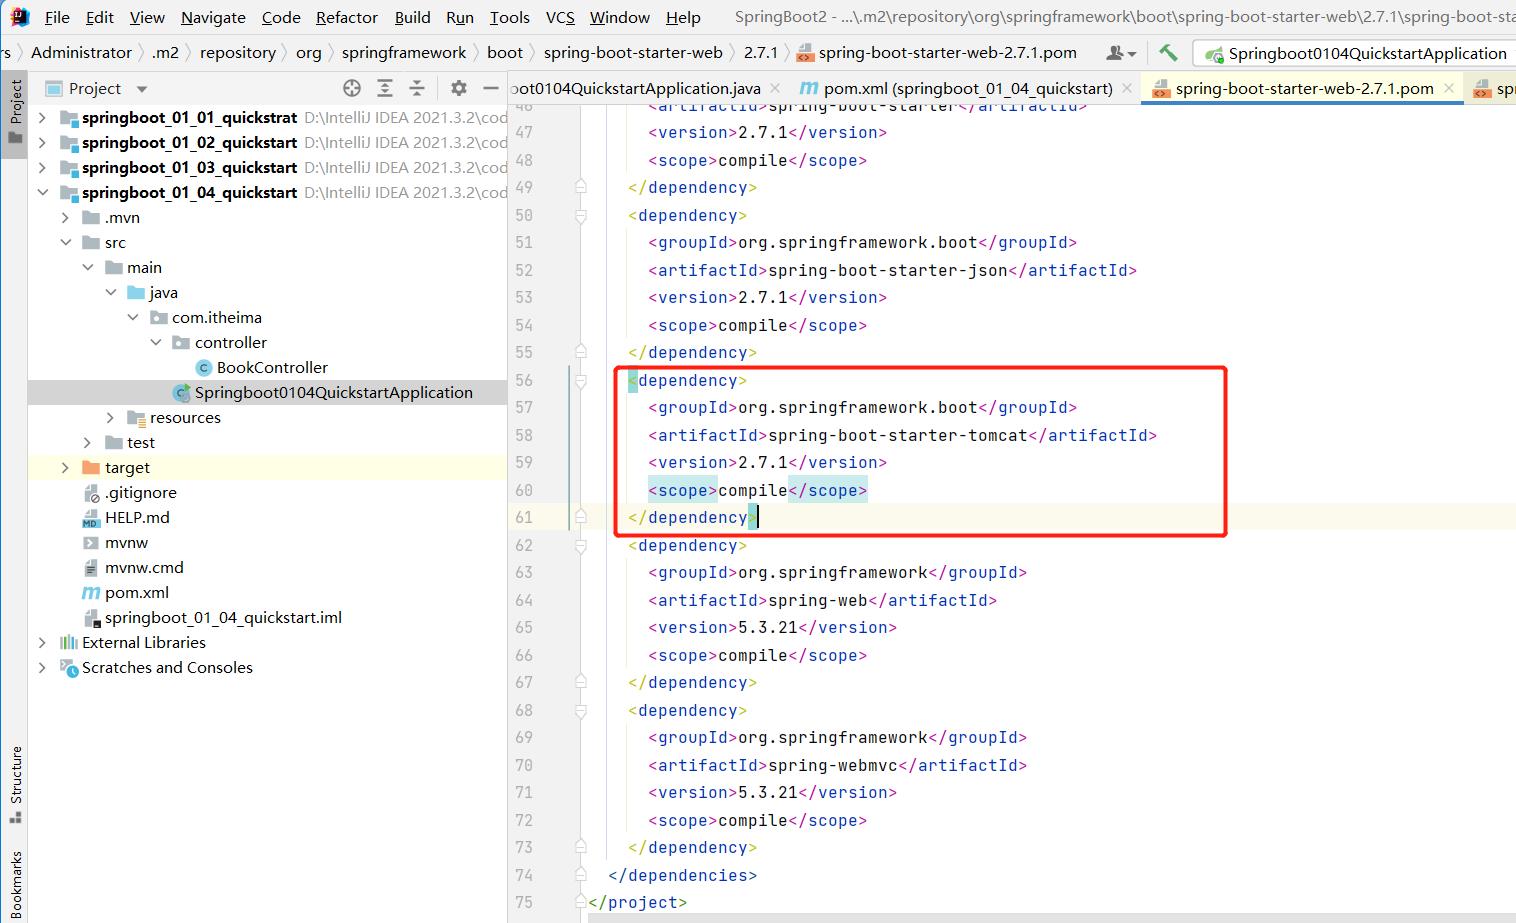
2.7 辅助功能
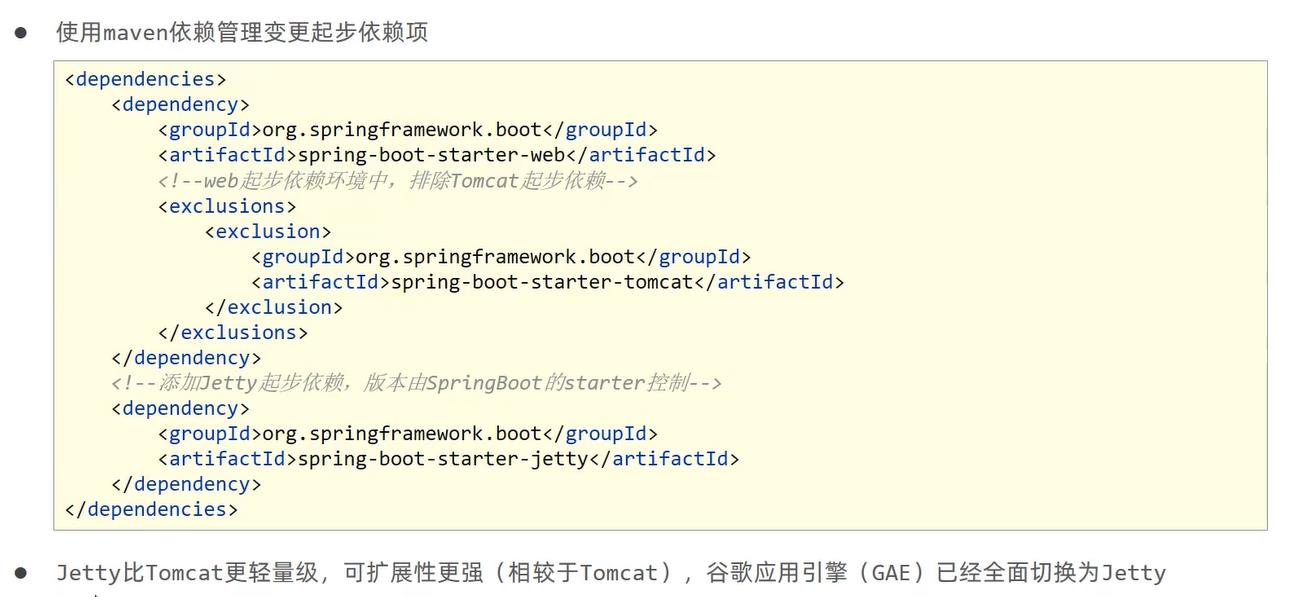
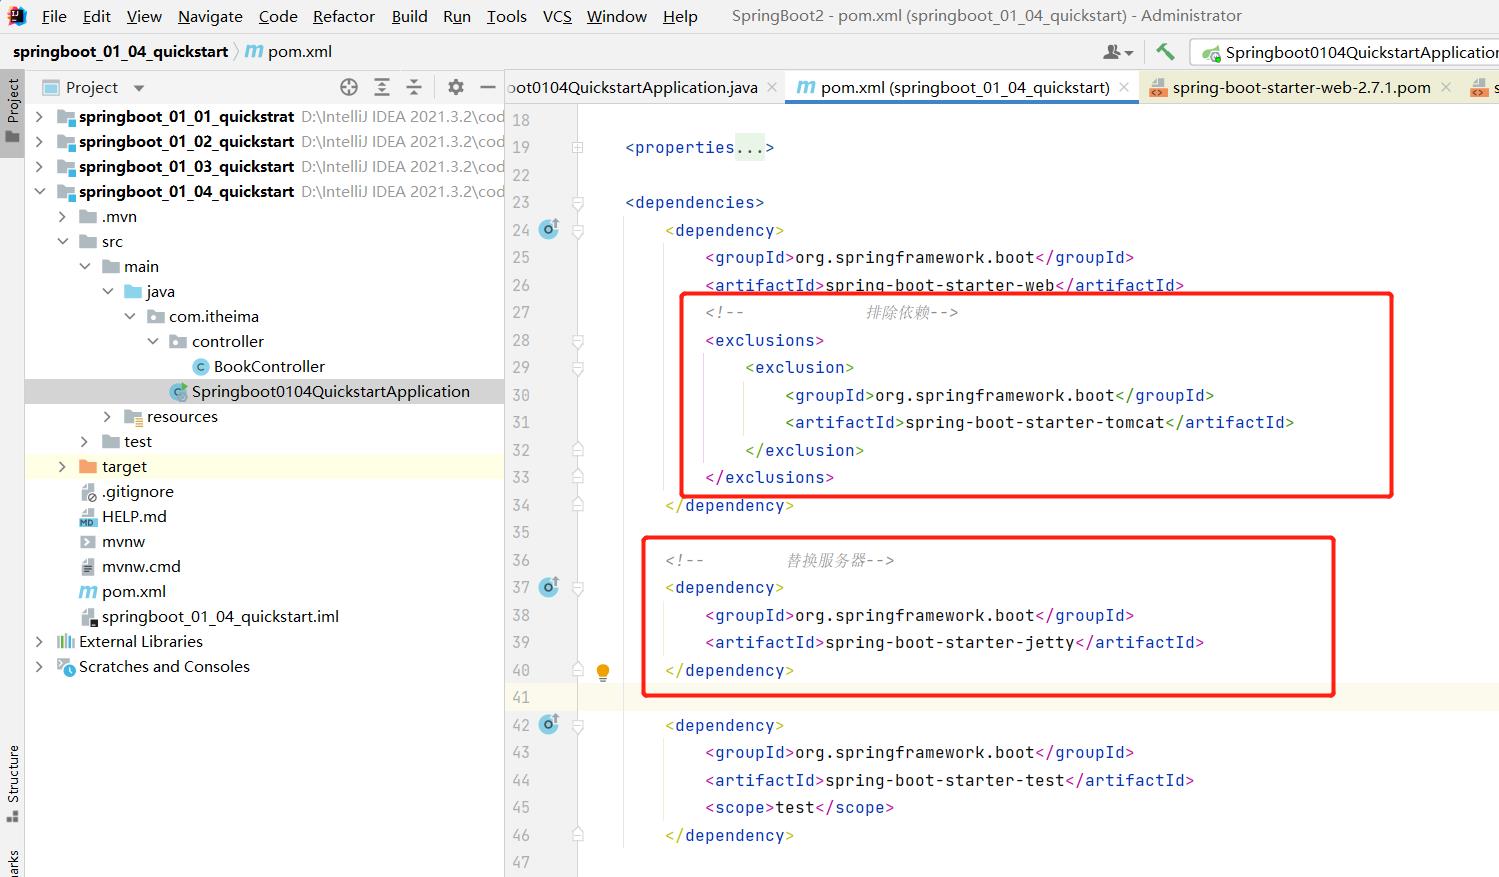
2.8 内置服务器

3、基础配置
3.1 属性配置
3.2 不同配置文件优先级
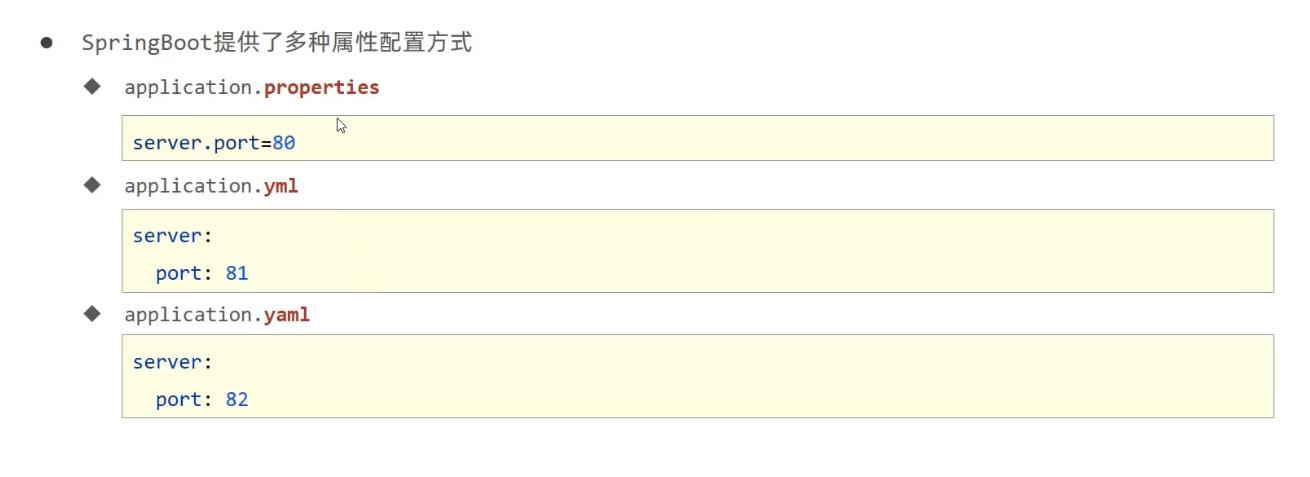
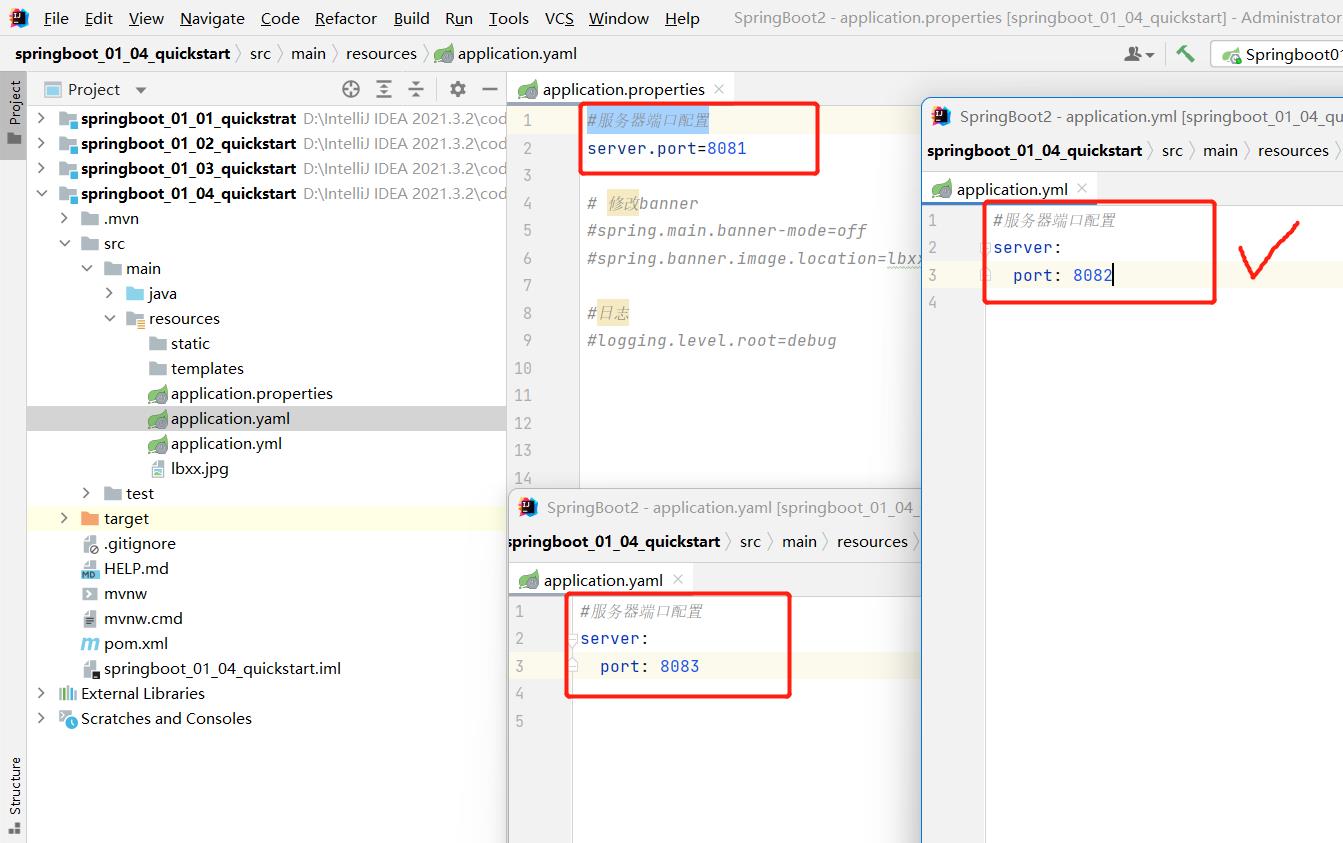
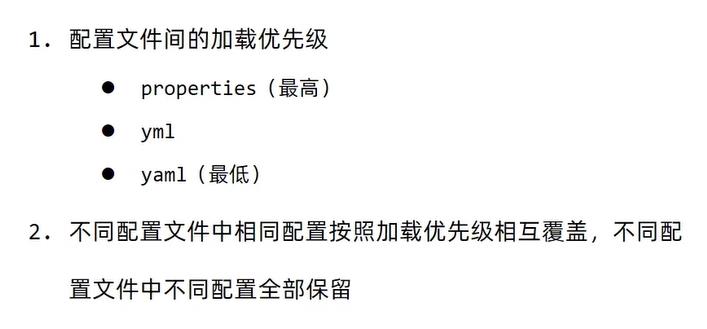
3.3 解决yaml和yml文件没提示
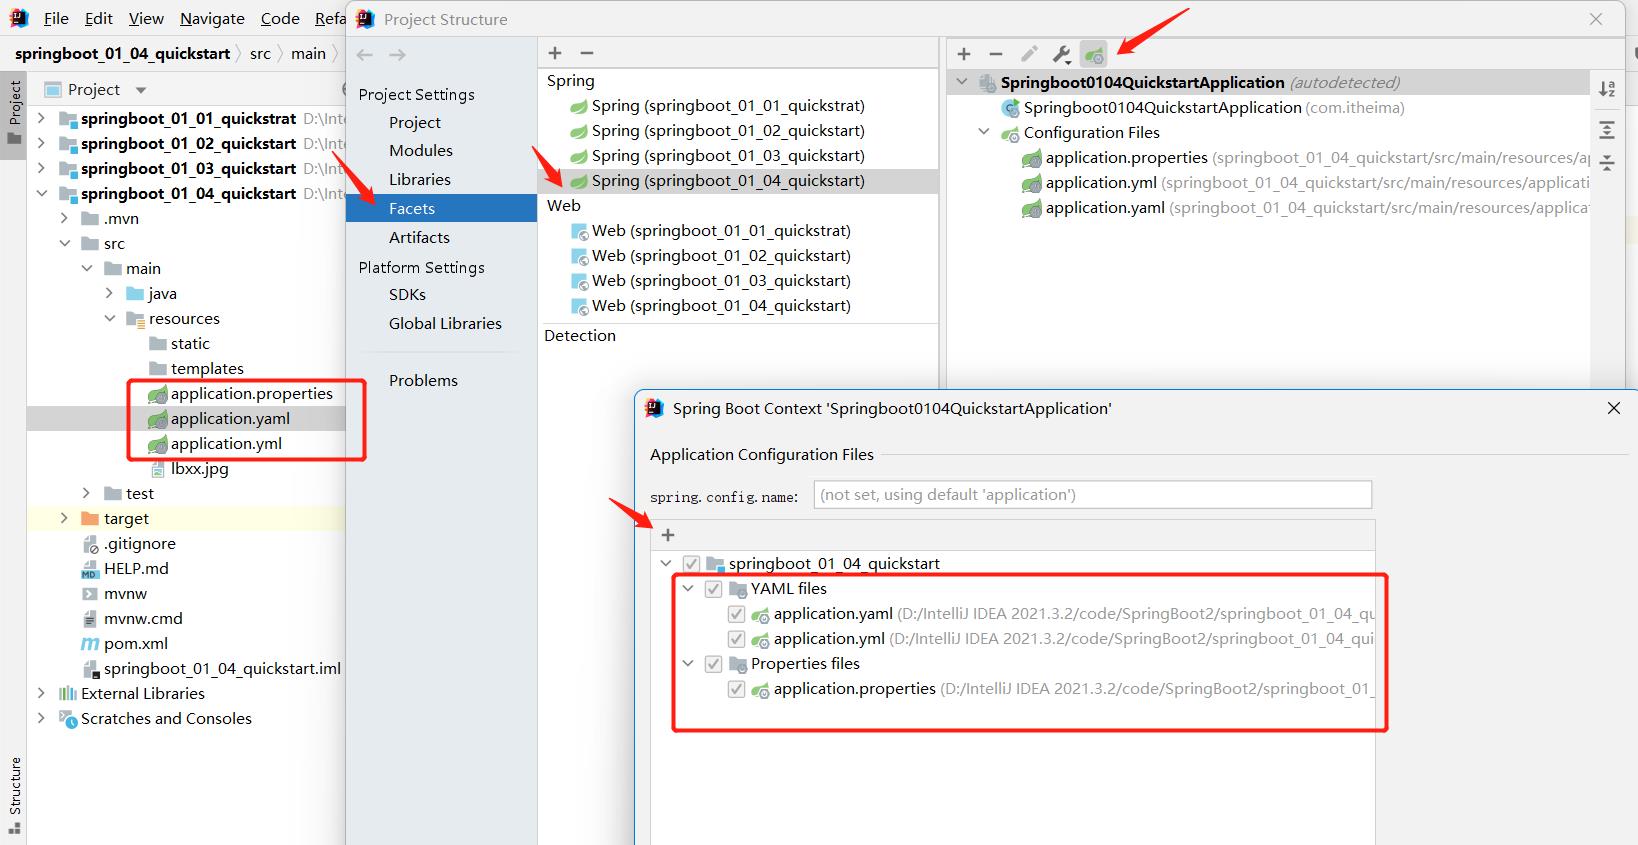
3.4 配置文件书写格式
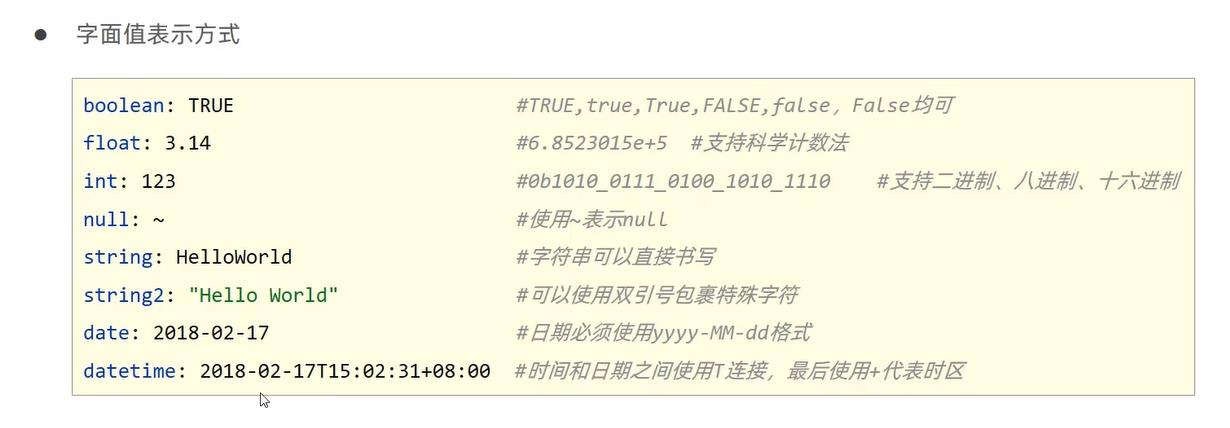
① yaml语法规则
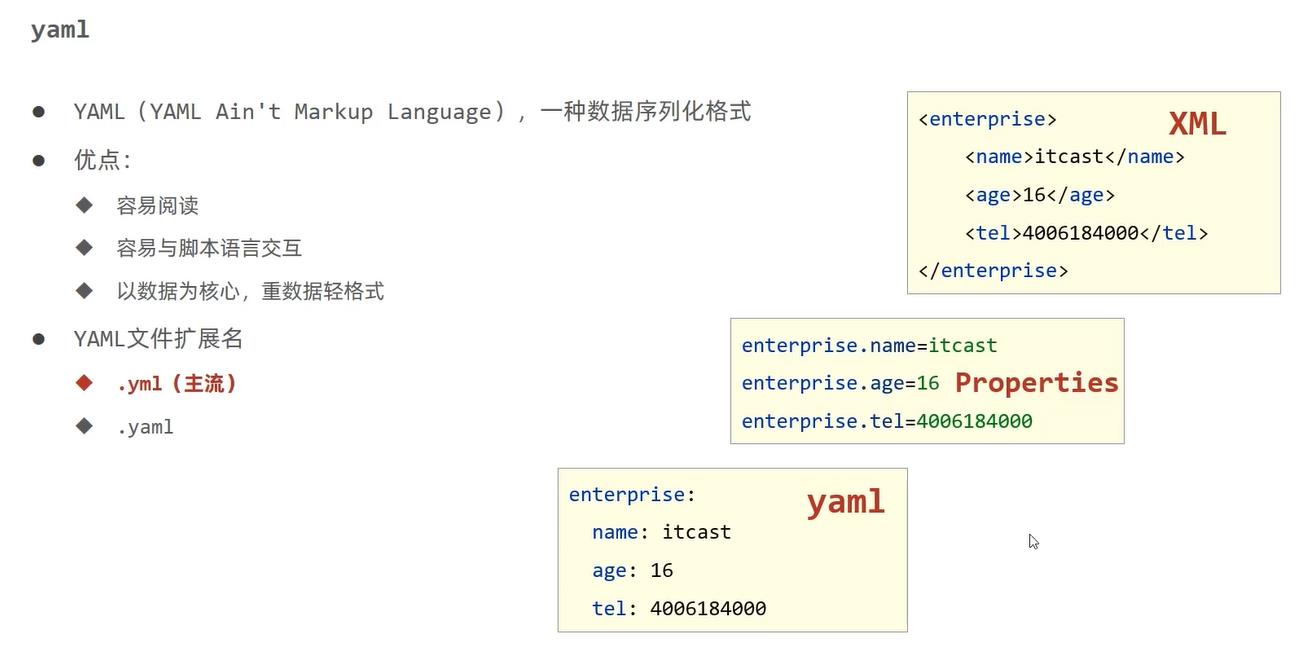

② 字面值表示方式
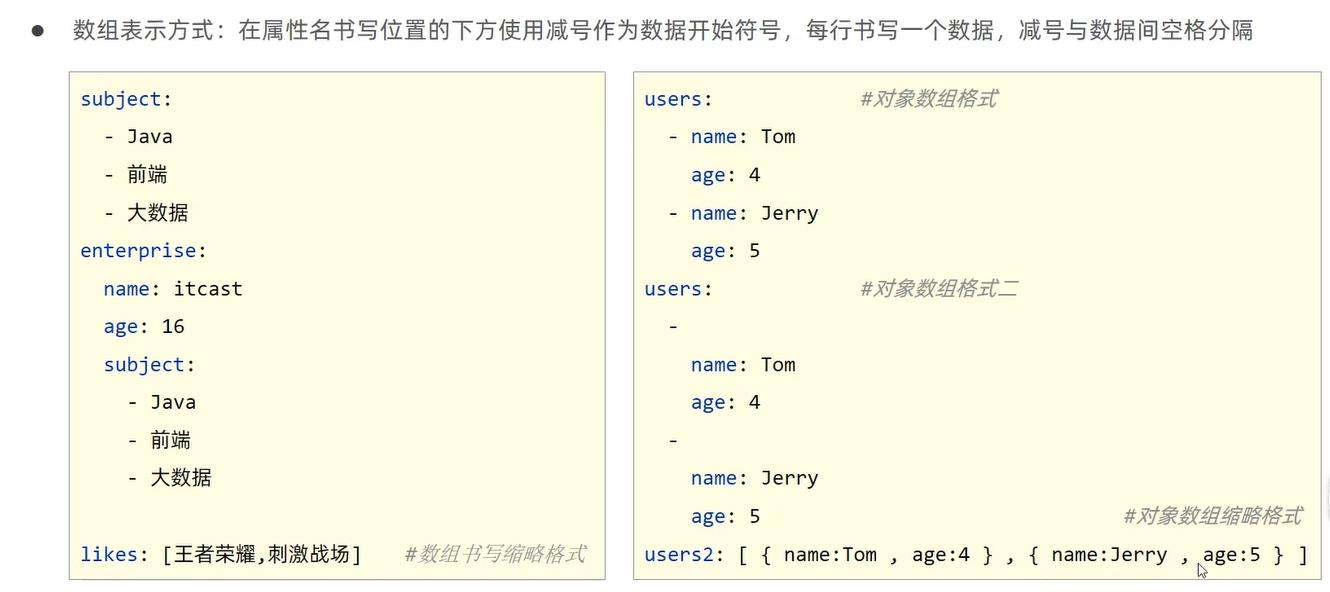
③ 数组表示方式
country: china
province: guangdo
city: shanwei
area: chengqu

port: 8080

party: true

birthday: 2000-07-29

user1:
  name: zyy
  age: 22

a:
  b:
    c:
      d: 123

likes1:
  - game
  - music
  - sleep


likes2: [ game,music,sleep ]

users1:
  - name: zyy
    age: 23
  - name: zqh
    age: 24

users2:
  - name: zyy
    age: 23

  - name: zqh
    age: 24

users3: [  name: zyy,age: 23 , name: zqh,age: 24  ]


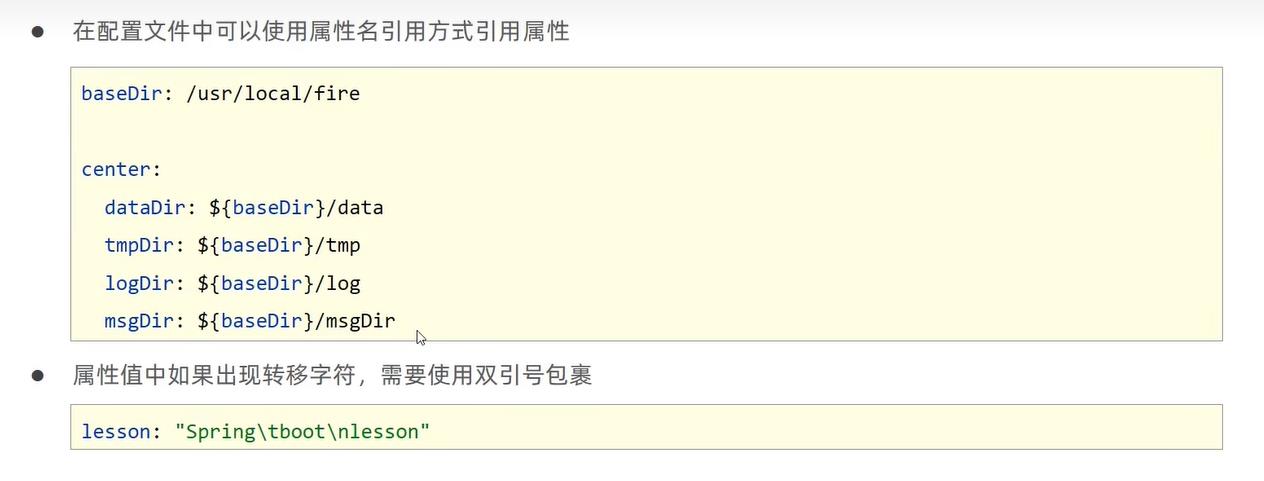
baseDir: c:\\windows

# 使用$属性名 引用数据
temoDir1: $baseDir\\temp

# 使用引号包裹的字符串,其中的转义字符可以生效
temoDir2: "$baseDir\\temp \\t1 \\t2 \\t3"
3.5 读取yaml配置文件的数据
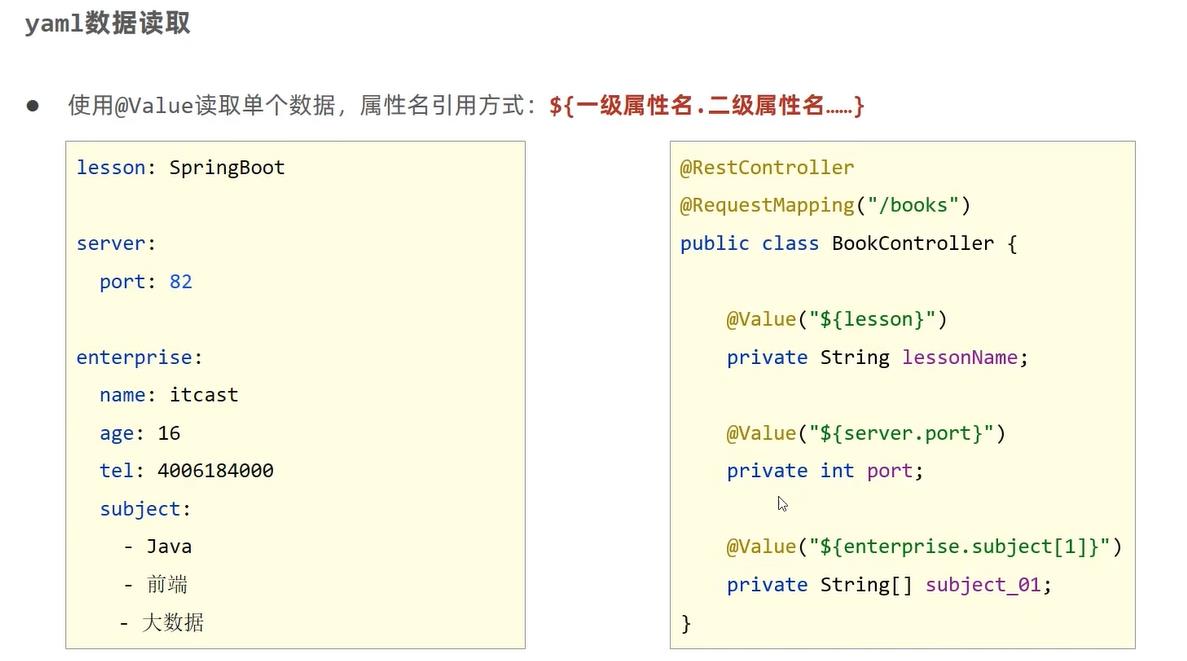
@RestController
@RequestMapping("/books")
public class BookController

    //读取yaml数据中的单一数据
    @Value("$country")
    private String country;

    @Value("$user1.name")
    private String name;

    @Value("$likes1[1]")
    private String likes1;

    @Value("$users1[0].age")
    private int age;

    @Value("$temoDir1")
    private String temoDir1;

    @Value("$temoDir2")
    private String temoDir2;

    @GetMapping
    public String getById()
        //country ====== china
        System.out.println("country ====== " + country);

        //name ====== zyy
        System.out.println("name ====== " + name);

        //like1 ====== music
        System.out.println("like1 ====== " + likes1);

        //age ====== 23
        System.out.println("age ====== " + age);

        //temoDir ====== c:\\windows\\temp
        System.out.println("temoDir1 ====== " + temoDir1);

        //temoDir2 ====== c:\\windows	emp 	1 	2 	3
        System.out.println("temoDir2 ====== " + temoDir2);
        return "SpringBoot is running...";
3.6 解决读取yaml配置文件数据的痛点
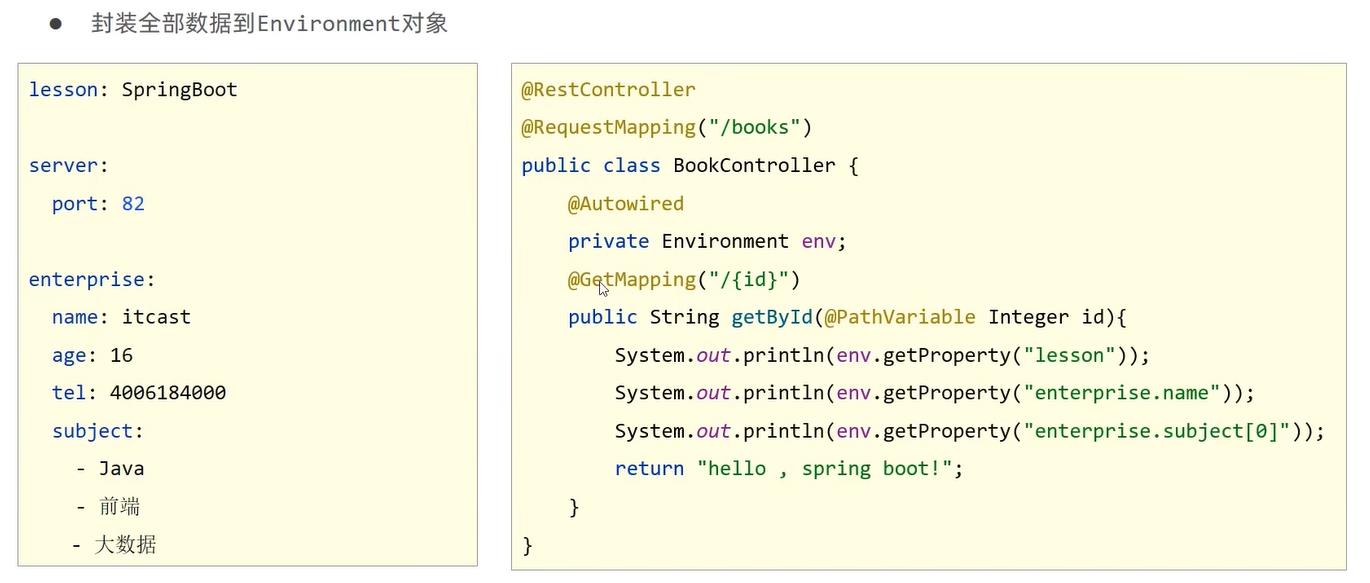
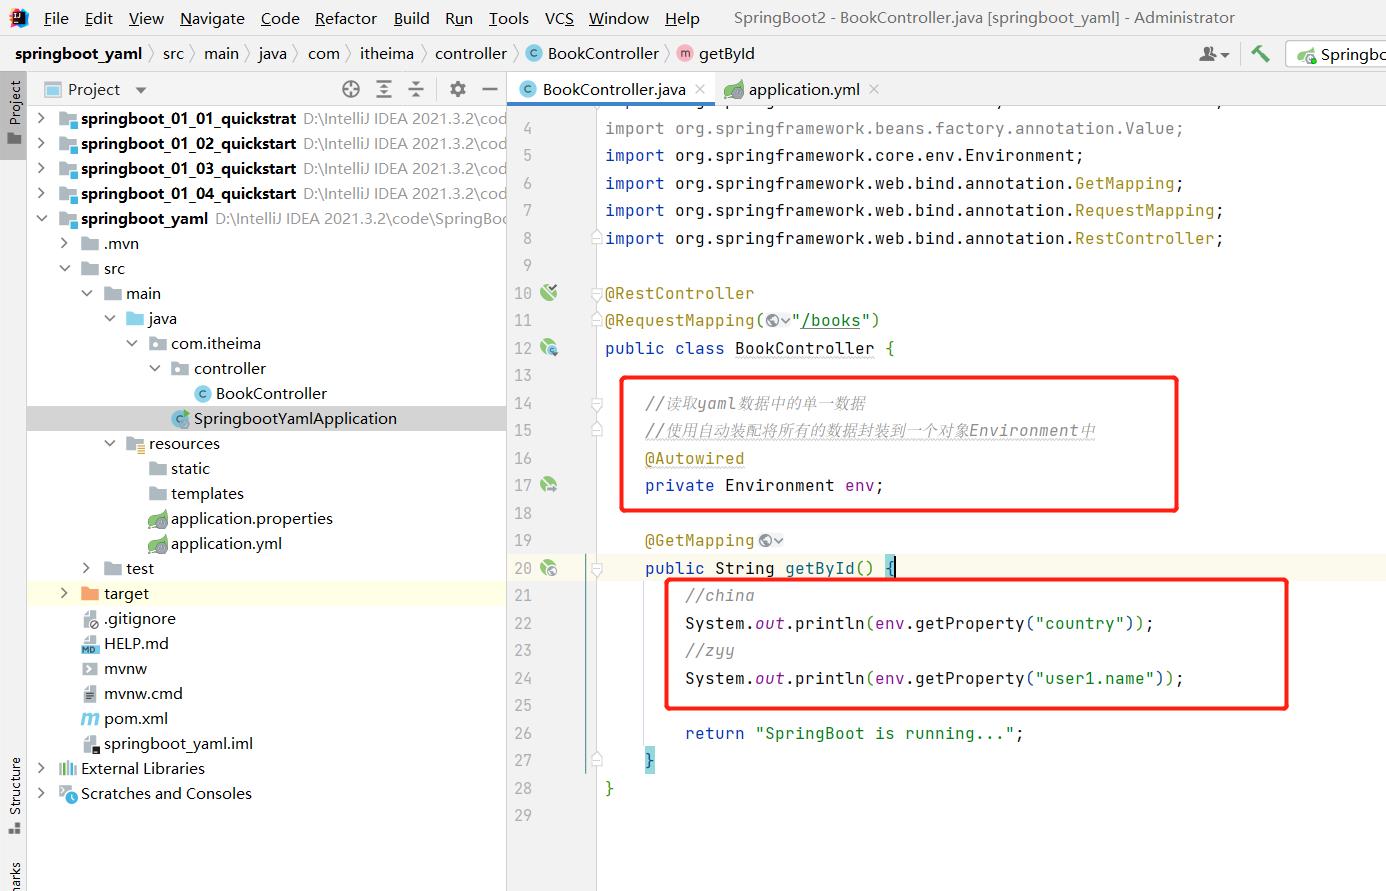
@RestController
@RequestMapping("/books")
public class BookController

    //读取yaml数据中的单一数据
    //使用自动装配将所有的数据封装到一个对象Environment中
    @Autowired
    private Environment env;


    @GetMapping
    public String getById()
        //china
        System.out.println(env.getProperty("country"));
        //zyy
        System.out.println(env.getProperty("user1.name"));

        return "SpringBoot is running...";
3.7 封装数据
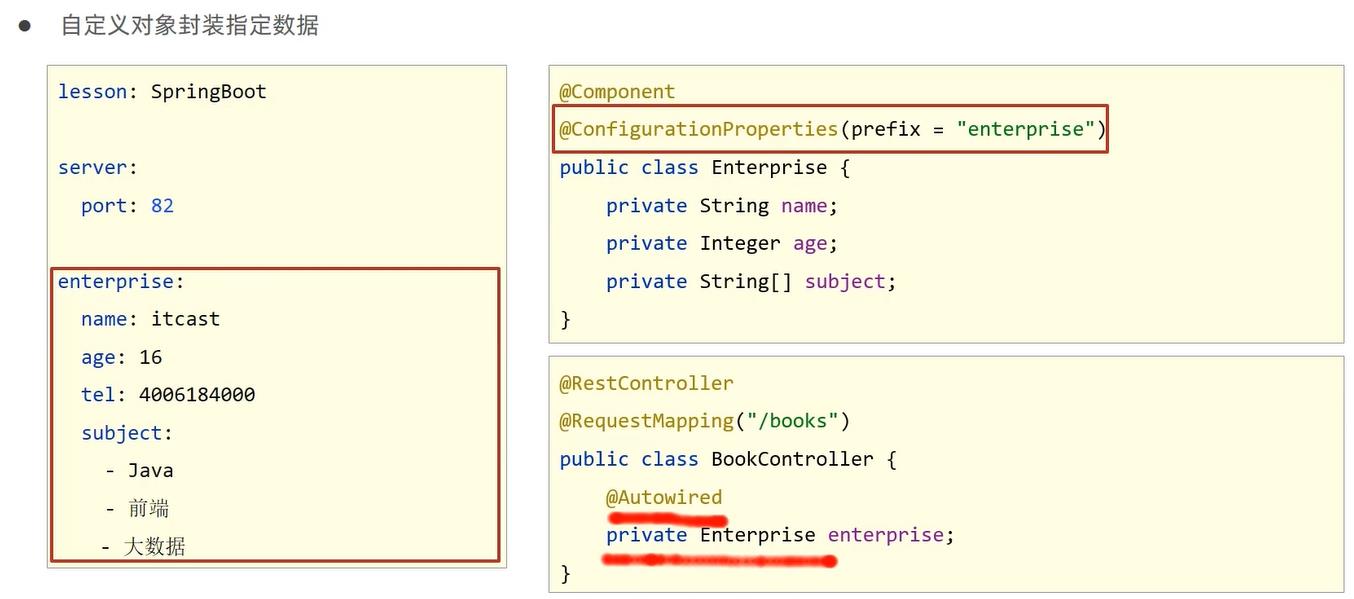
// 1、定义数据模型封装yaml文件中对应的数据
// 2、定义为spring管控的bean
@Component
// 3、指定加载的数据
@ConfigurationProperties(prefix = "datasource")
public class MyDataSource

    private String driver;
    private String url;
    private String username;
    private String password;

    public String getDriver()
        return driver;


    public void setDriver(String driver)
        this.driver = driver;


    public String getUrl()
        return url;


    public void setUrl(String url)
        this.url = url;


    public String getUsername()
        return username;


    public void setUsername(String username)
        this.username = username;


    public String getPassword()
        return password;


    public void setPassword(String password)
        this.password = password;


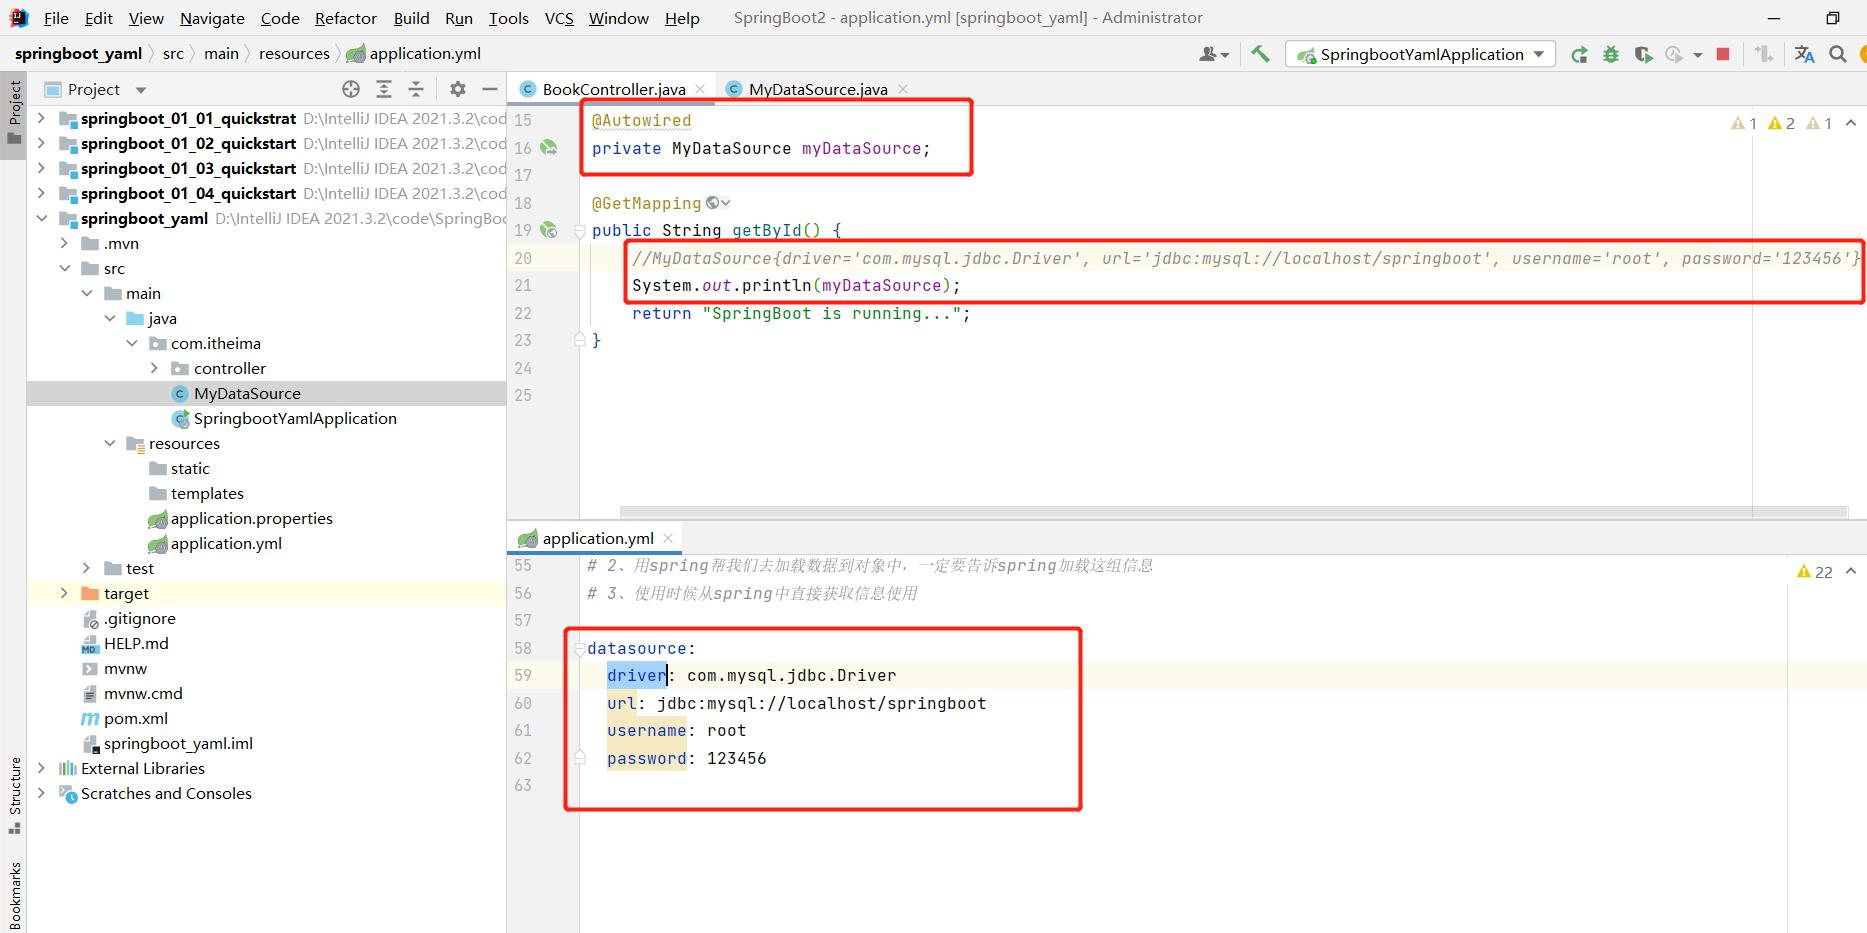
    @Override
    public String toString()
        return "MyDataSource" +
                "driver='" + driver + '\\'' +
                ", url='" + url + '\\'' +
                ", username='" + username + '\\'' +
                ", password='" + password + '\\'' +
                '';
4、整合第三方技术
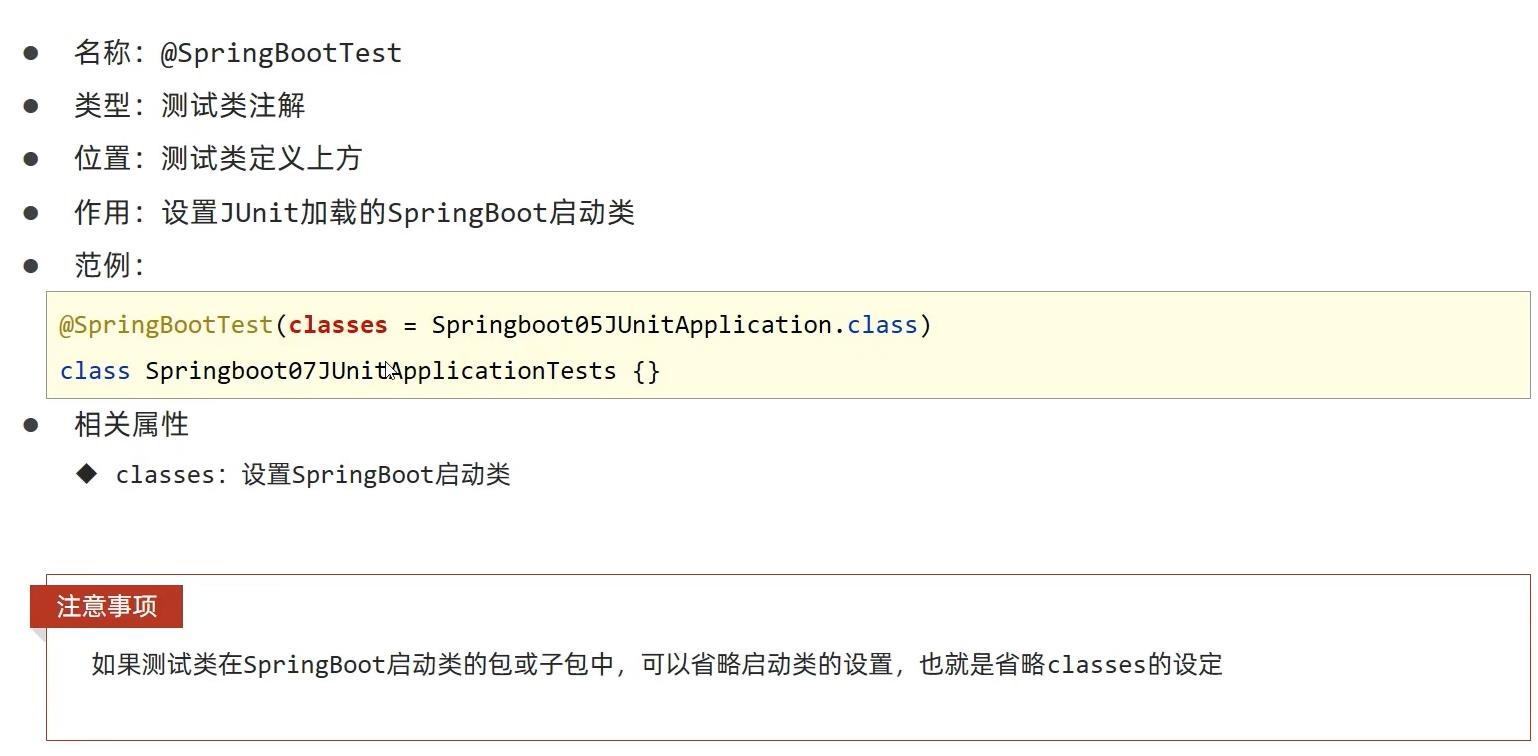
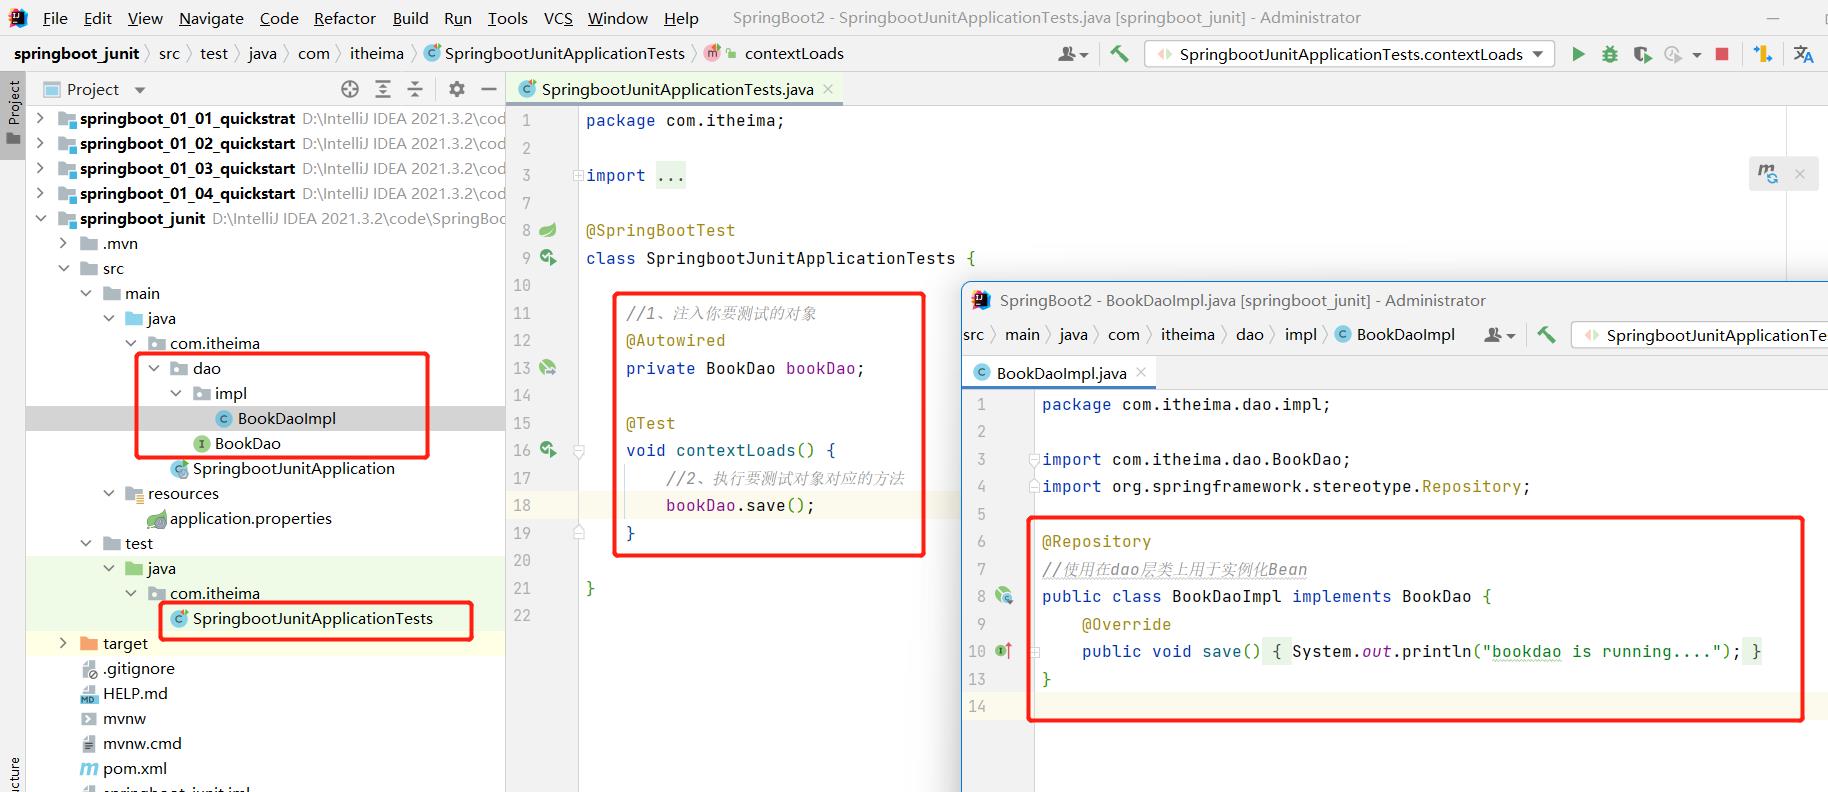
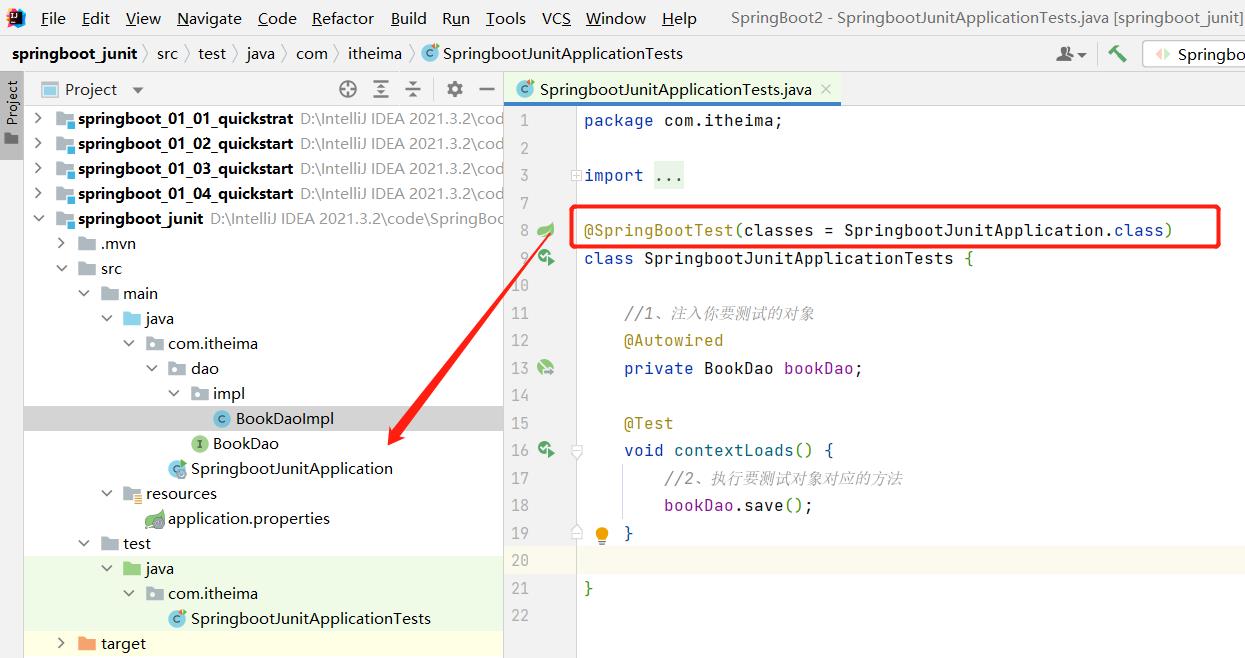
4.1 整合Junit
4.2 整合MyBatis
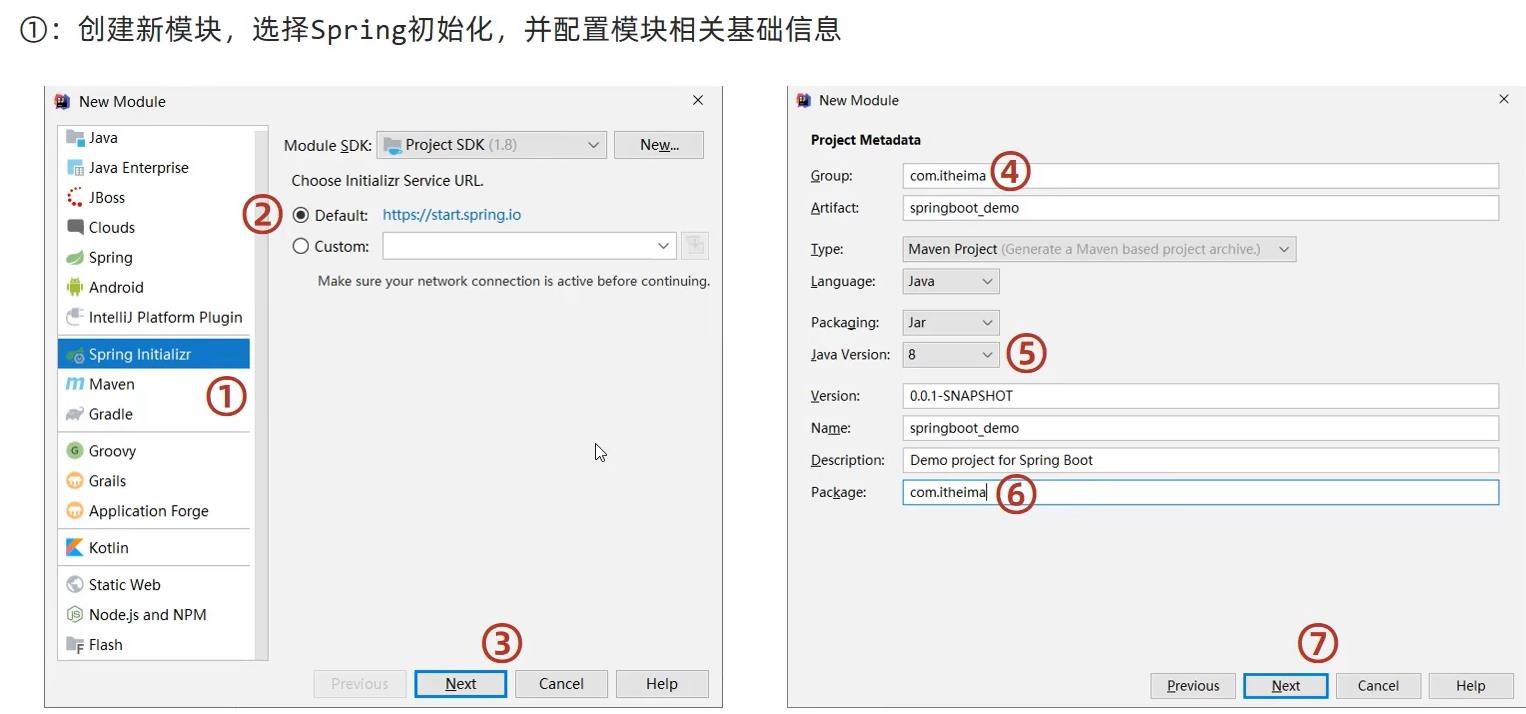
① 创建新模块
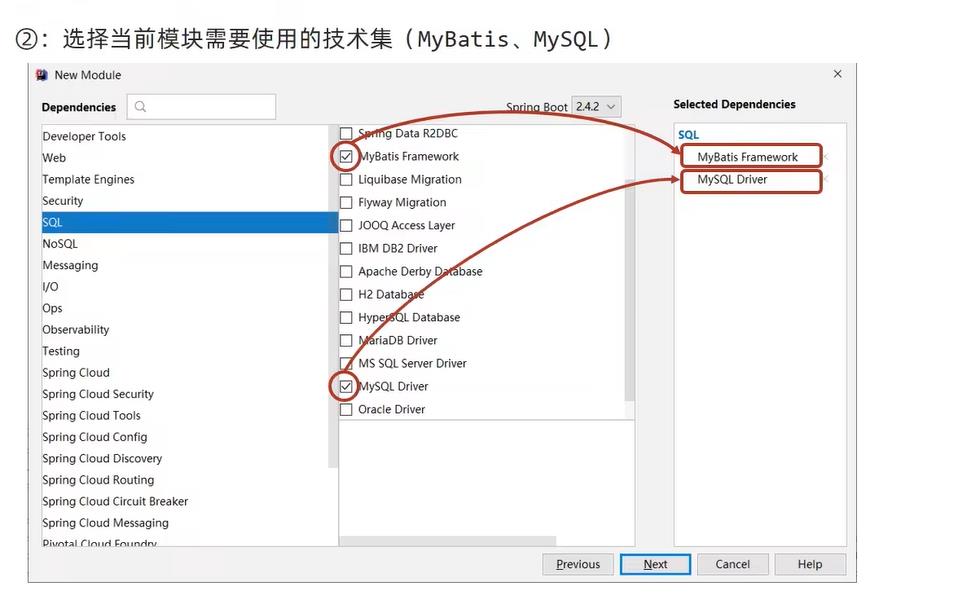
② 选择当前模块需要使用的技术集
③ 设置数据源参数

④ 定义数据层接口与映射配置

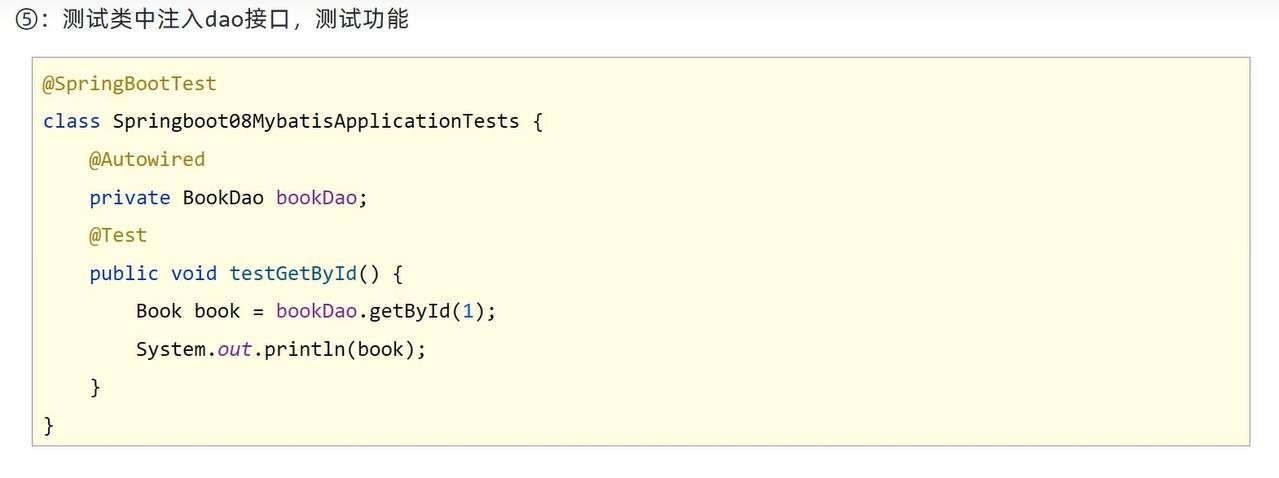
⑤ 运行测试
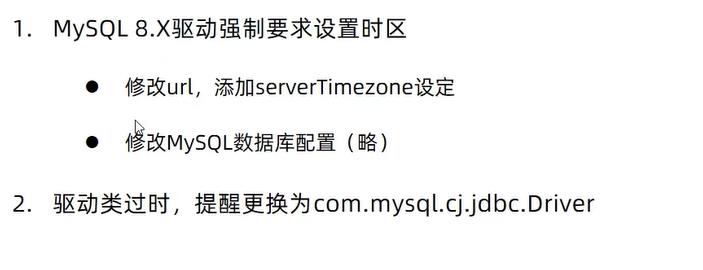
4.3 整合MyBatis常见问题
4.4 整合MyBatis-Plus
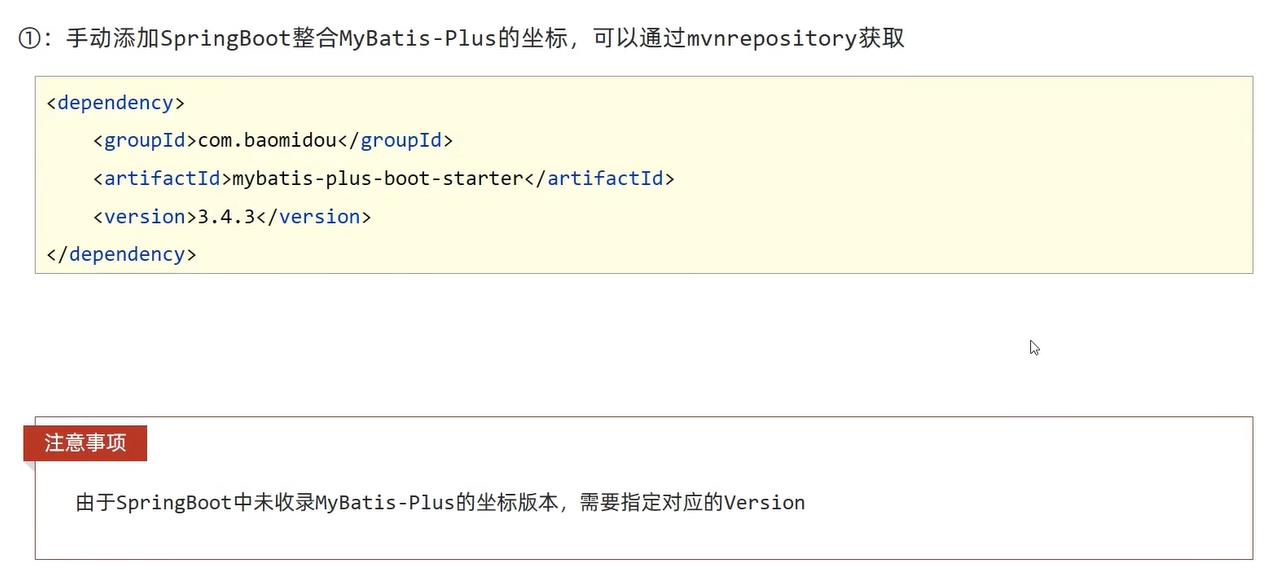
① 手动添加SpringBoot整合MyBatis-Plus的坐标
② 定义数据层接口与映射配置

③ 设置相关的配置文件

4.5 整合Druid
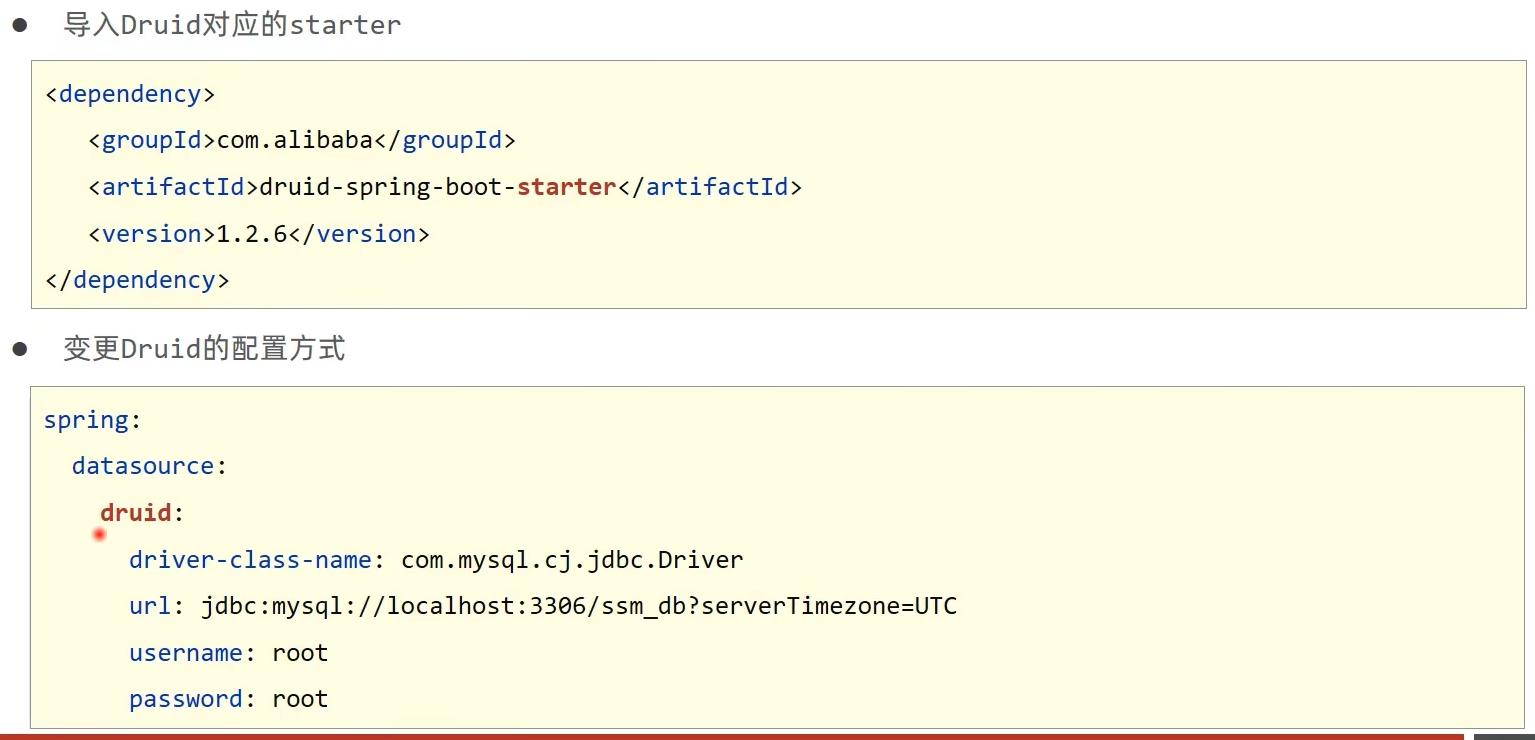
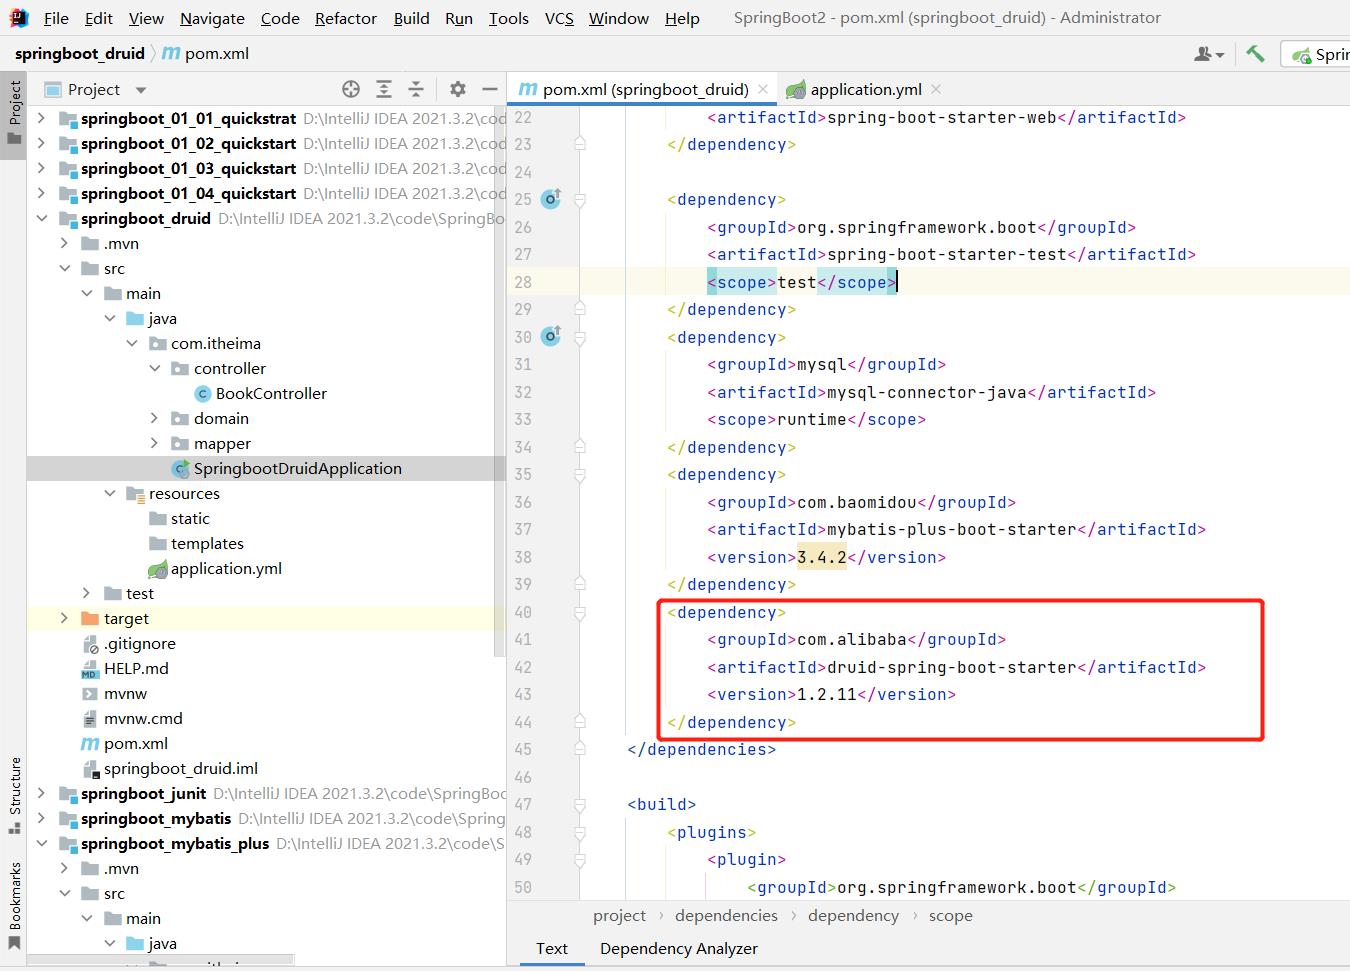
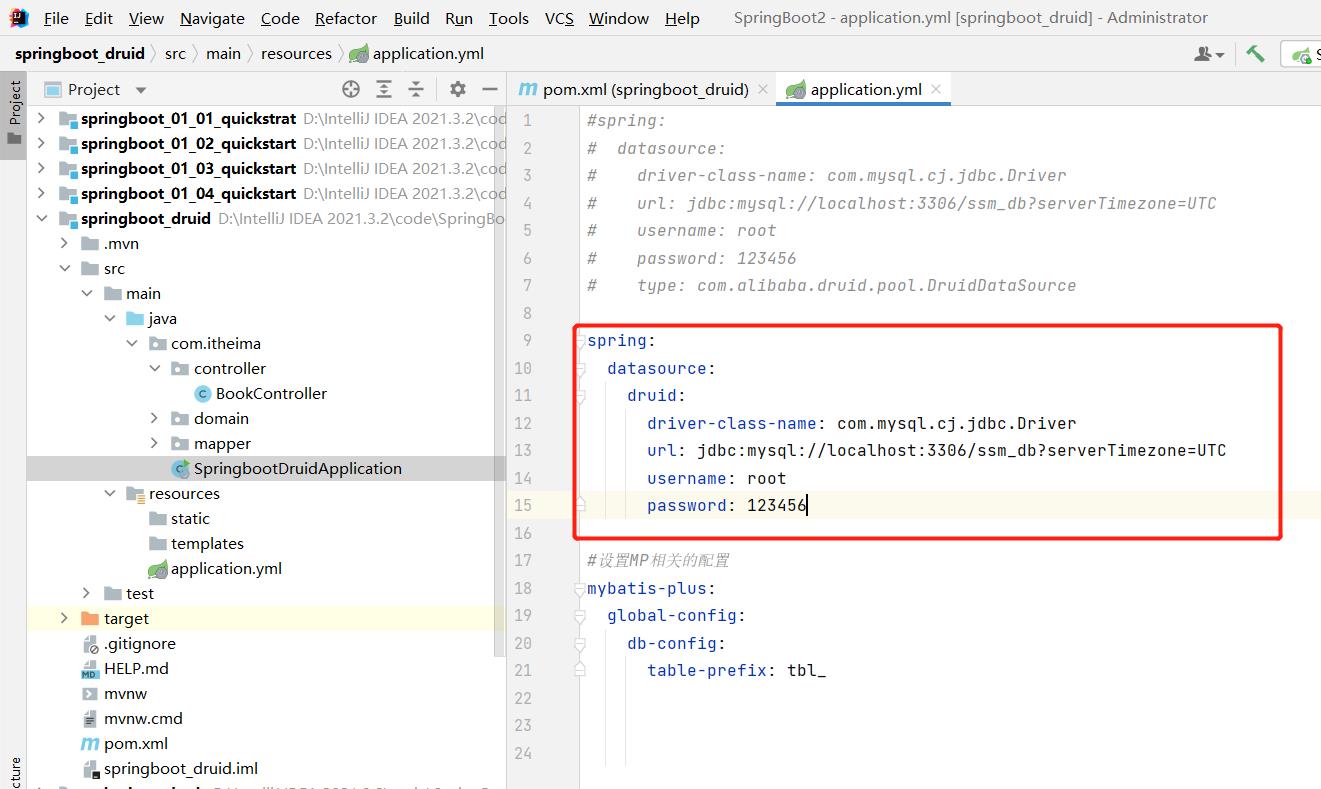
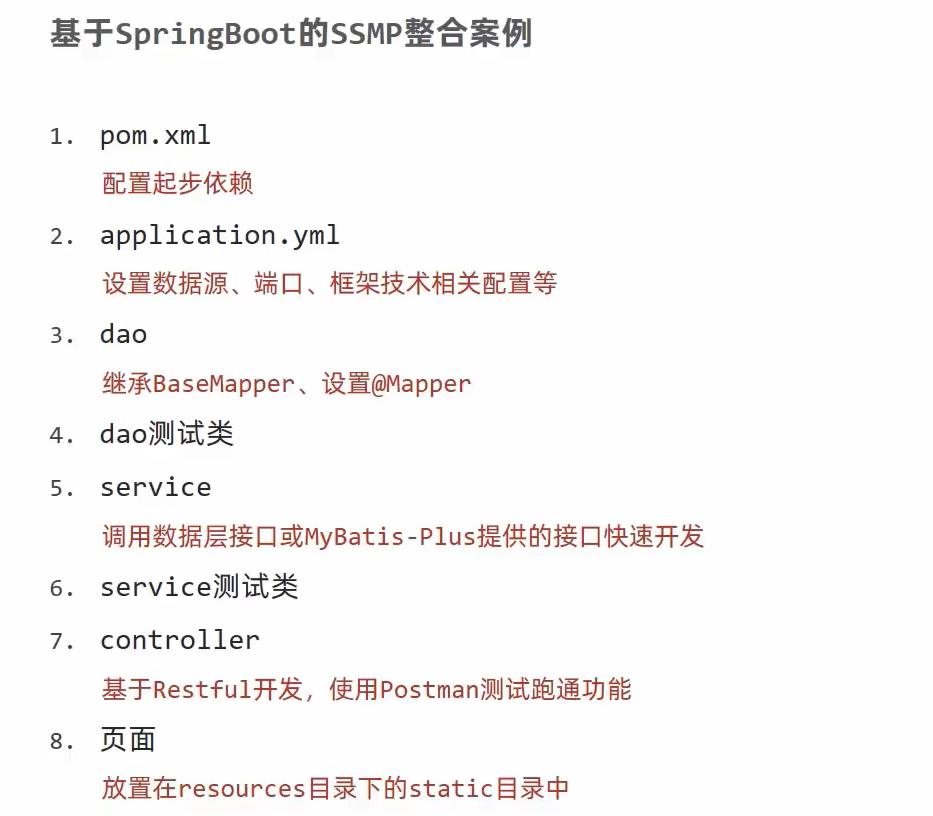
5、SSMP整合案例制作
5.1 导入lombok
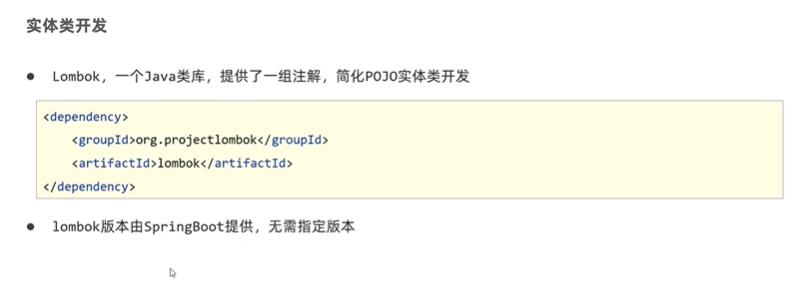

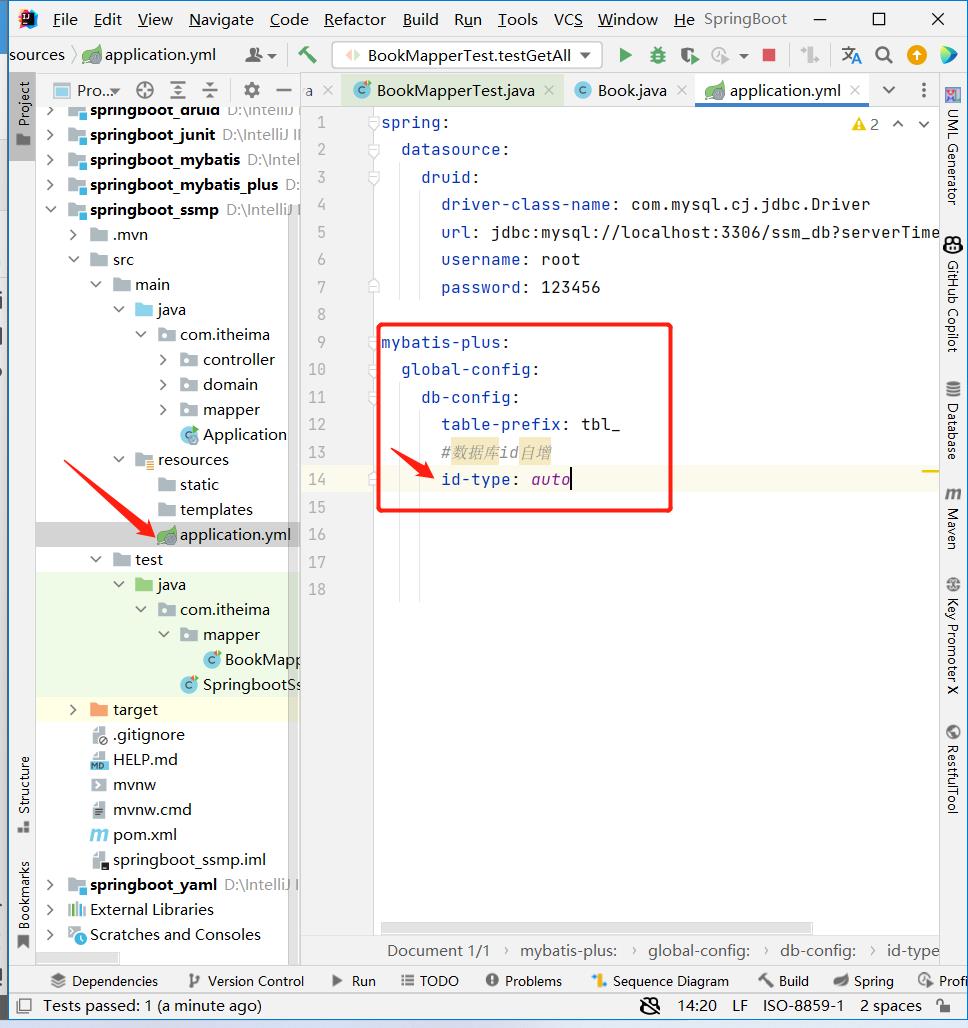
5.2 数据库id自增
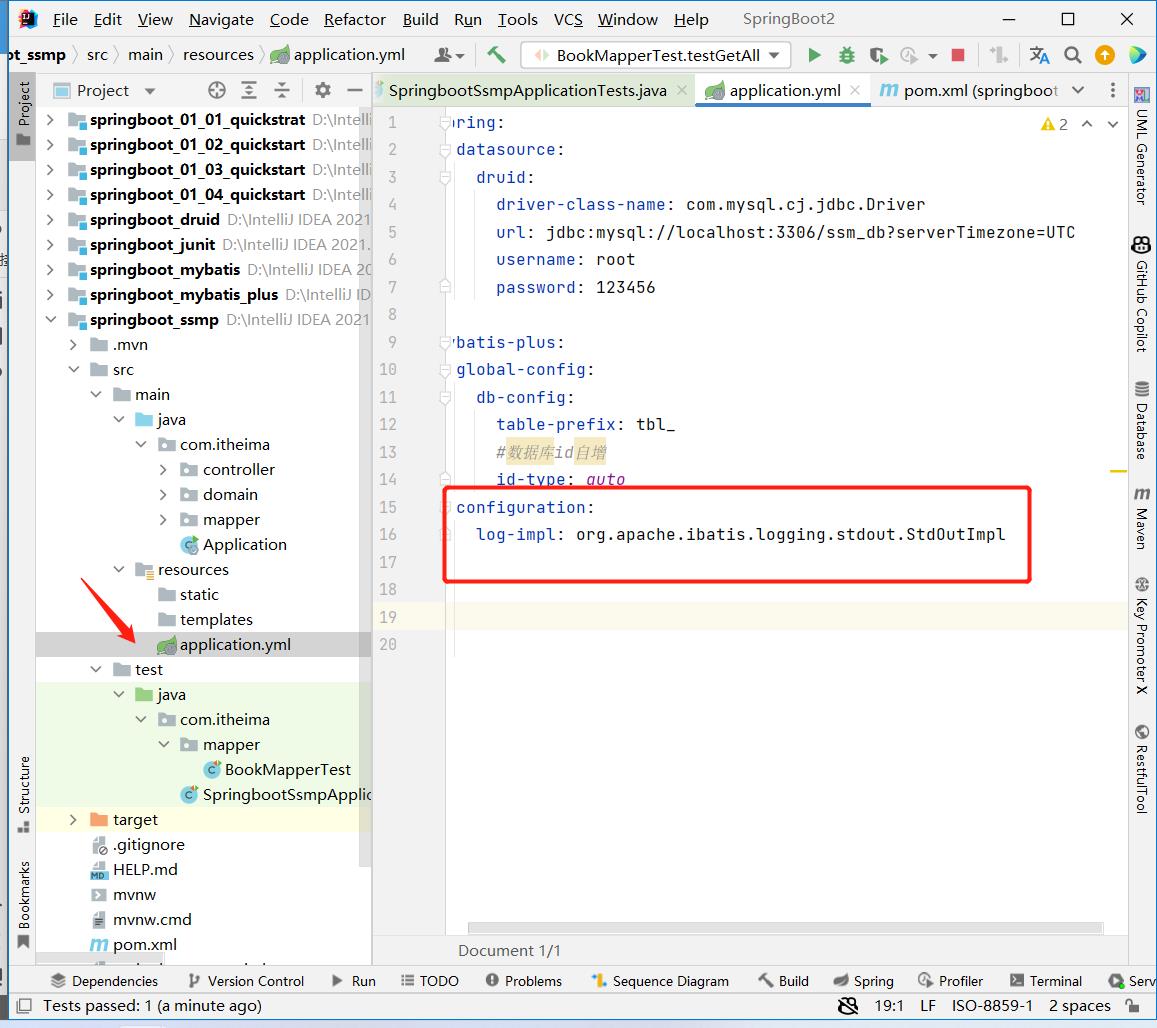
5.3 开启日志

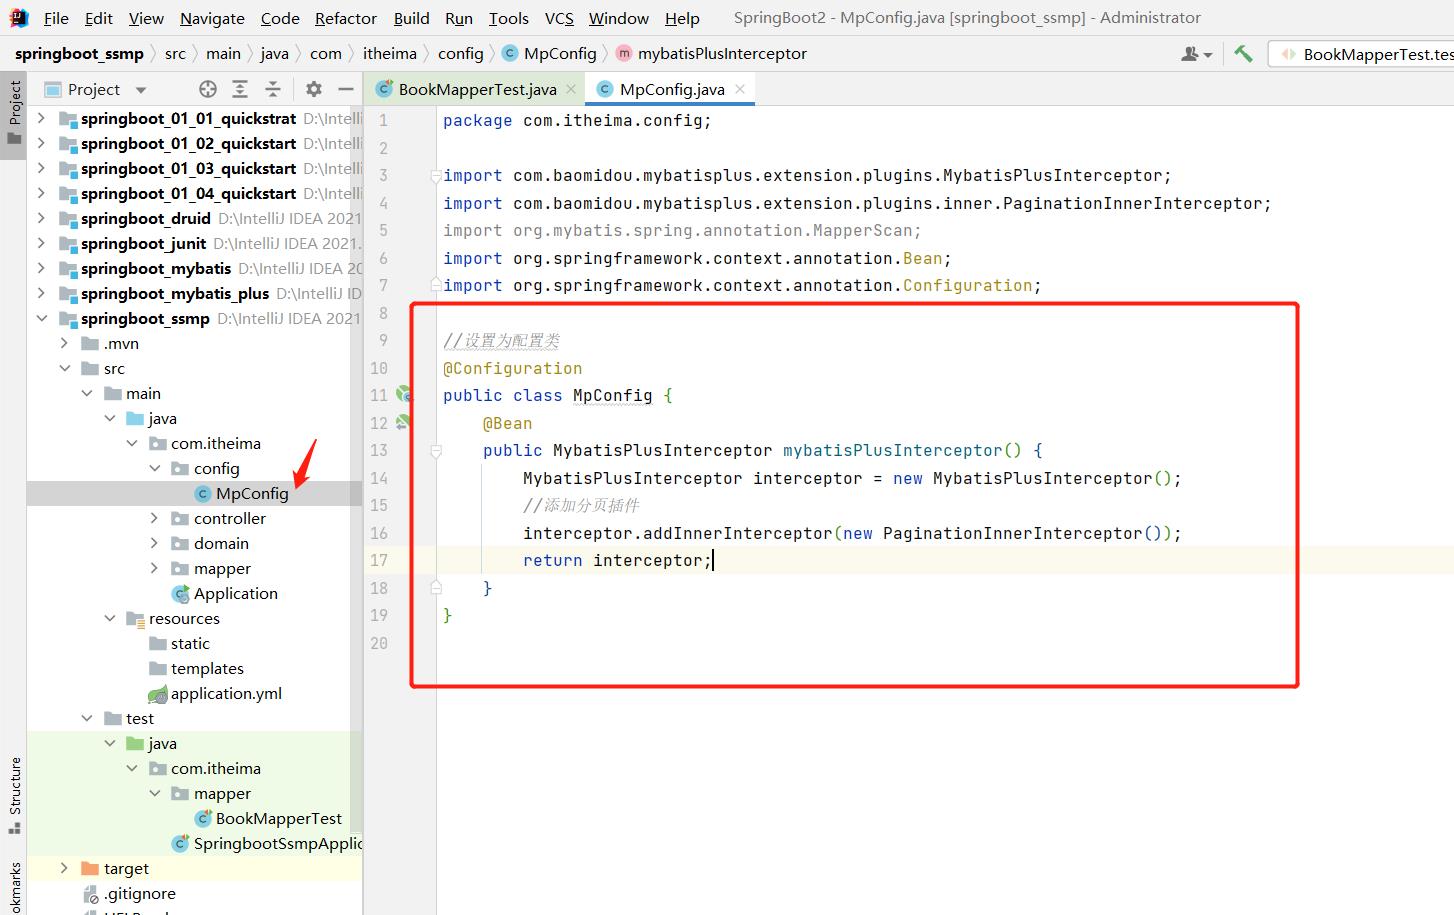
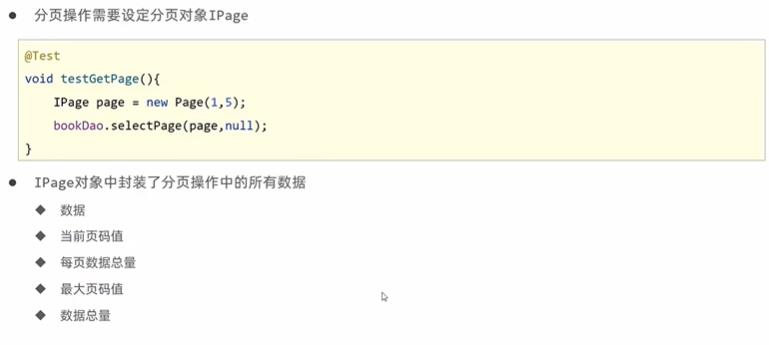
5.4 配置分页插件
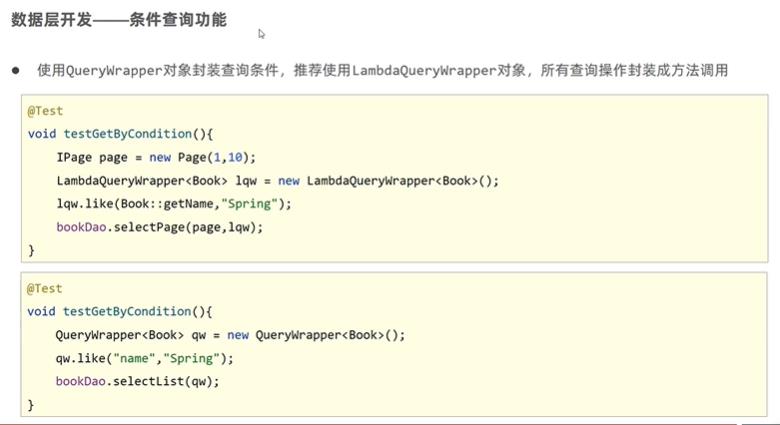
5.5 条件查询功能

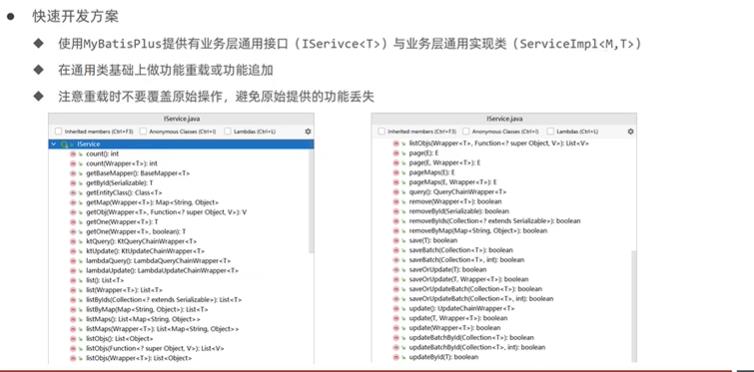
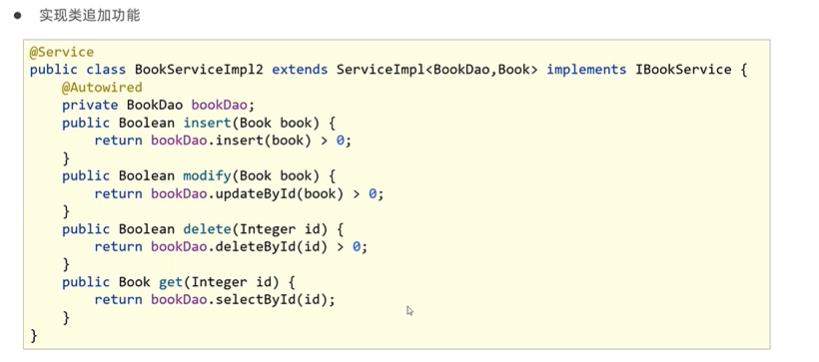
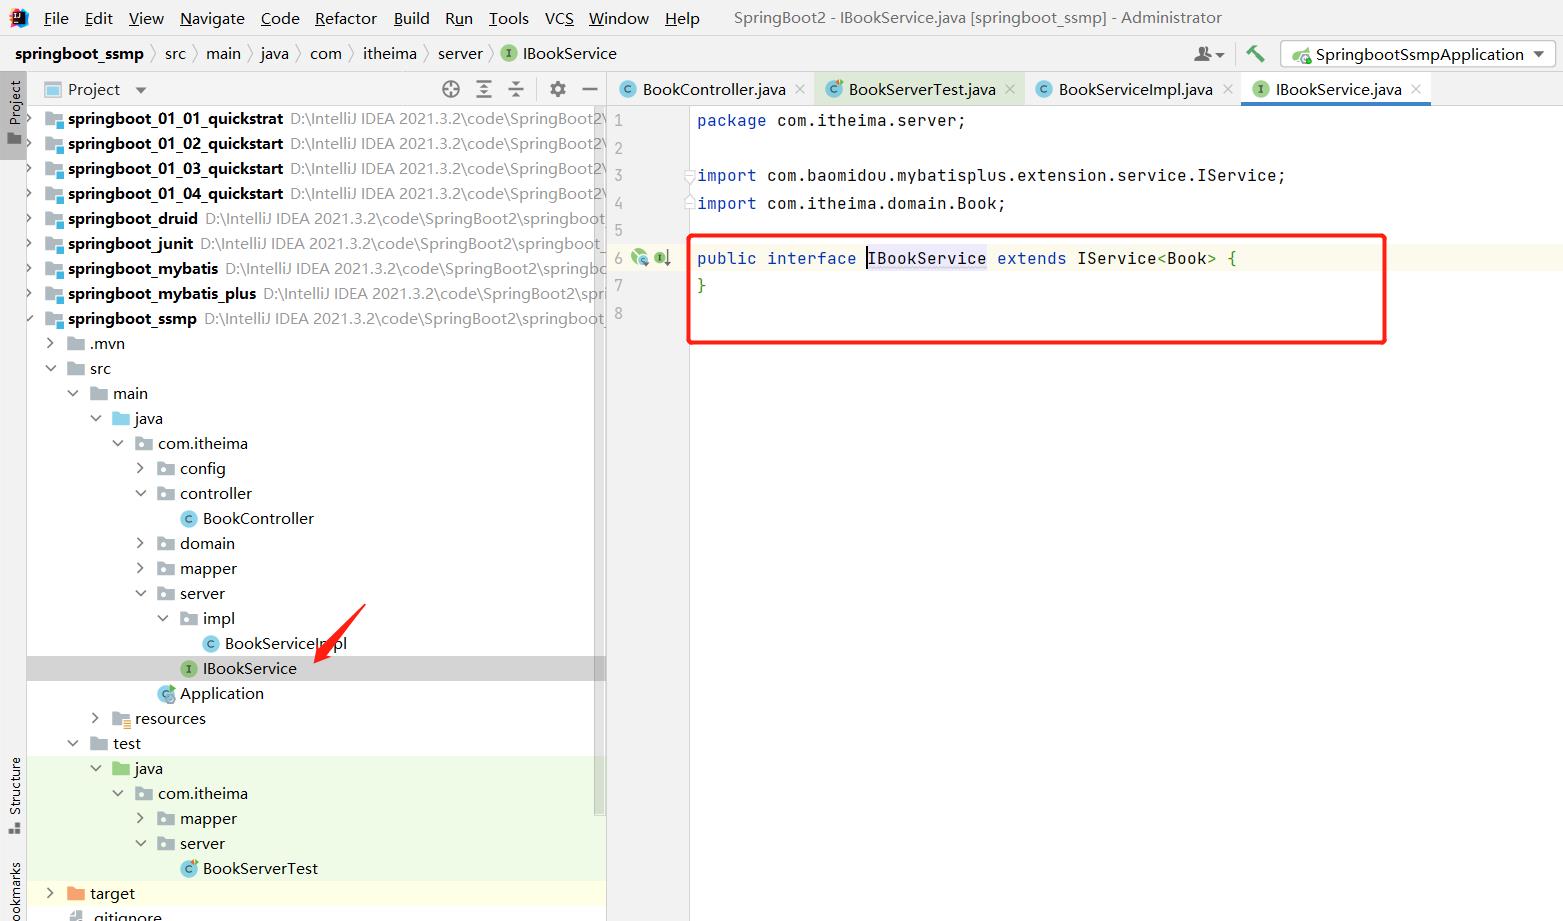
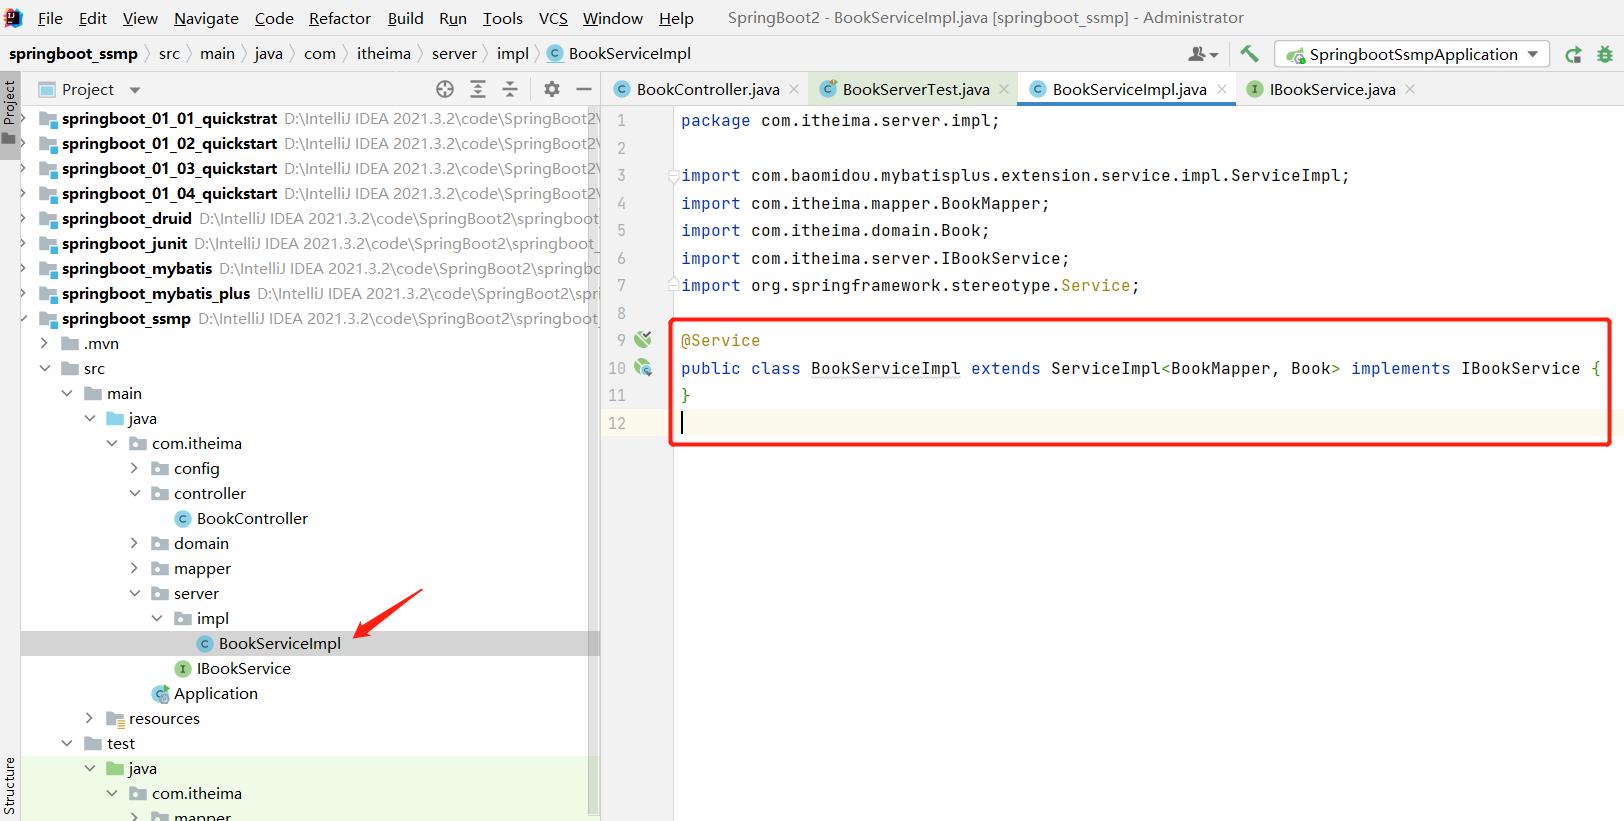
5.6 业务层快速开发
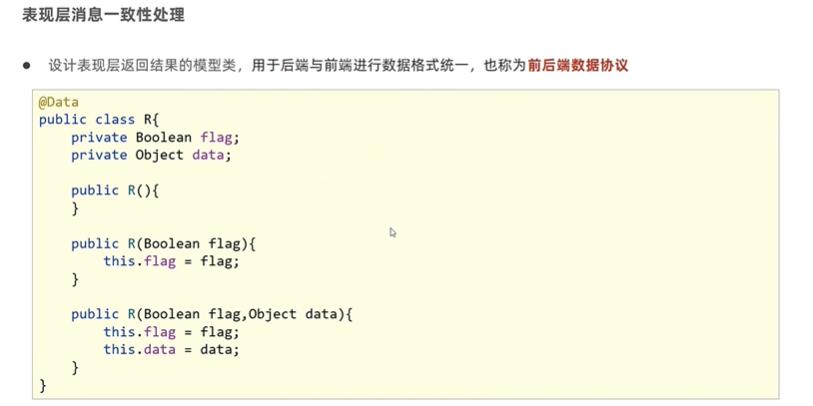
5.7 数据统一

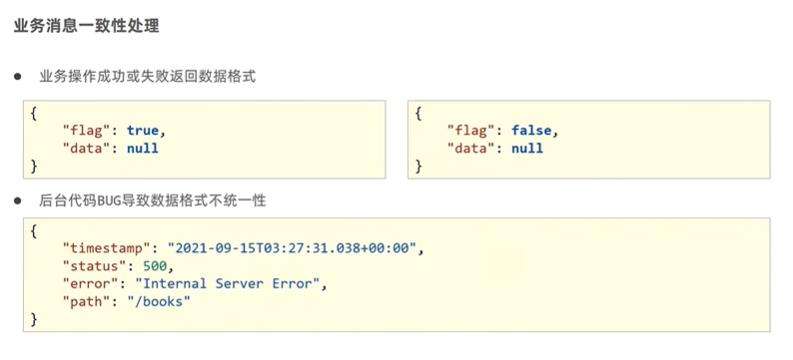
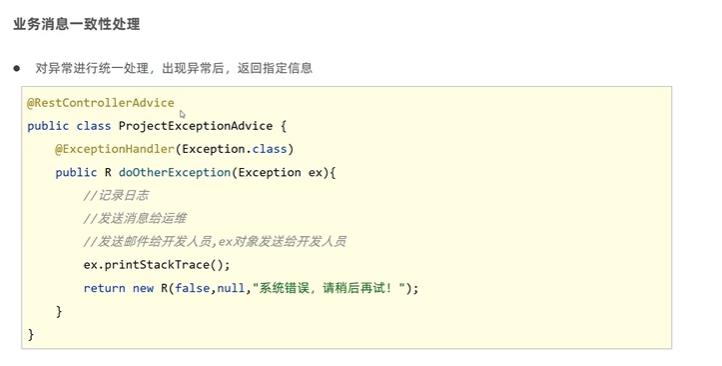
5.8 异常信息处理
5.9 前后端协议联调
以上是关于SpringBoot2:基础篇(黑马程序员:P1~P53)的主要内容,如果未能解决你的问题,请参考以下文章
