Vue
Posted xue_yun_xiang
tags:
篇首语:本文由小常识网(cha138.com)小编为大家整理,主要介绍了Vue相关的知识,希望对你有一定的参考价值。
一、监听属性
watch 监听属性数据的变化
<!DOCTYPE html>
<html lang="en">
<head>
    <meta charset="UTF-8">
    <title>Title</title>

    <script src="js/vue.js"></script>
</head>
<body>
<div id="app">
    count:count<button @click="incread()">incread</button>
    <br>
    千米:<input type="number" v-model="kilometer"><br>
    米:<input type="number" v-model="meter">
</div>

<script>
    var app = new Vue(

        el: '#app',
        data:
            count: 0,
            kilometer:0,
            meter:0
        ,
        methods:
            incread: function ()
                this.count++;

        ,
         watch:
        //     //可以在watch代码块中监控count数据的变化
        //     count:function (val)
        //         //获取count最新的值
        //         console.log("count:" + val);

             //监控kilometer数据变化
             kilometer:function (val)
                 console.log("kilometer:" + val);
                 this.meter = val * 1000;
             ,
             meter:function (val)
                 console.log("meter:" + val);
                 this.kilometer = val / 1000;


    )
        app.$watch('count',function (nval,oval)
            //获取count最新的值
            console.log("count:" + nval);

            console.log("count-最新数据:" + nval + "----旧数据:" + oval);
    )
</script>
</body>
</html>
二、样式绑定
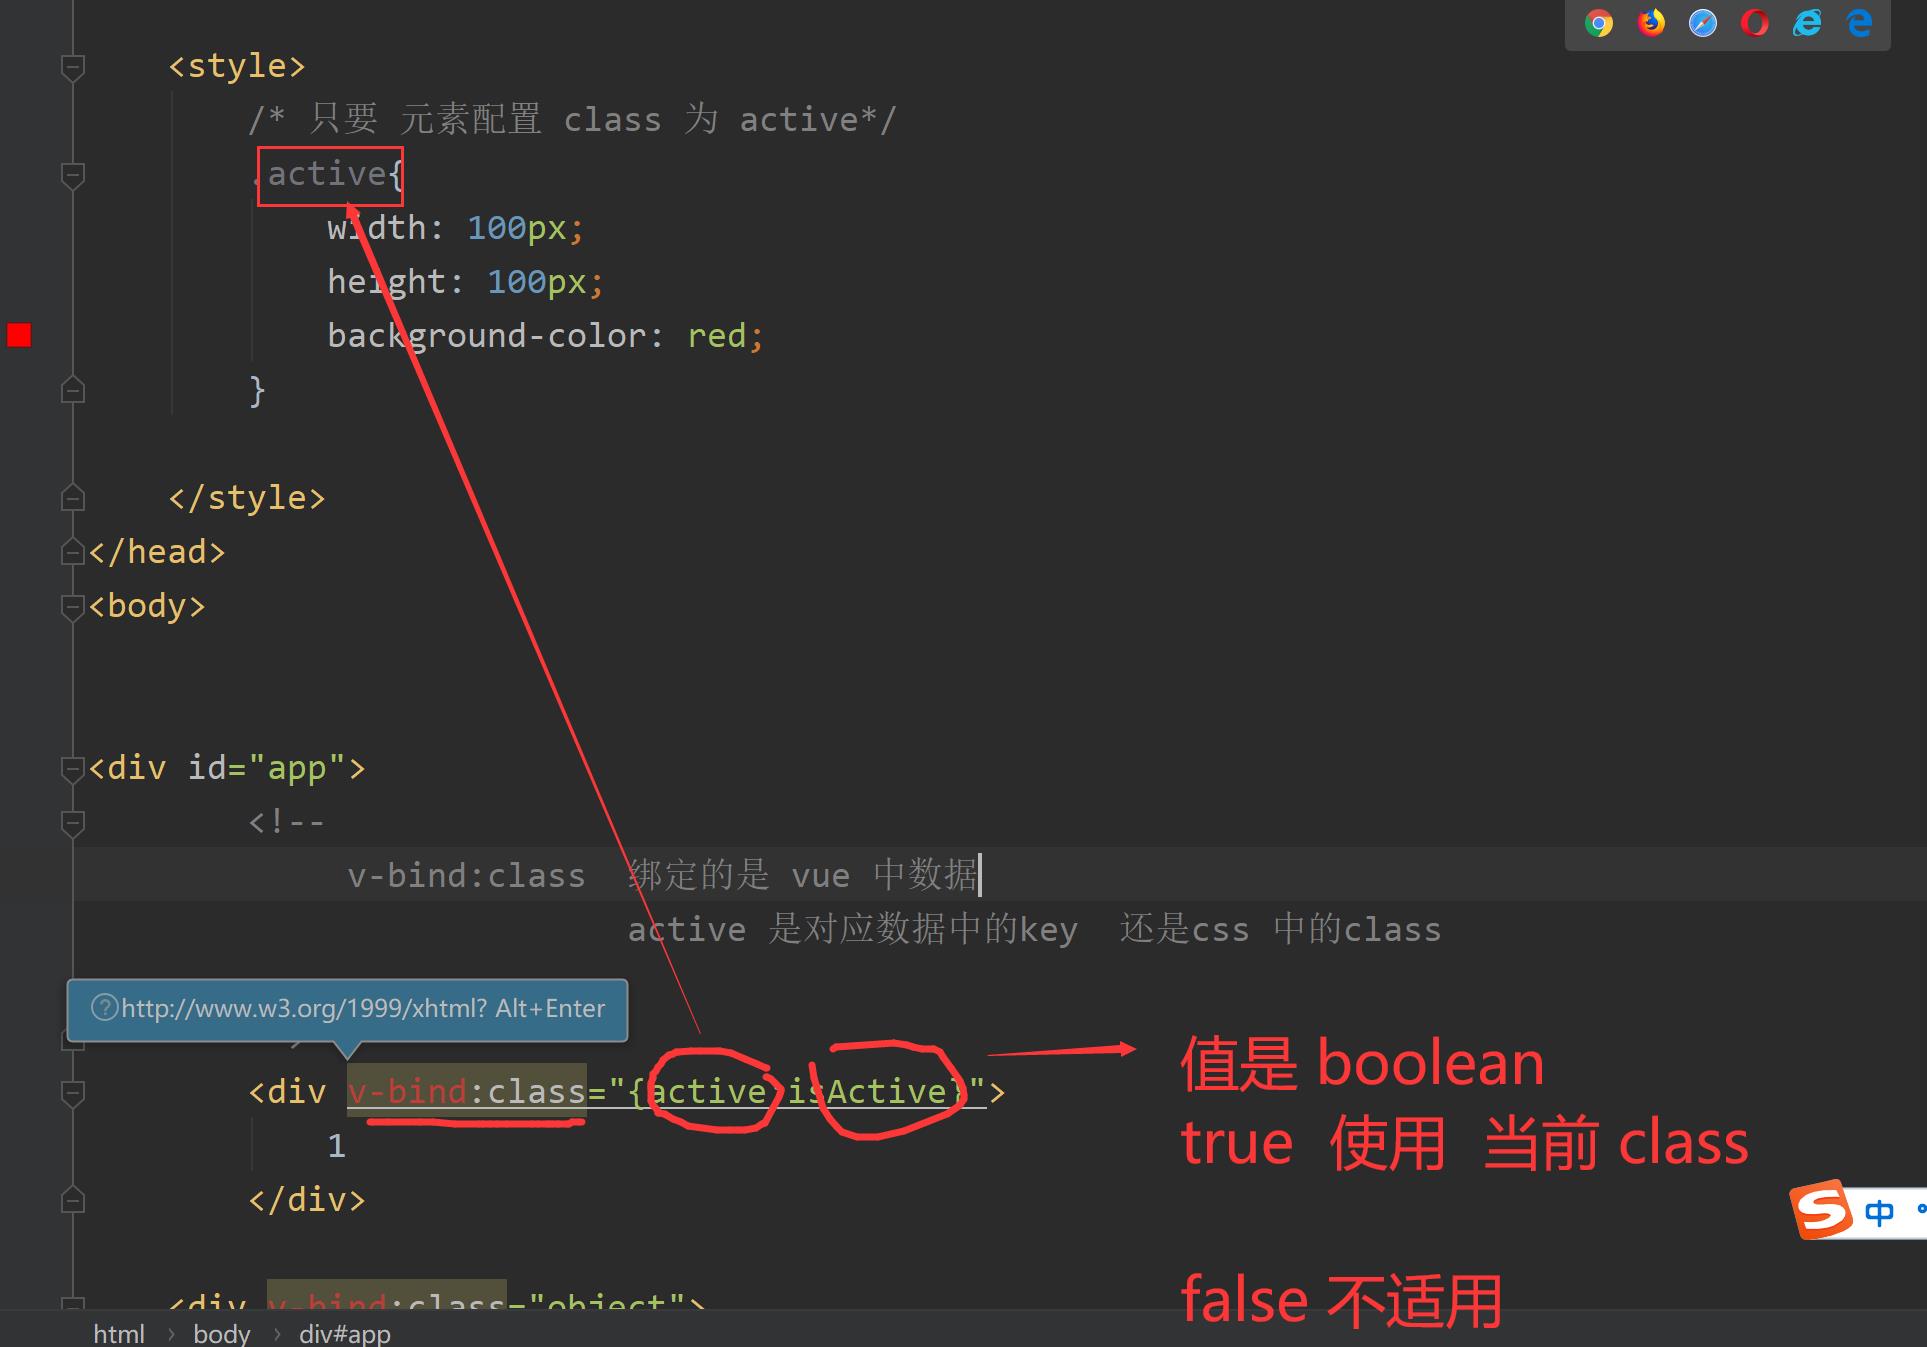
v-bind:class 绑定 css 中的class
<!DOCTYPE html>
<html lang="en">
<head>
    <meta charset="UTF-8">
    <title>Title</title>

    <script src="/js/vue.js"></script>

    <style>
        /* 只要 元素配置 class 为 active*/
        .active
            width: 100px;
            height: 100px;
            background-color: red;


    </style>
</head>
<body>


<div id="app">
        <!--
             v-bind:class  绑定的是 vue 中数据
                           active 是对应数据中的key  还是css 中的class

        -->
        <div v-bind:class="active:isActive">
            1
        </div>

    <div v-bind:class="object">
        2
    </div>


    <div v-bind:class="computedObject">
        3
    </div>

</div>

<script>

    var vm = new Vue(
        el:'#app',
        data:
            isActive:true,
            object:
                active:true

        ,
        computed:

          computedObject:function ()

              return
                  active:true


        ,
        methods:
        ,
        watch:

    )
</script>
</body>
</html>

三、Component
组件
在java 万物皆对象,对象都是有类创建来的,类对万物的描述和封装
vue 组件 是最常用模块,很多时候都需要用到前端代码块的复用,将公共代码块的抽离 就是 是我们的组件
组件分为两类:
- 全局组件:在工程中任何地方都可以使用
- 局部组件:只能在当前 vm 实例中使用
1、全局组件
  <div id="app">
                    <!--
                        3.    v-bind:msg=“vmMsg” 绑定自定义组件中的参数 和 vm 实例中的数据

                         vmMsg ------ > msg
                    -->
                <componentmsg v-bind:msg="vmMsg"></componentmsg>
    </div>

    <!--
        1 先创建一个模板
    -->

    <template id="template1">
        <div>
            msg:msg
        </div>
    </template>

    <script>

        // 2声明组件
        // 声明 自定义组件是如果名字有大写字母 自动给转为消息 一定注意
        Vue.component('componentmsg',
            template:'#template1',// 组件对应的模板 template1
            props:["msg"] // 声明自定义组件需要传递的参数
        )


        var  vm = new Vue(
            el:"#app",
            data:
                vmMsg:"五分钟后下课"


        )
    </script>
2、局部组件
<h1>局部组件  </h1>


    <div id="app">
            <!-- 第一次应用组件-->
            <customdiv></customdiv>


            <h1>sdfsdfsdffffff</h1>
        <customdiv></customdiv>
        <customdiv></customdiv>

    </div>


    <!--
        定义一个模板 相当于一个 div
            template 末班中只能 有一个 根节点 <div>  <h1>
                    一般请情况我们只是用div 进行包裹
    -->
    <template id="template1">
       <div>
           <h1>自定义模块</h1>
           <h3>sdfasdfsd</h3>
           <div>sdfasdfasd</div>
       </div>
    </template>

<script>

   var object =
       template:'#template1'


    var vm = new Vue(
        el:'#app',
        data:

        ,
        components:
              // 一个组件
                'customdiv':object

            ,
        computed:


        ,
        methods:

        ,
        watch:


    )


</script>
组件传递参数
<!DOCTYPE html>
<html lang="en">
<head>
    <meta charset="UTF-8">
    <title>Title</title>
    <script src="/js/vue.js"></script>
</head>
<body>

<h1>全局组件  </h1>


    <div id="app">
            <!-- 第一次应用组件-->
            <customdiv v-bind:title="vmTitle" v-bind:title2="vmTitle2" v-bind:content="vmContent"></customdiv>


            <h1>sdfsdfsdffffff</h1>
            <customdiv v-bind:title="vmHeader" v-bind:title2="vmHeader2" v-bind:content="vmHeaderContent"></customdiv>


    </div>


    <!--
        定义一个模板 相当于一个 div
            template 末班中只能 有一个 根节点 <div>  <h1>
                    一般请情况我们只是用div 进行包裹
    -->
    <template id="template1">
       <div>
           <h1>title</h1>
           <h3>title2</h3>
           <div>content</div>
       </div>
    </template>

<script>

    /*
    *   Vue 声明全局组件 所有vm 实例都可以使用
    *   组件名称  customdiv
    *    template 设置组件对应的模板
    * */
    Vue.component('customdiv',
        template:'#template1',
        props:["title","title2","content"] // 声明组件中可以传递参数
    )


    var vm = new Vue(
        el:'#app',
        data:
            vmTitle:'儿童节快乐',
            vmTitle2:'每人一个棒棒糖',
            vmContent:"xxxxxxxxxxxxxxxxxxxxx",
            vmHeader:'端午节安康',
            vmHeader2:'每人一个粽子',
            vmHeaderContent:"xxxxxxxxxxxxxxxxxxxxx"

        ,
        computed:


        ,
        methods:

        ,
        watch:


    )


</script>


</body>
</html>
四、生命周期
servlet实例生命周期:实例化 ----》初始化(init)–>服务(service)–>destory()销毁
vue实例生命周期:实例化(create)—>绑定将vue实例和el 对应的节点(mount)—》如果数据变化(update)----->销毁(destory)
声明周期对应的方法:8个
beforeCreate() 实例化前
created() 实例化后
beaforeMount() 挂载前
mounted() 挂载后 初始化数据,发生在当前位置
beforeUpdate():更新前
updated():更新后
beforeDestory():销毁前
destoryed():销毁后
<!DOCTYPE html>
<html lang="en">
<head>
    <meta charset="UTF-8">
    <title>Title</title>
    <script src="js/vue.js"></script>
</head>
<body>
<div id="app">
    count:count  <button @click="incread()"> count 自增1 </button>

    <br><button @click="destoryclick()"> 销毁当前实例</button>
</div>

<script>

    var  vm = new Vue(
        el:"#app",
        data:
            count:0
        ,
        methods:
            incread:function ()
                console.log("自增1")
                this.count++;// this 当前vue 实例
            ,
            destoryclick:function ()
                // 所有vm 实例内的方法调用都要加$
                this.$destroy()

        ,
        created()
            console.log("实例创建后")
        ,
        mounted()
            // 所有 vue 网络请求数据 ,初始化界面数据 在 mounted内设置
            console.log("挂载绑定后")
        ,
        updated()
            console.log("界面更新后")
        ,
        destroyed()
            console.log("实例销毁后")


    )
</script>

</body>
</html>
五、路由
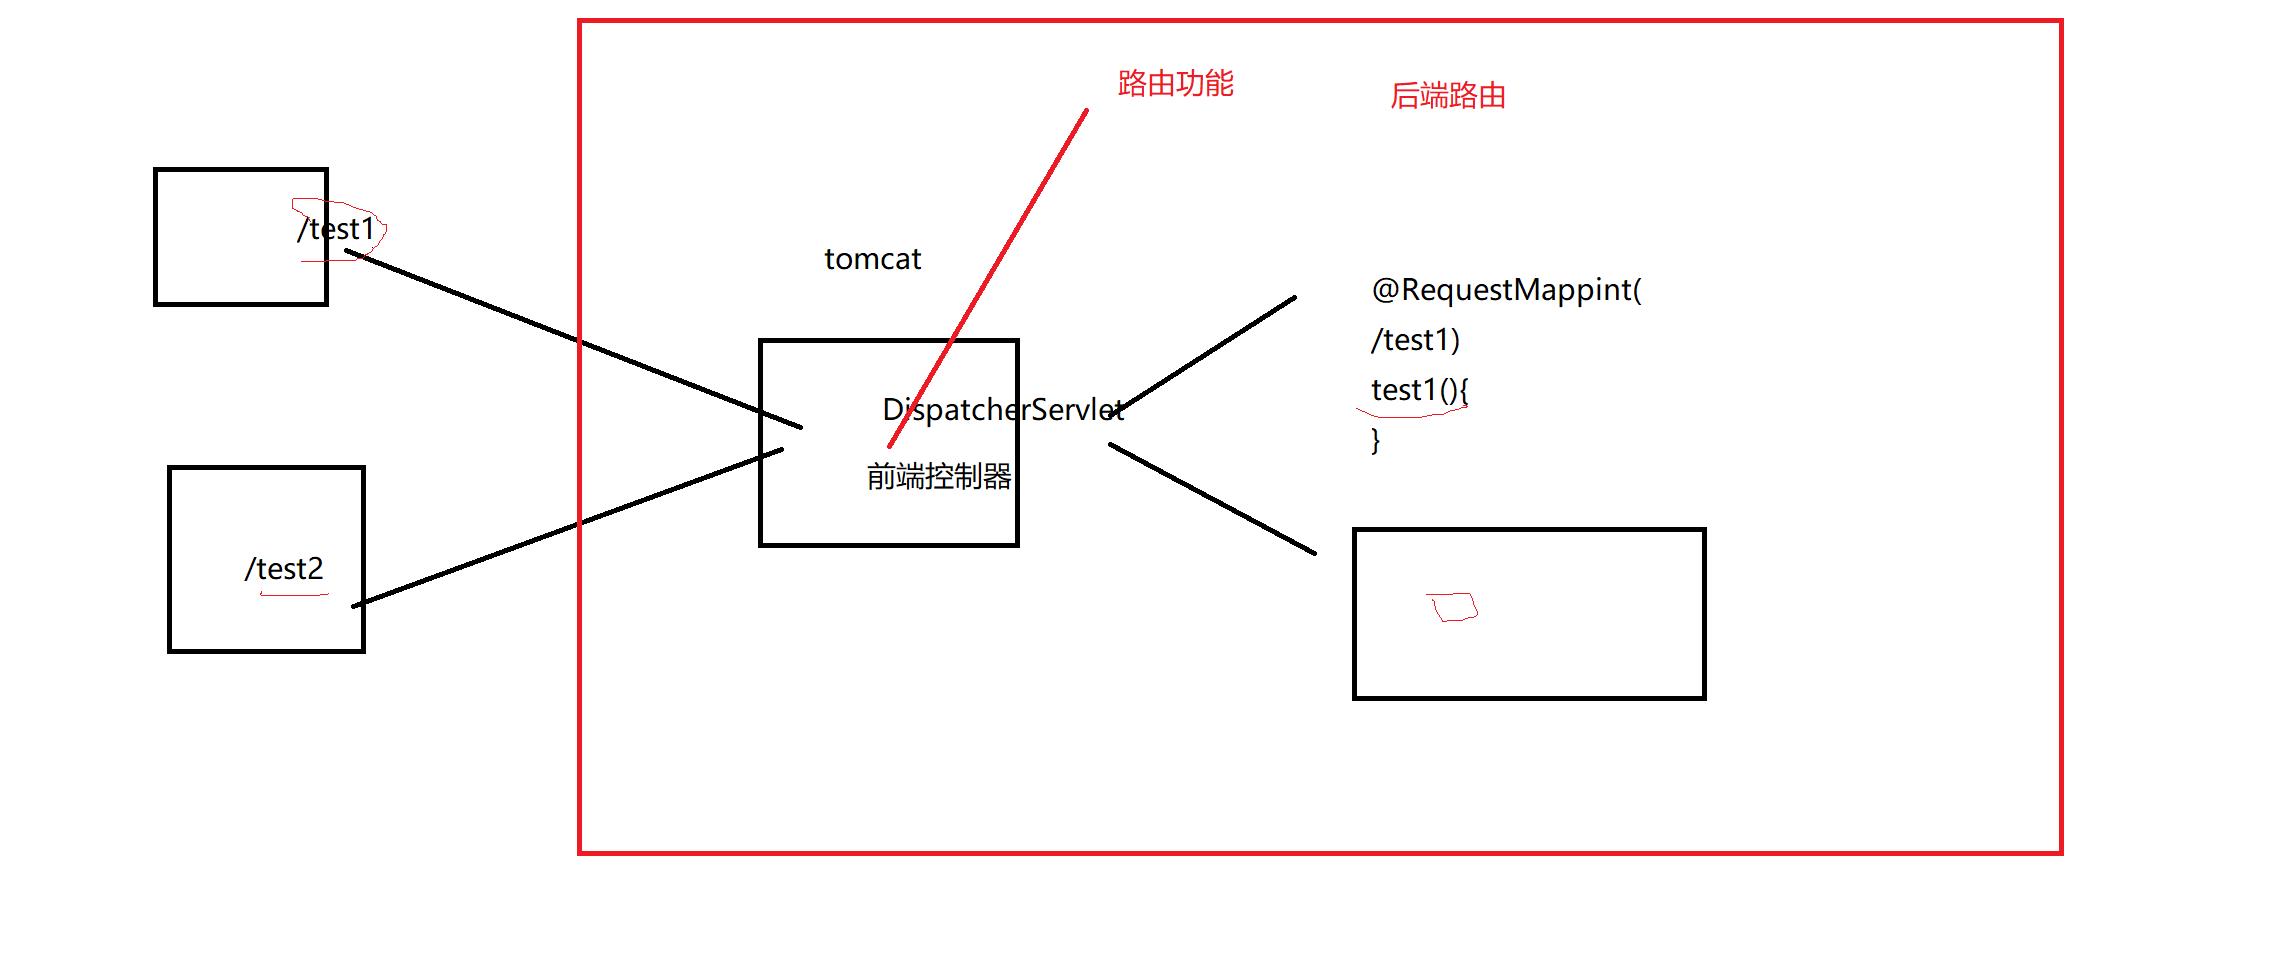
路由:路由器分发网络
vue路由:根据不同的路径响应不同的界面
router:路由管理者 负载分发请求
route:一条路由 包含 路径 组件 名字 (一个路径 +一个界面(组件))
routes:多条路由组成数组

1、引入路由依赖
 <script src="js/vue.js"></script>
    <!-- 必须 在 vue.js 下面-->
    <script src="js/vue-router.min.js"></script>
2、编写路由实例
<!DOCTYPE html>
<html lang="en">
<head>
    <meta charset="UTF-8">
    <title>Title</title>

    <script src="js/vue.js"></script>

<!--    必须在vue.js下面-->
    <script src="js/vue-router.min.js"></script>

</head>
<body>
<div id="app">


    <!--  5 使用路由-->
    <p>
<!--        表示当前路由要跳转哪一个页面-->
        <router-link to="/home">go home</router-link>
        <router-link to="/product">go product</router-link>
    </p>

<!--    用来展示不同路由显示的页面-->
    <router-view>

    </router-view>

</div>
<script>
    var Home =
        template:"<div>Home</div>"


    var Product =
        template:"<div>Product</div>"


    // 2. 一组路由
    var routes = [

            path:"/",//绑定路由首页
            component:Home
        ,


            path:"/home",
            component:Home
        ,

            path:"/product",
            component:Product

    ]

    // 3. VueRouter 管理路由
    var router = new VueRouter(
        routes:routes
    )

    var vm = new Vue(
        el:"#app",
        data:

        ,
        router // 4. 将router 传给 vue 实例
    )
</script>
</body>
</html>
六、网络请求
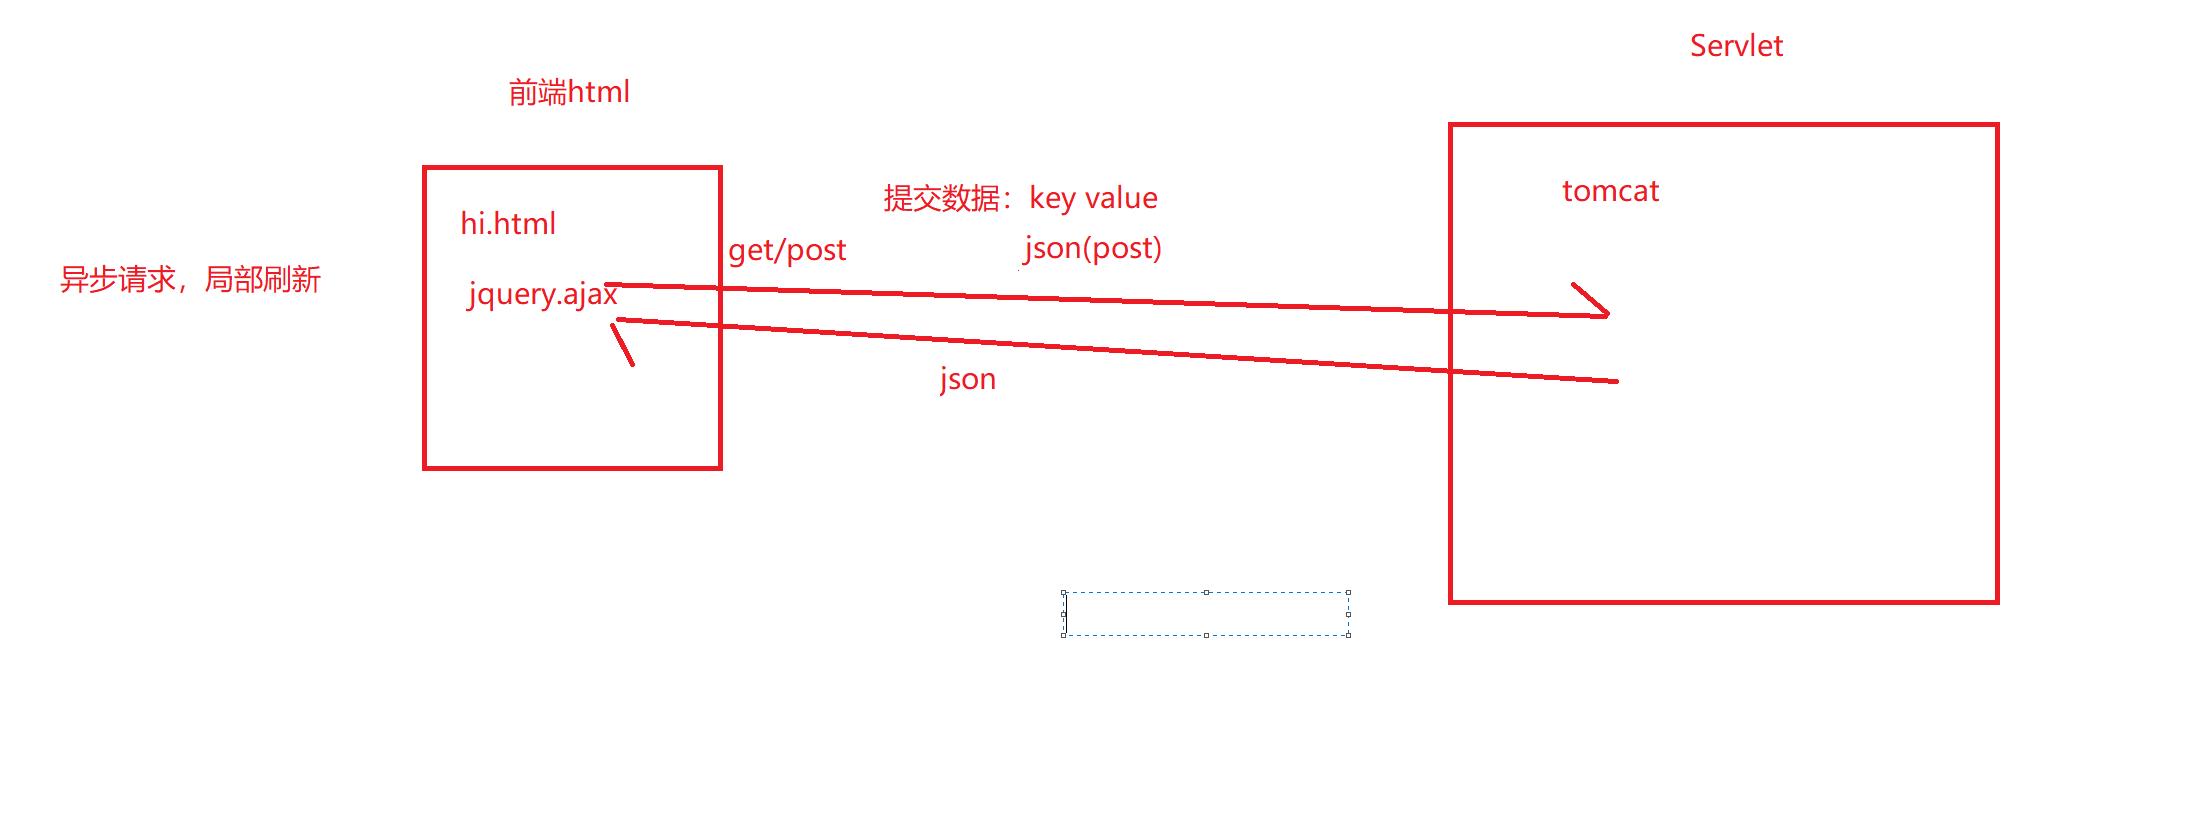
vue 异步请求:
vue-resource:vue 1.0版本默认的请求 方式 ,到2.对vue 进行瘦身
vue-axios(ajax): 当前vue 请求方式
axios 单独的网络请求组件,vue整合到vue
以前异步请求

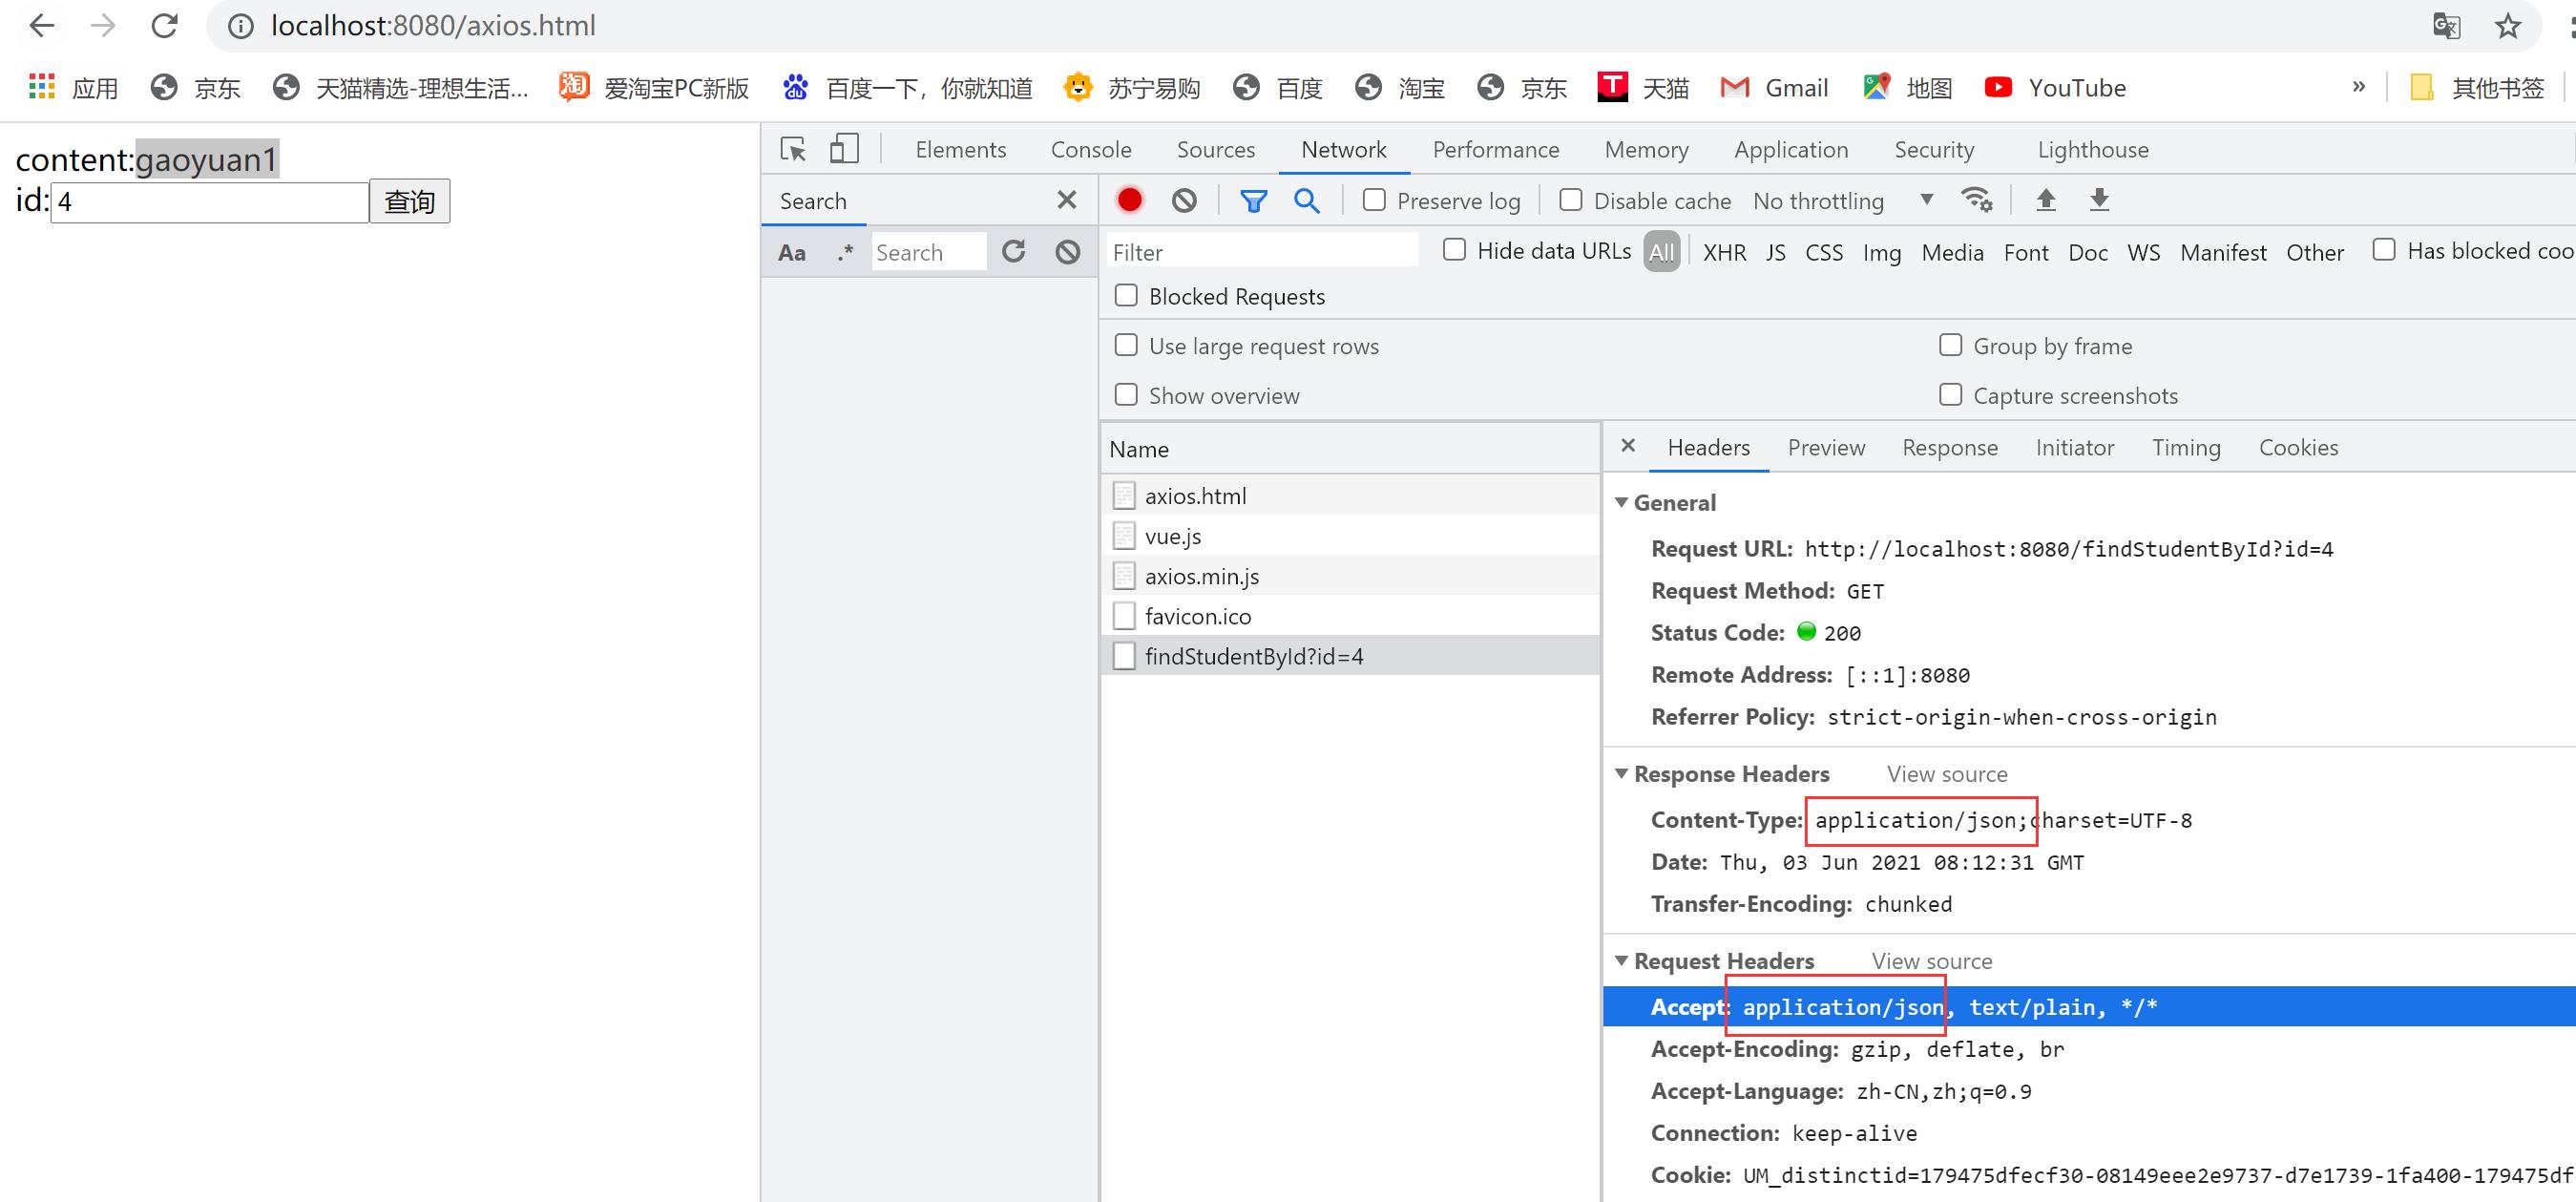
什么是 axios?

<!DOCTYPE html>
<html lang="en">
<head>
    <meta charset="UTF-8">
    <title>Title</title>

    <script src="js/vue.js"></script>

    <!--    必须在vue.js下面-->
    <script src="js/axios.min.js"></script>
</head>
<body>
<div id="app">
    content:content
    <br>
    id:<input type="number" v-model="id"><button @click="getStudentById">查询</button>
</div>

<script>

    var vm = new Vue(
        el:"#app",
        data:
            content:'xxx',
            id:2
        ,
        methods:
            getStudentById:function ()
                alert("即将查询id:" + this.id);
                axios(
                    url:'findStudentById',
                    methods:'get',//设置请求方式,post也可以
                    params:

                        //id:vm.id
                        id:2

                ).then(function (response) //接收返回的数据
                    //response.data------后台返回的数据

                    alert("data" + JSON.stringify(response.data));

                    //this指axios自己,不是当前vm实例
                    //this.content = response.data;
                    vm.content = response.data;
                ).catch(function (error)
                    alert("服务器异常:" + error);
                )

        ,
        mounted()//当页面挂载完成后,初始化数据
            this.getStudentById();

    )

</script>
</body>
</html>
以上是关于Vue的主要内容,如果未能解决你的问题,请参考以下文章