Android实现音乐播放器
Posted staceylee
tags:
篇首语:本文由小常识网(cha138.com)小编为大家整理,主要介绍了Android实现音乐播放器相关的知识,希望对你有一定的参考价值。
Graphical User Interface
本篇文章记录了我实现android简单音乐播放器的过程,(一)中介绍了怎么构建音乐播放器的前端页面。首先大家看一下,界面最后是这样的(界面有点粗陋)
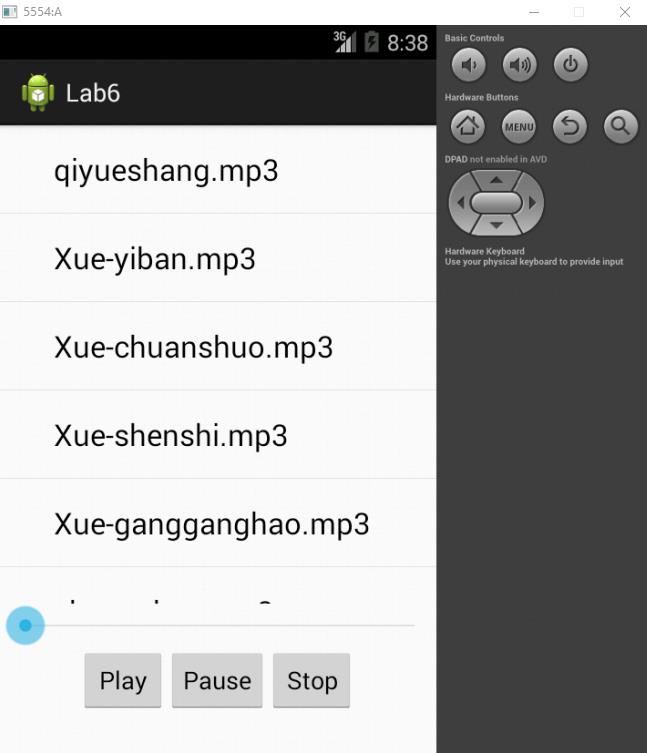
音乐文件列表是从SD卡中读取出来的。
首先我们先在Layout里面创建Music Player的GUI,diagram如下图所示:
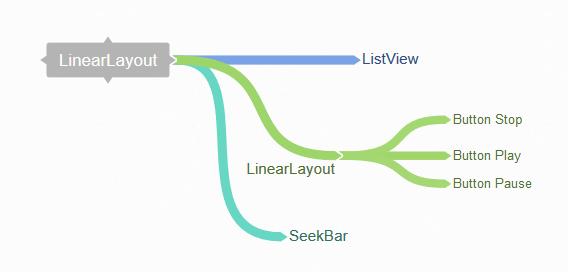
根据diagram我们在activity_main.xml写出如下代码:
<LinearLayout xmlns:android="http://schemas.android.com/apk/res/android"
    xmlns:tools="http://schemas.android.com/tools"
    android:id="@+id/container"
    android:layout_width="match_parent"
    android:layout_height="match_parent"
    android:orientation="vertical"
    tools:context="com.example.lab5.MainActivity"
    tools:ignore="MergeRootFrame" >

    <ListView
        android:id="@+id/listView"
        android:layout_width="fill_parent"
        android:layout_height="350dp" >
    </ListView>

    <SeekBar
        android:id="@+id/seekbar"
        android:layout_width="fill_parent"
        android:layout_height="wrap_content" />

    <LinearLayout
        android:layout_width="fill_parent"
        android:layout_height="wrap_content"
        android:orientation="horizontal"
        android:gravity="center_horizontal" >

        <Button
            android:id="@+id/play"
            android:layout_width="wrap_content"
            android:layout_height="wrap_content"
            android:text="Play" />

        <Button
            android:id="@+id/pause"
            android:layout_width="wrap_content"
            android:layout_height="wrap_content"
            android:text="Pause" />

        <Button
            android:id="@+id/stop"
            android:layout_width="wrap_content"
            android:layout_height="wrap_content"
            android:text="Stop" />
    </LinearLayout>

</LinearLayout>
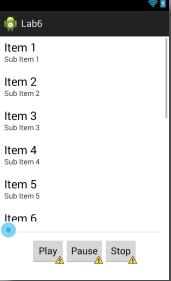
如果你写好了XML,大致布局就是这样子的啦。接下来我们要做的工作就是读取SD卡里面的内容,第一步,先push音乐文件到虚拟机的SD卡里面。
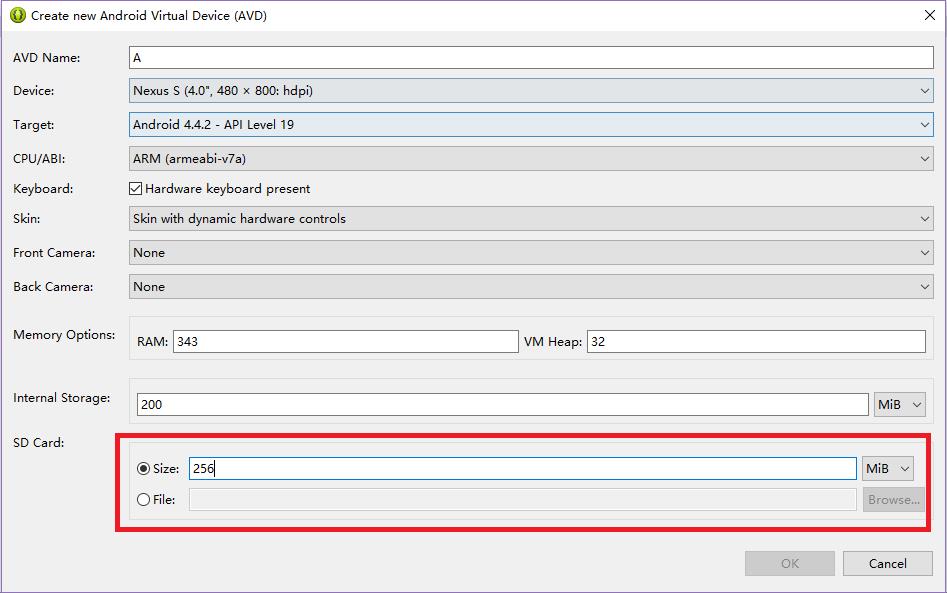
重要的事情提前说:在create AVD的时候一定记得要分配SDCard Size!!
1、配置ADB环境&&push音乐文件
找到adb.exe的路径,你可以在桌面右键eclipse,然后找到“打开文件所在位置”,adb就在sdk\\platform-tools里,把路径复制出来。桌面-我的电脑-右键-属性-高级系统设置-环境变量-用户变量-path
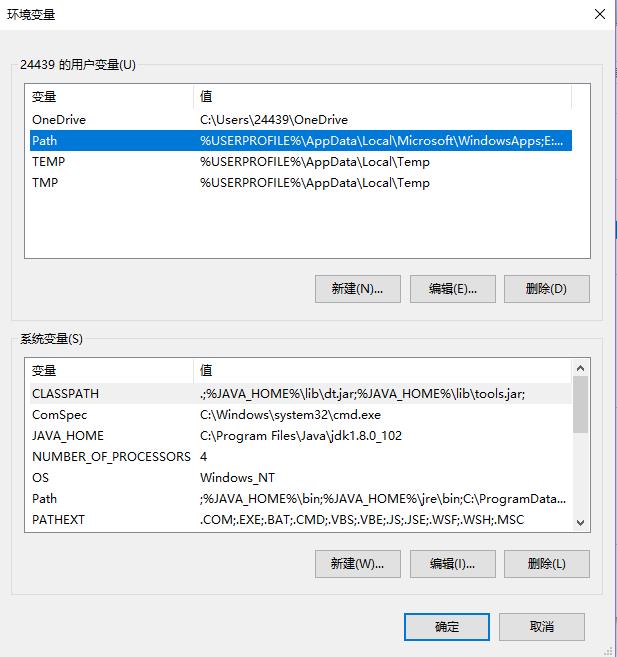
点击编辑,在path后面+“;”+adb路径,记得加分号和前面区分开,点击确定,一直确定下来就好了,这里说的是win10的配置方式,其他操作系统参考百度经验。接下来我们就可以用命令行的方式push音乐带SDCard了。
WIN+R打开运行,输入cmd打开命令行窗口,我们先进入虚拟机的SDCard里面看一下,前提必须是有SDcard读写的权限,敲入adb shell,enter后敲入“# mount -o remount rw /”enter后,敲入exit退出就可以了,然后再次打开命令窗口,依次
输入adb shell-cd mnt-cd sdcard-ls,查看sdcard里面的内容。
cd: call director;
ls: list director contents;
mkdir:make a new directory;
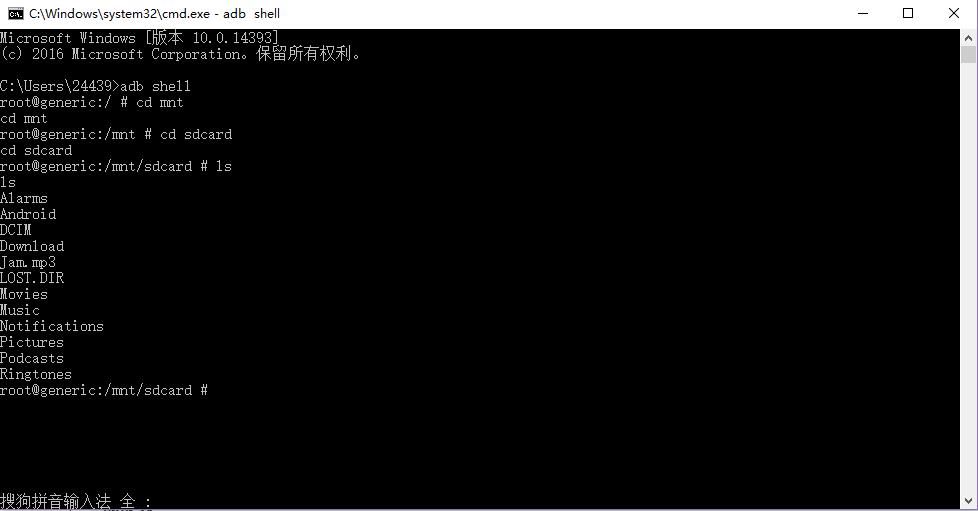
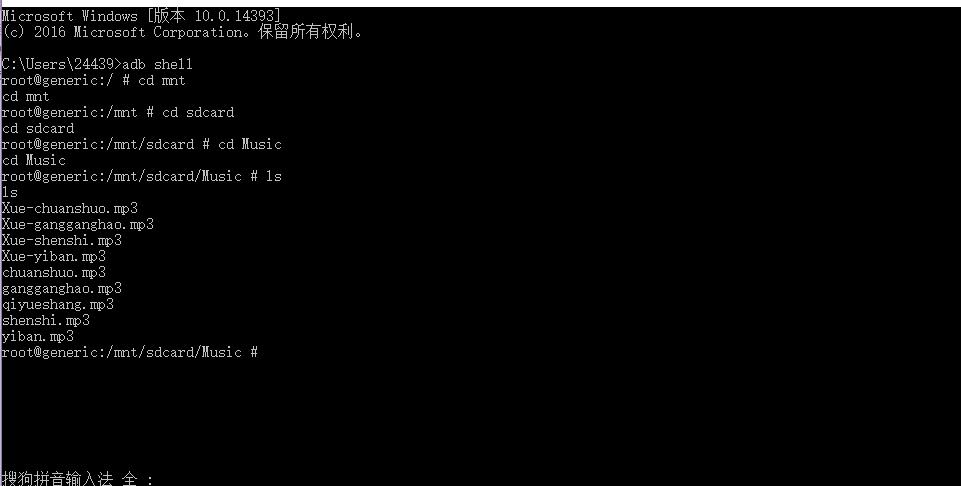
我们可以看到SDcard文件夹下有很多子文件夹,系统默认建好的,我们看到一个Music文件夹,我们把音乐放到这里面就行了,你也可以用命令mkdir+文件名,在SDCard下新建一个子文件夹。然后退出命令窗口。开始push了,鸡冻不!首先还是adb shell,enter后输入 adb push C:\\CloudMusic\\chuanshuo.mp3 /mnt/sdcard/Music/ 回车后看到出现上传的速度就代表成功了。前面是我的音乐文件所在的位置,空格后是要复制到的AVD的位置。都上传完毕后可以用上面查看sdcard的方式查看Music文件夹列表。
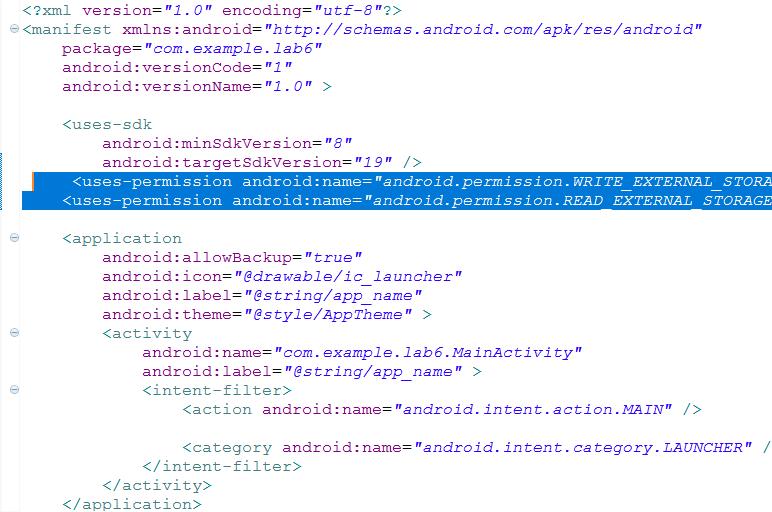
2、好了,现在sdcard里面已经有音乐文件了,接下来我们在 AndroidManifest清单文件中,加上读写sdcard的xml代码:
<uses-permission android:name="android.permission.WRITE_EXTERNAL_STORAGE"/>
<uses-permission android:name="android.permission.READ_EXTERNAL_STORAGE"/>
3、MainActivity中的代码
public class MainActivity extends Activity {
    ArrayList<String> files = new ArrayList<String>();// 存歌曲名字的数组
    ListView lv;// 定义一个listview并且和布局里面的listview联系起来

    @Override
    protected void onCreate(Bundle savedInstanceState) {
        super.onCreate(savedInstanceState);
        setContentView(R.layout.activity_main);

        lv = (ListView) findViewById(R.id.listView);
        /* 用于ListView的适配器 */
        ArrayAdapter<String> adapter = new ArrayAdapter<String>(this,
                android.R.layout.simple_expandable_list_item_1, getData());
        /* 将ArrayAdapter添加到ListView对象中 */
        lv.setAdapter(adapter);

    }

    private ArrayList<String> getData() {
        File sdcardDir = new File("mnt/sdcard/Music");
        File[] mp3s = sdcardDir.listFiles();
        if (mp3s == null || mp3s.length == 0) {
            Toast.makeText(getApplicationContext(), "no file",
                    Toast.LENGTH_LONG).show();
        } else {
            for (int i = 0; i < mp3s.length; i++) {
                files.add(mp3s[i].getName());
            }
        }

        return files;

    }

}
4、运行下就OK了。
以上是关于Android实现音乐播放器的主要内容,如果未能解决你的问题,请参考以下文章