目标检测YOLOv5分离检测和识别
Posted zstar-_
tags:
篇首语:本文由小常识网(cha138.com)小编为大家整理,主要介绍了目标检测YOLOv5分离检测和识别相关的知识,希望对你有一定的参考价值。
前言
YOLO作为单阶段检测方法,可以直接端到端的输出目标对象位置和类别,而在一些大型无人机遥感等目标检测任务中,使用单阶段检测往往会产生类别预测错误的问题。
正好,YOLOv5-6.2版本提供了一个图像分类的网络,那么就可以借此将YOLOv5进行改造,分离检测和识别的过程。
一阶段识别目标,并将目标框裁剪出来得到图片,然后输入到图像分类网络进行筛选,最后进行显示。
编码规则设定
这个思路的核心是设定一套编码规则,来让两阶段能够平滑地进行过渡。
我的思路是将一个裁剪出的对象直接通过文件名来和对应的label标签进行绑定,具体规则如下:
以下面这幅图片命名为例:
DJI_0001_03700__0.367188__0.738889__0.009375__0.025926.jpg
- DJI_0001_03700:原始图片名
- 0.367188:目标框水平中心x
- 0.738889:目标框水平中心y
- 0.009375:目标框宽度w
- 0.025926:目标狂高度h
注:上述四值均为百分比数据,取值0-1
想要实现这个操作,就要修改detect.py中的这个部分:
 if save_crop:
     save_one_box(xyxy, imc, file=save_dir / 'crops' / names[c] / f'p.stem.jpg', BGR=True, xywh=xywh)
save_one_box位于utils/general.py,修改如下:
def save_one_box(xyxy, im, file='image.jpg', gain=1.02, pad=10, square=False, BGR=False, save=True, xywh=[0, 0 ,0 ,0]):
    # Save image crop as file with crop size multiple gain and pad pixels. Save and/or return crop
    xyxy = torch.tensor(xyxy).view(-1, 4)
    b = xyxy2xywh(xyxy)  # boxes
    if square:
        b[:, 2:] = b[:, 2:].max(1)[0].unsqueeze(1)  # attempt rectangle to square
    b[:, 2:] = b[:, 2:] * gain + pad  # box wh * gain + pad
    xyxy = xywh2xyxy(b).long()
    clip_coords(xyxy, im.shape)
    crop = im[int(xyxy[0, 1]):int(xyxy[0, 3]), int(xyxy[0, 0]):int(xyxy[0, 2]), ::(1 if BGR else -1)]
    if save:
        # print(xywh)  # [0.952343761920929, 0.5180555582046509, 0.04843749850988388, 0.03611111268401146]
        x = '%.6f' % xywh[0]
        y = '%.6f' % xywh[1]
        w = '%.6f' % xywh[2]
        h = '%.6f' % xywh[3]
        save_path = str(increment_crop_path(file, mkdir=True).with_suffix('.jpg'))
        save_path = save_path.split('.')[0] + '__' + str(x) + '__' + str(y) + '__' + str(w) + '__' + str(h) + '.jpg'
        cv2.imwrite(save_path, crop)
    return crop
数据准备和检测
首先和通常一样训练一样,准备数据集,训练好模型。
然后运行detect.py,注意save-crop参数设为True,检测完之后,可以得到输出结果:
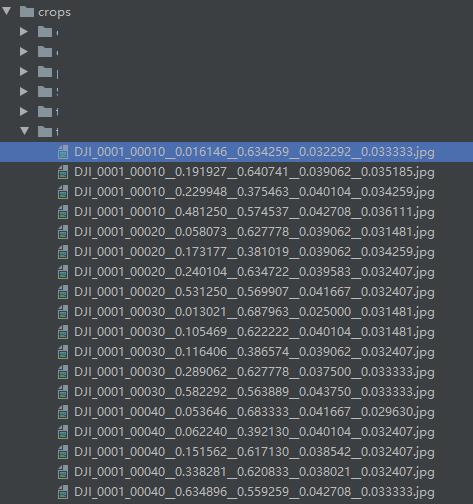
数据分类
下面进入到二阶段的图像分类的训练,在开始之前,需要拉取YOLOv5仓库的最新版本,注意不要拉取Tag6.2版本,该版本在图像分类识别中仅支持单文件识别,而最新版本已经支持文件夹的批量识别。
然后需要人工对数据进行一个校正,因为单阶段输出的很多类别是存在错误的,需要手工处理,将其划分到正确的文件夹,同时对一些虚检的对象进行剔除。这一步可能比较费劲,特别是处理小物体时,有时候比较难判断。
然后, 需要对数据进行一个划分,可以通过手动或程序的方式划分成train和test,结构如下图所示(图中数据类别做了脱敏处理):
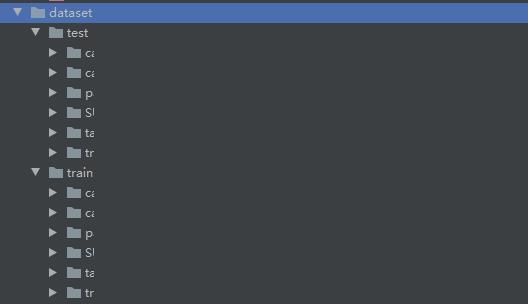
准备好数据之后,运行classify/train.py:
注意这里图片尺寸的设置可以设置为图片的长边尺寸
训练完之后,得到模型,然后将所有数据放到同一个文件夹里进行检测,即抛弃各种类别,混到同一个文件夹。
然后运行classify/predict.py进行识别,识别完成的结果如下:
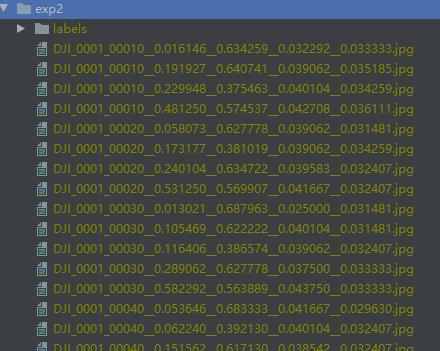
这里每一张图片会对应一个label,label中包含了最大5个类别的概率和名称。
格式转换与可视化
下面就需要把识别出来的结果转回到YOLO检测格式。
编写脚本cls2corp.py
# -- coding: utf-8 --
"""
@Time:2022-11-03 11:36
@Author:zstar
@File:cls2corp.py
@Describe:将yolov5分类结果转换为crop文件夹
"""
import os
from pathlib import Path
import shutil
from tqdm import tqdm

classes = ['class1', 'class2', 'class3']  # 这里修改为自己的类别
cls_path = 'runs/predict-cls/exp2'
labels_path = Path('cls_result')
value_threshold = 0.5  # 阈值,概率大于该阈值才会进行显示

if __name__ == '__main__':
    if labels_path.exists():
        shutil.rmtree(labels_path)
    os.mkdir(labels_path)
    for i in classes:
        dir = labels_path.joinpath(i)
        if dir.exists():
            shutil.rmtree(dir)
        os.mkdir(dir)
    for img in tqdm(os.listdir(cls_path)):
        suffix = img[-4:]
        if suffix == ".jpg" or suffix == ".png":
            img_name = img[:-4]
            for label in os.listdir(Path(f"cls_path/'labels'")):
                label_name = label[:-4]
                if img_name == label_name:
                    with open(f"cls_path/'labels'/label", 'r', encoding='utf-8') as f:
                        lines = f.readline()
                        value = lines.split(" ")[0]
                        cls = lines.split(" ")[1].strip()
                    break
            if float(value) >= value_threshold:
                shutil.copy(Path(f"cls_path/img"), Path(f"labels_path/cls"))
这里设定一个阈值value_threshold,主要考虑到虚检情况,对于一些模糊或者没有对象的图片,它的每一个类别概率都不超过0.5,此时就把这个对象给抛弃。
运行完之后,可以在cls_result中得到每个类别的对应图片,这里取概率值最大的图片作为一个对象的识别类别。
然后要把这个文件夹的内容还原成labels,编写脚本crop_merge.py
# -- coding: utf-8 --
"""
@Time:2022-10-15 9:36
@Author:zstar
@File:crop_merge.py
@Describe:将cls_result文件夹图片根据类别融合成labels
"""

import os
from pathlib import Path
import shutil
from tqdm import tqdm

classes = ['class1', 'class2', 'class3']  # 这里修改为自己的类别
crops_path = 'cls_result'
labels_path = Path('cls_labels')

if __name__ == '__main__':
    # 由于后续是追加写入txt,因此先要删除labels,再进行创建
    if labels_path.exists():
        shutil.rmtree(labels_path)
    os.mkdir(labels_path)
    for dir_class in tqdm(os.listdir(crops_path)):
        index = classes.index(dir_class)  # 根据类别顺序分配0-5
        for img in os.listdir(Path(f"crops_path/dir_class")):
            img = img[:-4]  # 去除文件名后缀
            parts = img.split('__')
            img_name = parts[0]
            x = float(parts[1])
            y = float(parts[2])
            w = float(parts[3])
            h = float(parts[4])
            line = (index, x, y, w, h)
            with open('cls_labels' + '/' + img_name + '.txt', mode='a') as f:
                f.write(('%g ' * len(line)).rstrip() % line + '\\n')
运行完后,得到如下结果:
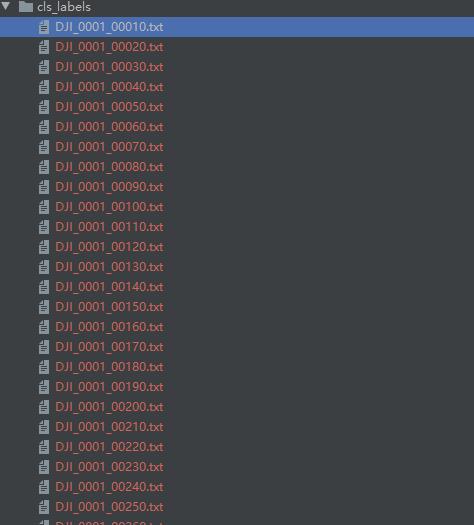
最后就是把生成的labels在原图上标记出来,编写可视化脚本visualize.py
# -- coding: utf-8 --
"""
@Time:2022-10-15 10:30
@Author:zstar
@File:visualize.py
@Describe:将生成的labels添加到图片中可视化,输出visualize_output
"""

import os
import shutil
from pathlib import Path
import numpy as np
import cv2
from tqdm import tqdm

# 修改输入图片文件夹
img_folder = "D:/Desktop/Work/XDUAV-dataset/images/"
img_list = os.listdir(img_folder)
img_list.sort()
# 修改输入标签文件夹
label_folder = "cls_labels/"
label_list = os.listdir(label_folder)
label_list.sort()
# 输出图片文件夹位置
path = os.getcwd()
output_folder = path + '/' + str("visualize_output")

labels = ['class1', 'class2', 'class3']  # 这里修改为自己的类别
colormap = [(0, 255, 0), (132, 112, 255), (255, 255, 255)]  # 色盘,可根据类别添加新颜色


# 坐标转换
def xywh2xyxy(x, w1, h1, img):
    label, x, y, w, h = x
    label = int(label)
    # print("原图宽高:\\nw1=\\nh1=".format(w1, h1))
    # 边界框反归一化
    x_t = x * w1
    y_t = y * h1
    w_t = w * w1
    h_t = h * h1
    # print("反归一化后输出:\\n第一个:\\t第二个:\\t第三个:\\t第四个:\\t\\n\\n".format(x_t, y_t, w_t, h_t))
    # 计算坐标
    top_left_x = x_t - w_t / 2
    top_left_y = y_t - h_t / 2
    bottom_right_x = x_t + w_t / 2
    bottom_right_y = y_t + h_t / 2
    # print('标签:'.format(labels[int(label)]))
    # print("左上x坐标:".format(top_left_x))
    # print("左上y坐标:".format(top_left_y))
    # print("右下x坐标:".format(bottom_right_x))
    # print("右下y坐标:".format(bottom_right_y))
    p1, p2 = (int(top_left_x), int(top_left_y)), (int(bottom_right_x), int(bottom_right_y))
    # 绘制矩形框
    cv2.rectangle(img, p1, p2, colormap[1], thickness=2, lineType=cv2.LINE_AA)
    label = labels[label]
    if label:
        w, h = cv2.getTextSize(label, 0, fontScale=2 / 3, thickness=2)[0]  # text width, height
        outside = p1[1] - h - 3 >= 0  # label fits outside box
        p2 = p1[0] + w, p1[1] - h - 3 if outside else p1[1] + h + 3
        # 绘制矩形框填充
        cv2.rectangle(img, p1, p2, colormap[1], -1, cv2.LINE_AA)
        # 绘制标签
        cv2.putText(img, label, (p1[0], p1[1] - 2 if outside else p1[1] + h + 2), 0, 2 / 3, colormap[2],
                    thickness=2, lineType=cv2.LINE_AA)
    """
    # (可选)给不同目标绘制不同的颜色框
    if int(label) == 0:
       cv2.rectangle(img, (int(top_left_x), int(top_left_y)), (int(bottom_right_x), int(bottom_right_y)), (0, 255, 0), 2)
    elif int(label) == 1:
       cv2.rectangle(img, (int(top_left_x), int(top_left_y)), (int(bottom_right_x), int(bottom_right_y)), (255, 0, 0), 2)
    """
    return img


if __name__ == '__main__':
    # 创建输出文件夹
    if Path(output_folder).exists():
        shutil.rmtree(output_folder)
    os.mkdir(output_folder)
    # labels和images可能存在不相等的情况,需要额外判断对应关系
    img_index = 0
    label_index = 0
    for _ in tqdm(range(len(label_list))):
        image_path = img_folder + "/" + img_list[img_index]
        label_path = label_folder + "/" + label_list[label_index]
        if img_list[img_index][:-4] != label_list[label_index][:-4]:
            img_index += 1
            continue
        # 读取图像文件
        img = cv2.imread(str(image_path))
        h, w = img.shape[:2]
        # 读取 labels
        with open(label_path, 'r') as f:
            lb = np.array([x.split() for x in f.read().strip().splitlines()], dtype=np.float32)
        # 绘制每一个目标
        for x in lb:
            # 反归一化并得到左上和右下坐标,画出矩形框
            img = xywh2xyxy(x, w, h, img)
        """
        # 直接查看生成结果图
        cv2.imshow('show', img)
        cv2.waitKey(0)
        """
        cv2.imwrite(output_folder + '/' + '.png'.format(image_path.split('/')[-1][:-4]), img)
        img_index += 1
        label_index += 1
在visualize_output文件夹下,得到最终效果。
总结
使用二阶段目标检测带来的明显好处是:
- 类别划分更加精准
- 对于虚检目标可以有效剔除
不过存在的问题是:
- 目标尺寸变化范围大时,很难确定输入图片的合适大小
- 对于图像边缘目标,容易造成误判
附录:YOLOv5s和YOLOv5s6区别
在模型训练过程中,我注意到官方提供了新的预训练模型yolov5s6,那么这个预训练模型和yolov5s有什么区别呢?有些博文说yolov5s6是在更大的图像尺寸(1280x1280)得到的,不过这比较片面。
使用python export.py --weight yolov5s.pt --include onnx将其转换成onnx格式后,可以用Netron打开查看其结构:
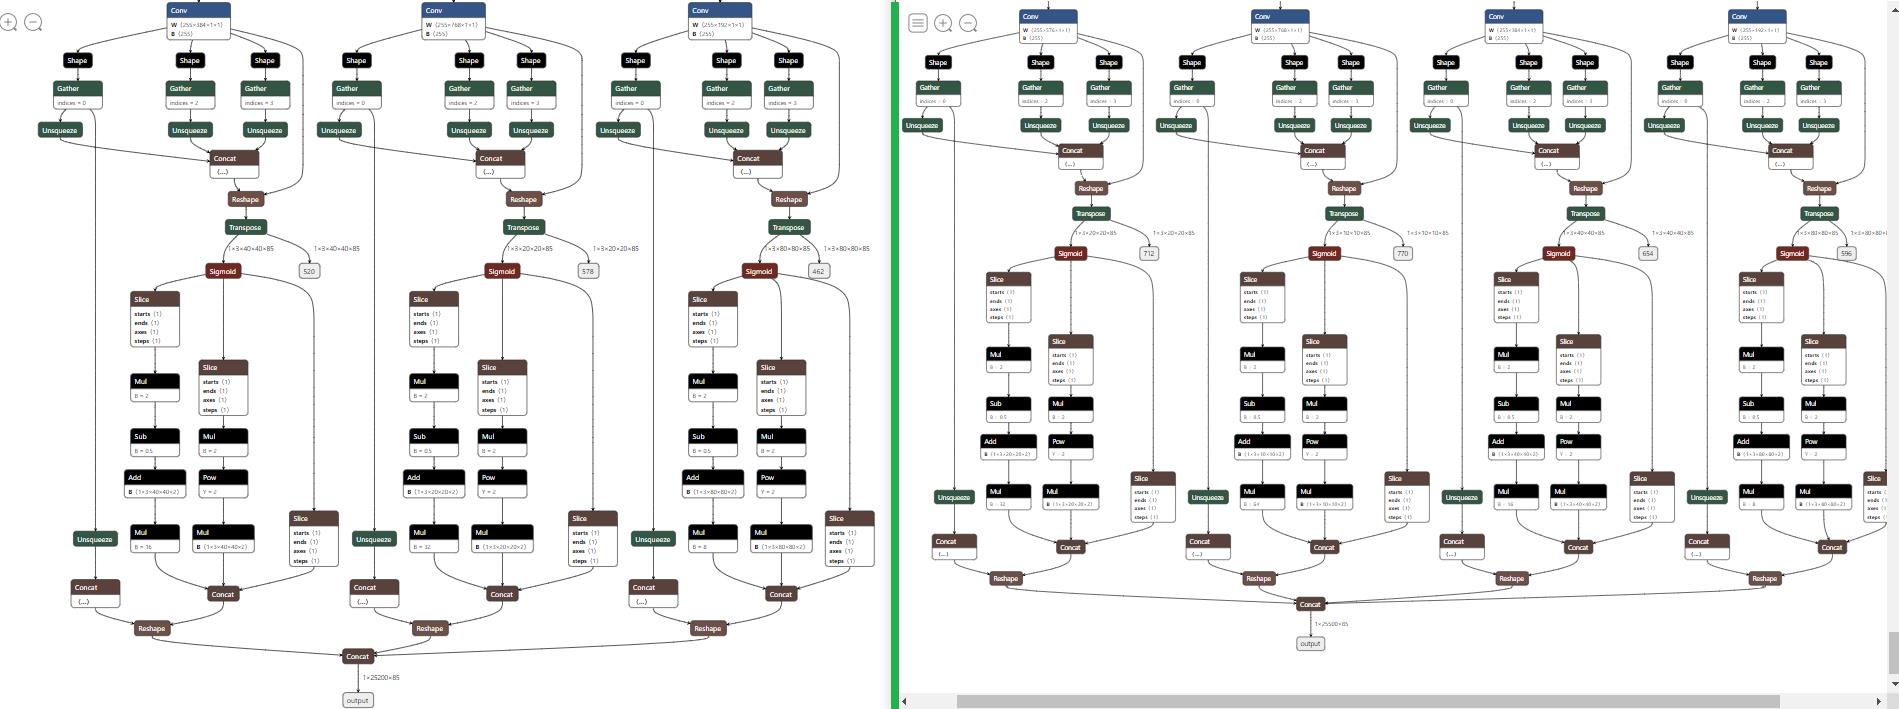
可以看到,yolov5s6在模型最后的输出部分新增了一个检测头,当然上面也有一些小改动,不过改动不大。
在model/hub/yolov5s6.yaml中,对应了yolov5s6的模型,那么,如果用yolov5s.yaml来加载yolov5s6也是可行的。
在train.py中,这两行代码加载了预训练模型:
model.load_state_dict(csd, strict=False)  # load
LOGGER.info(f'Transferred len(csd)/len(model.state_dict()) items from weights')  # report
注意这里的strict=False表示模型如果和预训练模型不匹配,会加载能够匹配上的层权,下面的这个日志打印出了具体有多少匹配上的内容。
因此,模型构建还是由yaml文件来决定的,下面我又做了个小测试,用yolov5.yaml分别来加载yolov5s.pt和yolov5s6.pt,两者得到的best.pt大小存在略微差异,而转换成onnx之后,两者大小一致,印证了结论的正确性。
以上是关于目标检测YOLOv5分离检测和识别的主要内容,如果未能解决你的问题,请参考以下文章
Python+Yolov5跌倒检测 摔倒检测 人物目标行为 人体特征识别