OpenGL入门06.绘制模型
Posted stq_wyy
tags:
篇首语:本文由小常识网(cha138.com)小编为大家整理,主要介绍了OpenGL入门06.绘制模型相关的知识,希望对你有一定的参考价值。
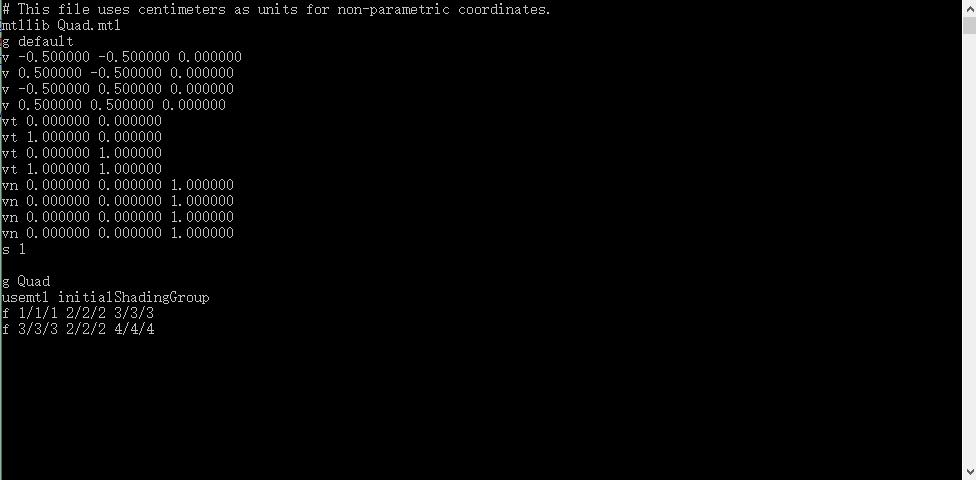
这篇文章来记录一下在OpenGL中是如何绘制模型的,首先我们准备几个模型 ,obj的文件使用txt打开之后信息如下:

我们仅需要v,vt,vn,以及f开头的数据,v代表vertex,vt代表vertextexcoord,vn代表vertexnormal。首先我们将工程中的光源和材质设置全都注释掉。添加objmodel.cpp和objmodel.h以及vertexdata.cpp和vertexdata.h文件。
objmodel.h:
#pragma once
#include "vertexdata.h"

class ObjModel

public:
	VertexData* mVertexes;
	int* mIndices;
	int mIndexCount;
	void Init(const char* ObjModel);
	void Draw();
;
objmodel.cpp:
#include "objmodel.h"
#include "Utils.h"
#include <string>
#include <sstream>
#include <vector>

void ObjModel::Init(const char* ObjModel)

	struct FloatData

		float v[3];
	;

	struct VerticeDefine

		int posIndex;
		int texcoordIndex;
		int normalIndex;
	;

	std::vector<FloatData> positions, texcoords, normals;
	std::vector<VerticeDefine> vertexes;
	std::vector<int> indexes;

	unsigned char* filecontent = LoadFileContent(ObjModel);
	std::stringstream ssFileContent((char*)filecontent);
	std::string temp;
	char szOneLine[256];
	while (!ssFileContent.eof())

		memset(szOneLine, 0, 256);
		ssFileContent.getline(szOneLine, 256);
		if (strlen(szOneLine) > 0)

			if (szOneLine[0] == 'v')

				std::stringstream ssOneLine(szOneLine);

				if (szOneLine[1] == 't')

					//纹理坐标
					ssOneLine >> temp;
					FloatData floatData;
					ssOneLine >> floatData.v[0];
					ssOneLine >> floatData.v[1];
					texcoords.push_back(floatData);

				else if (szOneLine[1] == 'n')

					//法线
					ssOneLine >> temp;
					FloatData floatData;
					ssOneLine >> floatData.v[0];
					ssOneLine >> floatData.v[1];
					ssOneLine >> floatData.v[2];
					normals.push_back(floatData);

				else

					//坐标点
					ssOneLine >> temp;
					FloatData floatData;
					ssOneLine >> floatData.v[0];
					ssOneLine >> floatData.v[1];
					ssOneLine >> floatData.v[2];
					positions.push_back(floatData);


			else if (szOneLine[0] == 'f')

				std::stringstream ssOneLine(szOneLine);
				ssOneLine >> temp;
				std::string vertexStr;
				for (int i = 0; i < 3; i++)

					ssOneLine >> vertexStr;
					size_t pos = vertexStr.find_first_of('/');
					std::string posIndexStr = vertexStr.substr(0, pos);
					size_t pos2 = vertexStr.find_first_of('/', pos + 1);
					std::string texcoordIndeStr = vertexStr.substr(pos + 1, pos2 - 1 - pos);
					std::string normalIndexStr = vertexStr.substr(pos2 + 1, vertexStr.length() - 1 - pos2);
					VerticeDefine vd;
					vd.posIndex = atoi(posIndexStr.c_str());
					vd.texcoordIndex = atoi(texcoordIndeStr.c_str());
					vd.normalIndex = atoi(normalIndexStr.c_str());
					//去重
					int nCurrentVertexIndex = -1;
					int nCurrentVertexCount = (int)vertexes.size();
					for (int j = 0; j < nCurrentVertexCount; ++j)

						if (vertexes[j].posIndex == vd.posIndex && vertexes[j].normalIndex == vd.normalIndex && vertexes[j].texcoordIndex == vd.texcoordIndex)

							nCurrentVertexIndex = j;
							break;


					if (nCurrentVertexIndex == -1)

						nCurrentVertexIndex = (int)vertexes.size();
						vertexes.push_back(vd);

					indexes.push_back(nCurrentVertexIndex);


	mIndexCount = (int)indexes.size();
	mIndices = new int[mIndexCount];

	for (int i = 0; i < mIndexCount; ++i)

		mIndices[i] = indexes[i];


	int vertexCount = (int)vertexes.size();
	mVertexes = new VertexData[vertexCount];

	for (int i = 0; i < vertexCount; ++i)

		memcpy(mVertexes[i].position, positions[vertexes[i].posIndex - 1].v, sizeof(float) * 3);
		memcpy(mVertexes[i].texcoord, texcoords[vertexes[i].texcoordIndex - 1].v, sizeof(float) * 2);
		memcpy(mVertexes[i].normal, normals[vertexes[i].normalIndex - 1].v, sizeof(float) * 3);

	delete filecontent;


void ObjModel::Draw()

	//关闭背面渲染,提高效率
	glEnable(GL_CULL_FACE);

	//glPolygonMode(GL_FRONT, GL_LINE);
	glPopMatrix();
	glTranslatef(0.0f, 0.0f, -3.0f);
	glRotatef(30.0f, 0.0f, 1.0f, 0.0f);
	glBegin(GL_TRIANGLES);

	for (int i = 0; i < mIndexCount; ++i)

		glTexCoord2fv(mVertexes[mIndices[i]].texcoord);
		glNormal3fv(mVertexes[mIndices[i]].normal);
		glVertex3fv(mVertexes[mIndices[i]].position);

	glEnd();
	glPopMatrix();
objmodel.cpp中,我们在Init函数中取到上边所讲到的v,vt,vn以及f开头的数据并保存下来,在Draw()函数中去绘制模型。
vertexdata.h:
#include <windows.h>
#include <gl/GL.h>

class VertexData

public:
	float position[3];
	float texcoord[2];
	float normal[3];
;
vertexdata.cpp里没有代码。接下来我们在main.cpp里声明ObjModel:
ObjModel model;
model.Init("res/Sphere.obj");
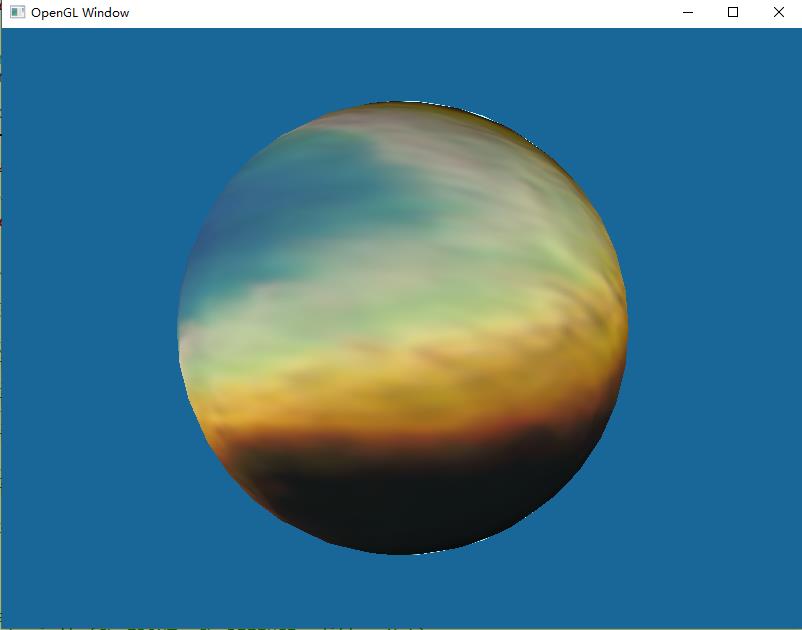
然后调用model.Draw();方法绘制模型,为了让模型好看一些,上篇文章的设置贴图的代码我们保留了,最终效果:

太挫了,不过能看出来是绘制了一个模型出来,接下来再慢慢优化它的显示效果吧
以上是关于OpenGL入门06.绘制模型的主要内容,如果未能解决你的问题,请参考以下文章