k8s二containerd的安装
Posted 攻城狮白玉
tags:
篇首语:本文由小常识网(cha138.com)小编为大家整理,主要介绍了k8s二containerd的安装相关的知识,希望对你有一定的参考价值。
目录
前言
上一篇文章,我们介绍了虚拟机的基础环境以及基础的网络配置,还有一些k8s节点要用到基础环境配置。本文将带领大家把containerd给安装了
containerd的项目官方地址
https://github.com/containerd/containerd
containerd的发布版本地址如下
https://github.com/containerd/containerd/releases
本次教程我们安装的是containerd-1.6.6版本
安装containerd
解压安装
首先下载压缩包
curl -LO https://github.com/containerd/containerd/releases/download/v1.6.6/containerd-1.6.6-linux-amd64.tar.gz解压到/usr/local目录下
tar Cxzvf /usr/local containerd-1.6.6-linux-amd64.tar.gz解压完成后,执行ctr -v 或者ctr version便可查看版本


配置成systemd任务
mkdir -p /usr/local/lib/systemd/system/ && \\
curl -L https://raw.githubusercontent.com/containerd/containerd/main/containerd.service -o /usr/local/lib/systemd/system/containerd.service && \\
systemctl daemon-reload && \\
systemctl enable --now containerd
安装runc
runc是容器运行时
runc实现了容器的init,run,create,ps...我们在运行容器所需要的cmd
curl -LO https://github.com/opencontainers/runc/releases/download/v1.1.1/runc.amd64 && \\
install -m 755 runc.amd64 /usr/local/sbin/runc
安装cni
CNI(Container Network Interface) 是一套容器网络接口规范,通过插件的形式支持各种各样的网络类型,而标准化的好处就是你只需一套标准json配置就可以为一个容器创建网络接口。
curl -JLO https://github.com/containernetworking/plugins/releases/download/v1.1.1/cni-plugins-linux-amd64-v1.1.1.tgz
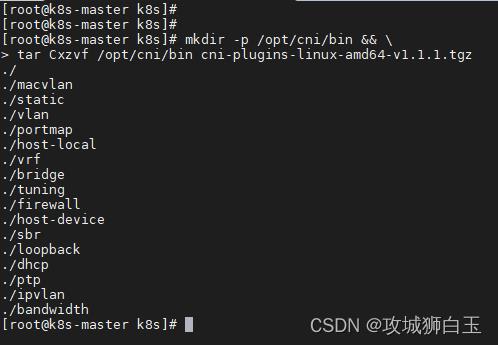
mkdir -p /opt/cni/bin && \\
tar Cxzvf /opt/cni/bin cni-plugins-linux-amd64-v1.1.1.tgz经过上面的步骤,把cni插件的可执行文件安装到了/opt/cni/bin目录下
配置containerd镜像源
由于网络原因,我们无法直接访问k8s.gcr.io网站。因此我们修改containerd的配置文件config.toml配置一下containerd的镜像源
mkdir -p /etc/containerd && \\
containerd config default > /etc/containerd/config.toml && \\
sed -i "s#k8s.gcr.io/pause#registry.aliyuncs.com/google_containers/pause#g"  /etc/containerd/config.toml  && \\
sed -i 's#SystemdCgroup = false#SystemdCgroup = true#g' /etc/containerd/config.toml  && \\
sed -i '/registry.mirrors]/a\\ \\ \\ \\ \\ \\ \\ \\ [plugins."io.containerd.grpc.v1.cri".registry.mirrors."docker.io"]' /etc/containerd/config.toml  && \\
sed -i '/registry.mirrors."docker.io"]/a\\ \\ \\ \\ \\ \\ \\ \\ \\ \\ endpoint = ["http://hub-mirror.c.163.com"]' /etc/containerd/config.toml && \\
sed -i '/hub-mirror.c.163.com"]/a\\ \\ \\ \\ \\ \\ \\ \\ [plugins."io.containerd.grpc.v1.cri".registry.mirrors."k8s.gcr.io"]' /etc/containerd/config.toml  && \\
sed -i '/"k8s.gcr.io"]/a\\ \\ \\ \\ \\ \\ \\ \\ \\ \\ endpoint = ["http://registry.aliyuncs.com/google_containers"]' /etc/containerd/config.toml && \\
echo "===========restart containerd to reload config===========" && \\
systemctl restart containerd
containerd基本使用
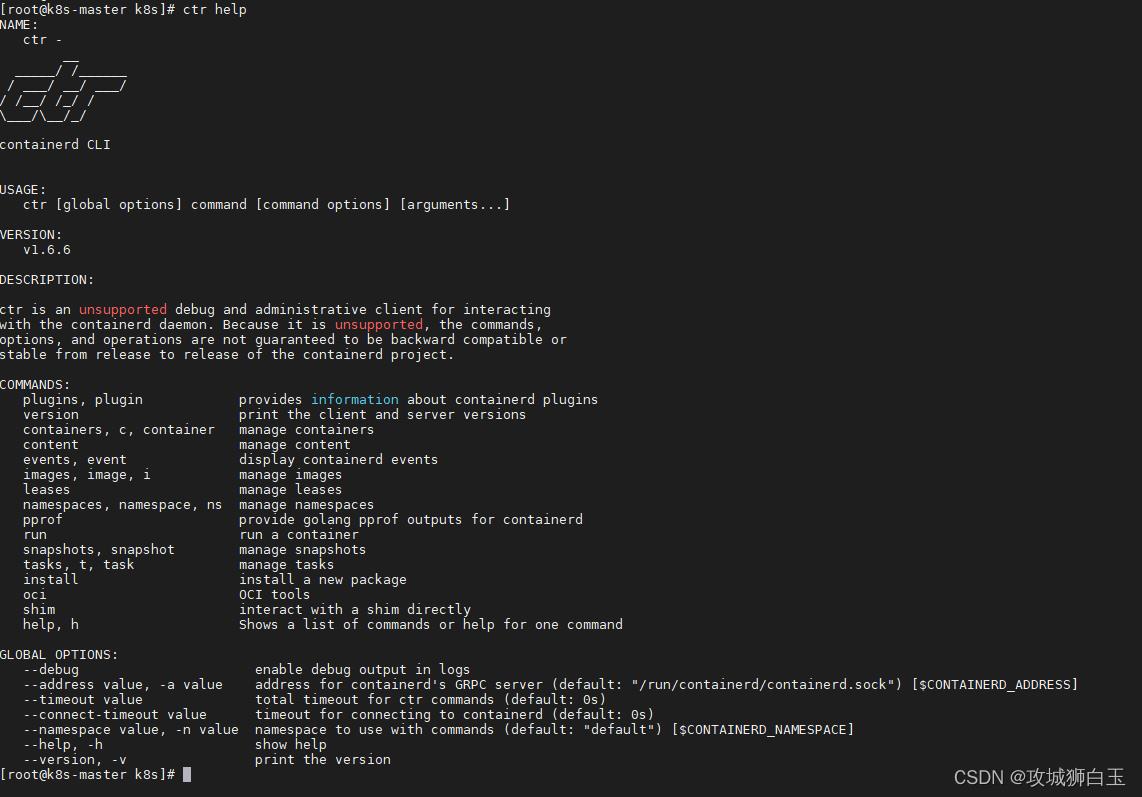
containerd命令与docker的命令大同小异,只是containerd多了一个namespace的概念。
ctr help可以查看containerd的命令
查看namespace为baiyu下的镜像文件
ctr images ls ns baiyu
一般k8s的镜像都会下载在k8s.io这个命名空间下
ctr iamges ls ns k8s.io

至此,k8s的基础容器containerd环境已经安装完毕了,注意,containerd是每台节点机器都要进行安装的。这里我只演示了k8s-master的部署。剩下的k8s-node1跟k8s-node2就由各位同学自行安装练习了。
拓展阅读
nerdctl工具安装及使用
nerdctl工具,是containerd官方为了让docker用户无感切换到containerd而开发的命令行工具。也就是docker的命令可以直接在nerdctl上使用

curl -LO https://github.com/containerd/nerdctl/releases/download/v0.22.2/nerdctl-0.22.2-linux-amd64.tar.gz
tar xzvf nerdctl-0.22.2-linux-amd64.tar.gz
cp nerdctl /usr/local/bin/
rm -rf containerd-rootless* nerdctl
整体脚本
#!/bin/bash
echo "===========Installing containerd to /user/local===========" && \\
tar Cxzvf /usr/local containerd-1.6.6-linux-amd64.tar.gz && \\
mkdir -p /usr/local/lib/systemd/system/ && \\
echo "===========start containerd via systemd===========" && \\
curl -L https://raw.githubusercontent.com/containerd/containerd/main/containerd.service -o /usr/local/lib/systemd/system/containerd.service && \\
systemctl daemon-reload && \\
systemctl enable --now containerd

echo "===========install runc.amd64 to /usr/local/sbin/runc==========="
curl -LO https://github.com/opencontainers/runc/releases/download/v1.1.4/runc.amd64 && \\
install -m 755 runc.amd64 /usr/local/sbin/runc

echo "===========install cni==========="
mkdir -p /opt/cni/bin && \\
tar Cxzvf /opt/cni/bin cni-plugins-linux-amd64-v1.1.1.tgz

echo "===========generate containerd config==========="
mkdir -p /etc/containerd && \\
containerd config default > /etc/containerd/config.toml && \\
sed -i "s#k8s.gcr.io/pause#registry.aliyuncs.com/google_containers/pause#g"  /etc/containerd/config.toml  && \\
sed -i 's#SystemdCgroup = false#SystemdCgroup = true#g' /etc/containerd/config.toml  && \\
sed -i '/registry.mirrors]/a\\ \\ \\ \\ \\ \\ \\ \\ [plugins."io.containerd.grpc.v1.cri".registry.mirrors."docker.io"]' /etc/containerd/config.toml  && \\
sed -i '/registry.mirrors."docker.io"]/a\\ \\ \\ \\ \\ \\ \\ \\ \\ \\ endpoint = ["http://hub-mirror.c.163.com"]' /etc/containerd/config.toml && \\
sed -i '/hub-mirror.c.163.com"]/a\\ \\ \\ \\ \\ \\ \\ \\ [plugins."io.containerd.grpc.v1.cri".registry.mirrors."k8s.gcr.io"]' /etc/containerd/config.toml  && \\
sed -i '/"k8s.gcr.io"]/a\\ \\ \\ \\ \\ \\ \\ \\ \\ \\ endpoint = ["http://registry.aliyuncs.com/google_containers"]' /etc/containerd/config.toml && \\
echo "===========restart containerd to reload config===========" && \\
systemctl restart containerd
总结
本文详细介绍了containerd的安装配置。经过上一篇文章以及本文的铺垫,k8s节点的基础环境就算正式完成了。下一篇文章,将会介绍k8s节点怎么安装。
写在后面
如果觉得有用的话,麻烦一键三连支持一下攻城狮白玉,并把本文分享给更多的小伙伴。你的简单支持,我的无限创作动力
以上是关于k8s二containerd的安装的主要内容,如果未能解决你的问题,请参考以下文章