NUC 11构建 ESXi 7.0.3f安装网卡驱动-V2(2022年7月升级版)
Posted teamlet
tags:
篇首语:本文由小常识网(cha138.com)小编为大家整理,主要介绍了NUC 11构建 ESXi 7.0.3f安装网卡驱动-V2(2022年7月升级版)相关的知识,希望对你有一定的参考价值。
NUC 11构建 ESXi 7.0.3f安装网卡驱动
一、进入powershell 环境
windows 10 操作系统,以管理员的身份打开cmd终端,执行
c:> powershell
二、查看powershell的模型路径,执行
$env:PSModulePath

三、下载 VMware 工具 (需要注册账号)
1、下载 ESXi 7.0.3(第一种方法)
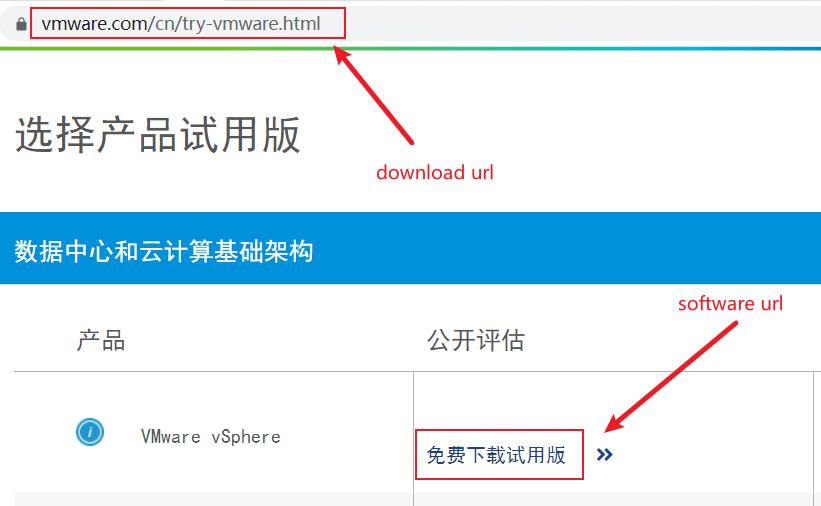
- 1)进入网址: https://www.vmware.com/cn/try-vmware.html
- 2)点击免费下载试用版
-
3)选择Offline Bundle,点击手动下载

-
4)下载的文件名

2、下载 ESXi 7.0.3(第二种方法)
-
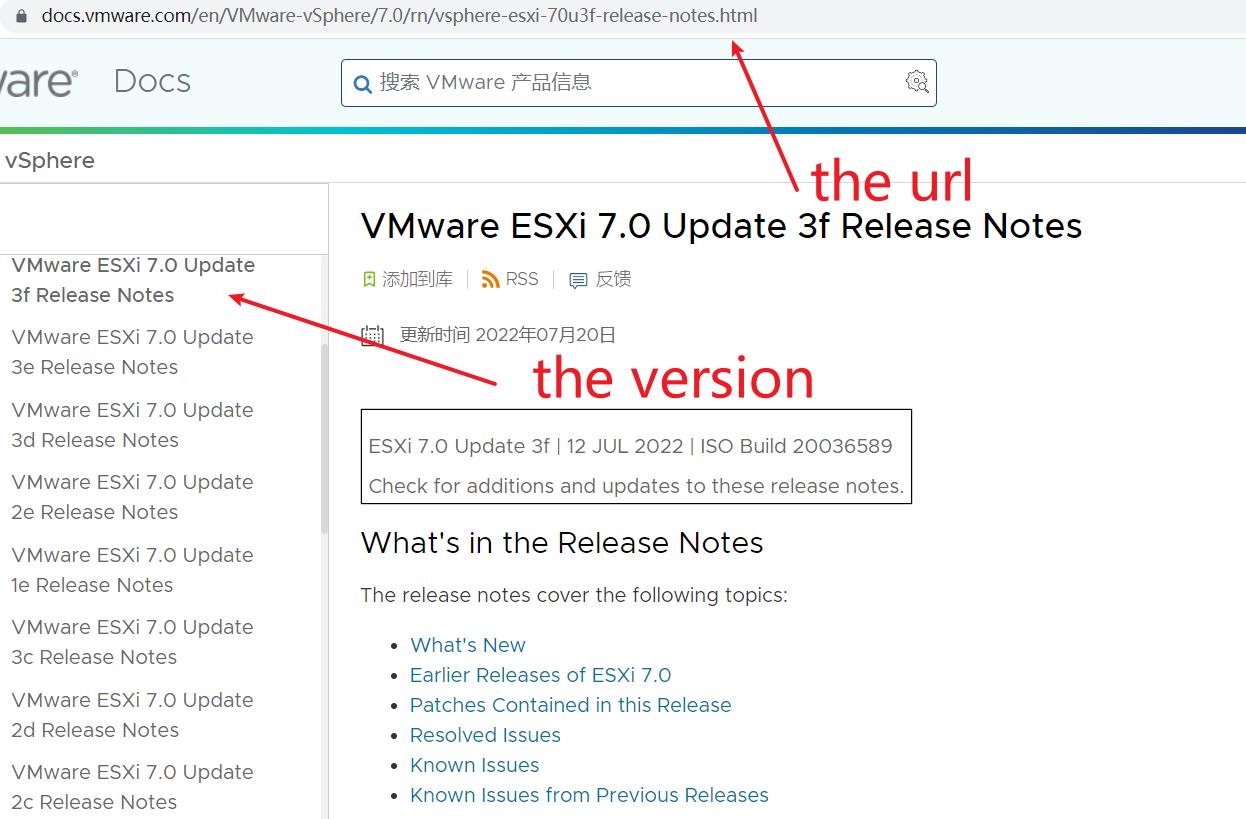
1)进入网址:https://docs.vmware.com/en/VMware-vSphere/7.0/rn/vsphere-esxi-70u3f-release-notes.html
-
2)选择左侧 Update Release Notes的相应版本,新安装的选最高版本
-
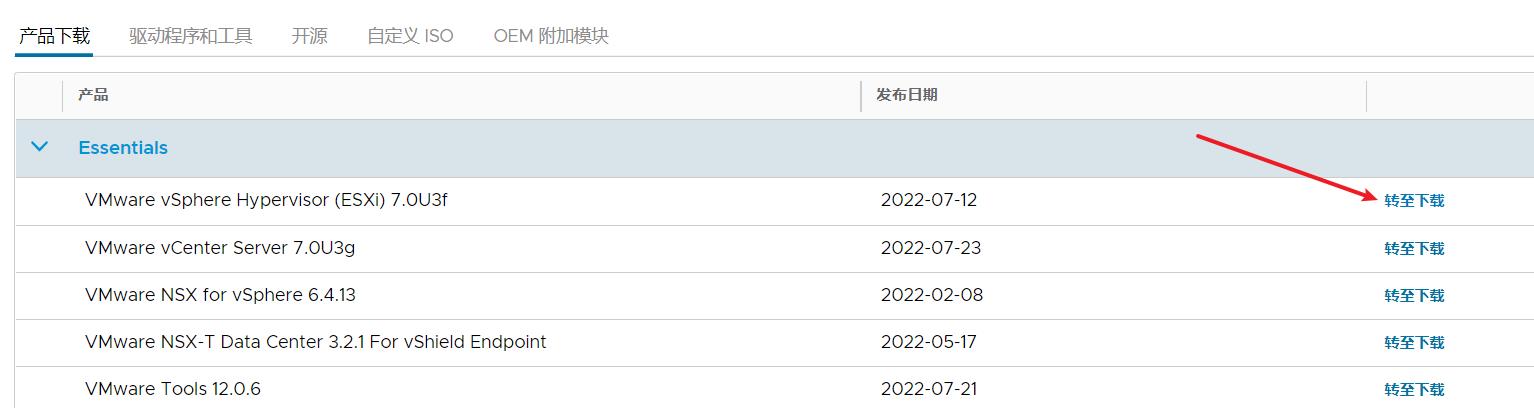
3)右下角点击【产品下载】

-
4)点击转至下载
-
5)立即下载

3、下载网卡驱动:
- 1)进入网址 https://flings.vmware.com/community-networking-driver-for-esxi

- 2)下载后的文件

4、下载PowerShell
- 1)进入下载网址: https://developer.vmware.com/web/tool/12.6.0/vmware-powercli
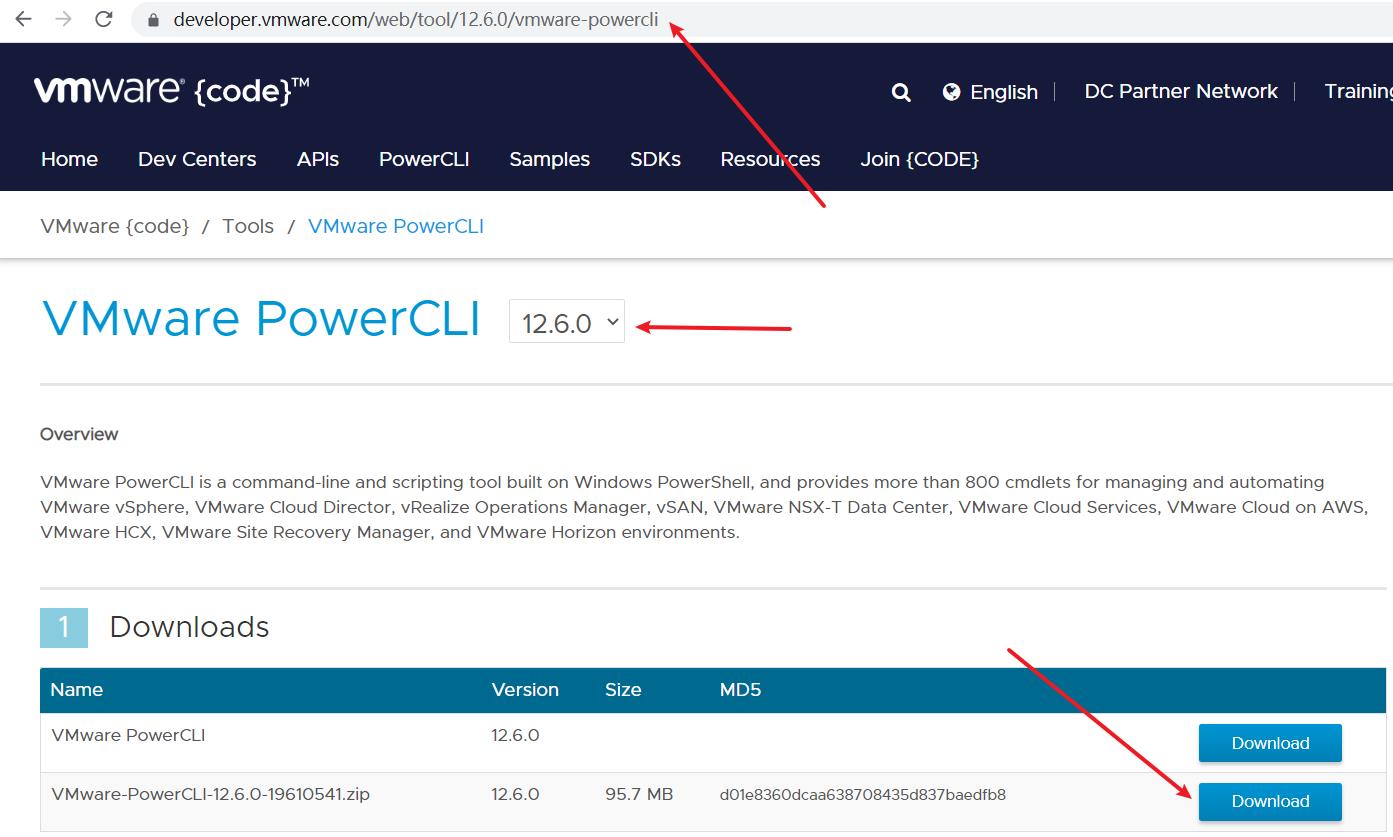
- 2)下载后的文件

四、环境准备
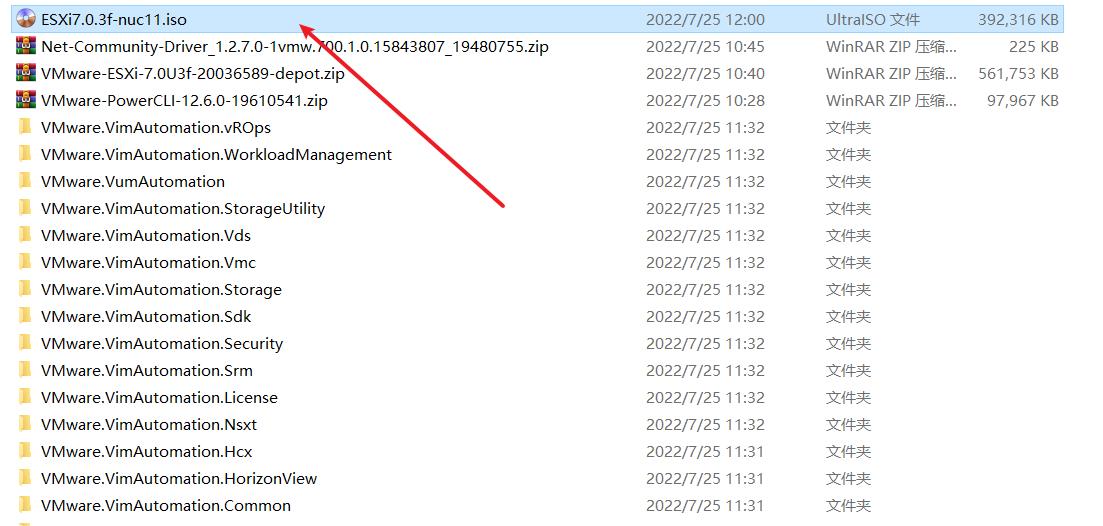
1、复制文件
- 将下载的 VMware-PowerCLI-12.6.0-19610541.zip 、VMware-ESXi-7.0U3f-20036589-depot.zip和Net-Community-Driver_1.2.7.0-1vmw.700.1.0.15843807_19480755.zip放到Modules路径下

2、进入Modules目录
- 以下操作全都在 Modules路径下。
cd 'D:\\Users\\xxxx\\Documents\\WindowsPowerShell\\Scripts\\Modules'
五、开始制作
1、解压 PowerCLI 到Modules
Expand-Archive .\\VMware-PowerCLI-12.6.0-19610541.zip -DestinationPath ./

2、继续执行
Get-ChildItem * -Recurse | Unblock-File
3、 查看可用的 PowerCLI
Get-Module -Name VMware.PowerCLI -ListAvailable

4、继续执行
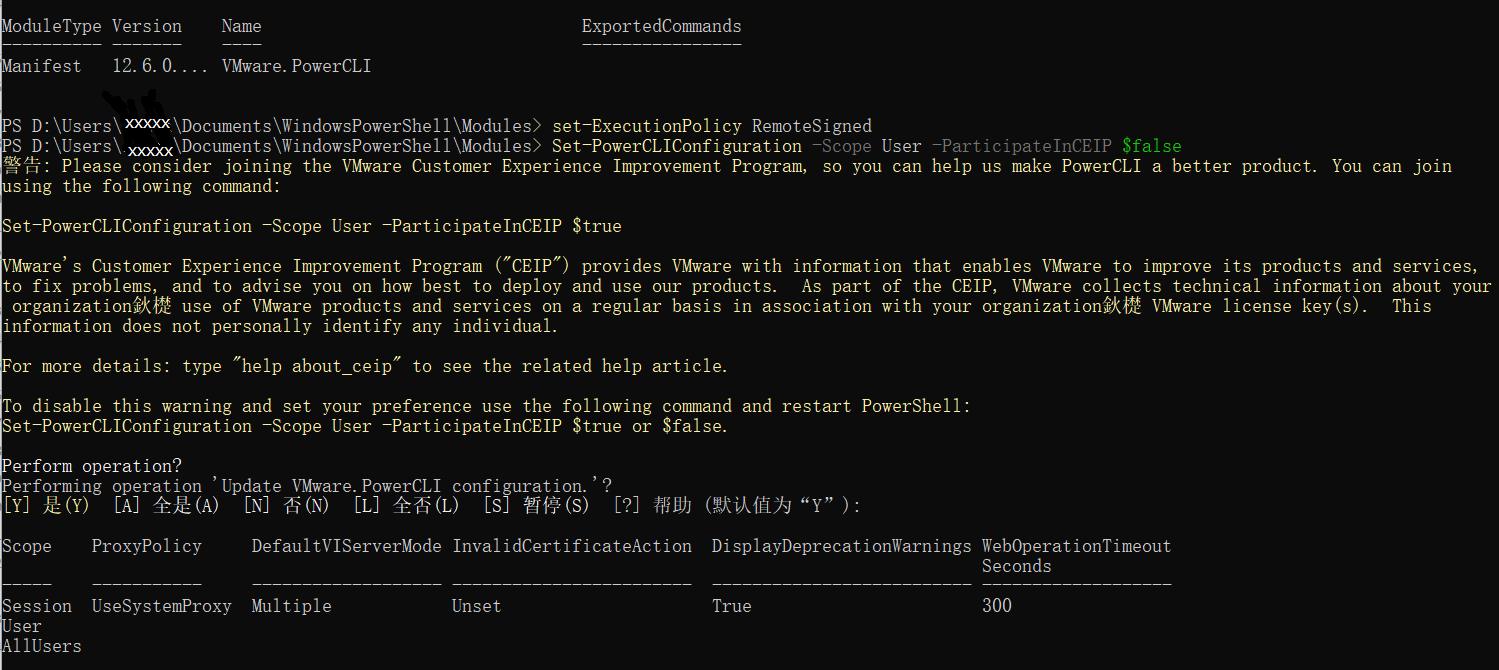
set-ExecutionPolicy RemoteSigned
Set-PowerCLIConfiguration -Scope User -ParticipateInCEIP $false
默认选择Y,回车继续
5、导入 ImageBuilder
Import-Module VMware.ImageBuilder
6、导入ESXi 包
Add-EsxSoftwareDepot .\\VMware-ESXi-7.0U3f-20036589-depot.zip

7、导入网卡驱动包
Add-EsxSoftwareDepot .\\Net-Community-Driver_1.2.7.0-1vmw.700.1.0.15843807_19480755.zip

8、查看可用的配置
Get-EsxImageProfile

9、克隆生成自己的配置
New-EsxImageProfile -CloneProfile "ESXi-7.0U3f-20036589-standard" -name "ESXi-7.0U3f-20036589-nuc11" -vendor "teamlet"

10、执行结果,出现自己定制的可用配置

11、加入网卡
Add-EsxSoftwarePackage -ImageProfile "ESXi-7.0U3f-20036589-nuc11" -SoftwarePackage "net-community"

12、打包生成 iso 镜像
Export-EsxImageProfile -ImageProfile "ESXi-7.0U3f-20036589-nuc11" -ExportToIso -FilePath ESXi7.0.3f-nuc11.iso
六、写入U盘
- 插入空白的16G U盘,使用rufus 将 ESXi7.0.3f-nuc11.iso 写入 U盘。
- rufus官网 - https://rufus.en.softonic.com/
七、启动机器
- 使用此U盘启动 NUC 11,记得按F2进入 BOIS ,在BOOT里面设置启动顺序。
以上是关于NUC 11构建 ESXi 7.0.3f安装网卡驱动-V2(2022年7月升级版)的主要内容,如果未能解决你的问题,请参考以下文章