SpringBoot整合rabbitMQ,spring-boot-starter-amqp 的使用
Posted
tags:
篇首语:本文由小常识网(cha138.com)小编为大家整理,主要介绍了SpringBoot整合rabbitMQ,spring-boot-starter-amqp 的使用相关的知识,希望对你有一定的参考价值。
参考技术A 在springBoot项目中使用rabbitMQ是很方便的,spring提供了spring-boot-starter-amqp依赖,只需要简单的配置即可与spring无缝整合本文不介绍rabbitMQ理论知识,主要介绍在spring中如何使用rabbirMQ
申明一个消费者,申明一个queue和Exchange(如果他们不存在),并binding
生产者
默认交换机其实就是直连交换机,可以理解为名称为空字符串的直连交换机,一个queue若不指定binding的交换机,就被绑定到默认交换机上,routingKey为queue的名称
消费者
生产者
申明两个消费者,对应queue-one和queue-two 都与 myFanoutExchange绑定,因为是扇形交换机,所以这里的routingKey是随意的
生产者
申明多个消费者,假设场景,有人在彩票商店中奖了,各个级别的电视台进行新闻报道.
通配符 # : 一个或多个word, * 一个word
生产者
执行结果
两个消费者,一个全匹配,一个任意匹配
生产者,上面的两个消费者都能收到消息
先看另一种申明消费者的写法
上面是springBoot的示例写法,可以看到,要申明队列或是交换机或是绑定它们,只需要构造对应的对象放到spring容器里就行,,而申明一个监听者(消费者)则需要构造一个MessageListenerContainer 对象,ListenerContainer至少需要知道如何连接到代理(ConnectionFactory),监听哪个队列的消息(QueueNames)以及收到消息的处理方法(MessageListenerAdapter).
到这里我们可以猜到,一个@RabbitListener就对应一个MessageListenerContainer,ConnectionFactory被自动注入,队列名称可以用queues,queuesToDeclare,或是bindings里面的queue指定,收到消息的处理方法用@RabbitHandler指定,或是直接把@RabbitListener打在对应的方法上就行.
如何设置交换机,队列的其它属性如Durable,Auto-delete等: 用@Bean的方式,构建对应对象,设置对应属性就行,用注解@Queue或是@Exchange里面都有对应属性,设置就行
如何设置消费者的其它属性,如消息确认方式,预处理消息数量等: 用@Bean的方式,构建MessageListenerContainer的对象,设置对应属性就行,用注解的话@RabbitListener里指定containerFactory,然后在containerFactory里设置
RabbitMQ——springboot整合RabbitMQ
环境搭建
一、创建一个Springboot项目
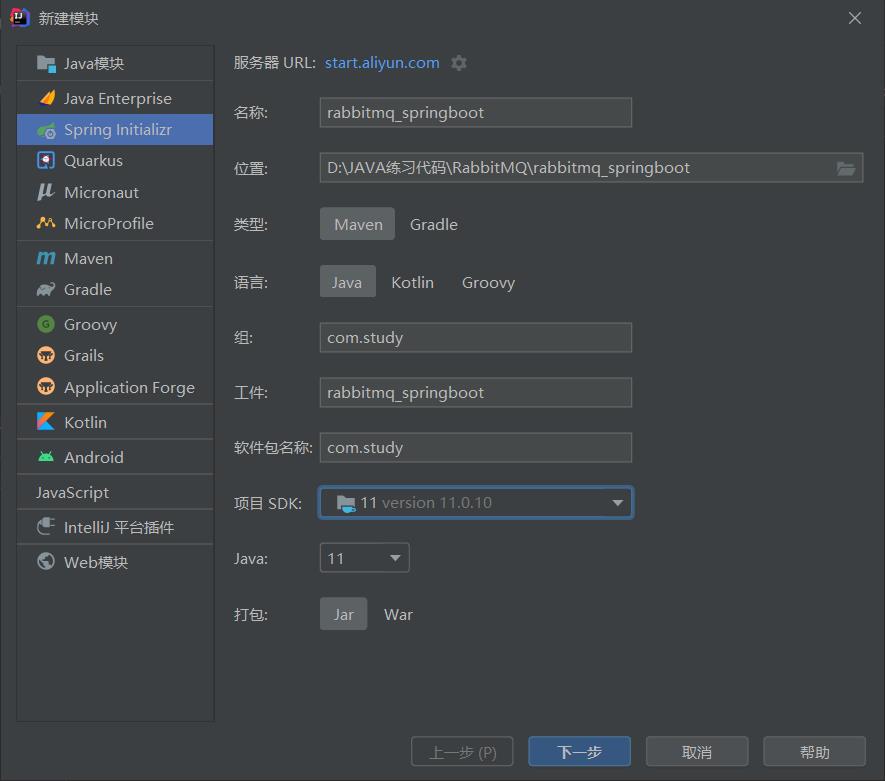
二、导入相关依赖
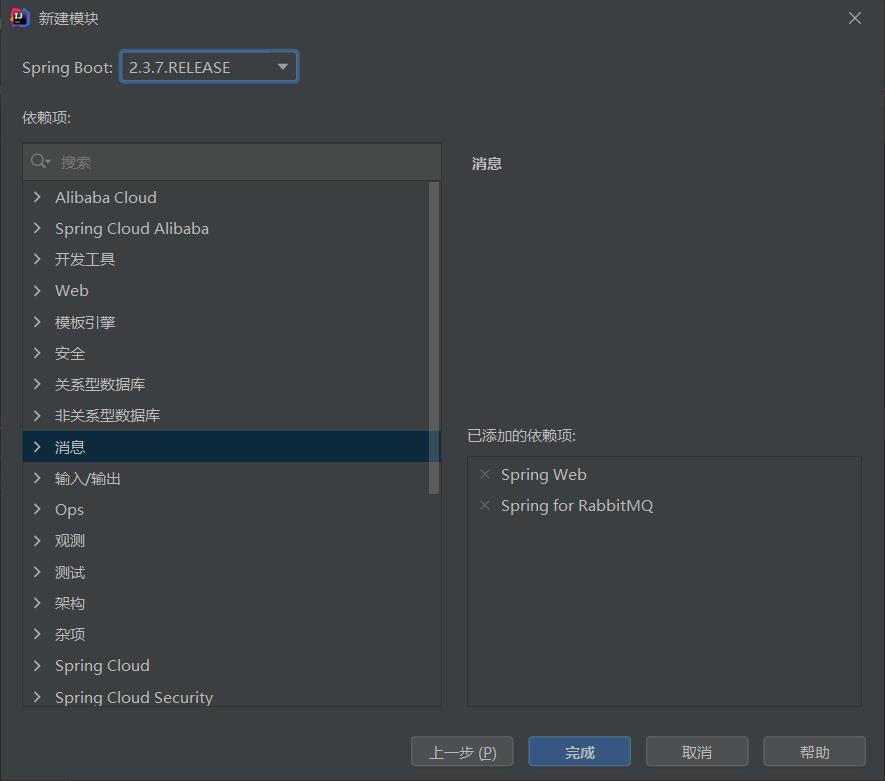
或者不勾选Spring for RabbitMQ,自己导入依赖
<dependency>
  <groupId>org.springframework.boot</groupId>
  <artifactId>spring-boot-starter-amqp</artifactId>
</dependency>
三、编写配置文件
# 应用名称
spring.application.name=rabbitmq_springboot
# 应用服务 WEB 访问端口
server.port=8080

spring.rabbitmq.port=5672
spring.rabbitmq.host=192.168.137.5
spring.rabbitmq.username=admin
spring.rabbitmq.password=123
#虚拟主机
spring.rabbitmq.virtual-host=/
helloworld模型
一、编写消费者
package com.study.hello;

import org.springframework.amqp.rabbit.annotation.Queue;
import org.springframework.amqp.rabbit.annotation.RabbitHandler;
import org.springframework.amqp.rabbit.annotation.RabbitListener;
import org.springframework.stereotype.Component;

@Component
// 生产端没有指定交换机只有routingKey和Object。
//消费方产生hello队列,放在默认的交换机(AMQP default)上。
//而默认的交换机有一个特点,只要你的routerKey的名字与这个
//交换机的队列有相同的名字,他就会自动路由上。
//生产端routingKey 叫hello ,消费端生产hello队列。
//他们就路由上了
@RabbitListener(queuesToDeclare = @Queue(value = "hello"))  //表示RabbitMQ消费者,声明一个队列
public class HelloConsumer {

    @RabbitHandler //当消费者从队列取出消息时的回调方法
    public void receive(String message){
        System.out.println("message = " + message);
    }
}
二、编写生产者测试类
package com.study;

import org.junit.Test;
import org.junit.runner.RunWith;
import org.springframework.amqp.rabbit.core.RabbitTemplate;
import org.springframework.beans.factory.annotation.Autowired;
import org.springframework.boot.test.context.SpringBootTest;
import org.springframework.test.context.junit4.SpringRunner;

@SpringBootTest(classes = RabbitmqSpringbootApplication.class)
@RunWith(SpringRunner.class)
public class TestRabbitMQ {
    //注入rabbitTemplate
    @Autowired
    private RabbitTemplate rabbitTemplate;
    //hello world
    @Test
    public void testHelloWorld(){
        //转换和发送    1.routingKey 2.消息
        rabbitTemplate.convertAndSend("hello","hello world");
    }
}
三、运行生产者测试类

work工作模型
一、消费者
package com.study.work;

import org.springframework.amqp.rabbit.annotation.Queue;
import org.springframework.amqp.rabbit.annotation.RabbitListener;
import org.springframework.stereotype.Component;

@Component
public class WorkConsumer {

    //第一个消费者
    @RabbitListener(queuesToDeclare = @Queue("work")) //@RabbitListener在方法上代表它监听这个方法作为队列消费回调
    public void receive1(String message){
        System.out.println("message1 = " + message);
    }
    //第二个消费者
    @RabbitListener(queuesToDeclare = @Queue("work")) //@RabbitListener在方法上代表它监听这个方法作为队列消费回调
    public void receive2(String message){
        System.out.println("message2 = " + message);
    }
}
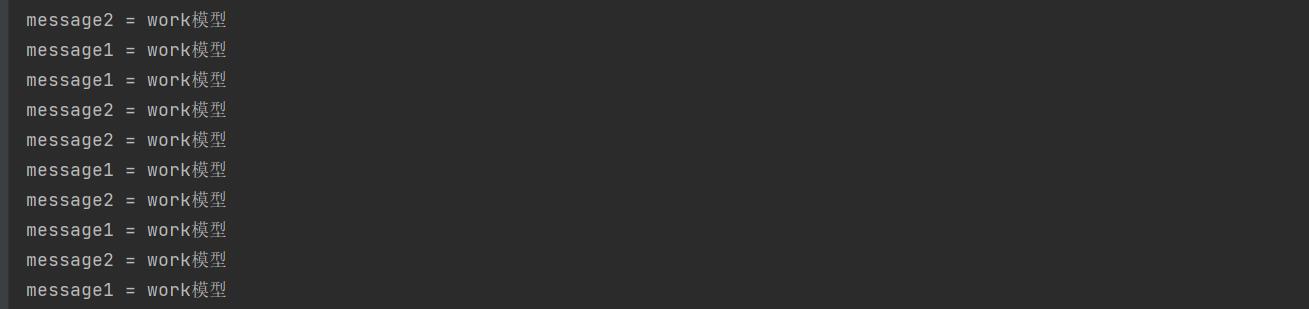
二、生产者
@Test
public void testWork(){
    for (int i = 0; i < 10; i++) {
        rabbitTemplate.convertAndSend("work","work模型");
    }
}
三、运行测试
fanout广播模型
一、消费者
package com.study.fanout;

import org.springframework.amqp.rabbit.annotation.Exchange;
import org.springframework.amqp.rabbit.annotation.Queue;
import org.springframework.amqp.rabbit.annotation.QueueBinding;
import org.springframework.amqp.rabbit.annotation.RabbitListener;
import org.springframework.stereotype.Component;

@Component
public class FanoutConsumer {
    @RabbitListener(bindings = {
            @QueueBinding(
                    value = @Queue, //创建临时队列
                    exchange =@Exchange(value = "logs",type = "fanout") //绑定的交换机
            )
    })
    public void receive1(String message){
        System.out.println("message1 = " + message);
    }

    @RabbitListener(bindings = {
            @QueueBinding(
                    value = @Queue, //创建临时队列
                    exchange =@Exchange(value = "logs",type = "fanout") //绑定的交换机
            )
    })
    public void receive2(String message){
        System.out.println("message2 = " + message);
    }
}
二、生产者
@Test
public void testFanout(){
    rabbitTemplate.convertAndSend("logs","","Fanout模型发送的消息");
}
三、运行测试

route路由模型
一、消费者
package com.study.route;

import org.springframework.amqp.rabbit.annotation.Exchange;
import org.springframework.amqp.rabbit.annotation.Queue;
import org.springframework.amqp.rabbit.annotation.QueueBinding;
import org.springframework.amqp.rabbit.annotation.RabbitListener;
import org.springframework.stereotype.Component;

@Component
public class RouteConsumer {
    @RabbitListener(bindings = {
            @QueueBinding(
                    value = @Queue,//临时队列
                    exchange = @Exchange(value = "directs",type = "direct"),//指定交换机名称和类型
                    key = {"info","error","warn"}
            )
    })
    public void receive1(String message){
        System.out.println("message1 = " + message);
    }

    @RabbitListener(bindings = {
            @QueueBinding(
                    value = @Queue,//临时队列
                    exchange = @Exchange(value = "directs",type = "direct"),//指定交换机名称和类型
                    key = {"error"}
            )
    })
    public void receive2(String message){
        System.out.println("message2 = " + message);
    }
}
二、生产者
@Test
public void testRoute(){
    rabbitTemplate.convertAndSend("directs","error","发送info的key的路由信息");
}
三、运行测试

Topic动态路由模型
一、消费者
package com.study.topic;

import org.springframework.amqp.rabbit.annotation.Exchange;
import org.springframework.amqp.rabbit.annotation.Queue;
import org.springframework.amqp.rabbit.annotation.QueueBinding;
import org.springframework.amqp.rabbit.annotation.RabbitListener;
import org.springframework.stereotype.Component;

@Component
public class TopicConsumer {
    @RabbitListener(bindings = {
            @QueueBinding(
                    value = @Queue,//临时队列
                    exchange = @Exchange(type = "topic",name = "topics"),
                    key = {"user.save","user.*"}
            )
    })
    public void receive1(String message){
        System.out.println("message1 = " + message);
    }
    @RabbitListener(bindings = {
            @QueueBinding(
                    value = @Queue,//临时队列
                    exchange = @Exchange(type = "topic",name = "topics"),
                    key = {"order.#","produce.#","user.*"}
            )
    })
    public void receive2(String message){
        System.out.println("message2 = " + message);
    }
}
二、生产者
@Test
public void testTopic(){
    rabbitTemplate.convertAndSend("topics","user.save","user.save 路由消息");
}
三、运行测试

以上是关于SpringBoot整合rabbitMQ,spring-boot-starter-amqp 的使用的主要内容,如果未能解决你的问题,请参考以下文章