蓝易云:Linux系统ping命令 – 测试主机间网络连通性
Posted 小蓝博客
tags:
篇首语:本文由小常识网(cha138.com)小编为大家整理,主要介绍了蓝易云:Linux系统ping命令 – 测试主机间网络连通性相关的知识,希望对你有一定的参考价值。
ping命令是Linux系统中最常用的网络工具之一,它可以用来测试主机之间的网络连通性,检查网络延迟、丢包等信息。
语法:
ping [选项] 目标主机
常用的选项包括:
-c: 控制ping命令发送的ICMP ECHO_REQUEST请求的次数。
-i: 控制ping命令发送的ICMP ECHO_REQUEST请求的时间间隔。
-w: 控制等待ping命令输出结果的时间,单位为秒。
-s: 指定ICMP数据包的大小。
-v: 显示ping命令的详细输出信息。
使用方法:
ping命令的基本用法是在终端输入“ping 目标主机”并回车,例如:
ping www.baidu.com
ping命令将发送一个ICMP ECHO_REQUEST请求到目标主机,并等待目标主机回复。如果目标主机能够回复,ping命令将显示如下信息:
64 bytes from 220.181.38.148: icmp_seq=0 ttl=128 time=31.3 ms
64 bytes from 220.181.38.148: icmp_seq=1 ttl=128 time=32.5 ms
64 bytes from 220.181.38.148: icmp_seq=2 ttl=128 time=35.7 ms
Ctrl-C
--- www.baidu.com ping statistics ---
5 packets transmitted, 5 received, 0% packet loss, time 4003ms
rtt min/avg/max/mdev = 31.343/33.551/35.751/1.811 ms
上面的输出结果显示了目标主机的IP地址、TTL值、响应时间等信息。其中,ttl是IP协议中的一个字段,表示数据包在网络中最多能经过多少跳(路由器),每经过一个路由器,TTL值就会减1。time表示ping命令发送请求到目标主机所用的时间,单位为毫秒。
如果目标主机不能回复,ping命令将显示如下信息:
From 192.168.1.1 icmp_seq=1 Destination Host Unreachable
From 192.168.1.1 icmp_seq=2 Destination Host Unreachable
From 192.168.1.1 icmp_seq=3 Destination Host Unreachable
Ctrl-C
--- www.baidu.com ping statistics ---
5 packets transmitted, 0 received, +3 errors, 100% packet loss, time 4000ms
这种情况可能是目标主机禁止响应ping命令或存在网络故障等原因导致。
通过ping命令,可以快速检测主机之间的网络连通性,对于网络故障排查也非常有用。

linux学习笔记32---命令ping
Linux系统的ping命令是常用的网络命令,它通常用来测试与目标主机的连通性,我们经常会说“ping一下某机器,看是不是开着”、不能打开网页时会说“你先ping网关地址192.168.1.1试试”。它通过发送ICMP ECHO_REQUEST数据包到网络主机(send ICMP ECHO_REQUEST to network hosts),并显示响应情况,这样我们就可以根据它输出的信息来确定目标主机是否可访问(但这不是绝对的)。有些服务器为了防止通过ping探测到,通过防火墙设置了禁止ping或者在内核参数中禁止ping,这样就不能通过ping确定该主机是否还处于开启状态。
linux下的ping和windows下的ping稍有区别,linux下ping不会自动终止,需要按ctrl+c终止或者用参数-c指定要求完成的回应次数。
1.命令格式:
ping [参数] [主机名或IP地址]
2.命令功能:
ping命令用于:确定网络和各外部主机的状态;跟踪和隔离硬件和软件问题;测试、评估和管理网络。如果主机正在运行并连在网上,它就对回送信号进行响应。每个回送信号请求包含一个网际协议(IP)和 ICMP 头,后面紧跟一个 tim 结构,以及来填写这个信息包的足够的字节。缺省情况是连续发送回送信号请求直到接收到中断信号(Ctrl-C)。
ping 命令每秒发送一个数据报并且为每个接收到的响应打印一行输出。ping 命令计算信号往返时间和(信息)包丢失情况的统计信息,并且在完成之后显示一个简要总结。ping 命令在程序超时或当接收到 SIGINT 信号时结束。Host 参数或者是一个有效的主机名或者是因特网地址。
3.命令参数:
-d 使用Socket的SO_DEBUG功能。
-f 极限检测。大量且快速地送网络封包给一台机器,看它的回应。
-n 只输出数值。
-q 不显示任何传送封包的信息,只显示最后的结果。
-r 忽略普通的Routing Table,直接将数据包送到远端主机上。通常是查看本机的网络接口是否有问题。
-R 记录路由过程。
-v 详细显示指令的执行过程。
<p>-c 数目:在发送指定数目的包后停止。
-i 秒数:设定间隔几秒送一个网络封包给一台机器,预设值是一秒送一次。
-I 网络界面:使用指定的网络界面送出数据包。
-l 前置载入:设置在送出要求信息之前,先行发出的数据包。
-p 范本样式:设置填满数据包的范本样式。
-s 字节数:指定发送的数据字节数,预设值是56,加上8字节的ICMP头,一共是64ICMP数据字节。
-t 存活数值:设置存活数值TTL的大小。
4.使用实例:
实例1:ping的通的情况
命令:
ping 192.168.120.205
输出:

PING 192.168.120.205 (192.168.120.205) 56(84) bytes of data.
64 bytes from 192.168.120.205: icmp_seq=1 ttl=64 time=0.720 ms
64 bytes from 192.168.120.205: icmp_seq=2 ttl=64 time=0.181 ms
64 bytes from 192.168.120.205: icmp_seq=3 ttl=64 time=0.191 ms
64 bytes from 192.168.120.205: icmp_seq=4 ttl=64 time=0.188 ms
64 bytes from 192.168.120.205: icmp_seq=5 ttl=64 time=0.189 ms
--- 192.168.120.205 ping statistics ---
5 packets transmitted, 5 received, 0% packet loss, time 4000ms
rtt min/avg/max/mdev = 0.181/0.293/0.720/0.214 ms
[root@localhost ~]#
说明:
实例2:ping不通的情况
命令:
ping 192.168.120.202
输出:
PING 192.168.120.202 (192.168.120.202) 56(84) bytes of data.
From 192.168.120.204 icmp_seq=1 Destination Host Unreachable
From 192.168.120.204 icmp_seq=2 Destination Host Unreachable
From 192.168.120.204 icmp_seq=3 Destination Host Unreachable
From 192.168.120.204 icmp_seq=4 Destination Host Unreachable
From 192.168.120.204 icmp_seq=5 Destination Host Unreachable
From 192.168.120.204 icmp_seq=6 Destination Host Unreachable
--- 192.168.120.202 ping statistics ---
8 packets transmitted, 0 received, +6 errors, 100% packet loss, time 7005ms
, pipe 4
[root@localhost ~]#
说明:
实例3:ping网关
命令:
ping -b 192.168.120.1
输出:
Kernel IP routing table
Destination Gateway Genmask Flags Metric Ref Use Iface
192.168.120.0 * 255.255.255.0 U 0 0 0 eth0
192.168.0.0 192.168.120.1 255.255.0.0 UG 0 0 0 eth0
10.0.0.0 192.168.120.1 255.0.0.0 UG 0 0 0 eth0
default 192.168.120.240 0.0.0.0 UG 0 0 0 eth0
[root@localhost ~]# ping -b 192.168.120.1
PING 192.168.120.1 (192.168.120.1) 56(84) bytes of data.
64 bytes from 192.168.120.1: icmp_seq=1 ttl=255 time=2.02 ms
64 bytes from 192.168.120.1: icmp_seq=2 ttl=255 time=1.83 ms
64 bytes from 192.168.120.1: icmp_seq=3 ttl=255 time=1.68 ms
64 bytes from 192.168.120.1: icmp_seq=4 ttl=255 time=1.98 ms
64 bytes from 192.168.120.1: icmp_seq=5 ttl=255 time=1.88 ms
--- 192.168.120.1 ping statistics ---
5 packets transmitted, 5 received, 0% packet loss, time 4000ms
rtt min/avg/max/mdev = 1.682/1.880/2.020/0.129 ms
说明:
实例4:ping指定次数
命令:
ping -c 10 192.168.120.206
输出:
PING 192.168.120.206 (192.168.120.206) 56(84) bytes of data.
64 bytes from 192.168.120.206: icmp_seq=1 ttl=64 time=1.25 ms
64 bytes from 192.168.120.206: icmp_seq=2 ttl=64 time=0.260 ms
64 bytes from 192.168.120.206: icmp_seq=3 ttl=64 time=0.242 ms
64 bytes from 192.168.120.206: icmp_seq=4 ttl=64 time=0.271 ms
64 bytes from 192.168.120.206: icmp_seq=5 ttl=64 time=0.274 ms
64 bytes from 192.168.120.206: icmp_seq=6 ttl=64 time=0.295 ms
64 bytes from 192.168.120.206: icmp_seq=7 ttl=64 time=0.269 ms
64 bytes from 192.168.120.206: icmp_seq=8 ttl=64 time=0.270 ms
64 bytes from 192.168.120.206: icmp_seq=9 ttl=64 time=0.253 ms
64 bytes from 192.168.120.206: icmp_seq=10 ttl=64 time=0.289 ms
--- 192.168.120.206 ping statistics ---
10 packets transmitted, 10 received, 0% packet loss, time 9000ms
rtt min/avg/max/mdev = 0.242/0.367/1.251/0.295 ms
[root@localhost ~]#
说明:
实例5:时间间隔和次数限制的ping
命令:
ping -c 10 -i 0.5 192.168.120.206
输出:
PING 192.168.120.206 (192.168.120.206) 56(84) bytes of data.
64 bytes from 192.168.120.206: icmp_seq=1 ttl=64 time=1.24 ms
64 bytes from 192.168.120.206: icmp_seq=2 ttl=64 time=0.235 ms
64 bytes from 192.168.120.206: icmp_seq=3 ttl=64 time=0.244 ms
64 bytes from 192.168.120.206: icmp_seq=4 ttl=64 time=0.300 ms
64 bytes from 192.168.120.206: icmp_seq=5 ttl=64 time=0.255 ms
64 bytes from 192.168.120.206: icmp_seq=6 ttl=64 time=0.264 ms
64 bytes from 192.168.120.206: icmp_seq=7 ttl=64 time=0.263 ms
64 bytes from 192.168.120.206: icmp_seq=8 ttl=64 time=0.331 ms
64 bytes from 192.168.120.206: icmp_seq=9 ttl=64 time=0.247 ms
64 bytes from 192.168.120.206: icmp_seq=10 ttl=64 time=0.244 ms
--- 192.168.120.206 ping statistics ---
10 packets transmitted, 10 received, 0% packet loss, time 4499ms
rtt min/avg/max/mdev = 0.235/0.362/1.241/0.294 ms
[root@localhost ~]# ping -c 10 -i 0.01 192.168.120.206
PING 192.168.120.206 (192.168.120.206) 56(84) bytes of data.
64 bytes from 192.168.120.206: icmp_seq=1 ttl=64 time=0.244 ms
64 bytes from 192.168.120.206: icmp_seq=2 ttl=64 time=0.195 ms
64 bytes from 192.168.120.206: icmp_seq=3 ttl=64 time=0.219 ms
64 bytes from 192.168.120.206: icmp_seq=4 ttl=64 time=0.204 ms
64 bytes from 192.168.120.206: icmp_seq=5 ttl=64 time=3.56 ms
64 bytes from 192.168.120.206: icmp_seq=6 ttl=64 time=1.93 ms
64 bytes from 192.168.120.206: icmp_seq=7 ttl=64 time=0.193 ms
64 bytes from 192.168.120.206: icmp_seq=8 ttl=64 time=0.193 ms
64 bytes from 192.168.120.206: icmp_seq=9 ttl=64 time=0.202 ms
64 bytes from 192.168.120.206: icmp_seq=10 ttl=64 time=0.211 ms
--- 192.168.120.206 ping statistics ---
10 packets transmitted, 10 received, 0% packet loss, time 90ms
rtt min/avg/max/mdev = 0.193/0.716/3.564/1.080 ms
[root@localhost ~]#
说明:
实例6:通过域名ping公网上的站点
命令:
ping -c 5 www.58.com
输出:
PING www.58.com (211.151.111.30) 56(84) bytes of data.
64 bytes from 211.151.111.30: icmp_req=1 ttl=49 time=14.7 ms
64 bytes from 211.151.111.30: icmp_req=2 ttl=49 time=16.4 ms
64 bytes from 211.151.111.30: icmp_req=3 ttl=49 time=15.2 ms
64 bytes from 211.151.111.30: icmp_req=4 ttl=49 time=14.6 ms
64 bytes from 211.151.111.30: icmp_req=5 ttl=49 time=19.9 ms
--- www.58.com ping statistics ---
5 packets transmitted, 5 received, 0% packet loss, time 20101ms
rtt min/avg/max/mdev = 14.618/16.192/19.917/1.965 ms
peida-VirtualBox ~ #
说明:
实例7:多参数使用
命令:
ping -i 3 -s 1024 -t 255 192.168.120.206
输出:
PING 192.168.120.206 (192.168.120.206) 1024(1052) bytes of data.
1032 bytes from 192.168.120.206: icmp_seq=1 ttl=64 time=1.99 ms
1032 bytes from 192.168.120.206: icmp_seq=2 ttl=64 time=0.694 ms
1032 bytes from 192.168.120.206: icmp_seq=3 ttl=64 time=0.300 ms
1032 bytes from 192.168.120.206: icmp_seq=4 ttl=64 time=0.481 ms
1032 bytes from 192.168.120.206: icmp_seq=5 ttl=64 time=0.415 ms
1032 bytes from 192.168.120.206: icmp_seq=6 ttl=64 time=0.600 ms
1032 bytes from 192.168.120.206: icmp_seq=7 ttl=64 time=0.411 ms
1032 bytes from 192.168.120.206: icmp_seq=8 ttl=64 time=0.281 ms
1032 bytes from 192.168.120.206: icmp_seq=9 ttl=64 time=0.318 ms
1032 bytes from 192.168.120.206: icmp_seq=10 ttl=64 time=0.362 ms
1032 bytes from 192.168.120.206: icmp_seq=11 ttl=64 time=0.408 ms
1032 bytes from 192.168.120.206: icmp_seq=12 ttl=64 time=0.445 ms
1032 bytes from 192.168.120.206: icmp_seq=13 ttl=64 time=0.397 ms
1032 bytes from 192.168.120.206: icmp_seq=14 ttl=64 time=0.406 ms
1032 bytes from 192.168.120.206: icmp_seq=15 ttl=64 time=0.458 ms
--- 192.168.120.206 ping statistics ---
15 packets transmitted, 15 received, 0% packet loss, time 41999ms
rtt min/avg/max/mdev = 0.281/0.531/1.993/0.404 ms
[root@localhost ~]#
说明:
-i 3 发送周期为 3秒 -s 设置发送包的大小为1024 -t 设置TTL值为 255
#####################
telnet 命令
#######################
telnet命令通常用来远程登录。telnet程序是基于TELNET协议的远程登录客户端程序。Telnet协议是TCP/IP协议族中的一员,是Internet远程登陆服务的标准协议和主要方式。它为用户提供了在本地计算机上完成远程主机工作的 能力。在终端使用者的电脑上使用telnet程序,用它连接到服务器。终端使用者可以在telnet程序中输入命令,这些命令会在服务器上运行,就像直接在服务器的控制台上输入一样。可以在本地就能控制服务器。要开始一个 telnet会话,必须输入用户名和密码来登录服务器。Telnet是常用的远程控制Web服务器的方法。
但是,telnet因为采用明文传送报文,安全性不好,很多Linux服务器都不开放telnet服务,而改用更安全的ssh方式了。但仍然有很多别的系统可能采用了telnet方式来提供远程登录,因此弄清楚telnet客户端的使用方式仍是很有必要的。
telnet命令还可做别的用途,比如确定远程服务的状态,比如确定远程服务器的某个端口是否能访问。
1.命令格式:
telnet[参数][主机]
2.命令功能:
执行telnet指令开启终端机阶段作业,并登入远端主机。
3.命令参数:
-8 允许使用8位字符资料,包括输入与输出。
-a 尝试自动登入远端系统。
-b<主机别名> 使用别名指定远端主机名称。
-c 不读取用户专属目录里的.telnetrc文件。
-d 启动排错模式。
-e<脱离字符> 设置脱离字符。
-E 滤除脱离字符。
-f 此参数的效果和指定"-F"参数相同。
-F 使用Kerberos V5认证时,加上此参数可把本地主机的认证数据上传到远端主机。
-k<域名> 使用Kerberos认证时,加上此参数让远端主机采用指定的领域名,而非该主机的域名。
-K 不自动登入远端主机。
-l<用户名称> 指定要登入远端主机的用户名称。
-L 允许输出8位字符资料。
-n<记录文件> 指定文件记录相关信息。
-r 使用类似rlogin指令的用户界面。
-S<服务类型> 设置telnet连线所需的IP TOS信息。
-x 假设主机有支持数据加密的功能,就使用它。
-X<认证形态> 关闭指定的认证形态。
4.使用实例:
实例1:远程服务器无法访问
命令:
telnet 192.168.120.206
输出:
Trying 192.168.120.209...
telnet: connect to address 192.168.120.209: No route to host
telnet: Unable to connect to remote host: No route to host
[root@localhost ~]#
说明:
处理这种情况方法:
(1)确认ip地址是否正确?
(2)确认ip地址对应的主机是否已经开机?
(3)如果主机已经启动,确认路由设置是否设置正确?(使用route命令查看)
(4)如果主机已经启动,确认主机上是否开启了telnet服务?(使用netstat命令查看,TCP的23端口是否有LISTEN状态的行)
(5)如果主机已经启动telnet服务,确认防火墙是否放开了23端口的访问?(使用iptables-save查看)
实例2:域名无法解析
命令:
telnet www.baidu.com
输出:
www.baidu.com/telnet: Temporary failure in name resolution
[root@localhost ~]#
说明:
处理这种情况方法:
(1)确认域名是否正确
(2)确认本机的域名解析有关的设置是否正确(/etc/resolv.conf中nameserver的设置是否正确,如果没有,可以使用nameserver 8.8.8.8)
(3)确认防火墙是否放开了UDP53端口的访问(DNS使用UDP协议,端口53,使用iptables-save查看)
实例3:
命令:
输出:
Trying 192.168.120.206...
telnet: connect to address 192.168.120.206: Connection refused
telnet: Unable to connect to remote host: Connection refused
[root@localhost ~]#
说明:
处理这种情况:
(1)确认ip地址或者主机名是否正确?
(2)确认端口是否正确,是否默认的23端口
实例4:启动telnet服务
命令:
service xinetd restart
输出:
[root@localhost xinetd.d]# ll
总计 124
-rw-r--r-- 1 root root 1157 2011-05-31 chargen-dgram
-rw-r--r-- 1 root root 1159 2011-05-31 chargen-stream
-rw-r--r-- 1 root root 523 2009-09-04 cvs
-rw-r--r-- 1 root root 1157 2011-05-31 daytime-dgram
-rw-r--r-- 1 root root 1159 2011-05-31 daytime-stream
-rw-r--r-- 1 root root 1157 2011-05-31 discard-dgram
-rw-r--r-- 1 root root 1159 2011-05-31 discard-stream
-rw-r--r-- 1 root root 1148 2011-05-31 echo-dgram
-rw-r--r-- 1 root root 1150 2011-05-31 echo-stream
-rw-r--r-- 1 root root 323 2004-09-09 eklogin
-rw-r--r-- 1 root root 347 2005-09-06 ekrb5-telnet
-rw-r--r-- 1 root root 326 2004-09-09 gssftp
-rw-r--r-- 1 root root 310 2004-09-09 klogin
-rw-r--r-- 1 root root 323 2004-09-09 krb5-telnet
-rw-r--r-- 1 root root 308 2004-09-09 kshell
-rw-r--r-- 1 root root 317 2004-09-09 rsync
-rw-r--r-- 1 root root 1212 2011-05-31 tcpmux-server
-rw-r--r-- 1 root root 1149 2011-05-31 time-dgram
-rw-r--r-- 1 root root 1150 2011-05-31 time-stream
[root@localhost xinetd.d]# cat krb5-telnet
# default: off
# description: The kerberized telnet server accepts normal telnet sessions, \\
# but can also use Kerberos 5 authentication.
service telnet
{
flags = REUSE
socket_type = stream
wait = no
user = root
server = /usr/kerberos/sbin/telnetd
log_on_failure += USERID
disable = yes
}
[root@localhost xinetd.d]#
说明:
配置参数,通常的配置如下:
service telnet
{
disable = no #启用
flags = REUSE #socket可重用
socket_type = stream #连接方式为TCP
wait = no #为每个请求启动一个进程
user = root #启动服务的用户为root
server = /usr/sbin/in.telnetd #要激活的进程
log_on_failure += USERID #登录失败时记录登录用户名
}
如果要配置允许登录的客户端列表,加入
only_from = 192.168.0.2 #只允许192.168.0.2登录
如果要配置禁止登录的客户端列表,加入
no_access = 192.168.0.{2,3,4} #禁止192.168.0.2、192.168.0.3、192.168.0.4登录
如果要设置开放时段,加入
access_times = 9:00-12:00 13:00-17:00 # 每天只有这两个时段开放服务(我们的上班时间:P)
如果你有两个IP地址,一个是私网的IP地址如192.168.0.2,一个是公网的IP地址如218.75.74.83,如果你希望用户只能从私网来登录telnet服务,那么加入
bind = 192.168.0.2
各配置项具体的含义和语法可参考xined配置文件属性说明(man xinetd.conf)
配置端口,修改services文件:
# vi /etc/services
找到以下两句
telnet 23/tcp
telnet 23/udp
如果前面有#字符,就去掉它。telnet的默认端口是23,这个端口也是黑客端口扫描的主要对象,因此最好将这个端口修改掉,修改的方法很简单,就是将23这个数字修改掉,改成大一点的数字,比如61123。注意,1024以下的端口号是internet保留的端口号,因此最好不要用,还应该注意不要与其它服务的端口冲突。
启动服务:
service xinetd restart
实例5:正常telnet
命令:
telnet 192.168.120.204
输出:
Trying 192.168.120.204...
Connected to 192.168.120.204 (192.168.120.204).
Escape character is \'^]\'.
localhost (Linux release 2.6.18-274.18.1.el5 #1 SMP Thu Feb 9 12:45:44 EST 2012) (1)
login: root
Password:
Login incorrect
说明:
一般情况下不允许root从远程登录,可以先用普通账号登录,然后再用su -切到root用户。
#######################
我常用的ping命令:
ping主要是用来检查两台机器间的联通状况。
ping IP
ping 域名
ping -c 10 -i 3 IP: 每三秒发一次ICMP包,一共发十次。
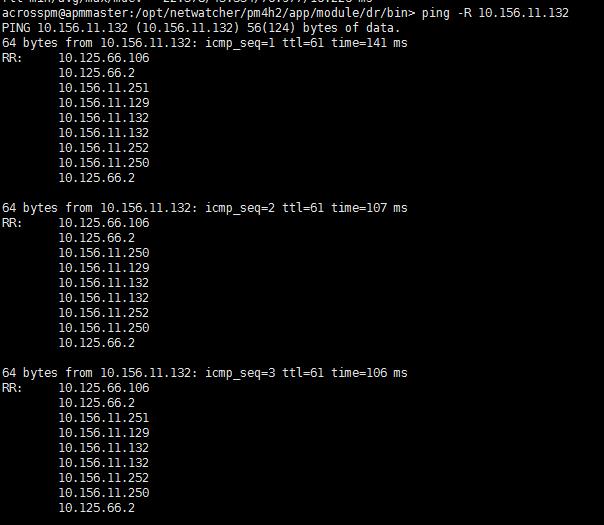
ping -R IP: ping某一个IP的路由信息、
以上是关于蓝易云:Linux系统ping命令 – 测试主机间网络连通性的主要内容,如果未能解决你的问题,请参考以下文章