Arduino框架下ESP32使用固件自带的SD库的总结
Posted perseverance52
tags:
篇首语:本文由小常识网(cha138.com)小编为大家整理,主要介绍了Arduino框架下ESP32使用固件自带的SD库的总结相关的知识,希望对你有一定的参考价值。
Arduino框架下ESP32使用固件自带的SD库的总结
- 代码调试还是使用
VSCode PIO方便一些。可以很方便的去查看相关函数的上一层封装。
跟随SD库附带的ReadMe文件认识一下卡的类型

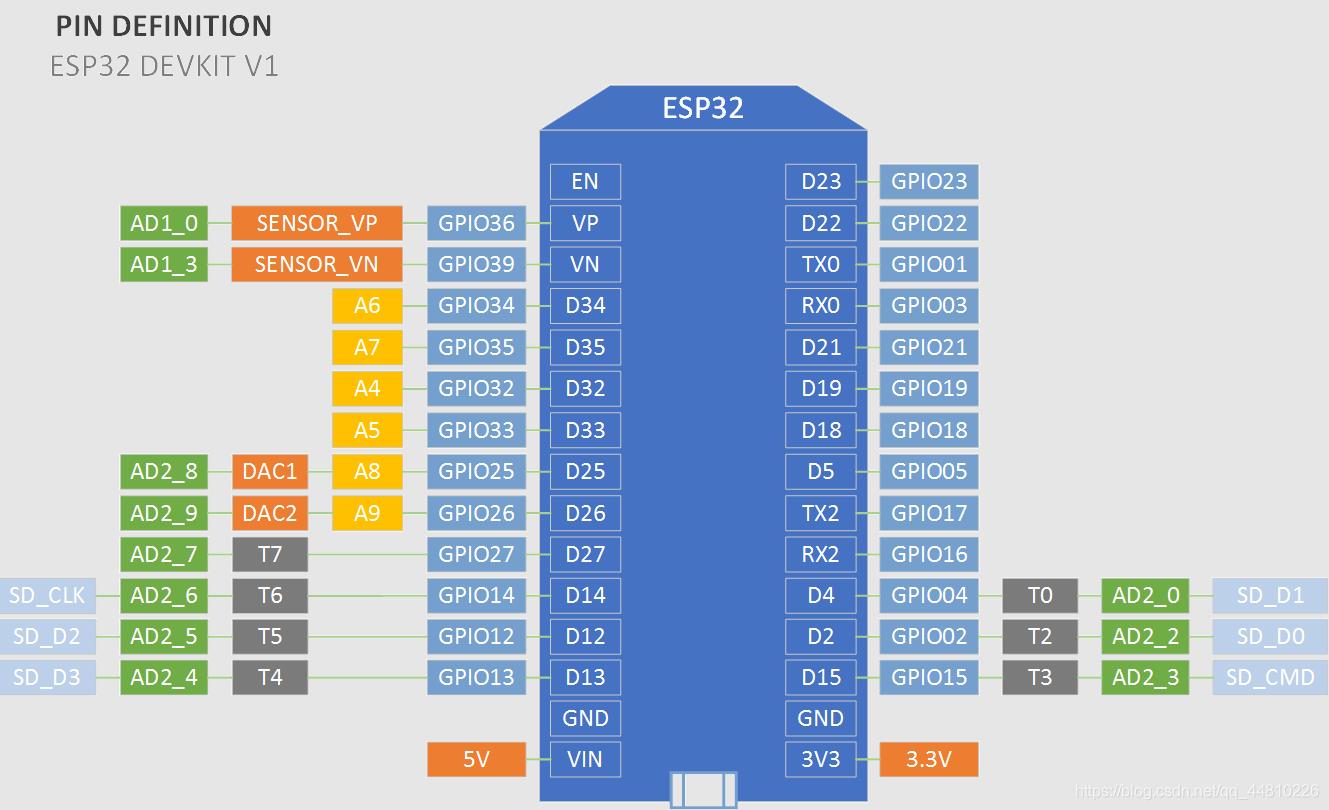
- SD卡与ESP32接线图(VSPI接线)

- 默认使用的是VSPI总线
| SPI | MOSI | MISO | CLK | CS |
|---|---|---|---|---|
| VSPI | 23 | 19 | 18 | 5 |
- SPI通讯
1.GND-for the ground pins.
2.VCC-for the supply voltage.
3.MISO-for the SPI Master Input Slave Output pin.
4.MOSI-for the SPI Master Output Slave Input pin.
5.SCK-for the SPI Serial Clock pin.
6.CS-for the SPI Chip Select pin.
- gnd -用于接地插脚。
- vcc- 电源电压。
- miso-用于SPI主输入从输出引脚。
- mosi -用于SPI主输出从输入引脚。
- sck -用于SPI串行时钟引脚。
- cs -用于SPI芯片选择引脚。
- esp32 Devkeit
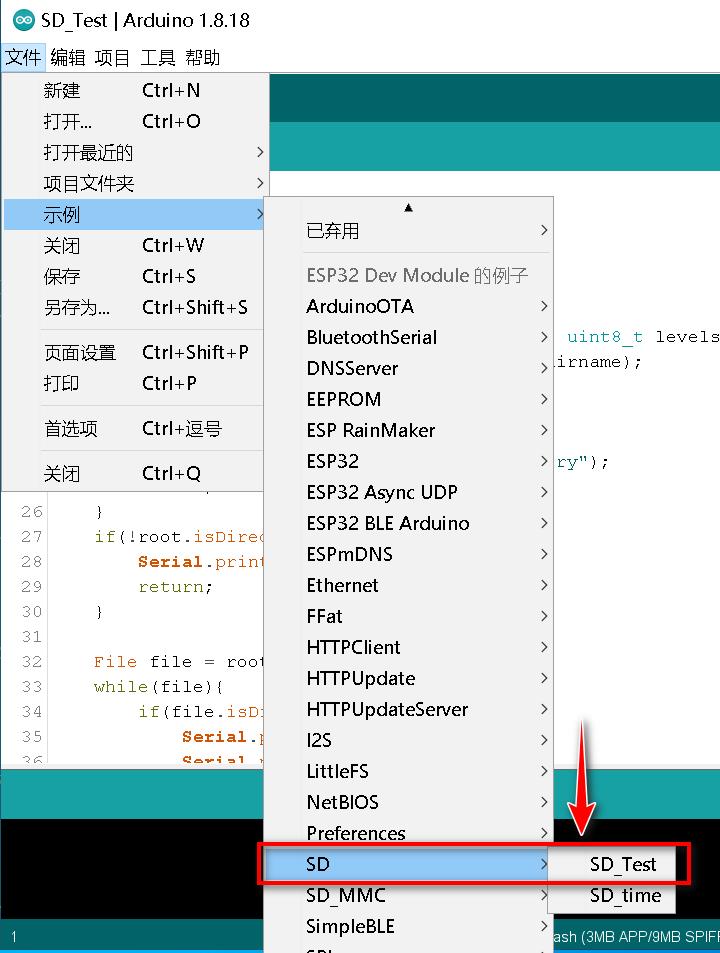
Arduino IDE中SD卡示例位置
-
本实验所使用的模块
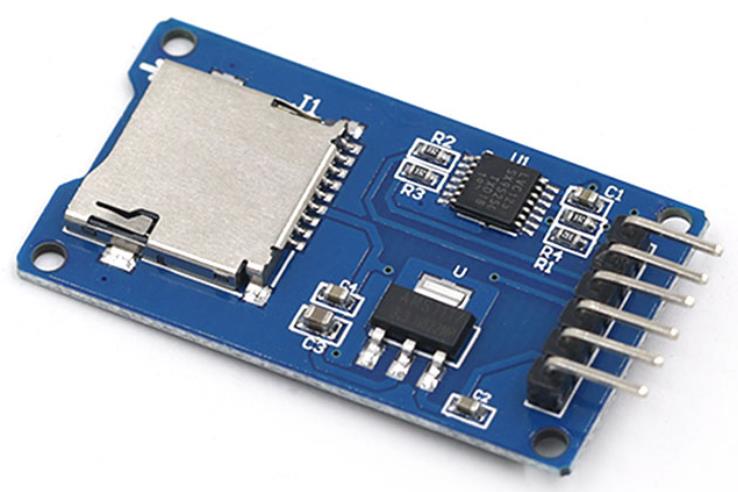
-
实例代码
/*
 * Connect the SD card to the following pins:
 *
 * SD Card | ESP32
 *    D2       -
 *    D3       SS
 *    CMD      MOSI
 *    VSS      GND
 *    VDD      3.3V
 *    CLK      SCK
 *    VSS      GND
 *    D0       MISO
 *    D1       -
 */
#include "FS.h"
#include "SD.h"
#include "SPI.h"

void listDir(fs::FS &fs, const char * dirname, uint8_t levels)
    Serial.printf("Listing directory: %s\\n", dirname);

    File root = fs.open(dirname);
    if(!root)
        Serial.println("Failed to open directory");
        return;

    if(!root.isDirectory())
        Serial.println("Not a directory");
        return;


    File file = root.openNextFile();
    while(file)
        if(file.isDirectory())
            Serial.print("  DIR : ");
            Serial.println(file.name());
            if(levels)
                listDir(fs, file.path(), levels -1);

         else
            Serial.print("  FILE: ");
            Serial.print(file.name());
            Serial.print("  SIZE: ");
            Serial.println(file.size());

        file = root.openNextFile();


void createDir(fs::FS &fs, const char * path)
    Serial.printf("Creating Dir: %s\\n", path);
    if(fs.mkdir(path))
        Serial.println("Dir created");
     else
        Serial.println("mkdir failed");


void removeDir(fs::FS &fs, const char * path)
    Serial.printf("Removing Dir: %s\\n", path);
    if(fs.rmdir(path))
        Serial.println("Dir removed");
     else
        Serial.println("rmdir failed");


void readFile(fs::FS &fs, const char * path)
    Serial.printf("Reading file: %s\\n", path);

    File file = fs.open(path);
    if(!file)
        Serial.println("Failed to open file for reading");
        return;


    Serial.print("Read from file: ");
    while(file.available())
        Serial.write(file.read());

    file.close();


void writeFile(fs::FS &fs, const char * path, const char * message)
    Serial.printf("Writing file: %s\\n", path);

    File file = fs.open(path, FILE_WRITE);
    if(!file)
        Serial.println("Failed to open file for writing");
        return;

    if(file.print(message))
        Serial.println("File written");
     else
        Serial.println("Write failed");

    file.close();


void appendFile(fs::FS &fs, const char * path, const char * message)
    Serial.printf("Appending to file: %s\\n", path);

    File file = fs.open(path, FILE_APPEND);
    if(!file)
        Serial.println("Failed to open file for appending");
        return;

    if(file.print(message))
        Serial.println("Message appended");
     else
        Serial.println("Append failed");

    file.close();


void renameFile(fs::FS &fs, const char * path1, const char * path2)
    Serial.printf("Renaming file %s to %s\\n", path1, path2);
    if (fs.rename(path1, path2))
        Serial.println("File renamed");
     else
        Serial.println("Rename failed");


void deleteFile(fs::FS &fs, const char * path)
    Serial.printf("Deleting file: %s\\n", path);
    if(fs.remove(path))
        Serial.println("File deleted");
     else
        Serial.println("Delete failed");


void testFileIO(fs::FS &fs, const char * path)
    File file = fs.open(path);
    static uint8_t buf[512];
    size_t len = 0;
    uint32_t start = millis();
    uint32_t end = start;
    if(file)
        len = file.size();
        size_t flen = len;
        start = millis();
        while(len)
            size_t toRead = len;
            if(toRead > 512)
                toRead = 512;

            file.read(buf, toRead);
            len -= toRead;

        end = millis() - start;
        Serial.printf("%u bytes read for %u ms\\n", flen, end);
        file.close();
     else
        Serial.println("Failed to open file for reading");


    file = fs.open(path, FILE_WRITE);
    if(!file)
        Serial.println("Failed to open file for writing");
        return;


    size_t i;
    start = millis();
    for(i=0; i<2048; i++)
        file.write(buf, 512);

    end = millis() - start;
    Serial.printf("%u bytes written for %u ms\\n", 2048 * 512, end);
    file.close();


void setup()
    Serial.begin(115200);
    if(!SD.begin())
        Serial.println("Card Mount Failed");
        return;

    uint8_t cardType = SD.cardType();

    if(cardType == CARD_NONE)
        Serial.println("No SD card attached");
        return;


    Serial.print("SD Card Type: ");
    if(cardType == CARD_MMC)
        Serial.println("MMC");
     else if(cardType == CARD_SD)
        Serial.println("SDSC");
     else if(cardType == CARD_SDHC)
        Serial.println("SDHC");
     else
        Serial.println("UNKNOWN");


    uint64_t cardSize = SD.cardSize() / (1024 * 1024);
    Serial.printf("SD Card Size: %lluMB\\n", cardSize);

    listDir(SD, "/", 0);
    createDir(SD, "/mydir");
    listDir(SD, "/", 0);
    removeDir(SD, "/mydir");
    listDir(SD, "/", 2);
    writeFile(SD, "/hello.txt", "Hello ");
    appendFile(SD, "/hello.txt", "World!\\n");
    readFile(SD, "/hello.txt");
    deleteFile(SD, "/foo.txt");
    renameFile(SD, "/hello.txt", "/foo.txt");
    readFile(SD, "/foo.txt");
    testFileIO(SD, "/test.txt");
    Serial.printf("Total space: %lluMB\\n", SD.totalBytes() / (1024 * 1024));
    Serial.printf("Used space: %lluMB\\n", SD.usedBytes() / (1024 * 1024));


void loop()
SD卡初始化
    if(!SD.begin())
        Serial.println("Card Mount Failed");
        return;
- 自定义
CS引脚
SD.begin(CSpin)
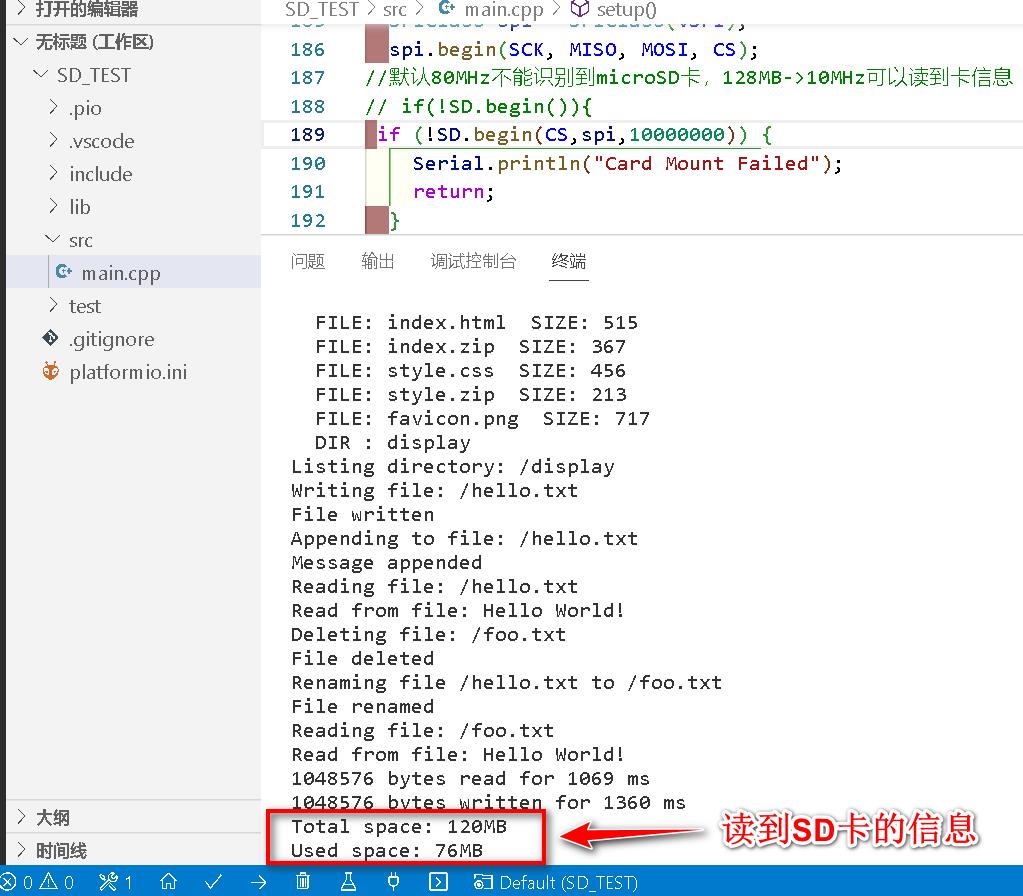
- 默认与microSD通讯时的频率为
10MHz,个人测试推荐使用默认频率比较稳定,容易识别到卡。如果设置到更高频率很大几率识别不到卡。esp32除了默认的SPI1连接的外置flash最高速度可以达到80MHz,其他的两组SPI通讯速度不能设置这么高。
自定义SPI引脚
#define SCK  17  //tx2
#define MISO  19
#define MOSI  23
#define CS  5

   SPIClass spi = SPIClass(VSPI);
   spi.begin(SCK, MISO, MOSI, CS);
   if (!SD.begin(CS,spi,10000000))
    Serial.println("Card Mount Failed");
    return;
-
- 采用
128MB容量的MicroSD卡很容易就读到。
- 采用
2GB的内存卡测试

插卡注意事项
先插卡再给MicroSD卡模块供电,如果是热拔插的情况,在插上Micro SD卡后需要重新给MicroSD卡模块断电重启一下,否则无法读取到卡。这一点很重要。
- 目前发现市面上的有些
MicroSD卡存在读取不到,不能被识别的情况,我在测试手上的3张MicroSD卡时,发现一张1GB容量的卡不管怎么都读不到,不知道是卡本身的原因还是ESP32就是对这类颗粒的存储芯片不兼容,内存卡是好的,通过读卡器,电脑都是可以识别到的,能正常写入和读取的卡。- 容量范围:最大理论支持32GB,目前手上没有这个容量的卡,没法验证和测试。
以上是关于Arduino框架下ESP32使用固件自带的SD库的总结的主要内容,如果未能解决你的问题,请参考以下文章