02 es 集群搭建
Posted 蓝风9
tags:
篇首语:本文由小常识网(cha138.com)小编为大家整理,主要介绍了02 es 集群搭建相关的知识,希望对你有一定的参考价值。
前言
呵呵 最近有一系列环境搭建的相关需求
记录一下
es 三个节点 : 192.168.110.150, 192.168.110.151, 192.168.110.152
150 为 master, 151 为 slave01, 152 为 slave02
三台机器都做了 trusted shell
es 单节点 docker 搭建
创建 docker-compose.yml 如下, 然后 docker-compose up -d 启动 es 即可使用
version: '3'
services:
  es:
    image: elasticsearch:7.7.0
    container_name: es
    environment:
      - "cluster.name=es"
      - "discovery.type=single-node"
      - "ES_JAVA_OPTS=-Xms1024m -Xmx1024m"
    volumes:
#      - ./es/plugins:/usr/share/elasticsearch/plugins
      - ./es/data:/usr/share/elasticsearch/data
      - ./es/config:/usr/share/elasticsearch/config
    ports:
      - 9200:9200
      - 9300:9300
  kibana:
    image: kibana:7.7.0
    container_name: kibana
    depends_on:
      - es
    environment:
      - "elasticsearch.hosts=http://es:9200"
    volumes:
      - ./kibana/config:/usr/share/kibana/config
    ports:
      - 5601:5601
es 集群搭建
es 三个节点 : 192.168.110.150, 192.168.110.151, 192.168.110.152
1. 基础环境准备
192.168.110.150, 192.168.110.151, 192.168.110.152 上面安装 jdk, 上传 es 的安装包
es 7.17 至少需要 jdk11
安装包来自于 Download Elasticsearch | Elastic
2. es 配置调整
更新 master, slave01, slave02 的 elasticsearch.yml 的配置文件如下
cluster.name: es_cluster
cluster.initial_master_nodes: ["master_1"]
node.master: true
node.max_local_storage_nodes: 3
node.name: master_1
node.data: false
path.data: /data/es/data/master_1
path.logs: /data/es/log/master_1
bootstrap.memory_lock: true
network.host: master
http.port: 9210
transport.tcp.port: 9310
discovery.zen.ping.unicast.hosts: ["master:9310"]
discovery.zen.minimum_master_nodes: 1
gateway.recover_after_nodes: 1
action.destructive_requires_name: true
discovery.zen.ping_timeout: 10s
node.attr.size: medium
cluster.name: es_cluster
cluster.initial_master_nodes: ["master_1"]
node.master: false
node.max_local_storage_nodes: 3
node.name: slave_1
node.data: true
path.data: /data/es/data/slave_1
path.logs: /data/es/log/slave_1
bootstrap.memory_lock: true
network.host: slave01
http.port: 9210
transport.tcp.port: 9310
discovery.zen.ping.unicast.hosts: ["master:9310"]
discovery.zen.minimum_master_nodes: 1
gateway.recover_after_nodes: 1
action.destructive_requires_name: true
discovery.zen.ping_timeout: 10s
node.attr.size: medium
cluster.name: es_cluster
cluster.initial_master_nodes: ["master_1"]
node.master: false
node.max_local_storage_nodes: 3
node.name: slave_2
node.data: true
path.data: /data/es/data/slave_2
path.logs: /data/es/log/slave_2
bootstrap.memory_lock: true
network.host: slave02
http.port: 9210
transport.tcp.port: 9310
discovery.zen.ping.unicast.hosts: ["master:9310"]
discovery.zen.minimum_master_nodes: 1
gateway.recover_after_nodes: 1
action.destructive_requires_name: true
discovery.zen.ping_timeout: 10s
node.attr.size: medium
三台机器分别创建 数据目录, 日志目录
mkdir -p /data/es/data/master_1
mkdir -p /data/es/log/master_1

mkdir -p /data/es/data/slave_1
mkdir -p /data/es/log/slave_1

mkdir -p /data/es/data/slave_2
mkdir -p /data/es/log/slave_2
新增 es 用户, 并增加相关配置
groupadd es
useradd -g es es
chown -R es:es /usr/local/ProgramFiles/elasticsearch-7.17/
chown -R es:es /data/es
passwd es
3. 修改涉及的系统配置
编辑 /etc/security/limits.conf, 新增如下配置
* soft nofile 300000
* hard nofile 300000
* soft nofile 65536
* hard nofile 65536
* hard memlock unlimited
* soft memlock unlimited
编辑 /etc/sysctl.conf 配置文件, 新增如下配置, 并使用 sysctl -p 重启
vm.max_map_count=262144
vm.swappiness=1
4. 切换到 es 用户, 启动集群
三台机器 分别切换到 es 用户
并启动集群, 注意 es 7.17 需要 jdk11
./bin/elasticsearch -d 测试集群
基于 curl 的测试
root@master:/usr/local/ProgramFiles/kafka_2.12-2.8.1# curl  -XPUT -H 'content-Type:application/json'  -d  '"mappings":"properties":"title":"type":"text","description":"type":"text","price":"type":"double","onSale":"type":"boolean","type":"type":"integer","createDate":"type":"date"' http://192.168.110.150:9210/position/?pretty

  "acknowledged" : true,
  "shards_acknowledged" : true,
  "index" : "position"

root@master:/usr/local/ProgramFiles/kafka_2.12-2.8.1# curl -XPOST -H 'content-Type:application/json' -d '"id":"5","title":"chinese","description":"chinese","price":5000' http://192.168.110.150:9210/position/_doc
"_index":"position","_type":"_doc","_id":"E23qwoABZqbSMddNmV3L","_version":1,"result":"created","_shards":"total":2,"successful":2,"failed":0,"_seq_no":0,"_primary_term":1
root@master:/usr/local/ProgramFiles/kafka_2.12-2.8.1# curl -XPOST -H 'content-Type:application/json' -d '"id":"6","title":"math","description":"math","price":2000' http://192.168.110.150:9210/position/_doc
"_index":"position","_type":"_doc","_id":"FG3qwoABZqbSMddNml1j","_version":1,"result":"created","_shards":"total":2,"successful":2,"failed":0,"_seq_no":1,"_primary_term":1
root@master:/usr/local/ProgramFiles/kafka_2.12-2.8.1# curl -XPOST -H 'content-Type:application/json' -d '"id":"6","title":"english","description":"english","price":3000' http://192.168.110.150:9210/position/_doc
"_index":"position","_type":"_doc","_id":"FW3qwoABZqbSMddNml2k","_version":1,"result":"created","_shards":"total":2,"successful":2,"failed":0,"_seq_no":2,"_primary_term":1
root@master:/usr/local/ProgramFiles/kafka_2.12-2.8.1# curl http://192.168.110.150:9210/position/_search
"took":896,"timed_out":false,"_shards":"total":1,"successful":1,"skipped":0,"failed":0,"hits":"total":"value":3,"relation":"eq","max_score":1.0,"hits":["_index":"position","_type":"_doc","_id":"E23qwoABZqbSMddNmV3L","_score":1.0,"_source":"id":"5","title":"chinese","description":"chinese","price":5000,"_index":"position","_type":"_doc","_id":"FG3qwoABZqbSMddNml1j","_score":1.0,"_source":"id":"6","title":"math","description":"math","price":2000,"_index":"position","_type":"_doc","_id":"FW3qwoABZqbSMddNml2k","_score":1.0,"_source":"id":"6","title":"english","description":"english","price":3000]
root@master:/usr/local/ProgramFiles/kafka_2.12-2.8.1#
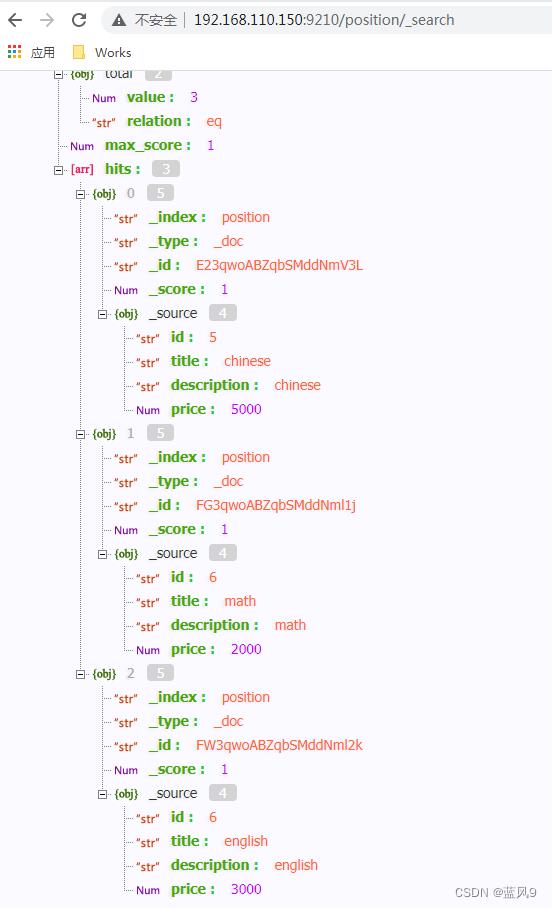
浏览器中 get 请求查询索引的数据
完
以上是关于02 es 集群搭建的主要内容,如果未能解决你的问题,请参考以下文章