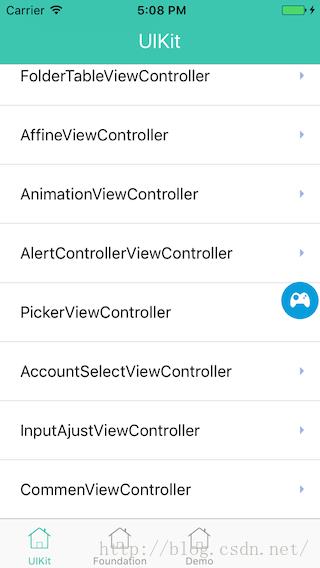
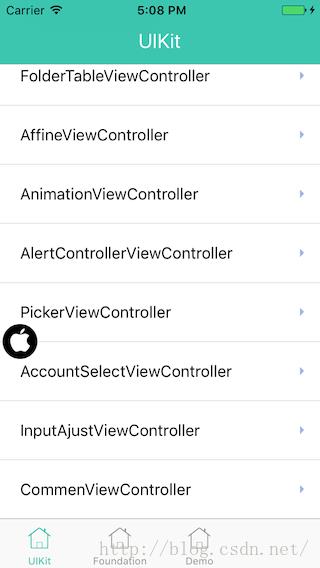
DemoiOS可吸附拖动的悬浮窗按钮插件
Posted Mr_厚厚
tags:
篇首语:本文由小常识网(cha138.com)小编为大家整理,主要介绍了DemoiOS可吸附拖动的悬浮窗按钮插件相关的知识,希望对你有一定的参考价值。
---------------------------------------------------------------------------------------------------------------------------------------------------------------------------------
@更新2017.1.14:
考虑到悬浮窗复用度高于是将其封装成了一个SDK 插件,插件github地址:https://github.com/jiangxh1992/XHFloatWindow
欢迎一起完善优化这个插件,目前很比较精简,但可以满足一般情况的需求;
之前的demo已经删除停止更新;
---------------------------------------------------------------------------------------------------------------------------------------------------------------------------------
@废话在前
悬浮窗用于在整个程序过程中始终显示在屏幕最上方供用户进行全局操作,可拖动,可点击,ios中悬浮窗的实现主要有两种思路,一种是使用UIWindow,另一种是使用UIButton。前者通过下文的探索已经比较完美的实现所需功能,后者仍然存在问题待解决,下面一起来从简单入手披荆斩棘来实现这个奇妙的悬浮窗组件吧!
一. UIWindow实现可吸附拖动的悬浮按钮(按钮拖动和点击事件冲突解决)
参考http://www.myexception.cn/operating-system/1924022.html的思路使用一个UIWindow实现按钮悬浮在应用中不受页面切换的影响,之后要实现悬浮窗口的拖动和自动吸附在靠近的屏幕边缘。


开始思路是直接改写UIButton,使用touch代理事件来监听按钮开始触摸,移动,触摸结束等事件获取触点坐标,改变UIWindow的位置实现悬浮窗整体的移动,
但发现按钮触摸事件和按钮的点击事件冲突了,点击按钮不响应。网上有解决办法是自定义tap和pan手势事件解决,我没有成功,想到另一个简单的办法:
在改写的可拖动的UIButton中加代理事件,只使用touch事件,touch began时记录下开始触点的位置,touchended的时候比较开始的触点位置和结束的触点位置的距离,如果距离足够小就认为是点击事件,否则只认为是拖动了(当然如果拖动回到起点还认为是点击事件不好,这个可以忽略,或者通过计算时间长度来优化)。
实现代码如下,重写一个UIDragButton类,用于实现悬浮uiwindow的移动和点击事件的代理监听,定义一个FloatingViewController作为初始化的控制器,设置悬浮uiwindow和悬浮按钮以及按钮点击事件的处理等。
改写的UIButton:
//
//  UIDragButton.h
//  JXHDemo
//
//  Created by Xinhou Jiang on 6/14/16.
//  Copyright © 2016 Jiangxh. All rights reserved.
//

#import <UIKit/UIKit.h>
/**
 *  代理按钮的点击事件
 */
@protocol UIDragButtonDelegate <NSObject>

- (void)dragButtonClicked:(UIButton *)sender;

@end

@interface UIDragButton : UIButton

/**
 *  悬浮窗所依赖的根视图
 */
@property (nonatomic, strong)UIView *rootView;

/**
 *  UIDragButton的点击事件代理
 */
@property (nonatomic, weak)id<UIDragButtonDelegate>btnDelegate;

@end
//
// UIDragButton.m
// JXHDemo
//
// Created by Xinhou Jiang on 6/14/16.
// Copyright © 2016 Jiangxh. All rights reserved.
//
// 屏幕高度
#define ScreenH [UIScreen mainScreen].bounds.size.height
// 屏幕宽度
#define ScreenW [UIScreen mainScreen].bounds.size.width
#import "UIDragButton.h"
@interface UIDragButton()
/**
* 开始按下的触点坐标
*/
@property (nonatomic, assign)CGPoint startPos;
@end
@implementation UIDragButton
// 枚举四个吸附方向
typedef enum
LEFT,
RIGHT,
TOP,
BOTTOM
Dir;
/**
* 开始触摸,记录触点位置用于判断是拖动还是点击
*/
- (void)touchesBegan:(NSSet<UITouch *> *)touches withEvent:(nullable UIEvent *)event
// 获得触摸在根视图中的坐标
UITouch *touch = [touches anyObject];
_startPos = [touch locationInView:_rootView];
/**
* 手指按住移动过程,通过悬浮按钮的拖动事件来拖动整个悬浮窗口
*/
- (void)touchesMoved:(NSSet *)touches withEvent:(UIEvent *)event
// 获得触摸在根视图中的坐标
UITouch *touch = [touches anyObject];
CGPoint curPoint = [touch locationInView:_rootView];
// 移动按钮到当前触摸位置
self.superview.center = curPoint;
/**
* 拖动结束后使悬浮窗口吸附在最近的屏幕边缘
*/
- (void)touchesEnded:(NSSet<UITouch *> *)touches withEvent:(UIEvent *)event
// 获得触摸在根视图中的坐标
UITouch *touch = [touches anyObject];
CGPoint curPoint = [touch locationInView:_rootView];
// 通知代理,如果结束触点和起始触点极近则认为是点击事件
if (pow((_startPos.x - curPoint.x),2) + pow((_startPos.y - curPoint.y),2) < 1)
[self.btnDelegate dragButtonClicked:self];
return;//点击后不吸附
// 与四个屏幕边界距离
CGFloat left = curPoint.x;
CGFloat right = ScreenW - curPoint.x;
CGFloat top = curPoint.y;
CGFloat bottom = ScreenH - curPoint.y;
// 计算四个距离最小的吸附方向
Dir minDir = LEFT;
CGFloat minDistance = left;
if (right < minDistance)
minDistance = right;
minDir = RIGHT;
if (top < minDistance)
minDistance = top;
minDir = TOP;
if (bottom < minDistance)
minDir = BOTTOM;
// 开始吸附
switch (minDir)
case LEFT:
self.superview.center = CGPointMake(self.superview.frame.size.width/2, self.superview.center.y);
break;
case RIGHT:
self.superview.center = CGPointMake(ScreenW - self.superview.frame.size.width/2, self.superview.center.y);
break;
case TOP:
self.superview.center = CGPointMake(self.superview.center.x, self.superview.frame.size.height/2);
break;
case BOTTOM:
self.superview.center = CGPointMake(self.superview.center.x, ScreenH - self.superview.frame.size.height/2);
break;
default:
break;
@end悬浮窗控制器:
//
//  FloatingViewController.h
//  Unity-iPhone
//
//  Created by Xinhou Jiang on 6/13/16.
//
//

#import <UIKit/UIKit.h>

@interface FloatingViewController : UIViewController

@end
//
// FloatingViewController.m
// Unity-iPhone
//
// Created by Xinhou Jiang on 6/13/16.
//
//
// 屏幕高度
#define ScreenH [UIScreen mainScreen].bounds.size.height
// 屏幕宽度
#define ScreenW [UIScreen mainScreen].bounds.size.width
// 悬浮按钮的尺寸
#define floatSize 50
#import "FloatingViewController.h"
#import "UIDragButton.h"
@interface FloatingViewController ()<UIDragButtonDelegate>
/**
* 悬浮的window
*/
@property(strong,nonatomic)UIWindow *window;
/**
* 悬浮的按钮
*/
@property(strong,nonatomic)UIDragButton *button;
@end
@implementation FloatingViewController
- (void)viewDidLoad
[super viewDidLoad];
// 将视图尺寸设置为0,防止阻碍其他视图元素的交互
self.view.frame = CGRectZero;
// 延时显示悬浮窗口
[self performSelector:@selector(createButton) withObject:nil afterDelay:1];
/**
* 创建悬浮窗口
*/
- (void)createButton
// 悬浮按钮
_button = [UIDragButton buttonWithType:UIButtonTypeCustom];
[_button setImage:[UIImage imageNamed:@"add_button"] forState:UIControlStateNormal];
// 按钮图片伸缩充满整个按钮
_button.imageView.contentMode = UIViewContentModeScaleToFill;
_button.frame = CGRectMake(0, 0, floatSize, floatSize);
// 按钮点击事件
//[_button addTarget:self action:@selector(floatBtnClicked:) forControlEvents:UIControlEventTouchUpInside];
// 按钮点击事件代理
_button.btnDelegate = self;
// 初始选中状态
_button.selected = NO;
// 禁止高亮
_button.adjustsImageWhenHighlighted = NO;
_button.rootView = self.view.superview;
// 悬浮窗
_window = [[UIWindow alloc]initWithFrame:CGRectMake(ScreenW-floatSize, ScreenH/2, floatSize, floatSize)];
_window.windowLevel = UIWindowLevelAlert+1;
_window.backgroundColor = [UIColor orangeColor];
_window.layer.cornerRadius = floatSize/2;
_window.layer.masksToBounds = YES;
// 将按钮添加到悬浮按钮上
[_window addSubview:_button];
//显示window
[_window makeKeyAndVisible];
/**
* 悬浮按钮点击
*/
- (void)dragButtonClicked:(UIButton *)sender
// 按钮选中关闭切换
sender.selected = !sender.selected;
if (sender.selected)
[sender setImage:[UIImage imageNamed:@"add_rotate"] forState:UIControlStateNormal];
else
[sender setImage:[UIImage imageNamed:@"add_button"] forState:UIControlStateNormal];
// 关闭悬浮窗
//[_window resignKeyWindow];
//_window = nil;
@end*使用方法只要在根视图控制器中实例化一个FloatingViewController,作为子控制器和子视图即可:

二. 屏幕旋转坐标系错乱问题
由于uiwindow自身的坐标系不随屏幕的旋转而变化,始终是手机正放时左上角为原点的坐标系,而当前视图rootview的坐标系随屏幕旋转而变化,变成旋转后屏幕的左上角为原点的坐标系。
那么问题来了,当屏幕旋转后,悬浮窗所在的uiwindow的坐标系和当前的视图坐标系不一致,导致触摸拖动事件错乱,要解决要么想办法将悬浮窗uiwindow的坐标系变换成和rootview一样的,要么在触摸时将触点在rootview所在坐标系的坐标转化成uiwindow所在的坐标系的坐标。
没有找到将悬浮窗uiwindow的坐标系变成和rootview一致的方法,自己写了一个三种情况(Landscape Left/LandscapeRight/UpsideDown)屏幕旋转后将触点坐标转化到旋转前Portrait时的坐标系中,也就是悬浮窗uiwindow自己的坐标系中,就是根据当前屏幕的旋转方向转化横纵坐标:
// 屏幕颠倒时坐标转换
- (CGPoint)UpsideDown:(CGPoint)p
    return CGPointMake(ScreenW - p.x, ScreenH - p.y);

// 屏幕左转时坐标转换
- (CGPoint)LandscapeLeft:(CGPoint)p
    return CGPointMake(p.y, ScreenW - p.x);

// 屏幕右转时坐标转换
- (CGPoint)LandscapeRight:(CGPoint)p
    return CGPointMake(ScreenH - p.y, p.x);

/**
 *  坐标转换,转换到屏幕旋转之前的坐标系中
 */
- (CGPoint)ConvertDir:(CGPoint)p
    // 获取屏幕方向
    UIInterfaceOrientation orientation = [UIApplication sharedApplication].statusBarOrientation;
    switch (orientation)
        case UIInterfaceOrientationLandscapeLeft:
            return [self LandscapeLeft:p];
            break;
        case UIInterfaceOrientationLandscapeRight:
            return [self LandscapeRight:p];
            break;
        case UIInterfaceOrientationPortraitUpsideDown:
            return [self UpsideDown:p];
            break;
        default:
            return p;
            break;
这样屏幕的吸附要考虑屏幕横横向的情况,悬浮窗的吸附也是使用屏幕旋转前竖直时的坐标系,屏幕的宽度和高度要不变,当屏幕横相时应该将高度和宽度反过来保持和纵向屏幕一致:
// 由于计算吸附时,坐标要转换到手机竖直不旋转时的坐标系,因此要保证屏幕宽度是竖直时的宽度,高度也是竖直时的高度,不随屏幕旋转而变化
    // 获取屏幕方向
    UIInterfaceOrientation orientation = [UIApplication sharedApplication].statusBarOrientation;
    CGFloat W = ScreenW;
    CGFloat H = ScreenH;
    if (orientation == UIInterfaceOrientationLandscapeRight||orientation ==UIInterfaceOrientationLandscapeLeft)
        W = ScreenH;
        H = ScreenW;
屏幕旋转UIWindow坐标系调整
@更新,问题已不存在。
。。。 。。。
三. 悬浮窗吸附加入优化动画
*使用uiview的animation为悬浮窗吸附到屏幕边缘的过程加上中间动画:
    // 开始吸附
    switch (minDir)
        case LEFT:

            [UIView animateWithDuration:0.3 animations:^
                self.superview.center = CGPointMake(self.superview.frame.size.width/2, self.superview.center.y);
            ];
            break;

        case RIGHT:

            [UIView animateWithDuration:0.3 animations:^
                self.superview.center = CGPointMake(W - self.superview.frame.size.width/2, self.superview.center.y);
            ];
            break;

        case TOP:

            [UIView animateWithDuration:0.3 animations:^
                self.superview.center = CGPointMake(self.superview.center.x, self.superview.frame.size.height/2);
            ];
            break;

        case BOTTOM:

            [UIView animateWithDuration:0.3 animations:^
                self.superview.center = CGPointMake(self.superview.center.x, H - self.superview.frame.size.height/2);
            ];
            break;

        default:
            break;
*优化后的完整代码:
//
//  UIDragButton.m
//  JXHDemo
//
//  Created by Xinhou Jiang on 6/14/16.
//  Copyright © 2016 Jiangxh. All rights reserved.
//
// 屏幕高度
#define ScreenH [UIScreen mainScreen].bounds.size.height
// 屏幕宽度
#define ScreenW [UIScreen mainScreen].bounds.size.width

#import "UIDragButton.h"
#import "AppDelegate.h"
@interface UIDragButton()

/**
 *  开始按下的触点坐标
 */
@property (nonatomic, assign)CGPoint startPos;

@end

@implementation UIDragButton

// 枚举四个吸附方向
typedef enum
    LEFT,
    RIGHT,
    TOP,
    BOTTOM
Dir;

/**
 *  开始触摸,记录触点位置用于判断是拖动还是点击
 */
- (void)touchesBegan:(NSSet<UITouch *> *)touches withEvent:(nullable UIEvent *)event
    // 获得触摸在根视图中的坐标
    UITouch *touch = [touches anyObject];
    _startPos = [touch locationInView:_rootView];
    _startPos = [self ConvertDir:_startPos];


/**
 *  手指按住移动过程,通过悬浮按钮的拖动事件来拖动整个悬浮窗口
 */
- (void)touchesMoved:(NSSet *)touches withEvent:(UIEvent *)event

    // 获得触摸在根视图中的坐标
    UITouch *touch = [touches anyObject];
    CGPoint curPoint = [touch locationInView:_rootView];
    curPoint = [self ConvertDir:curPoint];
    // 移动按钮到当前触摸位置
    self.superview.center = curPoint;


/**
 *  拖动结束后使悬浮窗口吸附在最近的屏幕边缘
 */
- (void)touchesEnded:(NSSet<UITouch *> *)touches withEvent:(UIEvent *)event
    // 获得触摸在根视图中的坐标
    UITouch *touch = [touches anyObject];
    CGPoint curPoint = [touch locationInView:_rootView];
    curPoint = [self ConvertDir:curPoint];
    // 通知代理,如果结束触点和起始触点极近则认为是点击事件
    if (pow((_startPos.x - curPoint.x),2) + pow((_startPos.y - curPoint.y),2) < 1)
        [self.btnDelegate dragButtonClicked:self];
        // 点击后不吸附
        return;

    // 由于计算吸附时,坐标要转换到手机竖直不旋转时的坐标系,因此要保证屏幕宽度是竖直时的宽度,高度也是竖直时的高度,不随屏幕旋转而变化
    // 获取屏幕方向
    UIInterfaceOrientation orientation = [UIApplication sharedApplication].statusBarOrientation;
    CGFloat W = ScreenW;
    CGFloat H = ScreenH;
    if (orientation == UIInterfaceOrientationLandscapeRight||orientation ==UIInterfaceOrientationLandscapeLeft)
        W = ScreenH;
        H = ScreenW;

    // 与四个屏幕边界距离
    CGFloat left = curPoint.x;
    CGFloat right = W - curPoint.x;
    CGFloat top = curPoint.y;
    CGFloat bottom = H - curPoint.y;
    // 计算四个距离最小的吸附方向
    Dir minDir = LEFT;
    CGFloat minDistance = left;
    if (right < minDistance)
        minDistance = right;
        minDir = RIGHT;

    if (top < minDistance)
        minDistance = top;
        minDir = TOP;

    if (bottom < minDistance)
        minDir = BOTTOM;


    // 开始吸附
    switch (minDir)
        case LEFT:

            [UIView animateWithDuration:0.3 animations:^
                self.superview.center = CGPointMake(self.superview.frame.size.width/2, self.superview.center.y);
            ];
            break;

        case RIGHT:

            [UIView animateWithDuration:0.3 animations:^
                self.superview.center = CGPointMake(W - self.superview.frame.size.width/2, self.superview.center.y);
            ];
            break;

        case TOP:

            [UIView animateWithDuration:0.3 animations:^
                self.superview.center = CGPointMake(self.superview.center.x, self.superview.frame.size.height/2);
            ];
            break;

        case BOTTOM:

            [UIView animateWithDuration:0.3 animations:^
                self.superview.center = CGPointMake(self.superview.center.x, H - self.superview.frame.size.height/2);
            ];
            break;

        default:
            break;


// 屏幕颠倒时坐标转换
- (CGPoint)UpsideDown:(CGPoint)p
    return CGPointMake(ScreenW - p.x, ScreenH - p.y);

// 屏幕左转时坐标转换
- (CGPoint)LandscapeLeft:(CGPoint)p
    return CGPointMake(p.y, ScreenW - p.x);

// 屏幕右转时坐标转换
- (CGPoint)LandscapeRight:(CGPoint)p
    return CGPointMake(ScreenH - p.y, p.x);

/**
 *  坐标转换,转换到屏幕旋转之前的坐标系中
 */
- (CGPoint)ConvertDir:(CGPoint)p
    // 获取屏幕方向
    UIInterfaceOrientation orientation = [UIApplication sharedApplication].statusBarOrientation;
    switch (orientation)
        case UIInterfaceOrientationLandscapeLeft:
            return [self LandscapeLeft:p];
            break;
        case UIInterfaceOrientationLandscapeRight:
            return [self LandscapeRight:p];
            break;
        case UIInterfaceOrientationPortraitUpsideDown:
            return [self UpsideDown:p];
            break;
        default:
            return p;
            break;


@end
@至此uiwindow实现悬浮窗已经完美实现!
四. UIButton实现悬浮窗
使用UIButton实现就不依靠UIWindow来将悬浮窗置顶了,而是想办法直接将一个UIButton按钮置顶。
UIDragButton的写法与上面的基本一样,除了移动的时候改变的是按钮自身的坐标不再是UIWindow的坐标,同时也不需要在屏幕旋转时进行坐标变换了,那些都是UIWindow惹出的问题,通过下面的方法可以将UIButton显示置顶,但并不是完美的置顶,虽然按钮始终渲染在最顶层,但当有新组件后来添加时触摸事件会覆盖掉悬浮按钮,即虽然悬浮按钮显示在后添加组件的上面,但却不响应事件,求解决办法==。
/**
 *  创建单纯uibutton悬浮窗口
 */
- (void)createButton

    // 悬浮按钮
    _button = [UIDragButton buttonWithType:UIButtonTypeCustom];
    [_button setImage:[UIImage imageNamed:@"add_button"] forState:UIControlStateNormal];
    // 按钮图片伸缩充满整个按钮
    _button.imageView.contentMode = UIViewContentModeScaleToFill;
    _button.frame = CGRectMake(0, 0, floatSize, floatSize);
    // 按钮点击事件
    [_button addTarget:self action:@selector(floatBtnClicked:) forControlEvents:UIControlEventTouchUpInside];
    // 初始选中状态
    _button.selected = NO;
    // 禁止高亮
    _button.adjustsImageWhenHighlighted = NO;
    _button.rootView = self.view.superview;
    _button.btnDelegate = self;

    // 置顶(只是显示置顶,但响应事件会被后来者覆盖!)
    _button.layer.zPosition = FLT_MAX;
    [self.view.superview addSubview:_button];
@求完美方案。。。。
不用留邮箱了^^,已经建了github项目:https://github.com/jiangxh1992/IOSFloatingWindow
orz......有问题吐槽请留言,帮到您烦请帮顶一下,谢谢^_^
---------------------------------------------------------------------------------------------------------------------------------------------------------------------------------
@更新2017.1.14:
考虑到悬浮窗复用度高于是将其封装成了一个SDK 插件,插件github地址:https://github.com/jiangxh1992/XHFloatWindow
欢迎一起完善优化这个插件,目前很比较精简,但可以满足一般情况的需求;
之前的demo已经删除停止更新;
以上是关于DemoiOS可吸附拖动的悬浮窗按钮插件的主要内容,如果未能解决你的问题,请参考以下文章