Android的ToolBar简单使用
Posted Mr_Tony
tags:
篇首语:本文由小常识网(cha138.com)小编为大家整理,主要介绍了Android的ToolBar简单使用相关的知识,希望对你有一定的参考价值。
文章目录
一、前言
在实际开发中,通常会有应用操作栏,如果整个应用有一个统一风格的应用状态栏的话,我们常常会自己对其封装一个公共的组件在各个地方进行引入。不过官方对其提供栏一个公共状态栏的组件,并且拥有其一些常用的属性。以前是ActionBar,现在叫做ToolBar。而且还可以和一些其它的组件进行联动。这些组件在不满足其使用的话还可以进行充分的拓展,拓展方式也很简单。但是由于是遵照Design风格设计的,这种风格国内用的感觉比较少,所以如果想要对其改造的符合具体使用场景的话,还不如自己组装一个公共状态栏。所以感觉大家也就是在处理一些和其它组件的联动的时候会用到ToolBar。
二、Activity、FragmentActivity与ToolsBar的关系
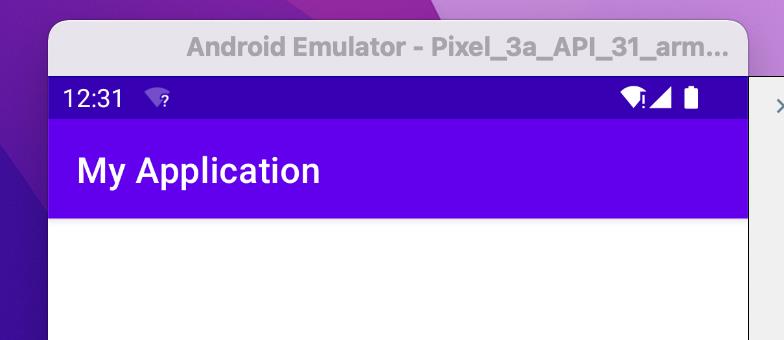
这里我们从最基本代码演示,现在假如我们创建一个项目。那么这个项目是默认是带着ToolsaBar的。效果如下:

默认代码如下:
androidManifest.xml
<application
        android:allowBackup="true"
        android:icon="@mipmap/ic_launcher"
        android:label="@string/app_name"
        android:roundIcon="@mipmap/ic_launcher_round"
        android:supportsRtl="true"
        android:theme="@style/Theme.MyApplication">
</application>
themes.xml
<resources xmlns:tools="http://schemas.android.com/tools">
    <!-- Base application theme. -->
    <style name="Theme.MyApplication" parent="Theme.MaterialComponents.DayNight.DarkActionBar">
        <!-- Primary brand color. -->
        <item name="colorPrimary">@color/purple_500</item>
        <item name="colorPrimaryVariant">@color/purple_700</item>
        <item name="colorOnPrimary">@color/white</item>
        <!-- Secondary brand color. -->
        <item name="colorSecondary">@color/teal_200</item>
        <item name="colorSecondaryVariant">@color/teal_700</item>
        <item name="colorOnSecondary">@color/black</item>
        <!-- Status bar color. -->
        <item name="android:statusBarColor" tools:targetApi="l">?attr/colorPrimaryVariant</item>
        <!-- Customize your theme here. -->
    </style>
</resources>
MainActivity.kt
class MainActivity : AppCompatActivity()
    override fun onCreate(savedInstanceState: Bundle?)
        super.onCreate(savedInstanceState)
        setContentView(R.layout.activity_main)
activity_tools_bar.xml
<?xml version="1.0" encoding="utf-8"?>
<androidx.constraintlayout.widget.ConstraintLayout xmlns:android="http://schemas.android.com/apk/res/android"
    xmlns:app="http://schemas.android.com/apk/res-auto"
    xmlns:tools="http://schemas.android.com/tools"
    android:layout_width="match_parent"
    android:layout_height="match_parent"
    tools:context=".MainActivity">

</androidx.constraintlayout.widget.ConstraintLayout>
可以看到在不更改themes的前提下(默认主题可以看到是有ActionBar的),继承AppCompatActivity时候,默认就会带一个状态栏。这个状态栏是通过操作ActionBar进行使用的,所以如果是一些简单的UI和操作的话就不用在布局里面定义新的ToolsBar或者ActionBar了,直接使用这个就可以进行操作,如下
supportActionBar?.title = "test"
这里不使用如下代码
actionBar?.title = "test"
是因为actionBar这个变量属于Activity类里面,但是这个类需要调用setActionBar(@Nullable Toolbar toolbar)进行设置,如果没有设置的话,值就是空的。而supportActionBar是Appcompatctivity中调用getSupportActionBar()通过getDelegate().getSupportActionBar();中的代理设置的,所以可以使用(这里没有细看,有些地方会有疏漏,并不完全对)。
三、ToolsBar的初步使用
我们在布局里面添加如下代码:
<?xml version="1.0" encoding="utf-8"?>
<androidx.constraintlayout.widget.ConstraintLayout xmlns:android="http://schemas.android.com/apk/res/android"
    xmlns:app="http://schemas.android.com/apk/res-auto"
    xmlns:tools="http://schemas.android.com/tools"
    android:layout_width="match_parent"
    android:layout_height="match_parent"
    tools:context=".ToolsBarActivity">
    <androidx.appcompat.widget.Toolbar
        android:id="@+id/toolbar"
        android:layout_width="match_parent"
        android:layout_height="wrap_content"
        android:background="@color/black"
        android:minHeight="?attr/actionBarSize"
        android:paddingEnd="20dp"
        app:title="少数的"
        app:layout_constraintEnd_toEndOf="parent"
        app:layout_constraintStart_toStartOf="parent"
        app:layout_constraintTop_toTopOf="parent"
        app:titleTextColor="@android:color/white"/>

</androidx.constraintlayout.widget.ConstraintLayout>
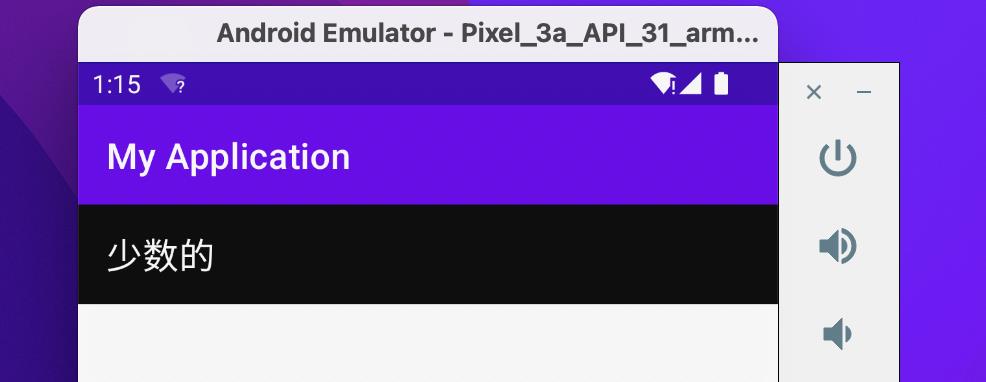
可以看到如下效果:

可以看到我们自己的ToolBar和系统的进行重叠了,这里需要修改系统主题将ActionBar隐藏掉,如下所示:
<style name="AppTheme_NoActionBar" parent="Theme.AppCompat.Light.NoActionBar">
    </style>
也可以在style里面添加以下代码:
<item name="windowActionBar">false</item>
<item name="windowNoTitle">true</item>
例如:
 <style name="Theme.AppCompat.Light.NoActionBar">
        <item name="windowActionBar">false</item>
        <item name="windowNoTitle">true</item>
    </style>
并将主题修改为该主题,效果如下:

注意:这里不需要设置supportActionBar = toolBar即可出现效果。
下面是ToolBar的一些常用属性可以供实际开发配置:
| 属性名称 | 作用 |
|---|---|
| toolbar:navigationIcon | 设置toolbar左边按钮图片 |
| toolbar:titleTextColor | 主标题颜色 |
| toolbar:subtitle | 副标题 |
| toolbar:subtitleTextColor | 副标题颜色 |
| toolbar:menu | 设置右侧折叠菜单 |
四、ToolBar的菜单配置
有时候ToolBar右侧需要一个菜单选项,那么可以通过toolbar:menu进行配置,这里需要创建一个菜单,步骤如下:
首先在../app/res/下面创建menu文件夹,里面创建menu.xml。内容如下:
<?xml version="1.0" encoding="utf-8"?>
<menu
    xmlns:android="http://schemas.android.com/apk/res/android"
    xmlns:app="http://schemas.android.com/apk/res-auto">
    <item
        android:id="@+id/action_search"
        android:title="search"
        android:orderInCategory="1"
        android:icon="@mipmap/ic_search"
        app:showAsAction="always" />
</menu>
在item中有两个需要注意的地方
-
orderInCategory: 表示排列的顺序,数值为int类型,数值越小,越靠近前面,数值一样,按先后顺序排列
-
showAsAction:显示规则,其规则如下:
| showAsAction 值 | 作用 |
|---|---|
| always | 总是显示在界面上 |
| never | 不显示在界面上,只让出现在右边的三个点中 |
| ifRoom | 如果有位置才显示,不然就出现在右边的三个点中 |
菜单的点击事件监听如下:
  private val toolbar: Toolbar by lazy
        findViewById(R.id.toolbar)

   toolbar.setOnMenuItemClickListener
            when(it.itemId)
                R.id.action_search ->
                    Toast.makeText(this,"搜索",Toast.LENGTH_SHORT).show()


            true
五、返回时间监听
一般ToolBar都有左上角的返回键,这里对此的监听如下:
 toolbar.setNavigationOnClickListener
            finish()
六、自定义ToolBar
需求总是千奇百怪,比如默认的标题在左侧,但是我们想要显示在中间,该如何处理呢,这里就需要进行拓展。示例如下:
<androidx.appcompat.widget.Toolbar
        android:id="@+id/toolbar"
        android:layout_width="match_parent"
        android:layout_height="wrap_content"
        android:background="@color/black"
        android:minHeight="?attr/actionBarSize"
        android:paddingEnd="20dp"
        app:menu="@menu/main_toolbar_menu"
        app:navigationIcon="@mipmap/icon_ic_arrow_back"
        app:layout_constraintEnd_toEndOf="parent"
        app:layout_constraintStart_toStartOf="parent"
        app:layout_constraintTop_toTopOf="parent"
        app:titleTextColor="@android:color/white">

        <androidx.appcompat.widget.AppCompatTextView
            android:id="@+id/center_title"
            android:layout_width="wrap_content"
            android:layout_height="wrap_content"
            android:text="中间标题"
            android:textColor="@color/white"
            android:layout_gravity="center"/>

    </androidx.appcompat.widget.Toolbar>
对控件对监听如下:
findViewById<View>(R.id.center_title).setOnClickListener
            Toast.makeText(this,"标题",Toast.LENGTH_SHORT).show()
Android ToolBar使用
ToolBar简介
ToolBar是Android 5.0推出的一个新的导航控件用于取代之前的ActionBar,由于其高度的可定制性、灵活性、具有Material Design风格等优点,越来越多的应用也用上了ToolBar,比如常用的知乎软件其顶部导航栏正是使用ToolBar。
ToolBar基本使用
更改主题
为了能够正常使用ToolBar,我们需要隐藏原来的ActionBar,这个可以在主题中修改,在res/values/styles.xml中做出如下修改:

在布局文件添加这个控件,代码如下:
 1 <?xml version="1.0" encoding="utf-8"?>
 2 <android.support.constraint.ConstraintLayout xmlns:android="http://schemas.android.com/apk/res/android"
 3     xmlns:app="http://schemas.android.com/apk/res-auto"
 4     xmlns:tools="http://schemas.android.com/tools"
 5     android:layout_width="match_parent"
 6     android:layout_height="match_parent"
 7     tools:context="com.contentprovide.liuliu.toolbardemo.MainActivity">
 8
 9     <android.support.v7.widget.Toolbar
10         android:layout_width="match_parent"
11         android:layout_height="wrap_content">
12
13         <TextView
14             android:layout_width="wrap_content"
15             android:layout_height="wrap_content"
16             android:text="标题栏" />
17
18     </android.support.v7.widget.Toolbar>
19
20 </android.support.constraint.ConstraintLayout>
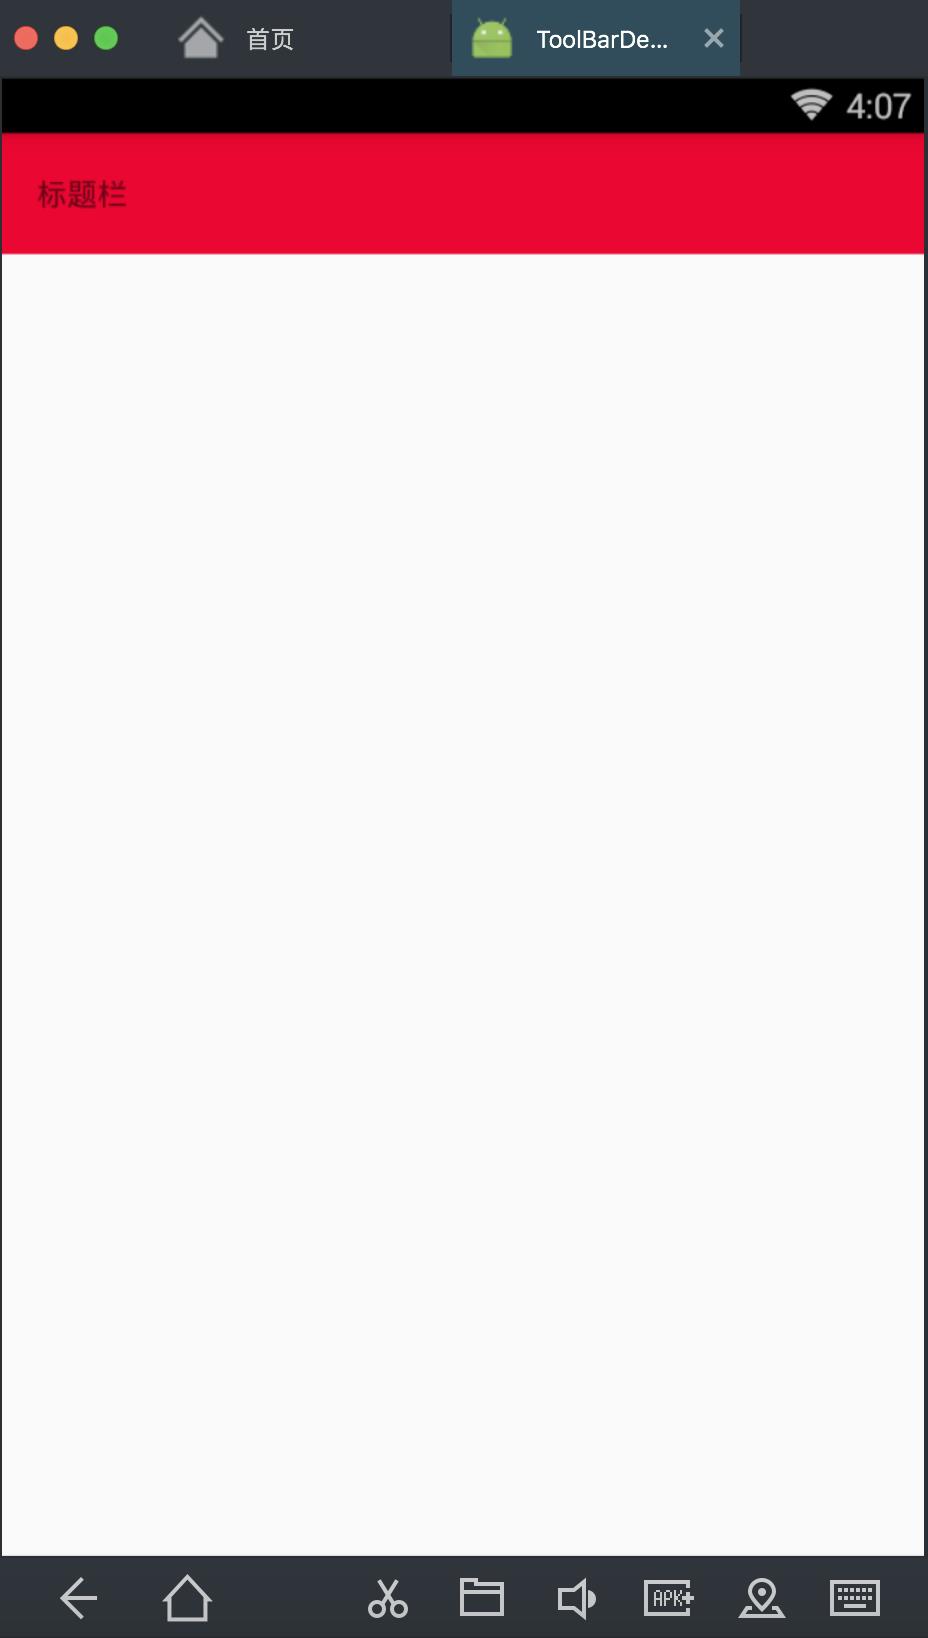
可以看到我在ToolBar里面放了一个TextView控件,这个ToolBar就相当于一个ViewGroup。在它内部放的view就可以自定义标题栏样式了.
运行程序,效果:

要进一步完善标题栏只需要在里面添加控件,也可以加上点击事件让功能更完善
以上是关于Android的ToolBar简单使用的主要内容,如果未能解决你的问题,请参考以下文章