Django+nginx+gunicorn搭建服务器后台
Posted Laccoliths
tags:
篇首语:本文由小常识网(cha138.com)小编为大家整理,主要介绍了Django+nginx+gunicorn搭建服务器后台相关的知识,希望对你有一定的参考价值。
@[toc] 本文以系统镜像选择Ubuntu18.04的阿里云轻量应用服务器为例,使用Stacklens的开源项目
远程连接服务器
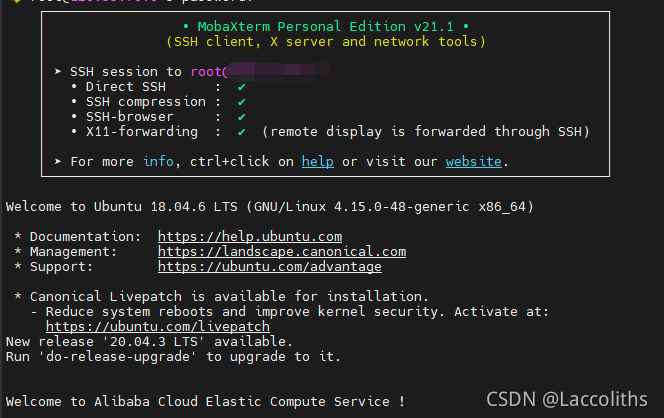
使用MobaXterm SSH连接阿里云服务器,根据提示输入账号和密码,进入成功后便可看到阿里云的欢迎界面。
 Django+nginx+gunicorn搭建服务器后台_nginx](https://image.cha138.com/20220505/de4969afd41d44ae948fdaa581c92502.jpg?x-oss-process=image/watermark,size_14,text_QDUxQ1RP5Y2a5a6i,color_FFFFFF,t_100,g_se,x_10,y_10,shadow_20,type_ZmFuZ3poZW5naGVpdGk=)
部署到服务器后就不能使用Django自带的后台服务器了,而是选择使用nginx和Gunicorn配合提供的网络服务。
- 客户端发来 http 请求,Nginx 作为直接对外的服务器接口,对 http 请求进行分析;
- 如果是静态资源请求,则由Nginx自己处理(效率极高);
- 如果是动态资源请求,则把它转发给 Gunicorn 进行预处理后,转发给 Django,最终完成资源的返回。
<hr>
安装anaconda环境
首先安装anaconda环境(用virtualenv同样可以)
wget https://mirrors.tuna.tsinghua.edu.cn/anaconda/archive/Anaconda3-5.3.1-Linux-x86_64.sh
bash Anaconda3-5.2.0-Linux-x86_64.sh -bfp /usr/anaconda

wget https://repo.anaconda.com/archive/Anaconda3-5.2.0-Linux-x86_64.sh
bash Anaconda3-5.2.0-Linux-x86_64.sh -bfp /usr/anaconda
安装之后使用conda命令查看是否安装成功
如果出现conda command not found 的话 使用如下命令
vim /etc/profile
按i键进入编辑模式 在文件内容的底部添加下面的内容,其中/usr/anaconda/bin是安装anaconda的位置
#Anacondaexport
PATH=$PATH:/usr/anaconda/bin
然后按Ctrl + c键,输入:wq保存配置文件
再输入以下指令重新载入配置文件
source /etc/profile
conda create -n venv python=3.8
source activate venv
<hr>
安装nginx和git
apt-get install nginx
apt-get install git
均成功后,创建并进入项目目录
mkdir -p /home/sites/myblog
cd /home/sites/myblog
接下来从Github上下载项目
git clone https://github.com/stacklens/django-vue-tutorial.git
下载好之后进入项目目录,安装依赖库、收集静态资源并迁移数据库:
cd django-vue-tutorial
pip3 install -r requirements.txt
python3 manage.py collectstatic
python3 manage.py migrate
python3 manage.py runserver
最后启动nginx
service nginx start
接下来在浏览器上输入你的公网ip,看到Nginx的欢迎界面就成功一半了。 <hr>
配置nginx
打开配置文件
vim /etc/nginx/sites-available/myblog
用vim写入配置信息:
server
  charset utf-8;
  listen 80;
  server_name XXX.XXX.XXX.XXX;  # 改成你的 IP

  # 定义 server 的根路径
  # 修改为你的项目的路径
  root /home/sites/myblog/django-vue-tutorial;

  # 以下4项都是在给静态资源配置转发路径
  # 注意路径名称一定要正确
  # 特别是中横线 - 和下划线 _ 别弄混了
  location /static
    alias /home/sites/myblog/django-vue-tutorial/collected_static;


  location /media
    alias /home/sites/myblog/django-vue-tutorial/media;


  location /js
    alias /home/sites/myblog/django-vue-tutorial/collected_static/js;


  location /css
    alias /home/sites/myblog/django-vue-tutorial/collected_static/css;


  # 将接口及后台请求转发给 Gunicorn
  location ~ (^/api|^/admin)
    proxy_set_header Host $host;
    proxy_pass http://unix:/tmp/XXX.XXX.XXX.XXX.socket;  # 改成你的 IP


  # 其他所有请求均直接请求 Vue 打包的 html 文件
  location /
    try_files /collected_static/index.html =404;
将配置文件链接在可用配置上
ln -s /etc/nginx/sites-available/myblog /etc/nginx/sites-enabled
<hr>
配置Gunicorn
pip3 install gunicorn
# 重启nginx
service nginx restart
# 将XXX.XXX.XXX.XXX改为自己的公网ip
gunicorn --bind unix:/tmp/XXX.XXX.XXX.XXX.socket drf_vue_blog.wsgi:application
 Django+nginx+gunicorn搭建服务器后台_django_02](https://image.cha138.com/20220505/7c48b312b0be44d18bbca30aa67afe18.jpg?x-oss-process=image/watermark,size_14,text_QDUxQ1RP5Y2a5a6i,color_FFFFFF,t_100,g_se,x_10,y_10,shadow_20,type_ZmFuZ3poZW5naGVpdGk=)
在浏览器上输入自己服务器的公网ip,便可看到:
 Django+nginx+gunicorn搭建服务器后台_nginx_03](https://image.cha138.com/20220505/a7d6c2cd0a034461819b44479735b0db.jpg?x-oss-process=image/watermark,size_14,text_QDUxQ1RP5Y2a5a6i,color_FFFFFF,t_100,g_se,x_10,y_10,shadow_20,type_ZmFuZ3poZW5naGVpdGk=)
以上是关于Django+nginx+gunicorn搭建服务器后台的主要内容,如果未能解决你的问题,请参考以下文章