AndroidGL ES-通过简单实例认识了解
Posted 溺于Android之渊
tags:
篇首语:本文由小常识网(cha138.com)小编为大家整理,主要介绍了AndroidGL ES-通过简单实例认识了解相关的知识,希望对你有一定的参考价值。
OpenGL EL
嵌入式图形处理库
定义了一个跨编程语言、跨平台编程的专业图形程序接口
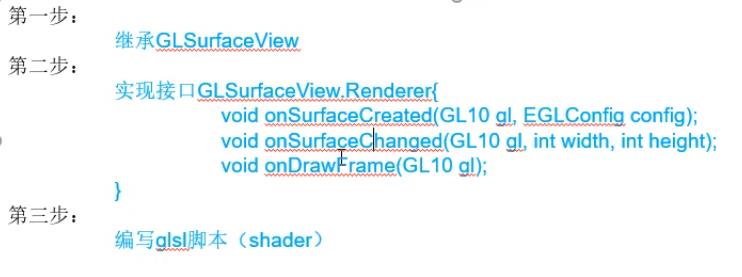
步骤:

实例
创建render类:
package com.example.noooooo;
import android.opengl.GLES20;
import android.opengl.GLSurfaceView;
import javax.microedition.khronos.egl.EGLConfig;
import javax.microedition.khronos.opengles.GL10;
public class WlGlRender implements GLSurfaceView.Renderer {
    public  WlGlRender(){
    }
    @Override
    public void onSurfaceCreated(GL10 gl, EGLConfig config) {
    }
    @Override
    public void onSurfaceChanged(GL10 gl, int width, int height) {
        //设置窗口大小
        GLES20.glViewport(0,0,width,height);
    }
    @Override
    public void onDrawFrame(GL10 gl) {
        //设置清屏
        //1:像素信息清除
        GLES20.glClear(GLES20.GL_COLOR_BUFFER_BIT);
        //2:用颜色来表示清屏
        GLES20.glClearColor(1.0f,0.0f,0.0f,1.0f);
    }
}
创建GLSurfaceView类,在里面调用Render
package com.example.noooooo;

import android.content.Context;
import android.opengl.GLSurfaceView;
import android.util.AttributeSet;

public class CxjGLSurfaceView extends GLSurfaceView {
    private WlGlRender cxjRender;
    public CxjGLSurfaceView(Context context) {
        super(context,null);
    }
    public CxjGLSurfaceView(Context context, AttributeSet attrs) {
        super(context, attrs);
        cxjRender = new WlGlRender();
        setRenderer(cxjRender);
    }
}
修改layout布局
<?xml version="1.0" encoding="utf-8"?>
<androidx.constraintlayout.widget.ConstraintLayout xmlns:android="http://schemas.android.com/apk/res/android"
    xmlns:app="http://schemas.android.com/apk/res-auto"
    xmlns:tools="http://schemas.android.com/tools"
    android:layout_width="match_parent"
    android:layout_height="match_parent"
    tools:context=".MainActivity">
    <com.example.noooooo.CxjGLSurfaceView
        android:layout_width="match_parent"
        android:layout_height="match_parent"/>
</androidx.constraintlayout.widget.ConstraintLayout>
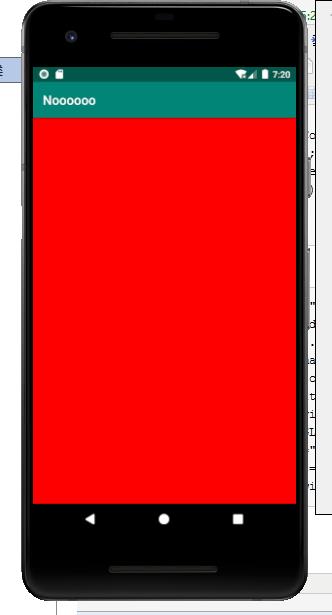
运行效果:界面变成红色


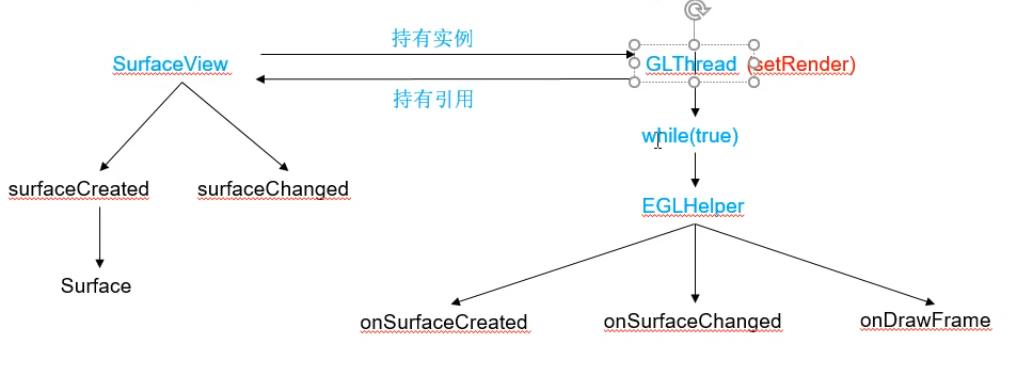
GLSurfaceView流程分析:

以上是关于AndroidGL ES-通过简单实例认识了解的主要内容,如果未能解决你的问题,请参考以下文章