OpenCV for AndroidAndroid Studio集成OpenCV
Posted WhiteXie_zx
tags:
篇首语:本文由小常识网(cha138.com)小编为大家整理,主要介绍了OpenCV for AndroidAndroid Studio集成OpenCV相关的知识,希望对你有一定的参考价值。
准备工作
1.下载安装android Studio(过程略)。
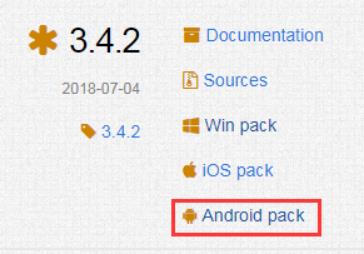
2.下载Android OpenCV:https://opencv.org/releases.html,找到Android pack点击下载。
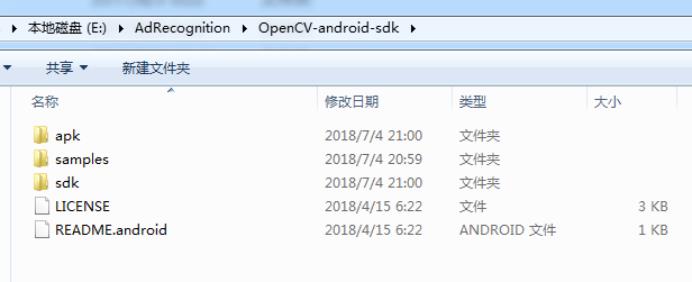
下载后解压得到如下文件,其中sdk文件夹就是Android studio集成OpenCV所需的文件。
集成步骤
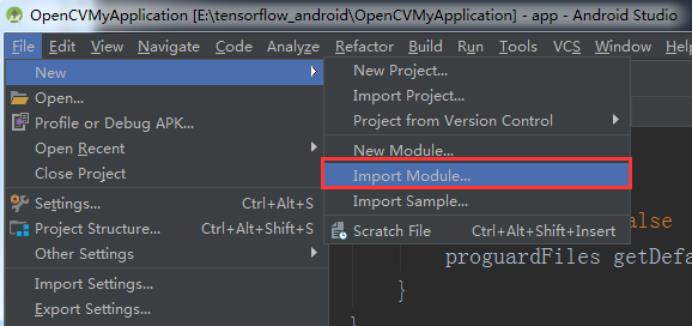
1. 在Android studio中创建项目,并在file -> new -> import module中导入OpenCV模块,如图
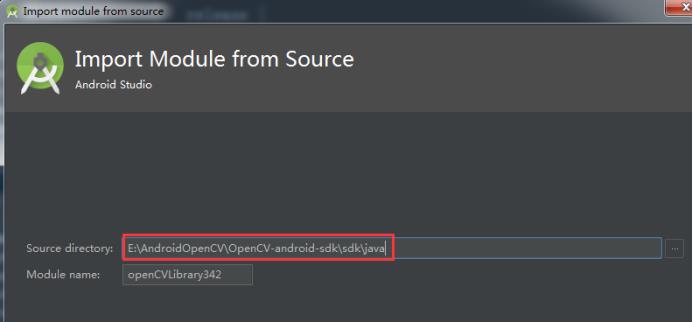
在source directory中选择刚才解压OpenCV文件路径-> sdk -> Java,如下,点击finish按钮即可。
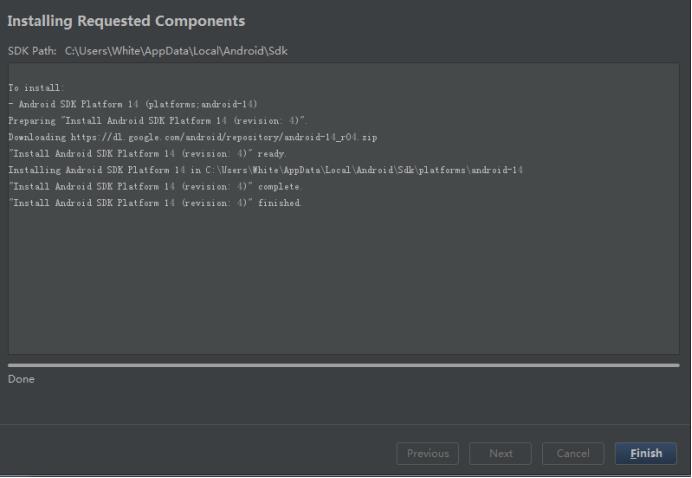
可能出现如下错误:点击蓝色字体,安装相关文件即可。

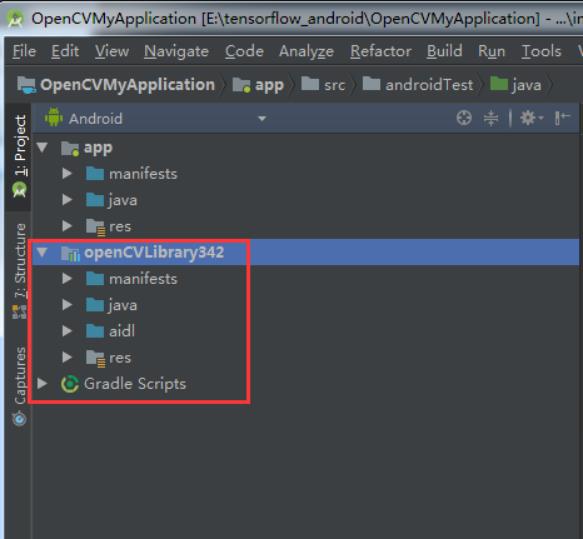
模块导入成功后,项目文件夹会出现如下目录:
2.添加依赖,点击file -> project structure,点击moudle下app,选择dependencies,

选择刚才下载的OpenCV库,
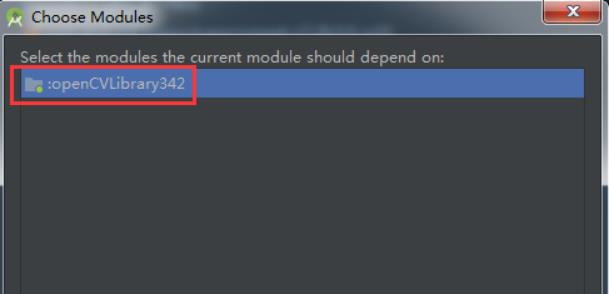
添加成功后如下。

添加依赖后,我们就可以在项目中使用OpenCV API了,但是如果现在运行APP,会提示安装OpenCV manager,表明此时OpenCV集成还未成功,因为自己的APP无法独立安装必须使用OpenCV manager这个APP才能运行,为了免去这个繁琐条件,我们继续执行下面的步骤。
修改build.gradle文件
1. 将OpenCVLibrary的build.gradle文件中的一些参数修改为与app的build.gradle文件中相同(红框标出的部分为需要修改的部分):
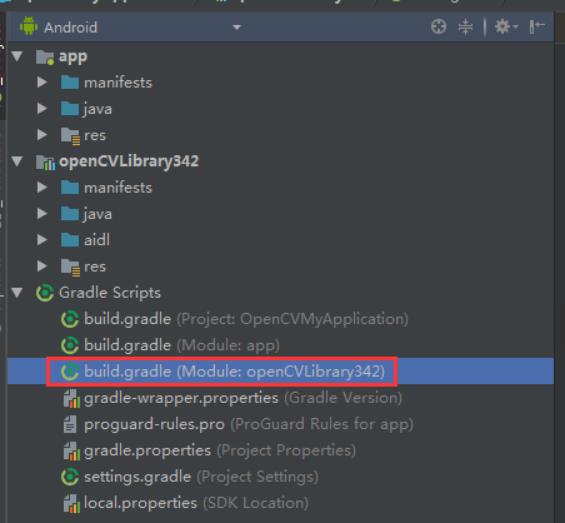
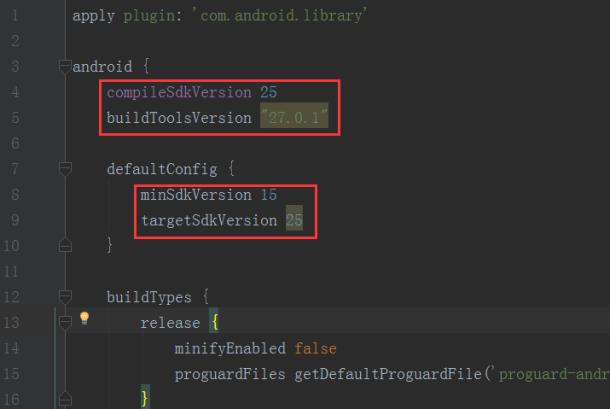
点击Sync按钮,出现如下提示:

按提示注释掉相应内容,
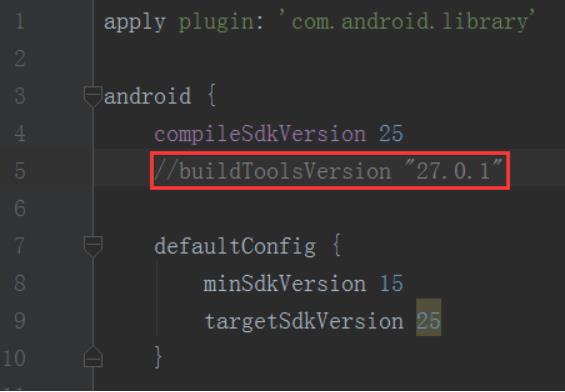
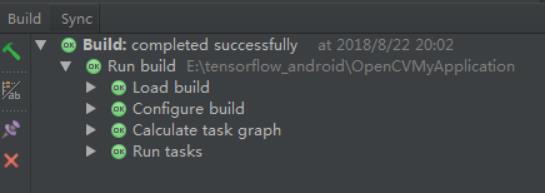
点击Sync则显示build成功。
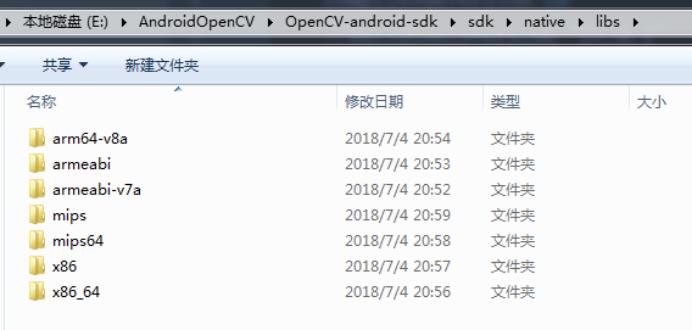
2. 将解压的OpenCV文件夹目录下的sdk -> native -> libs中的文件全部拷到项目的lib目录下,
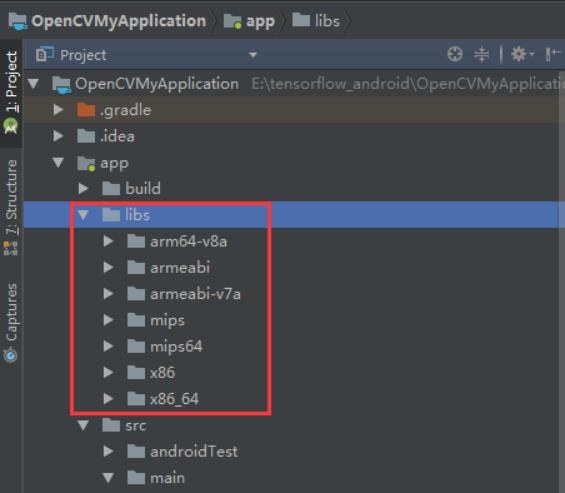
3.在app的gradle文件中添加如下代码:
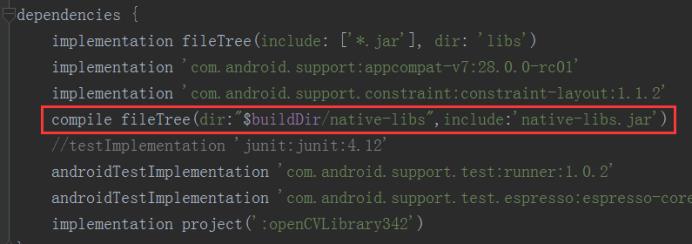
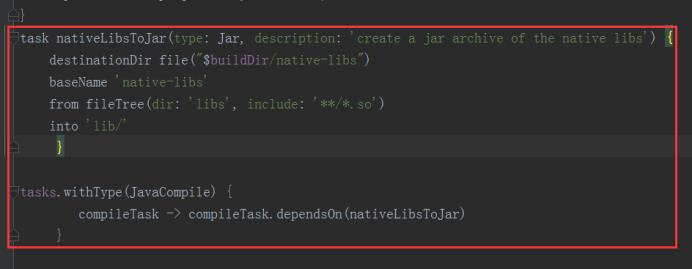
build.gradle文件的全部代码如下:
apply plugin: \'com.android.application\'

android {
    compileSdkVersion 28
    defaultConfig {
        applicationId "com.example.white.opencvmyapplication"
        minSdkVersion 15
        targetSdkVersion 28
        versionCode 1
        versionName "1.0"
        testInstrumentationRunner "android.support.test.runner.AndroidJUnitRunner"
        externalNativeBuild {
            cmake {
                cppFlags ""
            }
        }
    }
    buildTypes {
        release {
            minifyEnabled false
            proguardFiles getDefaultProguardFile(\'proguard-android.txt\'), \'proguard-rules.pro\'
        }
    }
}

dependencies {
    implementation fileTree(include: [\'*.jar\'], dir: \'libs\')
    implementation \'com.android.support:appcompat-v7:28.0.0-rc01\'
    implementation \'com.android.support.constraint:constraint-layout:1.1.2\'
    compile fileTree(dir:"$buildDir/native-libs",include:\'native-libs.jar\')
    //testImplementation \'junit:junit:4.12\'
    androidTestImplementation \'com.android.support.test:runner:1.0.2\'
    androidTestImplementation \'com.android.support.test.espresso:espresso-core:3.0.2\'
    implementation project(\':openCVLibrary342\')
}
task nativeLibsToJar(type: Jar, description: \'create a jar archive of the native libs\') {
    destinationDir file("$buildDir/native-libs")
    baseName \'native-libs\'
    from fileTree(dir: \'libs\', include: \'**/*.so\')
    into \'lib/\'
     }

tasks.withType(JavaCompile) {
        compileTask -> compileTask.dependsOn(nativeLibsToJar)
     }
    }

}
至此,OpenCV的配置就完成了,避免了NDK的繁琐和依赖第三方APP OpenCV manager,但此配置方式OpenCV的加载必须通过静态加载的方式。
测试
在mainactivity中添加如下代码,运行APP,
package com.example.white.opencvmyapplication;

import android.support.v7.app.AppCompatActivity;
import android.os.Bundle;
import android.util.Log;

import org.opencv.android.OpenCVLoader;


public class MainActivity extends AppCompatActivity {

    @Override
    protected void onCreate(Bundle savedInstanceState) {
        super.onCreate(savedInstanceState);
        //setContentView(R.layout.activity_main);
        System.out.println("loading");
        initLoadOpenCVLibs();

    }
    private void initLoadOpenCVLibs() {
        boolean success = OpenCVLoader.initDebug();
        if (success) {
            System.out.println("loading success");
            Log.d("test", "initLoadOpenCVLibs:OpenCV加载成功!");
        } else {
            System.out.println("loading failed");
            Log.d("test", "initLoadOpenCVLibs:OpenCV加载失败!");
        }
    }

}
在控制台打印如下,则说明OpenCV集成成功。

转载请注明出处:https://www.cnblogs.com/White-xzx/p/9563479.html
以上是关于OpenCV for AndroidAndroid Studio集成OpenCV的主要内容,如果未能解决你的问题,请参考以下文章