android.animation - PropertyValuesHolder与Keyframe(转)
Posted 夜行过客
tags:
篇首语:本文由小常识网(cha138.com)小编为大家整理,主要介绍了android.animation - PropertyValuesHolder与Keyframe(转)相关的知识,希望对你有一定的参考价值。
前几篇给大家讲了ValueAnimator、ObjectAnimator的知识,讲解了它们ofInt(),ofFloat(),ofObject()函数的用法。细心的同学可能会注意到,ValueAnimator、ObjectAnimator除了这些创建Animator实例的方法以外,都还有一个方法:
/**
 * valueAnimator的
 */
public static ValueAnimator ofPropertyValuesHolder(PropertyValuesHolder... values)
/**
 * ObjectAnimator的
 */
public static ObjectAnimator ofPropertyValuesHolder(Object target,PropertyValuesHolder... values)
也就是说ValueAnimator和ObjectAnimator除了通过ofInt(),ofFloat(),ofObject()创建实例外,还都有一个ofPropertyValuesHolder()方法来创建实例,这篇文章我就带大家来看看如何通过ofPropertyValuesHolder()来创建实例的。
由于ValueAnimator和ObjectAnimator都具有ofPropertyValuesHolder()函数,使用方法也差不多,相比而言,ValueAnimator的使用机会不多,这里我们就只讲ObjectAnimator中ofPropertyValuesHolder()的用法。相信大家懂了这篇以后,再去看ValueAnimator的ofPropertyValuesHolder(),也应该是会用的。
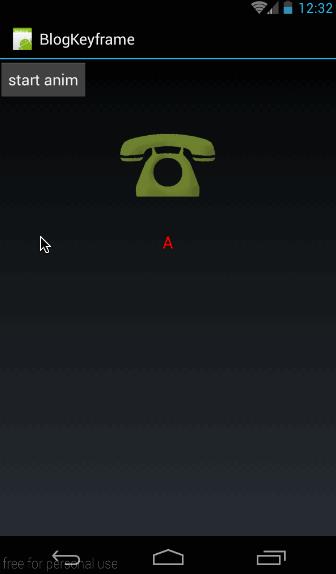
在这篇文章的最后,我们通过本篇内容做了一个电话响铃的效果,效果图如下:

一、PropertyValuesHolder
1、概述
PropertyValuesHolder这个类的意义就是,它其中保存了动画过程中所需要操作的属性和对应的值。我们通过ofFloat(Object target, String propertyName, float… values)构造的动画,ofFloat()的内部实现其实就是将传进来的参数封装成PropertyValuesHolder实例来保存动画状态。在封装成PropertyValuesHolder实例以后,后期的各种操作也是以PropertyValuesHolder为主的。
说到这里,大家就知道这个PropertyValuesHolder是有多有用了吧,上面我们也说了,ObjectAnimator给我们提供了一个口子,让我们自己构造PropertyValuesHolder来构造动画。
public static ObjectAnimator ofPropertyValuesHolder(Object target,PropertyValuesHolder... values)
PropertyValuesHolder中有很多函数,有些函数的api等级是11,有些函数的api等级是14和21;
高api的函数我们就不讲了,只讲讲api 11的函数的用法。有关各个函数的api等级,大家可以参考《Google文档:PropertyValuesHolder》
首先,我们来看看创建实例的函数:
public static PropertyValuesHolder ofFloat(String propertyName, float... values)
public static PropertyValuesHolder ofInt(String propertyName, int... values)
public static PropertyValuesHolder ofObject(String propertyName, TypeEvaluator evaluator,Object... values)
public static PropertyValuesHolder ofKeyframe(String propertyName, Keyframe... values)
这里总共有四个创建实例的方法,这一段我们着重讲ofFloat、ofInt和ofObject的用法,ofKeyframe我们单独讲。
2、PropertyValuesHolder之ofFloat()、ofInt()
(1)ofFloat()、ofInt()
我们先来看看它们的构造函数:
public static PropertyValuesHolder ofFloat(String propertyName, float... values)
public static PropertyValuesHolder ofInt(String propertyName, int... values)
其中:
- propertyName:表示ObjectAnimator需要操作的属性名。即ObjectAnimator需要通过反射查找对应属性的setProperty()函数的那个property.
- values:属性所对应的参数,同样是可变长参数,可以指定多个,还记得我们在ObjectAnimator中讲过,如果只指定了一个,那么ObjectAnimator会通过查找getProperty()方法来获得初始值。不理解的同学请参看《Animation动画详解(七)——ObjectAnimator基本使用》
大家看这些参数是不是很眼熟,让我们看一下ObjectAnimator的ofFloat是怎么样的:
public static ObjectAnimator ofFloat(Object target, String propertyName, float... values);
看到没,在ObjectAnimator.ofFloat中只比PropertyValuesHolder的ofFloat多了一个target,其它都是完全一样的!
好了,我们在讲完PropertyValuesHolder的ofFloat函数以后,我们再来看看如何将构造的PropertyValuesHolder实例设置进ObjectAnimator吧。
(2)、ObjectAnimator.ofPropertyValuesHolder()
在开篇时,我们也讲了ObjectAnimator给我们提供了一个设置PropertyValuesHolder实例的入口:
public static ObjectAnimator ofPropertyValuesHolder(Object target,PropertyValuesHolder... values)
其中:
- target:指需要执行动画的控件
- values:是一个可变长参数,可以传进去多个PropertyValuesHolder实例,由于每个PropertyValuesHolder实例都会针对一个属性做动画,所以如果传进去多个PropertyValuesHolder实例,将会对控件的多个属性同时做动画操作。
(3)、示例
下面我们就举个例子来如何通过PropertyValuesHolder的ofFloat、ofInt来做动画的。
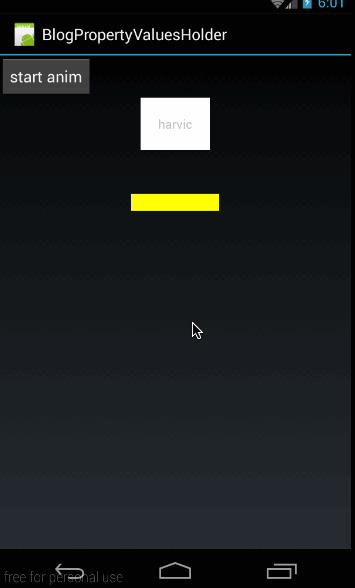
效果图如下:

这个动画很简单,就是在点击按钮的时候,给textView做动画,框架代码就不再讲了,我们主要来看看操作textview动画的代码。
动画代码为:
PropertyValuesHolder rotationHolder = PropertyValuesHolder.ofFloat("Rotation", 60f, -60f, 40f, -40f, -20f, 20f, 10f, -10f, 0f);
PropertyValuesHolder colorHolder = PropertyValuesHolder.ofInt("BackgroundColor", 0xffffffff, 0xffff00ff, 0xffffff00, 0xffffffff);
ObjectAnimator animator = ObjectAnimator.ofPropertyValuesHolder(mTextView, rotationHolder, colorHolder);
animator.setDuration(3000);
animator.setInterpolator(new AccelerateInterpolator());
animator.start();
在这里,我们创建了两个PropertyValuesHolder实例,第一个rotationHolder:
PropertyValuesHolder rotationHolder = PropertyValuesHolder.ofFloat("Rotation", 60f, -60f, 40f, -40f, -20f, 20f, 10f, -10f, 0f);
使用ofFloat函数创建,属性值是Rotation,对应的是View类中SetRotation(float rotation)函数。后面传进去很多值,让其左右摆动。
第二是动画是改变背景色的colorHolder
PropertyValuesHolder colorHolder = PropertyValuesHolder.ofInt("BackgroundColor", 0xffffffff, 0xffff00ff, 0xffffff00, 0xffffffff);
这里使用的是ofInt函数创建的,它操作的属性是BackgroundColor,对应的是View类中的setBackgroundColor(int color)函数,后面传进去的16进制颜色值让其在这些颜色值间变化。有关颜色值的变化,大家可以参考《Animation动画详解(七)——ObjectAnimator基本使用》中第三部分《常用函数》
最后通过ObjectAnimator.ofPropertyValuesHolder将rotationHolder、colorHolder设置给mTextView,构造出ObjectAnimator对象。然后开始动画即可
ObjectAnimator animator = ObjectAnimator.ofPropertyValuesHolder(mTextView, rotationHolder, colorHolder);
animator.setDuration(3000);
animator.setInterpolator(new AccelerateInterpolator());
animator.start();
好了,到这里有关PropertyValuesHolder的ofInt和ofFloat函数的用法就讲完了,大家可以看到PropertyValuesHolder使用起来也很容易,下面我们再来看看PropertyValuesHolder的ofObject的使用方法。
3、PropertyValuesHolder之ofObject()
(1)、概述
我们先来看一下ofObject的构造函数
public static PropertyValuesHolder ofObject(String propertyName, TypeEvaluator evaluator,Object... values)
- propertyName:ObjectAnimator动画操作的属性名;
- evaluator:Evaluator实例,Evaluator是将当前动画进度计算出当前值的类,可以使用系统自带的IntEvaluator、FloatEvaluator也可以自定义,有关Evaluator的知识,大家可以参考《Animation动画详解(五)——ValueAnimator高级进阶(一)》
- values:可变长参数,表示操作动画属性的值
它的各个参数与ObjectAnimator.ofObject的类似,只是少了target参数而已
public static ObjectAnimator ofObject(Object target, String propertyName,TypeEvaluator evaluator, Object... values)
(2)、示例
下面我们就讲讲PropertyValuesHolder.ofObject()函数的用法
本示例的效果图如下:

这里实现的效果与《Animation动画详解(六)——ValueAnimator高级进阶(二)》实现的效果相同,即通过自字义的CharEvaluator来自动实现字母的改变与计算。
首先是自定义一个CharEvaluator,通过进度值来自动计算出当前的字母:
public class CharEvaluator implements TypeEvaluator<Character> {
    @Override
    public Character evaluate(float fraction, Character startValue, Character endValue) {
        int startInt  = (int)startValue;
        int endInt = (int)endValue;
        int curInt = (int)(startInt + fraction *(endInt - startInt));
        char result = (char)curInt;
        return result;
    }
}
有关数字与字符间转换的原理已经在《Animation动画详解(六)——ValueAnimator高级进阶(二)》讲述,就不再细讲。这个CharEvaluator也是直接从这篇文章中拿过来的,强烈建议大家对这个系列文章从头开始看。
从CharEvaluator中可以看出,从CharEvaluator中产出的动画中间值类型为Character类型。TextView中虽然有setText(CharSequence text) 函数,但这个函数的参数类型是CharSequence,而不是Character类型。所以我们要自定义一个类派生自TextView来改变TextView的字符
public class MyTextView extends TextView {
    public MyTextView(Context context, AttributeSet attrs) {
        super(context, attrs);
    }
    public void setCharText(Character character){
        setText(String.valueOf(character));
    }
}
在这里,我们定义了一个方法setCharText(Character character),参数就是Character类型,我们知道这个方法所对应的属性是CharText;
最后MyActivity,在点击按钮的时候开始动画,核心代码为:
public class MyActivity extends Activity {
    private Button btn;
    private TextView mTextView;
    private MyTextView mMyTv;
    @Override
    public void onCreate(Bundle savedInstanceState) {
        super.onCreate(savedInstanceState);
        setContentView(R.layout.main);

        mMyTv = (MyTextView)findViewById(R.id.mytv);
        btn = (Button) findViewById(R.id.btn);
        btn.setOnClickListener(new View.OnClickListener() {
            @Override
            public void onClick(View v) {
                doOfObjectAnim();
            }
        });
    }

    private void doOfObjectAnim(){
        PropertyValuesHolder charHolder = PropertyValuesHolder.ofObject("CharText",new CharEvaluator(),new Character(\'A\'),new Character(\'Z\'));
        ObjectAnimator animator = ObjectAnimator.ofPropertyValuesHolder(mMyTv, charHolder);
        animator.setDuration(3000);
        animator.setInterpolator(new AccelerateInterpolator());
        animator.start();
    }
}
这部分代码,很好理解,在点击按钮的时候执行doOfObjectAnim()方法:
PropertyValuesHolder charHolder = PropertyValuesHolder.ofObject("CharText",new CharEvaluator(),new Character(\'A\'),new Character(\'Z\'));
ObjectAnimator animator = ObjectAnimator.ofPropertyValuesHolder(mMyTv, charHolder);
animator.setDuration(3000);
animator.setInterpolator(new AccelerateInterpolator());
animator.start();
首先是根据PropertyValuesHolder.ofObject生成一个PropertyValuesHolder实例,注意它的属性就是CharText,所对应的set函数就是setCharText,由于CharEvaluator的中间值是Character类型,所以CharText属性所对应的完整的函数声明为setCharText(Character character);这也就是我们为什么要自定义一个MyTextView原因,就是因为TextView中没有setText(Character character)这样的函数。
然后就是利用ObjectAnimator.ofPropertyValuesHolder生成ObjectAnimator实例了,最后就是对animator设置并start了,没什么难度,就不再讲了。
下面就开始最重要的部分了,有关KeyFrame的知识。
二、Keyframe
1、概述
通过前面几篇的讲解,我们知道如果要控制动画速率的变化,我们可以通过自定义插值器,也可以通过自定义Evaluator来实现。但如果真的让我们为了速率变化效果而自定义插值器或者Evaluator的话,恐怕大部分同学会有一万头草泥马在眼前奔过,因为大部分的同学的数学知识已经还给老师了。
为了解决方便的控制动画速率的问题,谷歌为了我等屁民定义了一个KeyFrame的类,KeyFrame直译过来就是关键帧。
关键帧这个概念是从动画里学来的,我们知道视频里,一秒要播放24帧图片,对于制作flash动画的同学来讲,是不是每一帧都要画出来呢?当然不是了,如果每一帧都画出来,那估计做出来一个动画片都得要一年时间;比如我们要让一个球在30秒时间内,从(0,0)点运动到(300,200)点,那flash是怎么来做的呢,在flash中,我们只需要定义两个关键帧,在动画开始时定义一个,把球的位置放在(0,0)点;在30秒后,再定义一个关键帧,把球的位置放在(300,200)点。在动画 开始时,球初始在是(0,0)点,30秒时间内就adobe flash就会自动填充,把球平滑移动到第二个关键帧的位置(300,200)点;
通过上面分析flash动画的制作原理,我们知道,一个关键帧必须包含两个原素,第一时间点,第二位置。即这个关键帧是表示的是某个物体在哪个时间点应该在哪个位置上。
所以谷歌的KeyFrame也不例外,KeyFrame的生成方式为:
Keyframe kf0 = Keyframe.ofFloat(0, 0);
Keyframe kf1 = Keyframe.ofFloat(0.1f, -20f);
Keyframe kf2 = Keyframe.ofFloat(1f, 0);
上面生成了三个KeyFrame对象,其中KeyFrame的ofFloat函数的声明为:
public static Keyframe ofFloat(float fraction, float value)
- fraction:表示当前的显示进度,即从加速器中getInterpolation()函数的返回值;
- value:表示当前应该在的位置
比如Keyframe.ofFloat(0, 0)表示动画进度为0时,动画所在的数值位置为0;Keyframe.ofFloat(0.25f, -20f)表示动画进度为25%时,动画所在的数值位置为-20;Keyframe.ofFloat(1f,0)表示动画结束时,动画所在的数值位置为0;
在理解了KeyFrame.ofFloat()的参数以后,我们来看看PropertyValuesHolder是如何使用KeyFrame对象的:
public static PropertyValuesHolder ofKeyframe(String propertyName, Keyframe... values)
- propertyName:动画所要操作的属性名
- values:Keyframe的列表,PropertyValuesHolder会根据每个Keyframe的设定,定时将指定的值输出给动画。
所以完整的KeyFrame的使用代码应该是这样的:
Keyframe frame0 = Keyframe.ofFloat(0f, 0);
Keyframe frame1 = Keyframe.ofFloat(0.1f, -20f);
Keyframe frame2 = Keyframe.ofFloat(1, 0);
PropertyValuesHolder frameHolder = PropertyValuesHolder.ofKeyframe("rotation",frame0,frame1,frame2);
 Animator animator = ObjectAnimator.ofPropertyValuesHolder(mImage,frameHolder);
animator.setDuration(1000);
animator.start();
第一步:生成Keyframe对象;
第二步:利用PropertyValuesHolder.ofKeyframe()生成PropertyValuesHolder对象
第三步:ObjectAnimator.ofPropertyValuesHolder()生成对应的Animator
2、示例
在了解了Keyframe如何使用以后,下面我们就来用一个例子来看看Keyframe的使用方法。
本例的效果图如下:

看起来跟开篇的一样,仔细对比一下,还是有不同的,这里只是实现了左右震动,但并没有放大效果。
(1)、main.xml
我们先来看看布局代码,代码很简单,一个btn,一个imageview
<?xml version="1.0" encoding="utf-8"?>
<LinearLayout xmlns:android="http://schemas.android.com/apk/res/android"
              android:orientation="vertical"
              android:layout_width="fill_parent"
              android:layout_height="fill_parent">
    <Button
            android:id="@+id/btn"
            android:layout_width="wrap_content"
            android:layout_height="wrap_content"
            android:text="start anim"/>

    <ImageView
            android:id="@+id/img"
            android:layout_width="150dp"
            android:layout_height="wrap_content"
            android:scaleType="fitCenter"
            android:layout_gravity="center_horizontal"
            android:src="@drawable/phone"/>
</LinearLayout>
这段布局代码没什么难度,就不再讲了,下面来看看MyActivity中的处理
(2)、MyActivity.java
public class MyActivity extends Activity {
    private ImageView mImage;
    private Button mBtn;
    @Override
    public void onCreate(Bundle savedInstanceState) {
        super.onCreate(savedInstanceState);
        setContentView(R.layout.main);
        mImage = (ImageView)findViewById(R.id.img);
        mBtn = (Button)findViewById(R.id.btn);
        mBtn.setOnClickListener(new View.OnClickListener() {
            @Override
            public void onClick(View v) {
                doOfFloatAnim();
            }
        });
    }

    private void doOfFloatAnim(){
        Keyframe frame0 = Keyframe.ofFloat(0f, 0);
        Keyframe frame1 = Keyframe.ofFloat(0.1f, -20f);
        Keyframe frame2 = Keyframe.ofFloat(0.2f, 20f);
        Keyframe frame3 = Keyframe.ofFloat(0.3f, -20f);
        Keyframe frame4 = Keyframe.ofFloat(0.4f, 20f);
        Keyframe frame5 = Keyframe.ofFloat(0.5f, -20f);
        Keyframe frame6 = Keyframe.ofFloat(0.6f, 20f);
        Keyframe frame7 = Keyframe.ofFloat(0.7f, -20f);
        Keyframe frame8 = Keyframe.ofFloat(0.8f, 20f);
        Keyframe frame9 = Keyframe.ofFloat(0.9f, -20f);
        Keyframe frame10 = Keyframe.ofFloat(1, 0);
        PropertyValuesHolder frameHolder = PropertyValuesHolder.ofKeyframe("rotation",frame0,frame1,frame2,frame3,frame4,frame5,frame6,frame7,frame8,frame9,frame10);

        Animator animator = ObjectAnimator.ofPropertyValuesHolder(mImage,frameHolder);
        animator.setDuration(1000);
        animator.start();
    }
}
这段代码难度也不大,在点击按钮的时候,执行doOfFloatAnim()函数,关键问题在doOfFloatAnim()上:
首先,我们定义了11个keyframe:
Keyframe frame0 = Keyframe.ofFloat(0f, 0);
Keyframe frame1 = Keyframe.ofFloat(0.1f, -20f);
Keyframe frame2 = Keyframe.ofFloat(0.2f, 20f);
Keyframe frame3 = Keyframe.ofFloat(0.3f, -20f);
Keyframe frame4 = Keyframe.ofFloat(0.4f, 20f);
Keyframe frame5 = Keyframe.ofFloat(0.5f, -20f);
Keyframe frame6 = Keyframe.ofFloat(0.6f, 20f);
Keyframe frame7 = Keyframe.ofFloat(0.7f, -20f);
Keyframe frame8 = Keyframe.ofFloat(0.8f, 20f);
Keyframe frame9 = Keyframe.ofFloat(0.9f, -20f);
Keyframe frame10 = Keyframe.ofFloat(1, 0);
在这些keyframe中,首先指定在开始和结束时,旋转角度为0,即恢复原样:
Keyframe frame0 = Keyframe.ofFloat(0f, 0);
Keyframe frame10 = Keyframe.ofFloat(1, 0);
然后在过程中,让它左右旋转,比如在进度为0.2时,旋转到左边20度位置:
Keyframe frame1 = Keyframe.ofFloat(0.1f, -20f);
然后在进度为0.3时,旋转到右边20度位置:
Keyframe frame3 = Keyframe.ofFloat(0.3f, -20f);
其它类似。正是因为来回左右的旋转,所以我们看起来就表现为在震动
然后,根据这些Keyframe生成PropertyValuesHolder对象,指定操作的属性为rotation
PropertyValuesHolder frameHolder = PropertyValuesHolder.ofKeyframe("rotation",frame0,frame1,frame2,frame3,frame4,frame5,frame6,frame7,frame8,frame9,frame10);

Animator animator = ObjectAnimator.ofPropertyValuesHolder(mImage,frameHolder);
animator.setDuration(1000);
animator.start();
最后,利用ObjectAnimator.ofPropertyValuesHolder(mImage,frameHolder)生成ObjectAnimator对象,并开始动画。
到这里想必大家已经对Keyframe有了初步的认识,下面我们就来详细的讲讲Keyframe;
3、Keyframe之ofFloat、ofInt与常用函数
(1)、ofFloat、ofInt
上面我们看到Keyframe.ofFloat()函数的用法,其实Keyframe除了ofFloat()以外,还有ofInt()、ofObject()这些创建Keyframe实例的方法,Keyframe.ofObject()我们下部分再讲,这部分,我们着重看看ofFloat与ofInt的构造函数与使用方法
/**
 * ofFloat
 */
public static Keyframe ofFloat(float fraction)
public static Keyframe ofFloat(float fraction, float value)
/**
 * ofInt
 */
public static Keyframe ofInt(float fraction)
public static Keyframe ofInt(float fraction, int value)
由于ofFloat和ofInt的构造函数都是一样的,我们这里只以ofFloat来例来说。
上面我们已经讲了ofFloat(float fraction, float value)的用法,fraction表示当前关键帧所在的动画进度位置,value表示当前位置所对应的值。
而另一个构造函数:
public static Keyframe ofFloat(float fraction)
这个构造函数比较特殊,只有一个参数fraction,表示当前关键帧所在的动画进度位置。那在这个进度时所对应的值要怎么设置呢?
当然有方法啦,除了上面的构造函数,Keyframe还有一些常用函数来设置fraction,value和interpolator,定义如下:
(2)、常用函数:
/**
 * 设置fraction参数,即Keyframe所对应的进度
 */
public void setFraction(float fraction)
/**
 * 设置当前Keyframe所对应的值
 */
public void setValue(Object value)
/**
 * 设置Keyframe动作期间所对应的插值器
 */
public void setInterpolator(TimeInterpolator interpolator)
这三个函数中,插值器的作用应该是比较难理解,如果给这个Keyframe设置上插值器,那么这个插值器就是从上一个Keyframe开始到当前设置插值器的Keyframe时,这个过程值的计算是利用这个插值器的,比如:
Keyframe frame0 = Keyframe.ofFloat(0f, 0);
Keyframe frame1 = Keyframe.ofFloat(0.1f, -20f);
frame1.setInterpolator(new BounceInterpolator());
Keyframe frame2 = Keyframe.ofFloat(1f, 20f);
frame2.setInterpolator(new LinearInterpolator());
在上面的代码中,我们给frame1设置了插值器BounceInterpolator,那么在frame0到frame1的中间值计算过程中,就是用的就是回弹插值器;
同样,我们给frame2设置了线性插值器(LinearInterpolator),所以在frame1到frame2的中间值计算过程中,使用的就是线性插值器
很显然,给Keyframe.ofFloat(0f, 0)设置插值器是无效的,因为它是第一帧
(3)、示例1——没有插值器
下面我们就举个例子来看下,如何使用上面的各个函数的用法,同样是基于上面的电话响铃的例子,如果我们只保存三帧,代码如下:
Keyframe frame0 = Keyframe.ofFloat(0f, 0);
Keyframe frame1 = Keyframe.ofFloat(0.5f, 100f);
Keyframe frame2 = Keyframe.ofFloat(1);
frame2.setValue(0f);
PropertyValuesHolder frameHolder = PropertyValuesHolder.ofKeyframe("rotation",frame0,frame1,frame2);

Animator animator = ObjectAnimator.ofPropertyValuesHolder(mImage,frameHolder);
animator.setDuration(3000);
animator.start();
在这段代码中,总共就只有三个关键帧,最后一个Keyframe的生成方法是利用:
Keyframe frame2 = Keyframe.ofFloat(1);
frame2.setValue(0f);
对于Keyframe而言,fraction和value这两个参数是必须有的,所以无论用哪种方式实例化Keyframe都必须保证这两个值必须被初始化。
这里没有设置插值器,会使用默认的线性插值器(LinearInterpolator)
效果图如下:

(4)、示例2——使用插值器
下面,我们给上面的代码加上插值器,着重看一下,插值器在哪部分起做用
Keyframe frame0 = Keyframe.ofFloat(0f, 0);
Keyframe frame1 = Keyframe.ofFloat(0.5f, 100f);
Keyframe frame2 = Keyframe.ofFloat(1);
frame2.setValue(0f);
frame2.setInterpolator(new BounceInterpolator());
PropertyValuesHolder frameHolder = PropertyValuesHolder.ofKeyframe("rotation",frame0,frame1,frame2);

Animator animator = ObjectAnimator.ofPropertyValuesHolder(mImage,frameHolder);
animator.setDuration(3000);
animator.start();
我们给最后一帧frame2添加上回弹插值器(BounceInterpolator),然后看看效果:

从效果图中可以看出,在frame1到frame2的过程中,使用了回弹插值器,所以从这里也可验证我们上面的论述:如果给当前帧添加插值器,那么在上一帧到当前帧的进度值计算过程中会使用这个插值器。
好了,到这里有关ofInt,ofFloat和常用的几个函数的讲解就结束了,下面我们再来看看ofObject的使用方法。
4、Keyframe之ofObject
与ofInt,ofFloat一样,ofObject也有两个构造函数:
public static Keyframe ofObject(float fraction)
public static Keyframe ofObject(float fraction, Object value)
同样,如果使用ofObject(float fraction)来构造,也必须使用setValue(Object value)来设置这个关键帧所对应的值。
我们还以TextView更改字母的例子来使用下Keyframe.ofObject
效果图如下:

明显L前的12个字母变化的特别快,后面的14个字母变化的比较慢。
我们使用到的MyTextView,CharEvaluator都与上面的一样,只是动画部分不同,这里只列出动画的代码:
Keyframe frame0 = Keyframe.ofObject(0f, new Character(\'A\'));
Keyframe frame1 = Keyframe.ofObject(0.1f, new Character(\'L\'));
Keyframe frame2 = Keyframe.ofObject(1,new Character(\'Z\'));

PropertyValuesHolder frameHolder = PropertyValuesHolder.ofKeyframe("CharText",frame0,frame1,frame2);
frameHolder.setEvaluator(new CharEvaluator());
ObjectAnimator animator = ObjectAnimator.ofPropertyValuesHolder(mMyTv,frameHolder);
animator.setDuration(3000);
animator.start();
在这个动画中,我们定义了三帧:
Keyframe frame0 = Keyframe.ofObject(0f, new Character(\'A\'));
Keyframe frame1 = Keyframe.ofObject(0.1f, new Character(\'L\'));
Keyframe frame2 = Keyframe.ofObject(1,new Character(\'Z\'));
frame0表示在进度为0的时候,动画的字符是A;frame1表示在进度在0.1的时候,动画的字符是L;frame2表示在结束的时候,动画的字符是Z;
利用关键帧创建PropertyValuesHolder后,一定要记得设置自定义的Evaluator:
frameHolder.setEvaluator(new CharEvaluator());
凡是使用ofObject来做动画的时候,都必须调用frameHolder.setEvaluator显示设置Evaluator,因为系统根本是无法知道,你动画的中间值Object真正是什么类型的。
5、疑问:如果没有设置进度为0或者进度为1时的关键帧,展示是怎样的?
首先,我们以下面这个动画为例:
Keyframe frame0 = Keyframe.ofFloat(0f, 0);
Keyframe frame1 = Keyframe.ofFloat(0.5f, 100f);
Keyframe frame2 = Keyframe.ofFloat(1,0);
PropertyValuesHolder frameHolder = PropertyValuesHolder.ofKeyframe("rotation", frame0,frame1,frame2);

Animator animator = ObjectAnimator.ofPropertyValuesHolder(mImage, frameHolder);
animator.setDuration(3000);
animator.start();
这里有三个帧,在进度为0.5时,电话向右旋转100度,然后再转回来。
效果图如下:

尝试一:去掉第0帧,将以第一帧为起始位置
如果我们把第0帧去掉,只保留中间帧和结束帧,看结果会怎样
Keyframe frame1 = Keyframe.ofFloat(0.5f, 100f);
Keyframe frame2 = Keyframe.ofFloat(1,0);
PropertyValuesHolder frameHolder = PropertyValuesHolder.ofKeyframe("rotation",frame1,frame2);

Animator animator = ObjectAnimator.ofPropertyValuesHolder(mImage, frameHolder);
animator.setDuration(3000);
animator.start();
效果图如下:

可以看到,动画是直接从中间帧frame1开始的,即当没有第0帧时,动画从最近的一个帧开始。
尝试二:去掉结束帧,将最后一帧为结束帧
如果我们把结束帧去掉,保留第0帧和中间帧,看结果会怎样:
Keyframe frame0 = Keyframe.ofFloat(0f, 0);
Keyframe frame1 = Keyframe.ofFloat(0.5f, 100f);
PropertyValuesHolder frameHolder = PropertyValuesHolder.ofKeyframe("rotation", frame0,frame1);

Animator animator = ObjectAnimator.ofPropertyValuesHolder(mImage, frameHolder);
animator.setDuration(3000);
animator.start();
效果图如下:

尝试三:只保留一个中间帧,会崩
如果我们把第0帧和结束帧去掉,代码如下:
PropertyValuesHolder frameHolder = PropertyValuesHolder.ofKeyframe("rotation",frame1);

Animator animator = ObjectAnimator.ofPropertyValuesHolder(mImage, frameHolder);
animator.setDuration(3000);
animator.start();
在点击按钮开始动画时,就直接崩了,报错信息如下:

报错问题是数组越界,也就是说,至少要有两个帧才行。
尝试四:保留两个中间帧
再尝试一下,如果我们把第0帧和结束帧去掉,保留两个中间帧会怎样:
我们在上面代码上再加一个中间帧:
Keyframe frame1 = Keyframe.ofFloat(0.5f, 100f);
Keyframe frame2 = Keyframe.ofFloat(0.7f,50f);
PropertyValuesHolder frameHolder = PropertyValuesHolder.ofKeyframe("rotation",frame1,frame2);

Animator animator = ObjectAnimator.ofPropertyValuesHolder(mImage, frameHolder);
animator.setDuration(3000);
animator.start();
效果图如下:

可以看到,在保留两个帧的情况下,是可以运行的,而且,由于去掉了第0帧,所以将frame1做为起始帧,又由于去掉了结束帧,所以将frame2做为结束帧。
下面我们做出结论:
- 如果去掉第0帧,将以第一个关键帧为起始位置
- 如果去掉结束帧,将以最后一个关键帧为结束位置
- 使用Keyframe来构建动画,至少要有两个或两个以上帧
6、开篇的电话响铃效果
再重新看看开篇的电话响铃的效果图:

发现了没,除了左右震动,图标在震动过程中始终是放大的。
上面,我们已经实现了左右震动,下面我们再添加放大效果就好了。
框架的部分就不再讲了,与上面一样,只是动画部分不同,先贴出动画的完整代码:
/**
 * 左右震动效果
 */
Keyframe frame0 = Keyframe.ofFloat(0f, 0);
Keyframe frame1 = Keyframe.ofFloat(0.1f, -20f);
Keyframe frame2 = Keyframe.ofFloat(0.2f, 20f);
Keyframe frame3 = Keyframe.ofFloat(0.3f, -20f);
Keyframe frame4 = Keyframe.ofFloat(0.4f, 20f);
Keyframe frame5 = Keyframe.ofFloat(0.5f, -20f);
Keyframe frame6 = Keyframe.ofFloat(0.6f, 20f);
Keyframe frame7 = Keyframe.ofFloat(0.7f, -20f);
Keyframe frame8 = Keyframe.ofFloat(0.8f, 20f);
Keyframe frame9 = Keyframe.ofFloat(0.9f, -20f);
Keyframe frame10 = Keyframe.ofFloat(1, 0);
PropertyValuesHolder frameHolder1 = PropertyValuesHolder.ofKeyframe("rotation", frame0, frame1, frame2, frame3, frame4,frame5, frame6, frame7, frame8, frame9, frame10);


/**
 * scaleX放大1.1倍
 */
Keyframe scaleXframe0 = Keyframe.ofFloat(0f, 1);
Keyframe scaleXframe1 = Keyframe.ofFloat(0.1f, 1.1f);
Keyframe scaleXframe2 = Keyframe.ofFloat(0.2f, 1.1f);
Keyframe scaleXframe3 = Keyframe.ofFloat(0.3f, 1.1f);
Keyframe scaleXframe4 = Keyframe.ofFloat(0.4f, 1.1f);
Keyframe scaleXframe5 = Keyframe.ofFloat(0.5f, 1.1f);
Keyframe scaleXframe6 = Keyframe.ofFloat(0.6f, 1.1f);
Keyframe scaleXframe7 = Keyframe.ofFloat(0.7f, 1.1f);
Keyframe scaleXframe8 = Keyframe.ofFloat(0.8f, 1.1f);
Keyframe scaleXframe9 = Keyframe.ofFloat(0.9f, 1.1f);
Keyframe scaleXframe10 = Keyframe.ofFloat(1, 1);
PropertyValuesHolder frameHolder2 = PropertyValuesHolder.ofKeyframe("ScaleX",scaleXframe0,scaleXframe1,scaleXframe2,scaleXframe3,scaleXframe4,scaleXframe5,scaleXframe6,scaleXframe7,scaleXframe8,scaleXframe9,scaleXframe10);


/**
 * scaleY放大1.1倍
 */
Keyframe scaleYframe0 = Keyframe.ofFloat(0f, 1);
Keyframe scaleYframe1 = Keyframe.ofFloat(0.1f, 1.1f);
Keyframe scaleYframe2 = Keyframe.ofFloat(0.2f, 1.1f);
Keyframe scaleYframe3 = Keyframe.ofFloat(0.3f, 1.1f);
Keyframe scaleYframe4 = Keyframe.ofFloat(0.4f, 1.1f);
Keyframe scaleYframe5 = Keyframe.ofFloat(0.5f, 1.1f);
Keyframe scaleYframe6 = Keyframe.ofFloat(0.6f, 1.1f);
Keyframe scaleYframe7 = Keyframe.ofFloat(0.7f, 1.1f);
Keyframe scaleYframe8 = Keyframe.ofFloat(0.8f, 1.1f);
Keyframe scaleYframe9 = Keyframe.ofFloat(0.9f, 1.1f);
Keyframe scaleYframe10 = Keyframe.ofFloat(1, 1);
PropertyValuesHolder frameHolder3 = PropertyValuesHolder.ofKeyframe("ScaleY",scaleYframe0,scaleYframe1,scaleYframe2,scaleYframe3,scaleYframe4,scaleYframe5,scaleYframe6,scaleYframe7,scaleYframe8,scaleYframe9,scaleYframe10);

/**
 * 构建动画
 */
Animator animator = ObjectAnimator.ofPropertyValuesHolder(mImage, frameHolder1,frameHolder2,frameHolder3);
animator.setDuration(1000);
animator.start();
这里的总共分为四步:
第一步,实现左右震铃效果;
这部分代码前面已经讲过,这里就不再赘述
第二步,利用View类中的SetScaleX(float value)方法所对应的ScaleX属性,在动画过程中,将图片横向放大1.1倍:
Keyframe scaleXframe0 = Keyframe.ofFloat(0f, 1);
Keyframe scaleXframe1 = Keyframe.ofFloat(0.1f, 1.1f);
Keyframe scaleXframe2 = Keyframe.ofFloat(0.2f, 1.1f);
Keyframe scaleXframe3 = Keyframe.ofFloat(0.3f, 1.1f);
Keyframe scaleXframe4 = Keyframe.ofFloat(0.4f, 1.1f);
Keyframe scaleXframe5 = Keyframe.ofFloat(0.5f, 1.1f);
Keyframe scaleXframe6 = Keyframe.ofFloat(0.6f, 1.1f);
Keyframe scaleXframe7 = Keyframe.ofFloat(0.7f, 1.1f);
Keyframe scaleXframe8 = Keyframe.ofFloat(0.8f, 1.1f);
Keyframe scaleXframe9 = Keyframe.ofFloat(0.9f, 1.1f);
Keyframe scaleXframe10 = Keyframe.ofFloat(1, 1);
非常注意的是,在动画过程中放大1.1倍,在开始动画和动画结束时,都要还原状态,即原大小的1倍值:
Keyframe scaleXframe0 = Keyframe.ofFloat(0f, 1);
Keyframe scaleXframe10 = Keyframe.ofFloat(1, 1);
第三步,同样利用View类的SetScaleY(float value)方法,在动画过程中将图片纵向放大1.1倍。原理与scaleX相同,就不再细讲。
第四步:生成ObjectAnimator实例: